Table of Contents
Advertisement
Quick Links
Advertisement
Table of Contents
Troubleshooting

Related Manuals for Zontes ZT125T-D


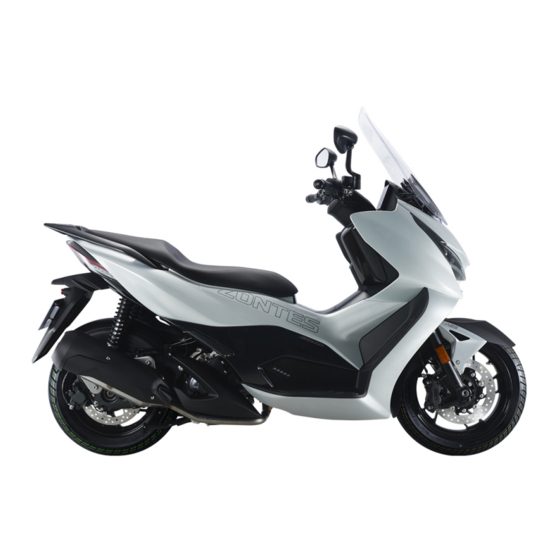
Summary of Contents for Zontes ZT125T-D
- Page 1 ZT125/350T-D Maintenance Manual 2023-04-14 1 / 183...
- Page 2 For colors or upgrades, please refer to the part codes on the official website of Zontes. This manual will not be listed in detail; if the part names in this manual are inconsistent with the official website of Zontes, please refer to the official website of Zontes.Individual parts of different displacements that differ in shape or...
- Page 3 User notice This manual is compiled by Guangdong Tayo Motorcycle Technology Co., Ltd. to guide dealers or service personnel to use it. This manual cannot provide more detailed knowledge about motorcycles, and is only for reference for maintenance. If you do not have the corresponding knowledge such as electrician, machine repair, etc., improper assembly or repair failure may occur during repair.
-
Page 4: Table Of Contents
Content Content ....................................... 4 1. Vehicle information ..................................12 Know Before Service ................................. 12 Body label ....................................13 D350 Technical specification..............................14 Front wheel/steering system ............................14 Rear wheel/suspension system ............................14 Brake system ..................................14 Battery/charging system ..............................15 Lamp/Speedometer/switch description ........................... - Page 5 4. Remove the air filter housing ............................42 5. Replace Air filter element ............................. 43 6. Inspection air filter waste oil pipe ..........................43 7. Reinstall ..................................43 Bolts and nuts of muffler ................................44 1. Check for air leaks at the engine exhaust........................44 2.
- Page 6 M125 ..................................64 Fuel pipe....................................65 1. Check the fuel pipe for leaks with the help of an endoscope with LED light ..............65 2. Replace high pressure oil pipe ............................65 3. Fuel pump ..................................66 3.1 Use oil pressure gauge to measure fuel pressure ....................66 3.2 Simple test of fuel pump .............................
- Page 7 Bolts and nuts for body and engine installation ........................82 1. Check the fasteners for the critical parts ........................82 2. Check engine fasteners ..............................82 D350 ..................................82 D125 ..................................83 Side bracket ....................................83 1. Check ..................................... 83 2.
- Page 8 12. Crankshaft position sensor ............................104 The engine cannot start and there is no sign of fault diagnosis process ................105 The engine cannot be started and there is a car symptom fault diagnosis process ............... 105 Poor acceleration ..................................106 High idling speed of hot car ..............................
- Page 9 D125 ....................................127 Cooling system disassembly ..............................127 D125 Remove the radiator assembly ..........................127 D350 Remove the radiator assembly ..........................128 D350 Coolant system hoop/clamp distribution map ...................... 129 D350 Thermostat assembly and small loop ........................129 Cooling system accessories ..............................130 1.D350 Main water tank ..............................
- Page 10 D125 Directional exploded view ............................. 150 Front fork exploded view ..............................151 D350 ..................................151 D125 ..................................152 Exploded view of lower link board ..........................153 D350 ..................................153 D125 ..................................154 Change the direction of the handle ............................155 1.
- Page 11 Windshield removal ................................173 Removal of the front sun visor ..............................173 Removal of the front cover and the front panel ........................173 Disassembly of the left &right side cover ..........................174 Disassembly of the cushion ..............................174 Disassembly of the storage box .............................. 174 Disassembly of the left, right fuel tank cover .........................
-
Page 12: Vehicle Information
1. Vehicle information Know Before Service 1. Use good quality tools, or special tools and fixtures designed by our company. The use of inferior tools may cause damage to parts, peeling of plating, improper assembly, etc. 2. The O-rings, paper gaskets, copper gaskets, and component sealing rings used for sealing must be replaced before assembling. 3. -
Page 13: Body Label
Body label ① The vehicle identification code VIN can be seen after opening the seat cushion, and the VIN code is engraved on the cross tube at the rear of the frame. ② The muffler code is on the inner side above the muffler. ③... -
Page 14: D350 Technical Specification
D350 Technical specification Item Specification Front tire specification 120/70-15 CM576 56S Rear tire specification 140/70-14 CM577 68S Front rim specification MT:3.5×15 Rear rim specification MT:3.75×14 Vehicle Brake fluid DOT4 0.25L(0.07 US gal,0.06 lmp gal) Replace fine filter: 1.75L(0.46 US gal,0.39 lmp gal) Oil consumption Without replacing the fine filter:... -
Page 15: Battery/Charging System
Battery/charging system Item Standard Type 6-FM-12 Capacity 12Ah Battery self-discharge current 1.1mA average Full 13.1~13.3V Charging voltage required for ≤12.8V Voltage unloaded bike Charging voltage required for ≤12V loading Battery Constant voltage range 14.4~14.8V Constant voltage charging Initial charging current 0.1~0.2 times the battery capacity mode Charging time... -
Page 16: D125 Technical Specification
D125 Technical specification Item Specification Front tire specification 100/80-14 CM576 48P Rear tire specification 120/70-14 CM577 61P Front rim specification MT:2.5×14 Rear rim specification MT:3.5×14 Brake fluid DOT4 0.23L(0.06 US gal,0.05 lmp gal) Vehicle 0.95L(0.25 US gal,0.21 lmp Replace fine filter: gal)... -
Page 17: Brake System
Brake system Item Standard Limit Brake fluid DOT4 Brake pad use limit Trough bottom Front brake disc Brake disc thickness ≥4.0mm (0.16 in) <4.0mm(0.16 in) Brake fluid DOT4 Brake pad use limit Trough bottom Rear brake disc Brake disc thickness ≥4.0mm (0.16 in) <4.0mm(0.16 in) Battery/charging system... -
Page 18: Cable/Cable/Pipe/Electrical Device Distribution Map
Cable/cable/pipe/electrical device distribution map 1. Distribution map of lamps and lanterns 1 - Headlights ((1) - Front turn light position (2) - Position light / daytime running light position (3) - High and low beam position) 2 - Side reflector 3 - Right handlebar auxiliary switch 4 - Right handlebar switch 5 - Right rear turn light ((4) - Position light / brake light position (5) - Rear turn light position) 6 - Rear reflector 7 - License plate light 8 - Left rear turn light ((4) - Brake light / position lamp position (5) - Rear turn light position) 9 - Left handlebar switch 10 - Left handle sub-switch. -
Page 19: Throttle Cable
2. Throttle cable 1- Oil return line 2- Fuel line 3. Brake upper pump and brake hose 1-Front disc brake main pump 2-FMC-HU brake hose 3-RMC-HU brake hose 4-rear disc brake main pump 19 / 183... -
Page 20: Calipers, Brake Hoses And Wheel Speed Sensors
4. Calipers, brake hoses and wheel speed sensors D350 D125 1-brake disc (front) 2- front whell ABS induction ring gear 3-wheel speed sensor (front wheel) 4-front disc brake caliper 5-FC-HU brake hose 6- rear whell ABS induction ring gear 7-brake disc (rear) 8-rear disc brake caliper 9-wheel speed sensor (rear wheel) 10-RC-HU brake hose 20 / 183... -
Page 21: Distribution Map Of Brake System Accessories
5. Distribution map of brake system accessories 5.1 D350 1-wheel speed sensor (front wheel) 2-FC-HU brake hose 3-RC-HU brake hose 4-wheel speed sensor (rear wheel) 5- rear disc brake main pump 6- rear brake lever 7- rear brake switch 8- RMC -HU brake hose 9-FMC-HU brake hose 10-front brake switch 11-front disc brake main pump 12-front brake handle 13-hydraulic control unit 21 / 183... - Page 22 5.2 D125 1-wheel speed sensor (front wheel) 2-FC-HU brake hose 3-RC-HU brake hose 4-wheel speed sensor (rear wheel) 5-rear brake lever 6-rear brake switch 7-RMC -HU brake hose 8-rear disc brake main pump 9-FMC-HU brake hose 10-front brake switch 11- front disc brake main pump 12-front brake handle 13-hydraulic control unit 22 / 183...
-
Page 23: D125
6. Oil supply system 6.1 D350 Fuel evaporation 1- Fuel level sensor 2- Fuel tank 3- Fuel pump 4- Oil-air separator (welded inside the fuel tank) 5- Fuel tank cap 6- Adsorption/vent pipe 7-High pressure fuel pipe 8-Carbon tank 9-Carbon tank solenoid valve 10- Solenoid valve intake pipe 11-solenoid valve outlet pipe 12-throttle valve body assembly Fuel evaporation: Oil and gas →... -
Page 24: D350 Fuel Supply
1- Fuel level sensor 2- Fuel tank 3- Fuel pump 4- Oil-air separator (welded inside the fuel tank) 5- Fuel tank cap 6- Adsorption/vent pipe 7-High pressure fuel pipe 8-Carbon tank 9-Carbon tank solenoid valve 10- Solenoid valve intake pipe 11- solenoid valve outlet pipe 12-throttle valve body assembly Fuel evaporation: Oil and gas →... -
Page 25: Distribution Map Of Cooling System Accessories
7. Distribution map of cooling system accessories 7.1 D350 1-Main water tank 2- Water tank filling port 3- Secondary water tank 4- Main water tank water inlet pipe 5- Main water tank water outlet pipe 6- Water and oil shared sensor 7- Thermostat 8- Water pump cover assembly 7.2 D125 25 / 183... -
Page 26: Electrical Device Layout
1- Secondary water tank 2-Secondary water tank link pipe 3-Engine inlet pipe 4- Thermostat outlet pipe 5- Thermostat 6- Water tank inlet pipe 7- Water and oil shared sensor 8- Water tank outlet pipe 9- Water tank filling port 10- Radiator assembly 11- Water pump cover assembly 8. - Page 27 1-TFT meter 2-Speaker 3-Faucet lock 4-Charging port holder 5-PKE 6-Main cable 7-EFI high-voltage cable 8-Side bracket flameout switch 9-Engine Controller (ECU) 10-Rectifier 11-seat lock 12-Tipping switch 13-Windshield Motor Controller 14-Flash 15-Induction antenna 16- GPS antenna 17-USB charging cable 18-Front storage compartment lock 19- Electronic tank lock 20 - carbon can solenoid valve 21 - start relay 22 - battery 23 - PKE buzzer.
-
Page 28: M125
1-seat lock 2-Rectifier 3-Engine controller (ECU) 4-pke external antenna 5-Fuse box 6-Start relay 7-Battery 8- Electronic tank lock 9-Ignition coil body 10-EFI high-voltage line 11-Side bracket flameout switch 12-Buzzer. 8.2 D125 28 / 183... - Page 29 1-TFT meter 2-Speaker 3-Faucet lock 4-Charging port holder 5-PKE 6-Main cable 7- ignition coil 8-Side bracket flameout switch 9-Engine Controller (ECU) 10-Rectifier 11-seat lock 12-Tipping switch 13-Windshield Motor Controller 14-Flash 15-Induction antenna 16 -USB charging cable 17-Front storage compartment lock 18- Electronic tank lock 19 - carbon can solenoid valve 20 - start relay 21 - battery 22 - PKE buzzer.
- Page 30 1-seat lock 2-Rectifier 3-Engine controller (ECU) 4-pke external antenna 5-Fuse box 6-Start relay 7-Battery 8- Electronic tank lock 9- ignition coil 10-Side bracket flameout switch 11-Buzzer. 30 / 183...
-
Page 31: Intake And Exhaust System
9. Intake and exhaust system 9.1 D350 1- Cylinder head 2- Cylinder head exhaust pipe 3- Air filter intake inlet 4- Crankshaft Box exhaust pipe 5- Air filter outlet pipe 6- Throttle valve body assembly 7- Intake manifold 8- Cylinder 9- Muffler Intake system (indicated by the green arrow): Air →... -
Page 32: Md125
9.2 D125 1- Cylinder head 2-Cylinder head exhaust pipe 3- Air filter intake pipe 4- Crankshaft Box exhaust pipe 5-Air filter outlet pipe 6- Throttle valve body assembly 7- Intake manifold 8-Cylinder 9- Muffler Intake system (indicated by the green arrow): Air →... -
Page 33: Tool
Tool 125-piece tool set Torque wrench On-board tools Claw hammer Pull code Rubber hammer Dynamic Balancing Machine Tire raking machine Oil pan Measuring cup Funnel Taps, dies Micrometer Depth gauge Vernier caliper Feeler gauge PT300 electronic spraying and Tire pressure gauge Magnetic base + dial indicator writing diagnostic Speedometer 17#Inner hexagon... -
Page 34: Swell Nail Description
Hoop clamp Internal Circlip Pliers External circlip pliers Clamp multimeter Multimeter Dust blow gun M350 replace the oil filter Some of the above pictures are from the Internet, and the copyright belongs to the author of the original picture. Do not use it for other purposes. -
Page 35: Maintenance
2. Maintenance Know Before Service 1. Use good quality tools, or special tools and fixtures designed by our company. The use of inferior tools may cause damage to parts, peeling of plating, improper assembly, etc. 2. The O-rings, paper gaskets, copper gaskets, and component seals used for sealing must be replaced before assembly. 3. -
Page 36: D350 Maintenance Schedule
D350 Maintenance schedule : inspection(Inspect and clean,adjust,lubricate or replace if necessary) :replace :Tighten ★:Comment Initial Every Every Inspectio Torque mile 1000/621 4000/2485 8000/4971 Replace regularly Check item n before N.m/kgf.m driving Months Initial 3 Every 15 Every 30 Inspection every 2 years or 20,000 Cradle buffer glue kilometers (12427 mile) Air filter (filter element) - Page 37 ensure riding comfort. Transmission system: If it is found th at the driving speed has dropped significantly, it is recommended to maintain and inspect th e CVT transmission system at any time, and replace it in advance if necessary. ●The initial maintenance should be carried out strictly in accordance with the above table, otherwise it may cause damage to the vehicle or other unpredictable failures.
-
Page 38: D125 Maintenance Schedule
D125 Maintenance schedule :Tighten ★: Comment : inspection(Inspect and clean,adjust,lubricate or replace if necessary) :replace Initial Every Every Inspectio Torque mile 1000/621 4000/2485 8000/4971 Replace regularly Check item n before N.m/kgf.m driving Months Initial 3 Every 6 Every 12 Inspection every 2 years or 20,000 Cradle buffer glue kilometers (12427 mile) Air filter (filter element) -
Page 39: D350 Air Filter (Filter Element), Air Inlet Filter Element
3. Remove the air inlet cover D350 Air filter (filter element), air inlet filter element a. Use a cross screwdriver to remove four self tapping screws from the air inlet sponge filter element assembly. Step: Remove the air inlet sponge after removing the front shell. 1. -
Page 40: Replace Air Filter Element
c.Use a Phillips screwdriver to remove the 4 screws that fix c. Replace the new filter element and sealing strip. the housing of the air filter. 7. Inspection air filter waste oil pipe After removing the rubber stopper, use a flashlight to light from directly below according to the direction of the arrow, and observe whether the waste oil drain pipe accumulates dirt or water through the rubber plug hole. - Page 41 ●The vehicle must be parked on a flat and stable ground or a lifting platform. ●The operation can only be performed after the engine has cooled down completely. ●The air filter element shall be checked every 4000km (2485 miles) or 15 months (whichever comes first), and replaced every 8000km (4971 miles) or 30 months (whichever comes first).
-
Page 42: M125 Air Filter (Filter Element), Air Inlet Filter Element
D125 Air filter (filter element), air inlet d. Remove the front part of the left engine cover. The bolts removed in the second step will fall off at this time. filter element 3. Replace the air inlet filter Step: Use a corss screwdriver to remove the 4 self-tapping 1. -
Page 43: Replace Air Filter Element
5. Replace Air filter element d. Align the left bolt with the mounting hole and tighten it. a. Use a Phillips screwdriver to remove the 6 screws that fix the filter element that comes with the air filter. e. Use 4# inner hexagon to install the other 4 M6×14 bolts. Replace the decorative buckle. -
Page 44: Bolts And Nuts Of Muffler
●If the air filter is clogged with dust, the air intake resistance ●Do not touch all metal surfaces of the muffler while the will increase and the output power will decrease. engine is running or after riding to prevent burns. ●If the filter element of the engine air intake is blocked by ●The vehicle must be parked on a flat and stable ground or a dust, the air intake resistance will increase, which will reduce... -
Page 45: D350 Spark Plug
D350 Spark plug e. Start by snapping the 4 decorative bolt buckles. Remove the 4 M6×14 shoulder bolts (1) of the windshield with 4# Caution: Allen. Remove the windshield cover, windshield pad, and sun ●Before disassembling, blow off the dust near the spark plug visor. -
Page 46: D125
i. Use your fingers or a plastic crowbar to insert the arrow n. Use 4# inner hexagon to remove 3 M6×14 bolts. indication point, first pry the arrow indication point open the gap and then pull up. m. Use a dust blow gun to blow away the dust and debris j. -
Page 47: Check The Spark Plug
D125 a. Check whether the insulator is cracked or damaged, whether the center electrode is abraded, fouled, corroded, excessively carbonized or discolored (the color of the ceramic insulator around the middle electrode of the spark plug should be light brown). If so, replace the spark plug with a new one. -
Page 48: Engine Oil
Engine oil ●The vehicle must be parked on a flat and stable ground or a lifting platform. ●Once the engine and muffler have cooled down, the operation can be performed. ●When adding engine oil, prevent the engine oil from e. Wipe clean the joint surface with a non-woven fabric. dripping onto the surface of the muffler. -
Page 49: Add Oil
3. Add oil b. Use a 14# sleeve to loosen the oil drain bolt⑶ counterclockwise. a. Replace the filter element with a measuring cup with a viscosity of SAE5W-40/10W-40/10W-50. The new API SN grade or higher motorcycle special machine 1.75L (1.85US qt, 1.54 lmp qt, 0.46 US gal, 0.39 lmp gal). -
Page 50: M125
D125 1. Drain the oil a. Start the vehicle and turn off the engine for 3-5 minutes after idling for 3-5 minutes. b. Use the main bracket to park the vehicle firmly. c. Rotate the oil dipstick⑴ on the right side of the engine counterclockwise, and remove the oil dipstick⑴... -
Page 51: Change Gear Box Oil
g. Fill the measuring cup with 0.16L of oil or gearbox d.inspection O ring⑵Whether there is damage or aging, if special oil (0.17US qt, 0.14 lmp qt, 0.04 US gal, 0.04 lmp gal). not, wipe it clean, if any, replace it. h. -
Page 52: Remove The Throttle Valve Body Assembly To Clean Up Carbon Deposits
f. Use throttle cleaner to clean the carbon deposits on the b. Straighten out the cables in the battery compartment. head of the stepper motor. Spray a small amount of cleaning Buckle the 2 decorative bolt buckles (3) first. Remove the 4 agent into the valve body hole. -
Page 53: Disassemble The Sensor
4. Disassemble the sensor d. Loosen the bolt of the clamp⑷ with a 4# inner hexagon and pull out the air filter outlet pipe⑸ and clamp⑷ in the a. If the idling speed is abnormal, it is easy to extinguish direction of the arrow to pull out the throttle valve body. -
Page 54: Throttle Valve Body Troubleshooting Process
electrical device box can be removed before proceeding. d. After releasing the throttle, turn off the flameout switch Clamp the clamp on the bottom with pliers and move it up to and lock the car; the top and remove the inlet pressure sensor from the hose e. -
Page 55: M125 Throttle Valve Body
D125 Throttle valve body e. Use 4# inner hexagon to loosen 2 pcs bolts come with the pipe clamp. Caution: ●The position sensor and stepper motor cannot be immersed in any liquid. ●It is forbidden to adjust the idle speed adjustment screw on the valve body. -
Page 56: Remove The Throttle Valve Body Assembly To Clean Up Carbon Deposits
3. Remove the throttle valve body Simple test method: After turning off the power, take out the stepping motor, assembly to clean up carbon deposits do not loosen the cable plug, press the flameout switch at a. Refer to the previous steps to loosen the bolts that startup without ignition, check whether the motor plug can come with the clamp, then rotate the throttle valve body shrink back and forth, and finally turn off the flameout switch... -
Page 57: Throttle Cable
2. Adjust the throttle cable clearance a. Fix the adjusting screw② with a 8# open-end wrench, ●The vehicle must be parked on a flat and stable ground or a and then use a 10# open-end wrench to loosen the nut① lifting platform. -
Page 58: Idle Speed
●After adjusting the gap of the throttle cable, make sure that the throttle handle can be automatically turned back to the closed position. Do not adjust the cable to increase the engine idling speed. ●After the adjustment, the engine idling speed cannot increase when turning the front of the car. -
Page 59: Fuel Evaporative Pollutant Control System
Fuel evaporative pollutant control system D350 fuel evaporation 1- Fuel level sensor 2- Fuel tank 3- Fuel pump 4- Oil-air separator (welded inside the fuel tank) 5- Fuel tank cap 6- Adsorption/vent pipe 7-High pressure fuel pipe 8-Carbon tank 9-Carbon tank solenoid valve 10- Solenoid valve intake pipe 11- solenoid valve outlet pipe 12-throttle valve body assembly Fuel evaporation: Oil and gas →... -
Page 60: M125 Fuel Evaporation
D125 fuel evaporation 1- Fuel level sensor 2- Fuel tank 3- Fuel pump 4- Oil-air separator (welded inside the fuel tank) 5- Fuel tank cap 6- Adsorption/vent pipe 7-High pressure fuel pipe 8-Carbon tank 9-Carbon tank solenoid valve 10- Solenoid valve intake pipe 11- solenoid valve outlet pipe 12-throttle valve body assembly Fuel evaporation: Oil and gas →... -
Page 61: Radiator
2. Add coolant (antifreeze) to the Coolant Radiator expansion tank If the water level of the Coolant expansion tank is lower ●The vehicle must be parked on a flat and stable ground or a than the "L" line, an appropriate amount of coolant must be added. -
Page 62: Put Coolant
b. Remove the filler cap of the Radiator to accelerate the b. Use a 10# sleeve to loosen the thermostat bleed bolt ⑵ flow of coolant. counterclockwise by 4 to 5 turns, do not completely remove c. Wipe all the joint surfaces clean with a non-woven cloth. it. -
Page 63: M125
D125 Be careful not to open the water tank cap, once opened, the coolant will flow out from here. After removing the water tank cover according to the previous steps, refer to M310 for maintenance. 6. Check all water pipes for leaks; aging. D350 1- Main water tank 2- Water tank filling port 3- Secondary water tank 4- Main water tank water inlet pipe 5- Main water tank water outlet pipe 6- Water and oil shared sensor 7- Thermostat 8- Water pump cover assembly... -
Page 64: M125
D125 1-Secondary water tank 2-Secondary water tank link pipe 3-Engine inlet pipe 4- Thermostat outlet pipe 5- Thermostat 6- Water tank inlet pipe 7- Water and oil shared sensor 8- Water tank outlet pipe 9- Water tank filling port 10- Radiator assembly 11- Water pump cover assembly 64 / 183... -
Page 65: Fuel Pipe
2. Replace high pressure oil pipe Fuel pipe a. Refer to steps a to c of "Remove stepping motor and Caution: clean up carbon deposits" in the throttle valve body, first ●A small amount of fuel will flow out when the high-pressure remove the cushion and storage box components, and fuel pipe is removed. -
Page 66: Fuel Pump
e. Unplug the fuel pump and start the engine at idle speed a. Refer to steps a to c of "Remove stepper motor and clean up carbon deposits" in the throttle valve body, first until the engine stops. Turn the engine stop switch to " ", remove the seat cushion and storage box components, and power off the vehicle and lock the vehicle. -
Page 67: Simple Test Of Fuel Pump
3.2 Simple test of fuel pump 4. Treatment of abnormal fuel pressure If you do not have the special equipment conditions, you If the fuel pressure is higher than the standard value, can do a simple test. replace the fuel pump. If it is lower than the standard value, After the vehicle is in the stalled state, unlock the vehicle you need to inspect the following items: and turn on the stall switch. -
Page 68: Braking System
Braking System Caution: ●For the layout of the brake hose on the vehicle, please refer to the brake system accessories distribution diagram in the "Vehicle Information" chapter of this manual. Caution: In order to facilitate after-sales tracking, those who need to purchase brake hoses, disc brake calipers, disc brake main pumps, and hydraulic control units must be reviewed by our company before they can be purchased. -
Page 69: Check The Brake Components
Caution: c. Measure the thickness of the front and rear brake discs. ●This inspection should be completed by a qualified If it is less than 4.0mm (0.16 in), replace it. Hang the front maintenance organization. wheel in the air and turn the front wheel by hand to observe ●Regularly check whether the brake fluid level is at 3/4 of the whether there are obvious damages on the surface, such as observation window. -
Page 70: Check The Front And Rear Brake Switches
a. Pull out the two plugs of the brake switch in the f. Take out the wheel speed sensor① from the wire direction of the arrow without distinguishing the positive and clamp②. Remove bolt⑵ with a 14# sleeve. Standard negative poles. torque of bolt⑵: 24N.m (2.4 kgf.m, 18 lbf.ft). -
Page 71: Replacing The Brake Handle
5.1 Replace the front brake pads D350 a. Remove both circlips by clamping the circlip ① with pointed nose pliers. D125 3.3 Replacing the brake handle Refer to the previous steps to remove the nut③ and bolt① to replace the new brake handle. b. -
Page 72: D125
e. Restore the front disc brake main pump assembly and c. Push the piston to the end in the direction of the arrow be sure to be accurately assembled in place. with the help of a tool. If the resistance is high, you can refer f. -
Page 73: Abnormal Sound Of Brake Pads
b. Use a 12# sleeve to remove the bolt③, turn the caliper side faces the brake disc; the black metal back plate faces the assembly clockwise around the bolt④, and remove the caliper. brake pad. Note that the bolt④ does not need to be disassembled. -
Page 74: Replacing The Front Brake Disc
6.1 Replacing the front brake disc The front brake disc can be removed by referring to the description of the steps for disassembling the front wheel assembly in the "Front Fork Assembly" of this manual. 6.2 Replacing the rear brake disc a. -
Page 75: Brake Hose
1. Add brake fluid to the main pumps of D125:Refer to the order of disassembly to restore. Note that bolts with torque requirements need to be calibrated the front and rear disc brakes according to standard values. a. Adding brake fluid to the main pump of a disc brake is taken as an example for description. -
Page 76: Replace The Front Brake Brake Fluid
recommended to replace the brake fluid every 2 years. If the the standard torque: 10N.m (1 kgf.m, 7 lbf.ft). Then put the brake fluid is not replaced for a long time, flocs will form to rubber cap on the air nozzle. block the oil pipe, the oil hole of the main pump of the disc h. -
Page 77: Check The Tires
●Avoid sudden acceleration, sharp turns, emergency braking, b. Support the front wheel with suitable tools, let the front etc. within 150 kilometers (93mile) after replacing the new tire hang in the air, and then rotate the tire to carefully check tire. -
Page 78: Check The Steering Mechanism
too large, it will cause driving jitter and abnormal noise when c. Screw the adjusting nut (4b) clockwise to 50N.m (5.1 braking. kgf.m, 37 lbf.ft), turn the front of the car to feel tight to normal, loosen 1/4 turn counterclockwise, and screw 1. -
Page 79: Maintain Steering Bearings
c. If the steering is heavy, loosen the adjusting nut (1c) ● Bolt torque at the hollow shaft of the front wheel of the counterclockwise. First screw it clockwise to 35N.m (3.6 shock-absorbing bottom cylinder: 20N.m (2.0 kgf.m, 15 lbf. kgf.m, 26 lbf.ft), then loosen 1/4 turn counterclockwise, and ft). -
Page 80: Check The Shock Absorption Performance
c. If there is a large amount of hydraulic oil attached to the front fork tube, wipe it clean and observe after riding. If there is no oil stain or slight oil stain, it is the hydraulic oil accumulated during the assembly of the dust seal, and it can be judged that the oil seal is not leaking. -
Page 81: Check
●It should be maintained according to the regular D350 maintenance table. Use the adjustment wrench provided with the vehicle. 1. Check a. One person straightens the vehicle and stabilizes the vehicle, and one person presses the rear armrest behind to observe whether the rear shock absorber can recover 2.2 Adjust the left rear shock absorption smoothly. -
Page 82: Bolts And Nuts For Body And Engine Installation
c. Remove the two expansion nails and two bolts (5) at the connection between the left and right parts of the fuel tank cover plate and the tail group, and remove the bushing (6) and buffer glue (7). Bolts and nuts for body and engine installation Caution: d. -
Page 83: D125
b. Check if the four nuts on the rear cradle of the fixed b. Check if the four nuts on the rear cradle of the fixed engine as shown in the figure are loose. The nut on the right engine as shown in the figure are loose. front part (a in the figure) needs to be pulled out or pulled out of the high-pressure oil pipe and cable connector to facilitate tightening with tools. -
Page 84: Lubrication
e. Remove the side bracket bushing⑷ from the frame. f. Use diesel or kerosene, or a clean cloth to wipe off the remaining grease. Apply a proper amount of grease to the two installation planes inside the side bracket and the surface that matches the flameout switch, and try not to apply it to the threaded holes. -
Page 85: Lubrication
2. Lubrication 4. Replace the return spring post of the main support a. Keep the main bracket in the retracted position, on right side, use pliers to remove the split pin⑴ in the direction of After removing the main bracket referring to the previous the arrow, and remove the gasket⑵. -
Page 86: Sound, Light, And Electrical Device Inspection
Sound, light, and electrical device driver's manual. Here is only a brief description of how to test whether it is normal. Inspection ①SET key: Short press SET to enter the main menu/confirm Caution: selection. Long press to return to the main interface. Operate ●Before driving, check whether the lights of the whole car this button when driving a vehicle is prohibited. -
Page 87: Headlight Height Adjustment
If the battery power supply fails to start, it can be charged through the PKE charging port. Open the right storage box cover, insert the buckle with your fingernail or a thin flat-blade screwdriver, press inward and pull out the buckles on both sides, and then remove the right storage box cover. -
Page 88: Fuse Box
3.Fuse box Caution: ●If the fuse is blown, you must replace the fuse of the same specification. It is forbidden to use wires such as copper or iron wire for direct connection. ●If it is blown after replacement, you need to troubleshoot the entire vehicle cable before replacing it. ●This vehicle uses a small fuse. -
Page 89: Troubleshooting
4. Troubleshooting If the button cannot be pressed, it is directly judged as a switch problem. If there is no response when pressed, it is necessary to judge the problem of the switch, circuit, or electrical device. 4.1 Right hand switch a.No response when pressing the start button:... -
Page 90: Left Hand Handle Auxiliary Switch
d. “ ” Not responding There is a detailed description of PKE functions in the driver's manual, including the method of emergency starting the vehicle when the sensor key is exhausted, and the specific meaning of the buzzer sound. Bring the Replace the battery, the Right auxiliary induction key... -
Page 91: Left Hand Switch
4.5 Left hand switch The left hand switch controls the turn signal, horn and far, low beam, hazard warning light, and overtaking light. It is difficult to check if there are more lines. 91 / 183... -
Page 92: Light
4.6 Light Caution: ●When using wires to detect lamps, please pay attention to distinguish the positive and negative poles. For detailed wire colors, please refer to the electrical schematic diagram in the driver's manual provided with the car. The troubleshooting methods of the lamps are basically the same. You can directly lead the wires to the battery with the battery. -
Page 93: Efi System
3. EFI system Know Before Service Caution: 1. The structure and working principle of the EFI system are relatively complicated, and it is necessary to have a certain understanding of the working principle and structural characteristics of each EFI system before checking and troubleshooting. The content of this chapter requires certain maintenance experience. -
Page 94: Error Code
Error code Caution: ●Unlock the vehicle and turn on the flameout switch. When it is not started, the EFI fault light is always on as normal. If it is not on, the vehicle cannot be started. ●After starting the vehicle, if the fault light is on and the EFI failure is reported, it means that the EFI system is abnormal. ●When the EFI system reports a failure, continuing to drive the vehicle may cause damage. -
Page 95: Error Code
3. Error code Code Instruction Code Instruction The heating control circuit of the upstream 1 Engine coolant temperature sensor signal is P0030 PD116 cylinder oxygen sensor is open unreasonable The upstream 1 cylinder oxygen sensor Engine coolant temperature sensor circuit voltage is P0031 P0117 heating control circuit voltage is too low... -
Page 96: Efi Parts Layout
EFI parts layout D350 D150 96 / 183... -
Page 97: Fault Diagnosis And Elimination Of Efi Parts
OBD diagnostic Carbon canister Dump switch interface (main Fuel pump Ignition coil body EFI relay solenoid valve cable) Water and oil Throttle Body Crankshaft Fuel injector Oxygen Sensor MSE6.0 ECU shared sensor Assembly position sensor Crankshaft Throttle Body Fuel pump Oxygen Sensor Ignition coils Fuel injector... -
Page 98: Obd Port
2. OBD port The main cable has its own OBD interface, and the location is shown in the previous section to read the fault code through the diagnostic Speedometer. Use the diagnostic tool through the diagnostic interface to read historical fault codes, current fault codes, clear fault codes and read ECU status. -
Page 99: Efi Relay
Can be judged by the following methods: a. Park the vehicle firmly, start the engine, and let the engine run at idle speed. Use the auscultation needle or stethoscope to listen to the working sound of the cylinder. You should be able to hear the rhythmic working sound of the injector. -
Page 100: D350
D125 Remove the spark plug from the engine and install it on the high-pressure cap according to the steps in the section Remove the left cover and left pedal accordingt to the "Maintenance-Spark plug-Removing the spark plug". Put steps in "Maintenance - Spark Plug - Remove Spark Plug". away the side brackets, use the main bracket to park the Unplug the ignition coil connector, pull out the high- vehicle firmly and unlock the vehicle, turn the flameout... -
Page 101: Throttle Valve Body
8. Throttle valve body 8.1 Common failure phenomena 1. The engine is easy to stall when the vehicle is running, and it is difficult to start, especially cold starting. 2. Idle speed is unstable or no idle speed, and there is intermittent jitter when accelerating. 3. -
Page 102: Oxygen Sensor
Standard torque:13±1.5N.m (1.3±0.2 kgf.m,10±1 lbf.ft) 10. Oxygen Sensor ●The oxygen sensor must be removed after the engine and muffler have cooled down completely. When there is poor engine performance, unstable idle speed, high fuel consumption, and incorrect air-fuel ratio, check the oxygen sensor. -
Page 103: D125
D125 After finding the oxygen sensor plug, first push the dark red buckle in the direction of the arrow, then hold the plug end of the oxygen sensor with one hand, press the buckle indicated by the arrow on the cable end with the other hand, and pull out the plug. -
Page 104: D125
D125 The ECU can only be removed after removing the rear storage box, rear armrest and rear right rear skirt. Pull out the ECU plug after pressing the buckle indicated by the arrow. Remove 2 M6×12 bolts with 4# hexagon socket to remove the ECU. 12. -
Page 105: The Engine Cannot Start And There Is No Sign Of Fault Diagnosis Process
The engine cannot start and there is no sign of fault diagnosis process When the start button is pressed and the starter motor can drive the engine to run normally, but the engine does not work normally, and there is no sign of the car, you can refer to the following diagnosis process to troubleshoot the cause of the fault. No spark or weak Check the ignition strength... -
Page 106: Poor Acceleration
Poor acceleration Rotate the rubber sleeve with the right hand. The engine speed cannot increase immediately, and there is hysteresis, and the acceleration is slow; you can refer to the following diagnosis process to troubleshoot the cause of the fault. Check Check if the air Poor... -
Page 107: Unsteady Idling, Easy To Cutoff
Unsteady idling, easy to cutoff The engine is running at an unstable idling speed, easy to stall, and can return to normal after a warm car. You can refer to the following diagnosis process to troubleshoot the cause of the fault. Unsteady idling / flameout Check the oil circuit Whether it returns to... -
Page 108: Analysis Flow Chart Of Efi Failure Indicator Light Always On
Analysis flow chart of EFI failure indicator light always on If the EFI failure indicator light " " is always on, you should first check whether the wires of the EFI sensors are loose. The fault light is always on during driving Read fault code Idle speed fault... -
Page 109: Electrical Schematic Diagram Of Efi System
Electrical schematic diagram of EFI system 109 / 183... -
Page 110: Ignition System
4. Ignition system Know Before Service 1. The content of this chapter requires certain maintenance experience. It is recommended to check or repair with a qualified maintenance organization. 2. Do not disassemble the parts connected to the 12V power supply at will after power-on, to avoid the self-inductance of the coil in the electrical appliance, which may damage the ECU or sensor due to the instantaneous voltage. -
Page 111: Troubleshooting
Troubleshooting Check the following items before diagnosing the ignition system a. Check whether the spark plug is abnormal; b. Check whether the ignition coil high-voltage cap or plug is loose; c. Check whether water enters the high pressure cap; d. If there is no spark, find the ignition coil of the same model to confirm that there is no fault and install it on the faulty vehicle to test whether there is spark;... -
Page 112: Ignition System Layout
Ignition system layout D350 D125 1 - Dump switch 2 - PKE 3 – relay 4 - main lock 5 - right handlebar auxiliary switch 6 - right handlebar switch 7 - battery 8 - fuse box 9 - start relay 10 - ignition coil 11 - side bracket flameout switch 12 - spark plug 13 - crankshaft position sensor 14 - magneto stator 15 –... -
Page 113: Ignition System Inspection
Ignition system inspection Caution: ●If there is no spark in the spark plug, check all the cable connections for looseness or poor contact before checking the ignition system. ●Use a high-precision digital multimeter. For details of the ignition coil test method, please refer to the section "Ignition Coil" in the "Electronic Injection System" chapter of this manual. -
Page 114: Ignition Coils
a. Align the keyway of the flywheel with the half-circle key and install the flywheel in place, put in φ10.3×φ28×4 washer, M10×1.25×45 hexagon flange bolts, screw in the threads manually, tighten the timing chain, and turn the flywheel clockwise , Align the line immediately after the "T"... -
Page 115: Starting System
5. Starting system Know Before Service 1. If current flows through the starter motor when the engine is not started, it can be judged that the starter motor is damaged and needs to be replaced. 2. Before servicing the starter motor, turn on the engine stop switch to " "... -
Page 116: Starter Motor
2. Starter motor Does the Brake switch or After the vehicle is Short circuit starter motor flameout switch energized, the flameout relay work? failure switch is hit“ ” The flameout switch of the Whether the EFI Press the start Does the starting Relay failure right handle is fault light is on... -
Page 117: Starting System Electrical Schematic Diagram
Starting system electrical schematic diagram Starter motor Caution: ●If the starter motor is removed for maintenance, replace the O-ring with a new one and apply a proper amount of engine oil. ●Our company only sells starter motor assemblies, not O- rings and motor parts separately. -
Page 118: Disassemble The Starter Motor
d. Pull the air outlet pipe to the right side of the vehicle the electric starter reduction gear. Note that the O-ring to expose the two M6×30 bolts that fix the starter motor, needs to be correctly assembled into the box, as it will and remove them with an 8# sleeve. -
Page 119: Examination
1-M6×90 bolt×2 2-O ring×2 3-O ring 4-starter motor front cover 5-gasket 6-rectangular sealing ring 7-starter motor outer shell 8- rectangular sealing ring 9-electric pole 10-screw ×2 11-Negative brush×2 12-Volute spring×4 13-Positive brush×2 14-Brush frame 15-Brush holder insulation gasket 16-Starter motor back cover 17-Insulation gasket 18-Nut×2 19- Gasket Examination Starter motor front cover:... -
Page 120: Check The Starting Relay
Check the starting relay 2.2 Ground wire 1. Operation check The vehicle is powered off and locked. Set the multimeter to the buzzer position, connect one test lead to the a. Remove the seat and rear storage box first, find the green/red wire, and one to any bolt connected to the frame. -
Page 121: Fuel Supply System
6. Fuel supply system Know Before Service 1. Bending or twisting the control cable will affect the smooth operation, and may cause a short circuit or open circuit, causing the vehicle to lose control. 2. The operation should be carried out in an open and ventilated place. All activities that may cause sparks, such as smoking, calling on mobile phones, etc., are prohibited on the job site. -
Page 122: Disassemble The Fuel Pump
d. Remove the oil pump plug in the same way. Pinch the snorkel clamp and move it down, and pull out the snorkel. Press the anti-release buckle of the high-pressure oil pipe at the end of the oil pump, and pull the high-pressure oil pipe along the axis of the oil outlet of the oil pump. -
Page 123: Remove The External Parts Of The Fuel Tank Assembly
Caution: When reassembling, you need to pre-tighten the corners and then tighten the 4 M6×16 bolts. Otherwise, the uneven ●Early production vehicles do not contain brackets⑵, you compression of the sealing rubber ring of the oil level sensor can purchase and install them by yourself. may cause leakage and cause safety hazards. -
Page 124: Cooling System
7. Cooling system Know Before Service 1. Please refer to the radiator section of the "Maintenance" chapter of this manual for the corresponding precautions for the coolant (antifreeze). 2. Check the cooling water pipe; check the height of the cooling liquid, adding and discharging the cooling liquid have been described in detail in the radiator section of the "Maintenance"... -
Page 125: Coolant System Distribution Map
Coolant system distribution map D350 1 - Main water tank 2 - Water tank filler 3 - Auxiliary water tank 4 - Water inlet pipe of main water tank 5 - Water outlet pipe of main water tank 6 - Water oil shared sensor 7 - Thermostat 8 - Water pump cover assembly D125 125 / 183... -
Page 126: Coolant Flow Diagram
1- Secondary water tank 2-Secondary water tank link pipe 3-Engine inlet pipe 4- Thermostat outlet pipe 5- Thermostat 6- Water tank inlet pipe 7- Water and oil shared sensor 8- Water tank outlet pipe 9- Water tank filling port 10- Radiator assembly 11- Water pump cover assembly Coolant flow diagram D350... -
Page 127: D125
1 - Water inlet pipe 2 - Water outlet pipe of main water tank 3 - Water inlet pipe of main water tank 4 - Connecting pipe of auxiliary water tank 5 - Water inlet pipe of cylinder 6 - Water inlet pipe of water pump cover Cooling system: Small loop (indicated by the blue arrow): Water pump →... -
Page 128: D350 Remove The Radiator Assembly
D350 Remove the radiator assembly d. Remove the radiator deflector at the bottom and middle of the enclosure according to the steps of "Enclosure a. Refer to the steps of "removing spark plugs", remove Removal".. the right pedal in the same way, remove the fixing bolts of e. -
Page 129: D350 Coolant System Hoop/Clamp Distribution Map
D350 Coolant system hoop/clamp distribution map 1- Water pipe clamp (φ9) 2-Water pipe clamp (φ26)*3 3-Water pipe clamp (φ24) *2 4-Water pipe clamp (φ26) D350 Thermostat assembly and small loop 1-Thermostat assembly 2-M6 × 22 Bolt * 2 3-M6 × 12 bolts * 2 4-water pipe hoop( φ 25) 5 - Water pump cover inlet pipe 6 - Water pipe hoop(... -
Page 130: Cooling System Accessories
Before reassembly, the joint surface should be cleaned. Note that the O-ring cannot be missing and must be correctly assembled in place. The hoop should be clamped inside the boss to prevent loosening. Bolt⑵ Torque: 12±1.5 N.m (1.2±0.2 kgf.m, 9±1 lbf.ft). Cooling system accessories Caution: ●Special ventilation tooling (gas pressure reducing valve, air gun, sealing tube) is required for testing. -
Page 131: D350 Main Water Tank
1.D350 Main water tank Check whether the cushion rubber is aging and cracked. Plug ports A and C with self-made head, and check the sealing by ventilation from port C. Inject the gas with a pressure of 160kPa (1.63Kgf/cm2, 23.2 psi) to ensure that there is no air leakage at the nozzle. Immerse the water tank in the water for 10s and observe whether there are bubbles. -
Page 132: Thermostat
5. Thermostat 5.1 Inspection ●The D125steps are similar to the D310, taking the D310 as an example. Check the appearance for damage and leakage. Simple test method (test on the whole vehicle): After the cold car is started, immediately open the water filler cap. If there is no fluctuation in the liquid level, the thermostat is normal, otherwise it is abnormal. -
Page 133: Thermostat Core Inspection
5.4 Thermostat core inspection Check the opening temperature, full opening temperature and lift of the main valve in the thermostatic heating equipment with adjustable temperature. If one of them does not meet the specified value, it should be replaced. Or use a thermometer, water, heater, and container to test. -
Page 134: Braking System
8. Braking system Know Before Service 1. The content of this chapter requires certain maintenance experience. It is recommended to check or repair with a qualified maintenance organization. 2. Frequent inhalation of the dust generated by the brake pads, regardless of the composition, may have a certain impact on health. -
Page 135: Trouble Shooting
Trouble shooting Soft feeling from brake lever a. The brake system oil circuit enters the air b. Brake fluid leakage c. The brake pads or brake discs have oil stains d. Wear of brake caliper or disc drive main pump piston seal ring e. -
Page 136: Disassemble The Rear Disc Brake Main Pump
vacuum can be used Vacuum cleaner. Before assembling the c. Remove the brake pads according to the steps of piston assembly and spring, apply a small amount of DOT4 removing the brake pads brake fluid, and do not apply other lubricating materials such d. -
Page 137: Disassemble The Rear Disc Brake Caliper
kept away from the caliper body. If the distance is too close, the piston may suddenly fly out and cause damage. Check the piston and caliper cylinder for scratches, damage, pits, etc. Check whether the pin is deformed. b. Use a 14# sleeve to remove the bolt (3). Standard torque of bolt (3): 24N.m (2. -
Page 138: Brake Hose And Wheel Speed Sensor
●The open end of the piston should face the caliper ●The D125 steps are similar to the D350, taking the D350 as mounting plate, and do not install it backwards. an example. ●If there is slight rust on the surface of the piston, it can be polished off with 2000 mesh fine sandpaper. -
Page 139: Fmc-Hu And Rmc-Hu
to prevent the residual brake fluid from dripping on the parts Use an 8# sleeve to remove the bolt⑷, and take off the when the oil pipe nut joint is loosened. D350 use a 14# open- FC-HU hose. end wrench to loosen the oil pipe nut joints at the hydraulic If you need to remove the hose bracket⑵, you can use 4# control unit counterclockwise. -
Page 140: Abs System Layout
c. Pull the RC-HU head out of the gap between the pke and e. Pull out the wheel speed sensor from the clamp⑷, the frame. remove the bolt⑸ with a 4# inner hexagon, and then remove the wheel speed sensor from the car. If you need to remove the clamp⑷, you can use 4# inner hexagon to remove the bolt⑸... -
Page 141: Abs Hydraulic Control Unit
ABS hydraulic control unit Caution: ●Before disassembling the hydraulic control unit, the positive and negative electrodes of the battery must be disassembled to prevent damage to electrical components caused by misoperation. ●Brake fluid is toxic, so it needs to be protected. For specific precautions, please refer to the pre-service instructions. -
Page 142: Abs Troubleshooting
ABS troubleshooting 142 / 183... -
Page 143: Battery/Charging System
9. Battery/charging system Know Before Service 1. It is necessary to properly dispose of discarded batteries to avoid pollution to the environment. It is recommended that waste batteries be returned to a professional recycling agency for recycling. 2. It is forbidden to use chargers that have not passed the inspection to charge the battery. 3. -
Page 144: Troubleshooting
Troubleshooting Battery damage or attenuation troubleshooting process Battery failure Use a Measure the multimeter to battery voltage Battery Remove the battery and check whether first, then use a battery tester to there is leakage, Check the voltage<charging measure the check the battery the leakage charging voltage voltage<14.5~14.9... -
Page 145: Charging System Layout Diagram
Charging system layout diagram 1-Charging port (PKE) 2-Main fuse (25A) 3-Battery 4-Magnetic motor 5-Rectifier Electrical schematic diagram Letter Chinese green yellow English Green Yellow 145 / 183... -
Page 146: Battery Disassembly
Battery disassembly attention to first adjust the current to the high gear, and then gradually reduce to the appropriate gear. 1. Disassembly c. Measure whether the leakage current is below 0.3mA. If Refer to the steps “a” to “d” in the section "Removing the it exceeds the standard value, check whether the circuit has stepper motor and cleaning the carbon deposit"... -
Page 147: Remove The Rectifier
d. After unplugging the yellow 3P plug, measure the red d. Pull down the rectifier and pull the cable out of the hole positive wire and green negative wire with a multimeter, and in the front of the rear mud board. Remove the rectifier from the battery voltage should be measured. -
Page 148: Front Fork Assembly
10. Front fork assembly Know Before Service 1. Use good quality tools, or special tools and fixtures designed by our company. The use of inferior tools may cause damage to parts, peeling of plating, improper assembly, etc. 2. The O-rings, paper gaskets, copper gaskets, and component seals used for sealing must be replaced before assembly. 3. -
Page 149: Exploded View Of Front Fork Components
Exploded view of front fork components: D350 Directional exploded view 149 / 183... -
Page 150: D125 Directional Exploded View
D125 Directional exploded view 150 / 183... -
Page 151: Front Fork Exploded View
Front fork exploded view D350 151 / 183... -
Page 152: D125
D125 152 / 183... -
Page 153: Exploded View Of Lower Link Board
Exploded view of lower link board D350 153 / 183... -
Page 154: D125
D125 154 / 183... -
Page 155: Change The Direction Of The Handle
2. Remove the components Change the direction of the handle Caution: a. Use 5# inner hexagon to remove 4 M6×30 bolts⑵, and ●When removing the disc brake oil cup, it must be vertically remove the left auxiliary handle switch, the rear disc brake upward to prevent air from entering the brake pipeline. -
Page 156: Installation Of The Direction Component
e. Unscrew the M6 provided by the right balance weight pump of the disc brake with the triangle mark on the handle with 5 # hexagonal socket counterclockwise × 80 bolts, be switch, and then tighten the 4 M6×30 bolts with a 5# inner careful not to screw them too many times, otherwise the nut hexagon. -
Page 157: Replace The Front Wheel
Replace the front wheel Caution: ●After the front wheel is installed, please press the brake ●Be careful not to damage the ABS coil when disassembling. handle repeatedly until the brake restores the braking effect. ●After removing the front wheel, do not press the brake ●Contaminated disc brake discs and disc brake pads will handle. -
Page 158: Front Wheel Assembly Exploded View
Front wheel assembly exploded view: D350 Part name Caution Oil seal TC φ28×φ42×7 GB276 bearing 6004-2RS-C3 φ20×φ42×12 Sleeve Tire pressure sensor Bend toward the left. ABS sensor gear(56T) 265×5.0front brake disc Non-standard bolt M8×25 25 N.m(2.5 kgf.m,18 lbf.ft) GB12615 φ3.2×9 rivet (stainless steel) D125 Part name Caution... -
Page 159: Inspection And Maintenance Of Front Wheel Assembly
the bearing. When the following conditions occur, the front Inspection and maintenance of front wheel oil seals and bearings should be checked in advance wheel assembly: a. Abnormal front wheel noise when riding. b. When the direction bar shakes left and right when Caution: riding. -
Page 160: Dynamic Balance
3.3 Dynamic balance inner hexagon to remove one M6×30 bolt⑴, take out the gasket⑸. The wheel is a whole composed of tires and rims. Due to manufacturing reasons, the mass distribution of each part of the wheel may not be very uniform. When the wheel rotates at a high speed, it will form a dynamic imbalance state, causing wheel jitter during driving. -
Page 161: Reinstall The Shock Absorber, Front Fender, Front Wheel And Other Components
c. Remove M8 with 6 # hexagonal socket × 4 bolts (6) of g. Press and hold the position held when removing the 35, pry the gap on the lower yoke plate with a screwdriver, front mud pan, pass through the proper position in the and remove the left front shock absorber and the right front middle of the shock absorber, and install it to the shock absorber. -
Page 162: Remove The Left And Right Front Shock Absorbers
d.First press the two sides of the front mud board shock absorber. You need to remove the shock absorber that according to the small arrow, press the protrusion on the is not in place and install it in place. front mud board arrow inward, and then move the front mud d. -
Page 163: Removing The Direction Pad
b.Take out the handle switch harness and brake hose in 3. Removing the direction pad the direction wire clip from the direction of the wire clip gap D350 one by one, until the direction is taken out all the wire harnesses in the wire clip, and then use the 4# inner hexagon a.Refer to“Removing the cover”to remove the head to remove the M6×12 bolt that fixed direction wire, take out... -
Page 164: D125
b. Put the bearing (9), shaft ring (8) and dust cover (7) b. Put the bearing (9), shaft ring (8) and dust cover (7) smeared with grease on the lower yoke plate in turn, screw smeared with grease on the lower yoke plate in turn, screw in one adjusting nut (5) of the steering column, and tighten in one adjusting nut (5) of the steering column, and tighten the adjusting nut (5) of the steering column with a four jaw... -
Page 165: Disassemble The Engine Of The Vehicle
11. Disassemble the engine of the vehicle Caution: d. Take out the decorative buckle (2) on the bolt, and use ●The vehicle must be parked on a level and stable ground or the 4 # hexagonal socket to remove the two M6 × 16 bolts (1) on a lifting platform. -
Page 166: Put The Coolant And Pull Out The Connection Plug
c. Remove the left cover in the same way. h. Remove the left pedal by referring to”Removing the Spark plig. i. Remove the right paedal and surround the right part in the same way. d. Remove two expansion nails and two bolts (5) at the connection between the left and right part of the fuel tank cover plate and the tail group respectively with 4 # socket head and 8 # sleeve, and remove the bushing (6) and buffer... - Page 167 Caution: A small amount of fuel will flow out when the high-pressure oil pipe is pulled out, and it is forbidden to drip onto the surface of the part. D125 e. Find and pull off the crankshaft position sensor plug ⑤ b.
-
Page 168: Disassemble The Engine
4. Disassemble the engine h. Use an 8# sleeve to remove a bolt on the starter motor, and take out the positive wire⑨ on the bolt. D350 a. Remove the muffler according to "Removing the muffler". b. One person uses the 21 # sleeve to extend into the front of the fine filter to fix one nut (2) on the left side of the motorcycle to fix the engine, and the other person uses the 24 # sleeve to remove one bolt (1) on the right side of the... -
Page 169: D125
D125 5. Install the engine D350 a. Remove the muffler according to "Removing the muffler". a. Two people cooperate to push the whole car to a b. b. One person uses a 17# torx wrench to insert a M12 suitable position, and first place the rear brake caliper on the nut⑴... -
Page 170: D125
d. One person uses 21 # socket to extend into the front of c. open the brake pads on the rear brake caliper with a flat- the fine filter to fix one nut (2) on the left side of the blade or other suitable tool, then install the brake caliper on motorcycle to fix the engine, and the other person uses 24 # the rear rocker arm, and then install 2 M8×37 bolts⑹, use... -
Page 171: Disassembly And Assembly Of Vehicle Covering Parts
12. Disassembly and assembly of vehicle covering parts Caution: ●The vehicle must be parked on a level and stable ground or on a lifting platform. ●The operation can only be performed after the engine and muffler has cooled down completely. ●Attention and sequence when removing the plastic buckle to avoid the buckle from breaking 1.Windshield 2.Front headlight 3.Front right storage box 4.Front right panel 5. - Page 172 1.Instrument panel 2.Front right pedal pad pressure plate 3.Front right pedal pad 4.Rear right pedal pad 5.Rear right pedal pad presser 6.Fuel tank cover 7.Middle part of the fuel tank cover 8.Front left pedal pad pressure plate 9.Front left pedal rubber pad 10.Rear left pedal rubber pad 11.Rear left pedal pad presser 172 / 183...
-
Page 173: Disassembly And Assembly Of Vehicle Panel
Disassembly and assembly of vehicle panel Removal of the front sun visor Caution: a. Use 4# inner hexagon to remove the 3 swell nails on the ●During disassembly, please pay attention to the force to front sun visor. prevent breaking the buckle. ●When removing the panels, please remove them in strict order. -
Page 174: Disassembly Of The Left &Right Side Cover
c. Remove 4 M6 × 14 from the front cover plate with 4 # b. Hold the seat cushion with one hand, remove the 3 M6 socket head Shoulder bolt (1). Separate the front panel from nuts fixed on the seat cushion bracket by 10# double offset the front cover. -
Page 175: Disassembly Of The Left, Right Fuel Tank Cover
Disassembly of the left, right fuel tank Removal of the front left and right panels cover a. Remove M6× 12 bolts (1) from the front left and right panels with 4 # hexagonal socket and expansion nails. a. Remove 2 expansion nails connecting the fuel tank trim cover and the tail skirt with 4 # hexagonal socket. -
Page 176: Removal Of Front Left And Right Panel Bottom Lining
b. Remove the M6× 14 Shoulder bolt (1) at the left of the headlamp with the 4 # hexagonal socket. Remove the expansion nail with 4 # hexagonal socket. Remove the bolts and expansion nails on the other side in the same way. c. -
Page 177: Removal Of Windshield Base
b. Unfasten the wire clamp and tidy up the harness. b. Remove the two M6× 16 on the hydraulic control unit bracket with 8 # socket. Remove the hydraulic control unit with bolts. Remove M8 from horn bracket with 6 # hexagonal socket ×... -
Page 178: Disassembly The Middle Cover Of The Fuel Tank
f. Use a Phillips screwdriver to remove two M4 × 16 bolts, c. Find and unplug the fuel tank lock connector from the separate the rocker arm pressure block from the right lower left side of the fuel tank, and sort out the harness of the fuel rocker arm. -
Page 179: Disassembly The Left And Right Storage Boxes
Disassembly the left and right storage boxes a. Press the switch indicated by the small arrow to open the front right storage box; Remove M6× 14 Shoulder bolt (1) with 4 # hexagonal socket. Remove the front right storage box cover and the front right storage box inner cover bracket togethe e. -
Page 180: Removal Of Left And Right Pedals And Surrounding Left And Right Parts
d. Turn to the back and pull the cable out of the lock frame h. Use a Phillips screwdriver to remove three M4 × 25. in the direction of the arrow. Turn back the front and remove Remove the electronic storage box lock after the bolt. M6×... -
Page 181: Disassembly Of The Surrounding Bottom
Disassembly of the surrounding bottom d. Use the 4 # hexagonal socket to remove the 1 M6× 14 Shoulder bolt ⑴ at the left of the surrounding base plate a. Grasp the rear part of the around the bottom plate by connection;... -
Page 182: Removal Of Tail Skirt And Tail Lamp
Removal of tail skirt and tail lamp e. Remove the right part of the tail skirt in the same way. f. Remove two M6 with 4 # socket head × 14 Shoulder bolt a. Use the 4 # hexagonal socket to remove the 3 expansion (4). - Page 183 d. Use a ratchet wrench+8 # socket to extend under the rectifier and remove the two outer hexagon M6× 22 bolts (7) fixing the rectifier. Caution: The rectifier can not be taken out at this time, just hang it in the air e.
Need help?
Do you have a question about the ZT125T-D and is the answer not in the manual?
Questions and answers