Sign In
Upload
Manuals
Brands
Zeiss Manuals
Microscope
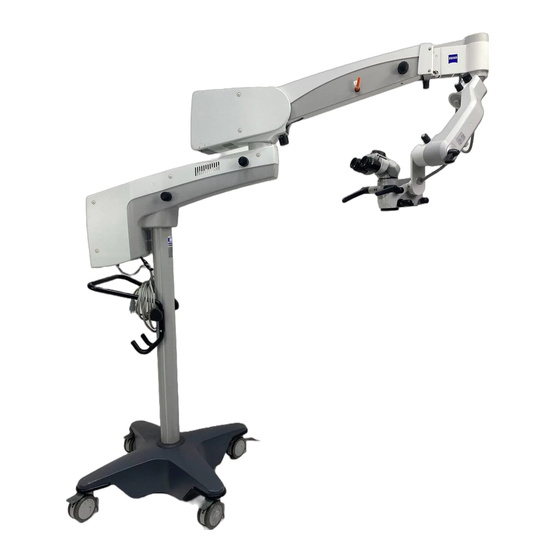
OPMI PROergo S7
Zeiss OPMI PROergo S7 Microscope Manuals
Manuals and User Guides for Zeiss OPMI PROergo S7 Microscope. We have
3
Zeiss OPMI PROergo S7 Microscope manuals available for free PDF download: Instructions For Use Manual
Zeiss OPMI PROergo S7 Instructions For Use Manual (268 pages)
Brand:
Zeiss
| Category:
Microscope
| Size: 9 MB
Table of Contents
Safety Measures
7
Table of Contents
7
Key to Symbols
9
Hazard Symbols
9
Information Symbols
9
Target Group
10
Field of Use
10
Intended Use
10
Normal Use
10
Reasonably Foreseeable Misuse
11
Liability and Warranty
11
Notes for the Operator
12
Requirements for Operation
15
Prior to the very First Use
15
Before Every Use
16
During Use
18
After Every Use
19
Risk of Burn Injuries Caused by High Illumination Intensity
20
Stand Safety Equipment
23
Symbols and Labels on the Device
28
Labels on the Microscope
28
Labels on the Connection Panel
31
Labels on S7 Floor Stand
32
Additional Labels on S7 Floor Stand (Instrument Tray Option)
38
Labels on S7 Ceiling Mount
40
Additional Label on S7 Ceiling Mount with Lifting Column
44
Labels on S7 Wall Mount and on S7 Centro Suspension System
46
Additional Labels on S7 Wall Mount
51
Labels on the Light Sources of the Suspension Systems
52
Labels on the Wall Power Outlet (Optional)
55
Device Overview
57
Proergo Surgical Microscope on S7 Suspension System
60
Properties
60
System Components
62
OPMI Proergo Surgical Microscope
64
Set-Up
64
Control Elements, Displays, Connections
66
Binocular Tubes and Eyepieces
72
Floor Stand S7
76
Set-Up
76
Suspension Arm
78
Carrier Arm, Stand Column, Stand Base
80
Connector Panel of S7 Floor Stand
82
Instrument Tray (Option)
84
S7 Ceiling Mount
86
Set-Up
86
Support Arm and Suspension Arm
88
Connector Panel of S7 Ceiling Mount
90
S7 Ceiling Mount with Lifting Column
92
Set-Up
92
Ceiling Flange with Lifting Column
94
Support Arm and Suspension Arm
96
Connector Panel of S7 Ceiling Mount with Lifting Column
98
S7 Wall Mount and S7 Centro Suspension System
100
Set-Up
100
Support Arm and Suspension Arm
102
Connector Panel of S7 Ceiling Mount
104
Connectors for the Optional Wall Outlet (Ceiling Mount)
106
Illumination System
108
Halogen Lighting System
110
Xenon Lighting System
112
Control Panel and Menu Overview
116
Structure of the Menus
118
Optional Foot Control Panel
134
Foot Control Panel for Zoom and Focus
135
14-Function Foot Control Panel, Wired (FCP) and Wireless (FCP WL)
136
1Chip HD Camera (Option)
138
Preparations for Use
139
Attaching the Equipment
142
Attaching the Tube and Eyepieces
142
Connections, Establishing
144
Connecting the Strain Relief
144
Connecting the Suspension System - S7 Floor Stand
146
Connecting the Suspension System - S7 Ceiling Mount with Rigid Column
148
Connecting the Suspension System - S7 Ceiling Mount with Lifting Column
150
Connecting the Suspension System - S7 Wall Mount
152
Connecting the Video Monitor and the MEDIALINK 100 (Option)
154
1Chip HD Camera Option
156
Installing the 1Chip HD Camera
156
1Chip HD Camera with Iris Diaphragm for Video Lenses
157
Cable Connections for the 1Chip HD Camera
158
Adjusting the System - S7 Floor Stand
160
Setting the Suspension Arm Weight Compensation
160
Limiting the Suspension Arm's Downward Movement
160
Adjusting the System - Ceiling Mount, Wall Mount and S7
162
Centro Suspension System
162
Setting the Suspension Arm Weight Compensation
162
Limiting the Suspension Arm's Downward Movement
162
Adjusting the System - S7 Ceiling Mount with Lifting Column
164
Set Ergonomic Working Height
164
Setting the Suspension Arm Weight Compensation
166
Limiting the Suspension Arm's Downward Movement
166
Balancing the Surgical Microscope
168
Adjusting the Surgical Microscope
173
Preparing the Device for Sterile Use
175
Attaching Asepsis Caps
175
Attaching the Drapes
175
Relocating the S7 Floor Stand
176
Operation
179
Checklist for S7 Floor Stand
180
Checklist for Wall Mount, Ceiling Mount and S7 Centro Suspension System
184
Checklist for S7 Ceiling Mount with Lifting Column
189
Operating Procedure
194
Switching the Device on and off
194
Working with the Speedfokus (Autofocus) Option
196
What to Do in the Event of Malfunctions
197
Failure of Main Functions
199
Failure of Magnetic Brakes
199
Failure of the Speedfokus (Autofocus) Option
199
Failure of the Motorized Focusing Function
200
Failure of the Halogen Lamps
202
Lamp Failure of the Xenon Illumination
204
Causes of Malfunctions and Remedies
207
Care and Maintenance
213
Care of the Device
214
Cleaning
214
Sterilization
215
Disinfection
216
Device Maintenance
217
Maintenance Intervals
217
Safety Check
218
Changing the Halogen Lamp
220
Xenon Lamp Module, Changing
222
Spare Parts
224
Disposal
225
Device Data
227
Technical Data
228
Essential Performance Features S7 / OPMI Proergo
228
Surgical Microscope
228
Stands/Mounts
230
Technical Data on Video Equipment
238
Ordering Data
239
Compliance
250
Environmental Conditions
251
Guidelines and Manufacturer's Declaration Concerning Electromagnetic Compatibility
252
EMC - Electromagnetic Compatibility IEC 60601-1-2: 2014 (4Th Edition)
254
Electromagnetic Interference
254
Electromagnetic Immunity for All ME Equipment and Systems
255
Electromagnetic Immunity for ME Equipment and Systems that Are Not Life-Sustaining
256
System Enhancements
257
Advertisement
Zeiss OPMI PROergo S7 Instructions For Use Manual (260 pages)
Brand:
Zeiss
| Category:
Medical Equipment
| Size: 3 MB
Table of Contents
Chapter Overview
5
Table of Contents
7
Key to Symbols
9
Hazard Symbols
9
Information Symbols
9
Target Group
10
Field of Application
10
Intended Use
10
Normal Use
10
Reasonably Foreseeable Misuse
10
Liability and Warranty
11
Notes for the Operator
12
Requirements for Operation
15
Prior to the very First Use
15
Before Every Use
16
During Use
18
After Every Use
19
Risk of Burn Injuries Caused by High Illumination Intensity
20
Safety Devices of the Suspension Systems
23
Symbols and Labels on the Device
28
Labels on the Microscope
28
Labels on S7 Floor Stand
32
Additional Labels on S7 Floor Stand (Instrument Tray Option)
38
Labels on S7 Ceiling Mount
40
Additional Label on S7 Ceiling Mount with Lifting Column
44
Labels on S7 Wall Mount and on S7 Centro Suspension System
46
Proergo Surgical Microscope on S7 Suspension System
58
Features
58
System Components
60
OPMI Proergo Surgical Microscope
62
Design
62
Controls, Displays, Connections
64
Tiltable Binocular Tube and Eyepieces
70
S7 Floor Stand
74
Design
74
Suspension Arm
76
Carrier Arm, Stand Column, Stand Base
78
Connector Panel of S7 Floor Stand
80
Instrument Tray (Option)
82
S7 Ceiling Mount
84
Design
84
Carrier and Suspension Arms
86
Connector Panel
88
S7 Ceiling Mount with Lifting Column
90
Design
90
Ceiling Flange with Lifting Column
92
Carrier and Suspension Arms
94
Connector Panel of S7 Ceiling Mount with Lifting Column
96
S7 Wall Mount and S7 Centro Suspension System
98
Design
98
Carrier and Suspension Arms
100
Connector Panel
102
Illumination System
104
Halogen Illumination System
106
Xenon Illumination System
108
Control Panel and Menu Overview
112
Structure of the Menus
114
Foot Control Panel (Option)
134
Features
134
Design
134
Foot Control Panel with 14 Functions
136
Foot Control Panel with 8 Functions
137
Foot Control Panel for Zoom and Focus
138
Attaching the Equipment
142
Mounting the Tube and Eyepieces
142
Connections
144
Connecting the Strain Relief Device
144
Connecting the Suspension System - S7 Floor Stand
146
Connecting the Suspension System - S7 Ceiling Mount with Rigid Column
148
Connecting the Suspension System - S7 Ceiling Mount with Lifting Column
150
Connecting the Suspension System - S7 Wall Mount
152
Connecting the Video Monitor and the MEDIALINK 100 (Option)
154
Adjusting the System - S7 Floor Stand
156
Balancing the Suspension Arm
156
Setting the Limit of Downward Travel of the Suspension Arm
156
Adjusting the System - S7 Ceiling and Wall Mounts and S7 Centro Suspension System
158
Balancing the Suspension Arm
158
Setting the Limit of Downward Travel of the Suspension Arm
158
Adjusting the System - S7 Ceiling Mount with Lifting Column
160
Setting an Ergonomic Working Height
160
Balancing the Suspension Arm
162
Setting the Limit of Downward Travel of the Suspension Arm
162
Balancing the Surgical Microscope
164
Adjusting the Surgical Microscope
169
Preparing the System for Sterile Use
171
Attaching Asepsis Caps
171
Applying Drapes
171
Configuring the Camera Settings (Config)
172
Relocating the S7 Floor Stand
178
Operation
181
Checklist for S7 Floor Stand
182
Checklist for S7 Ceiling and Wall Mounts and S7 Centro Suspension System
186
Checklist for S7 Ceiling Mount with Lifting Column
190
Procedure
194
Working with the Speedfokus Autofocus Option
195
What to Do in the Event of Malfunctions
197
Failure of Main Functions
199
Failure of the Magnetic Brakes
199
Failure of the Speedfokus Autofocus Option
199
Failure of the Motorized Focusing Function
200
Failure of the Halogen Lamp
202
Lamp Failure of the Xenon Illumination
204
Causes of Malfunctions and Remedies
207
Care of the Device
214
Cleaning
214
Sterilization
215
Disinfection
216
System Maintenance
217
Maintenance Intervals
217
Safety Check
218
Replacing the Halogen Lamp
220
Changing the Xenon Lamp Module
222
Spare Parts
224
Disposal
225
Technical Data
228
Surgical Microscope
228
Suspension Systems
229
Integrated 1 CCD PAL Video Camera (Option)
236
Integrated 1 CCD NTSC Video Camera (Option)
236
Ordering Data
237
Regulatory Information
241
Ambient Conditions
242
EMC (Electromagnetic Compatibility)
243
Electromagnetic Interference
244
Electromagnetic Immunity for ME Equipment and ME Systems
245
Electromagnetic Immunity for Non-Life-Supporting ME Equipment and ME Systems
247
Recommended Safety Distances between Portable and Mobile RF Communication Equipment and the S7 / OPMI Proergo
249
System Combinations
250
Zeiss OPMI PROergo S7 Instructions For Use Manual (254 pages)
Brand:
Zeiss
| Category:
Medical Equipment
| Size: 2 MB
Table of Contents
Chapter Overview
3
Table of Contents
5
Key to Symbols
6
Hazard Symbols
6
Information Symbols
6
Target Group
7
Field of Application
7
Intended Use
7
Normal Use
7
Reasonably Foreseeable Misuse
8
Liability and Warranty
8
Notes for the Operator
9
Requirements for Operation
12
Prior to the very First Use
12
Before Every Use
13
After Every Use
15
Risk of Burn Injuries Caused by High Illumination Intensity
15
Safety Devices of the Suspension Systems
19
Symbols and Labels on the Device
24
Labels on the Microscope
24
Labels on S7 Floor Stand
28
Additional Labels on S7 Floor Stand (Instrument Tray Option)
34
Labels on S7 Ceiling Mount
36
Additional Label on S7 Ceiling Mount with Lifting Column
40
Labels on the Light Sources of the Suspension Systems
42
Sensera Surgical Microscope on S7 Suspension Systems
48
Features
48
System Components
50
OPMI Sensera Surgical Microscope
52
Design
52
Controls, Displays, Connections
54
Tiltable Binocular Tube and Eyepieces
60
S7 Floor Stand
64
Design
64
Suspension Arm
66
Carrier Arm, Stand Column, Stand Base
68
Connector Panel of S7 Floor Stand
70
Instrument Tray (Option)
74
S7 Ceiling Mount
76
Design
76
Carrier and Suspension Arms
78
Connector Panel of S7 Ceiling Mount
80
S7 Ceiling Mount with Lifting Column
82
Design
82
Ceiling Flange with Lifting Column
84
Carrier and Suspension Arms
86
Connector Panel of S7 Ceiling Mount with Lifting Column
88
Illumination System
90
Halogen Illumination System
92
Xenon Illumination System
94
Control Panel and Menu Overview
98
Structure of the Menus
100
Foot Control Panel (Option)
122
Features
122
Design
122
Foot Control Panel with 14 Functions
124
Foot Control Panel with 8 Functions
125
Attaching the Equipment
130
Mounting the Tube and Eyepieces
130
Connections
132
Connecting the Strain Relief Device
132
Connecting the Suspension System - S7 Floor Stand
134
Connecting the Suspension System - S7 Ceiling Mount with Rigid Column
136
Connecting the Suspension System - S7 Ceiling Mount with Lifting Column
138
Connecting the Video Monitor and the MEDIALINK 100 (Option)
140
Adjusting the System - S7 Floor Stand
142
Balancing the Suspension Arm
142
Setting the Limit of Downward Travel of the Suspension Arm
142
Adjusting the System - S7 Ceiling Mount with Rigid Column
144
Balancing the Suspension Arm
144
Setting the Limit of Downward Travel of the Suspension Arm
144
Adjusting the System - S7 Ceiling Mount with Lifting Column
146
Setting an Ergonomic Working Height
146
Balancing the Suspension Arm
148
Setting the Limit of Downward Travel of the Suspension Arm
148
Balancing the Surgical Microscope
150
Adjusting the Surgical Microscope
154
Preparing the System for Sterile Use
156
Attaching Asepsis Caps
156
Applying Drapes
156
Surgical Microscope with a Laser Micromanipulator
157
Configuring the Camera Settings (Config)
159
Configuring Image Capture
164
Relocating the S7 Floor Stand
171
Operation
173
Checklist for S7 Floor Stand
174
Checklist for S7 Ceiling Mount with Rigid Column
178
Checklist for S7 Ceiling Mount with Lifting Column
182
Procedure
186
Working with the Speedfokus Autofocus Option
187
Display and Deletion of Images (USB Option)
188
What to Do in the Event of Malfunctions
191
Failure of Main Functions
192
Failure of the Focusing Function
192
Failure of the Zoom Function
194
Failure of the Halogen Lamp
196
Lamp Failure of the Xenon Illumination
198
Failure of the Speedfokus Autofocus Option
201
Causes of Malfunctions and Remedies
202
Care of the Device
208
Cleaning
208
Sterilization
209
Disinfection
210
System Maintenance
211
Maintenance Intervals
211
Safety Check
212
Replacing the Halogen Lamp
214
Changing the Xenon Lamp Module
216
Spare Parts
218
Disposal
219
Technical Data
222
Surgical Microscope
222
Suspension Systems
224
Integrated 1 CCD PAL Video Camera (Option)
229
Integrated 1 CCD NTSC Video Camera (Option)
229
Ordering Data
230
Regulatory Information
234
Ambient Conditions
235
EMC (Electromagnetic Compatibility)
236
Electromagnetic Interference
237
Electromagnetic Immunity for ME Equipment and ME Systems
238
Electromagnetic Immunity for Non-Life-Supporting ME Equipment
240
And ME Systems
240
Recommended Safety Distances between Portable and Mobile RF Communication Equipment and the S7 / OPMI Sensera
242
System Combinations
243
Advertisement
Advertisement
Related Products
Zeiss Standard WL Pol
Zeiss Stemi 508
Zeiss SV8
Zeiss Stemi 305
Zeiss Stemi 305 cam
Zeiss S100/OPMI pico
Zeiss S88
Zeiss SV 11
Zeiss SIGMA Series
Zeiss Sigma 300 VP
Zeiss Categories
Microscope
Medical Equipment
Binoculars
Measuring Instruments
Laboratory Equipment
More Zeiss Manuals
Login
Sign In
OR
Sign in with Facebook
Sign in with Google
Upload manual
Upload from disk
Upload from URL