Sign In
Upload
Manuals
Brands
VHF Manuals
Dental equipment
E5
VHF E5 Manuals
Manuals and User Guides for VHF E5. We have
2
VHF E5 manuals available for free PDF download: Original Operating Instructions
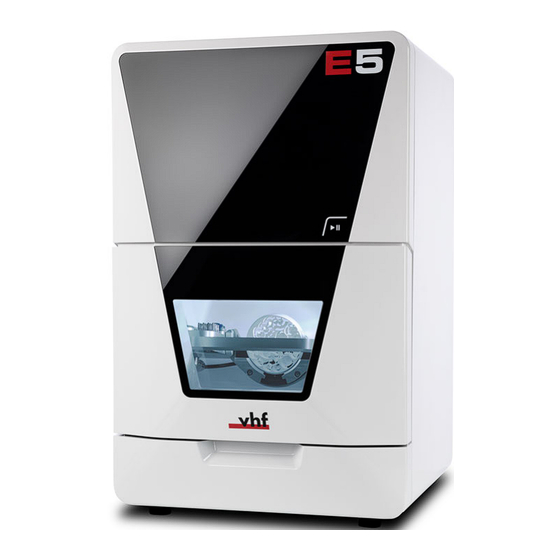
VHF E5 Original Operating Instructions (216 pages)
Brand:
VHF
| Category:
Dental equipment
| Size: 5 MB
Table of Contents
English
3
Table of Contents
3
Signal Word
5
Copyright
5
Welcome
5
Used Symbols
5
Target Group
5
General Safety Instructions
6
Intended Use
6
User Skills
6
Incorrect Operation of the Machine
6
Personal Injury
6
Electric Shock
6
Fire Hazard
6
Power
7
DENTALCAM & DENTALCNC Software
7
Spindle
7
Material Damage
7
Spare Parts, Extra Equipment and Accessories
7
Maintenance and Troubleshooting
7
Air Extraction System
7
Working Chamber
7
Housing
7
Operating Noise
7
Air Extraction System
8
Working Chamber
8
Working Chamber Door
8
Transportation and Storage
9
Handles on the Underside of the Machine
9
Transporting the Machine in the Box
9
Preparing Transportation or Storage
9
Repackaging
9
Putting the Machine Back into Operation after Storage
9
Rear Side of the Machine
10
Get to Know Your Machine
10
Front Side of the Machine
10
Connection Panel
11
Start Button
11
Working Chamber Door
11
Working Chamber
11
Axes / A-B Axis Module
12
Linear Axes
12
Rotational Axes
12
Location of the Identification Plate and Serial Number
12
Technical Data
13
Installation
15
Checking the Scope of Delivery
16
Connecting the Machine
17
Machine Installation Scheme
17
Connecting the CAM Computer
17
Installing the Air Extraction System
18
Establishing the Electric Connection
20
Commissioning
21
Starting the Machine
21
Setting up a Software Connection to the Machine
21
Removing the Spindle Lock
24
Warming the Spindle
25
Operating the Machine
26
Starting the Machine
27
Starting the Machine with a Tool in the Collet Chuck
27
Mounting & Removing Blanks
28
Suitable Blanks
28
Overview of Blank Holders and Standard Clamping Devices
28
How to Mount the Different Blank Types
28
Mounting Discs in the Working Chamber
29
Removing Blanks
30
Clamp the Blocks and Block Holders in the Working Chamber
31
Mounting Blocks to the Block Holder
31
Remove Block Holder from Workspace
32
Mounting the Block Holder in the Working Chamber
32
Remove Blocks from the Block Holder
33
Inserting and Exchanging Tools
34
Automatic or Manual Tool Change
34
Inserting Tools into the Tool Magazine
35
Using ATB
36
Adding Backup Tools
36
Removing Tools from the Tool Magazine
36
Starting, Interrupting, Canceling Jobs
37
Starting Jobs
37
Interrupting and Continuing the Machining Process
37
Aborting Machining
37
Switching off the Machine
39
Servicing
40
Guaranty
40
Maintenance
40
Maintenance Section
40
Preventive Maintenance
40
Basic Maintenance
40
Once Per Day
41
Once Per Week
41
Every 2 Years
41
When Necessary
41
Spare and Wear Parts
42
Definition of Wear Parts
42
Spare Parts List
42
Cleaning the Machine
44
Performing the Daily Cleaning
44
Performing the Weekly Cleaning
45
Removing the Collet Chuck
47
Clean or Replace the Collet Cuck of the Spindle
47
Cleaning the Collet Chuck
48
Inserting the Collet Chuck
48
Exchanging Clamping Devices and Blank Holders
50
Exchanging the Clamping Devices
50
Exchanging the Blank Holder
51
Exchanging Tool Magazine Inserts and Associated Holders
54
Exchanging the Bellow
59
Exchanging the Spindle Unit
66
Exchanging the System Module
73
Exchanging the System Module Locking Bolt
76
Exchanging the Measuring Key Protective Cap
78
Exchanging the Measuring Key
78
Exchanging the Fuser Latches and Clamping Blocks on the Upper Service Cover
82
Exchanging the Fuser Latches and Clamping Blocks on the Lower Service Cover
84
Exchanging the Gasket of the Working Chamber Door
86
Replacing the A-B Axis Module Cover Caps
88
Exchanging the Working Chamber Door
89
Replacing the A-B Axis Module
91
Exchanging the Main Fuse
95
Calibrating the Axes
96
Updating the Software and Firmware
97
Updating DENTALCAM & DENTALCNC
97
Updating the Firmware of the Machine
97
Troubleshooting
98
Links to Troubleshooting Guides
98
Machine-Specific Notes
98
Loud Machining Noise
98
How to Proceed in the Event of a Machine Malfunction
98
How to Proceed in the Event of a Tool Breakage
98
How to Proceed in the Event of a Power Failure
98
Emergency Opening of the Working Chamber Door
100
Removing Broken Tools from the Collet Chuck
101
Disposal
102
Deutsch
110
Signalwörter
112
Urheberrecht
112
Verwendete Zeichen
112
Willkommen
112
Zielgruppe
112
Allgemeine Sicherheitshinweise
113
Benutzerqualifikationen
113
Bestimmungsgemäße Verwendung
113
Fehlbedienung der Maschine
113
Personenschäden
113
Stromschlag
113
Absauganlage
114
Arbeitsgeräusche
114
Arbeitsraum
114
Brandgefahr
114
Ersatzteile, Zusatzausstattung und Zubehör
114
Gehäuse
114
Sachschäden
114
Spindel
114
Wartung und Fehlerbehebung
114
Absauganlage
115
Arbeitsraum
115
Arbeitsraumtür
115
DENTALCAM & DENTALCNC-Software
115
Strom
115
Griffe an der Unterseite der Maschine
116
Maschine IM Karton Transportieren
116
Maschine nach Lagerung wieder in Betrieb Nehmen
116
Transport oder Lagerung Vorbereiten
116
Transport und Lagerung
116
Wiederverpacken
116
Lernen Sie Ihre Maschine Kennen
117
Rückseite der Maschine
117
Vorderseite der Maschine
117
Anschlusspanel
118
Arbeitsraum
118
Arbeitsraumtür
118
Start-Taste
118
Achsen / A-B-Achsmodul
119
Drehachsen
119
Linearachsen
119
Ort des Typenschilds und der Seriennummer
119
Technische Daten
120
Installation
122
Lieferumfang Prüfen
123
CAM-Rechner Verbinden
124
Maschine Anschließen
124
Schema Maschineninstallation
124
Absauganlage Installieren
125
Stromverbindung Herstellen
127
Erstinbetriebnahme
128
Maschine Starten
128
Softwareverbindung zur Maschine Einrichten
128
Spindelsicherung Entfernen
131
Spindel Warmlaufen Lassen
132
Maschine Betreiben
133
Maschine mit einem Werkzeug in der Spannzange Hochfahren
134
Maschine Starten
134
Geeignete Rohlinge
135
Rohlinge Einspannen & Entfernen
135
Wie Sie die Verschiedenen Rohlingstypen Ein- Spannen
135
Überblick Rohlingshalter und Standard-Spann- Vorrichtungen
135
Ronden in den Arbeitsraum Einspannen
136
Ronden Entfernen
137
Blöcke in den Blockhalter Einspannen
138
Blöcke und Blockhalter in den Arbeitsraum Einspannen
138
Blockhalter aus dem Arbeitsraum Entfernen
139
Blockhalter in den Arbeitsraum Einspannen
139
Blöcke aus dem Blockhalter Entfernen
140
Automatischer oder Manueller Werkzeugwechsel
141
Werkzeuge Einsetzen und Tauschen
141
Werkzeuge in das Werkzeugmagazin Einsetzen
142
ATB Verwenden
143
Ersatzwerkzeuge Hinzufügen
143
Werkzeuge aus dem Werkzeugmagazin Entfernen
143
Aufträge Starten
145
Aufträge Starten, Unterbrechen, Abbrechen
145
Bearbeitung Abbrechen
145
Bearbeitung Unterbrechen und Fortführen
145
Maschine Ausschalten
147
Garantie
148
Grundwartung
148
Planmäßige Wartung
148
Servicearbeiten
148
Wartung
148
Wartungsbereich
148
Alle 2 Jahre
149
Bei Bedarf
149
Einmal Täglich
149
Einmal Wöchentlich
149
Wartungstabelle
149
Definition Verschleißteile
150
Ersatz- und Verschleißteile
150
Ersatzteilliste
150
Maschine Reinigen
153
Tägliche Reinigung Durchführen
153
Wöchentliche Reinigung Durchführen
154
Spannzange Ausbauen
156
Spindelspannzange Reinigen oder Tauschen
156
Spannzange Einsetzen
157
Spannzange Reinigen
157
Spannvorrichtungen Tauschen
159
Spannvorrichtungen und Rohlingshalter Tauschen
159
Rohlingshalter Tauschen
160
Werkzeugmagazineinsätze und Zugehörige Halter Tauschen
163
Faltenbalg Austauschen
168
Spindeleinheit Austauschen
175
Systemmodul Tauschen
182
Verriegelungsbolzen des Systemmoduls Tauschen
185
Messtaster-Schutzkappe Tauschen
187
Messtaster Austauschen
189
Fixierriegel und Spannblöcke der Oberen Ser- Viceabdeckung Tauschen
191
Fixierriegel und Spannblöcke der Unteren Ser- Viceabdeckung Tauschen
193
Dichtung der Arbeitsraumtür Tauschen
195
Abdeckkappen des A-B-Achsmoduls Tauschen
197
Arbeitsraumtür Austauschen
198
A-B-Achsmodul Tauschen
200
Hauptsicherung Tauschen
204
Achsen Kalibrieren
205
DENTALCAM & DENTALCNC Aktualisieren
206
Firmware der Maschine Aktualisieren
206
Software und Firmware Aktualisieren
206
Fehlerbehebung
207
Laute Bearbeitungsgeräusche
207
Links zu den Leitfäden zur Fehlerbehebung
207
Maschinenspezifische Hinweise
207
Vorgehen bei einem Werkzeugbruch
207
Vorgehen bei einer Maschinenstörung
207
Vorgehen bei einem Stromausfall
208
Not-Öffnung der Arbeitsraumtür
209
Abgebrochene Werkzeuge aus der Spannzange Entfernen
210
Advertisement
VHF E5 Original Operating Instructions (105 pages)
Brand:
VHF
| Category:
Dental equipment
| Size: 5 MB
Table of Contents
Table of Contents
3
Welcome
5
Target Group
5
Used Symbols
5
Signal Words
5
Copyright
5
General Safety Instructions
6
Intended Use
6
User Skills
6
Incorrect Operation of the Machine
6
Personal Injury
6
Electric Shock
6
Fire Hazard
7
Housing
7
Working Chamber
7
Air Extraction System
7
Operating Noise
7
Maintenance and Troubleshooting
7
Spare Parts, Extra Equipment and Accessories
7
Material Damage
7
Spindle
7
DENTALCAM & DENTALCNC Software
8
Power
8
Air Extraction System
8
Working Chamber
8
Working Chamber Door
8
Transportation and Storage
9
Handles on the Underside of the Machine
9
Transporting the Machine in the Carton
9
Preparing Transportation or Storage
9
Repackaging
9
Putting the Machine Back into Operation after Storage
9
Get to Know Your Machine
10
Front Side of the Machine
10
Rear Side of the Machine
10
Connection Panel
11
Start Button
11
Working Chamber Door
11
Working Chamber
11
Axes / A-B Axis Module
12
Linear Axes
12
Rotary Axes
12
Location of the Identification Plate and Serial Number
12
Technical Data
13
Installation
15
Checking the Scope of Delivery
16
Connecting the Machine
17
Machine Installation Scheme
17
Connecting the CAM Computer
17
Installing the Air Extraction System
18
Establishing the Electric Connection
20
Commissioning
21
Starting the Machine
21
Setting up a Software Connection to the Machine
21
Removing the Spindle Lock
23
Warming the Spindle
24
Operating the Machine
25
Starting the Machine
26
Starting the Machine with a Tool in the Collet Chuck
26
Mounting & Removing Blanks
27
Suitable Blanks
27
Overview of Blank Holders and Standard Clamping Devices
27
How to Mount the Different Blank Types
27
Mounting Discs in the Working Chamber
28
Removing Discs
29
Mounting Blocks and Block Holders in the Working Chamber
30
Mounting Blocks to the Block Holder
30
Mounting the Block Holder in the Working Chamber
31
Removing the Block Holder from the W Orking Chamber
31
Removing the Blocks from the Block Holder
32
Inserting and Exchanging Tools
33
Automatic or Manual Tool Change
33
Inserting Tools into the Tool Magazine
34
Removing Tools from the Tool Magazine
35
Adding Backup Tools
35
Using ATB
35
Starting, Interrupting, Canceling Jobs
37
Starting Jobs
37
Interrupt and Continue Machining
37
Aborting Machining
37
Switching off the Machine
39
Maintenance
40
Basic Maintenance
40
Preventive Maintenance
40
Maintenance Section
40
Servicing
40
Warranty
40
Maintenance Table
41
Once Per Day
41
Once Per Week
41
Every 2 Years
41
When Necessary
41
Spare Parts and Wear Parts
42
Definition of Wear Parts
42
Spare Part List
42
Cleaning the Machine
44
Performing the Daily Cleaning
44
Performing the Weekly Cleaning
45
Cleaning or Replacing the Collet Chuck of the Spindle
47
Removing the Collet Chuck
47
Cleaning the Collet Chuck
48
Greasing the Collet Chuck
48
Inserting the Collet Chuck
48
Exchanging Clamping Devices and Blank Holders
50
Exchanging Clamping Devices
50
Exchanging the Blank Holder
51
Exchanging Tool Magazine Inserts and Associated Holders
54
Exchanging the Bellow
59
Exchanging the Spindle Unit
66
Close the Working Chamber Door
69
Switch on the Machine at the Main Power Switch
72
Start DENTALCNC
72
Open the Maintenance Section Window with the Fol- Lowing Icon in the Main Icon Bar
72
Select the Following Icon of the Entry Exchange
72
Exchanging the System Module
73
Exchanging the System Module Locking Bolt
76
Exchanging the Measuring Key Protective Cap
78
Exchanging the Measuring Key
79
Exchanging the Fuser Latches and Clamping Blocks on the Upper Service Cover
81
Exchanging the Fuser Latches and Clamping Blocks on the Lower Service Cover
83
Exchanging the Gasket of the Working Chamber Door
85
Exchanging the A-B Axis Module Cover Caps
87
Exchanging the Working Chamber Door
88
Exchanging the A-B Axis Module
90
Exchanging the Main Fuse
94
Calibrating the Axes
95
Updating the Software and Firmware
96
Updating DENTALCAM & DENTALCNC
96
Updating the Firmware of the Machine
96
Troubleshooting
97
Links to Troubleshooting Guides
97
Machine-Specific Notes
97
Loud Machining Noise
97
How to Proceed in the Event of a Machine Malfunction
97
How to Proceed in the Event of a Tool Breakage
97
How to Proceed in the Event of a Power Failure
97
Emergency Opening of the Working Chamber Door
99
Removing Broken Tools from the Collet Chuck
100
Disposal
101
Disposing Machining Residues
101
General
101
Solid Machining Residues
101
Disposing of the Machine
101
Dismantling, Transport and Packaging
101
Index
102
Advertisement
Related Products
VHF E4
VHF K5+
VHF N4 Impression
VHF R5
VHF S5
VHF Z4
VHF Categories
Dental equipment
Power Tool
Lathe
More VHF Manuals
Login
Sign In
OR
Sign in with Facebook
Sign in with Google
Upload manual
Upload from disk
Upload from URL