Sign In
Upload
Manuals
Brands
VHF Manuals
Dental equipment
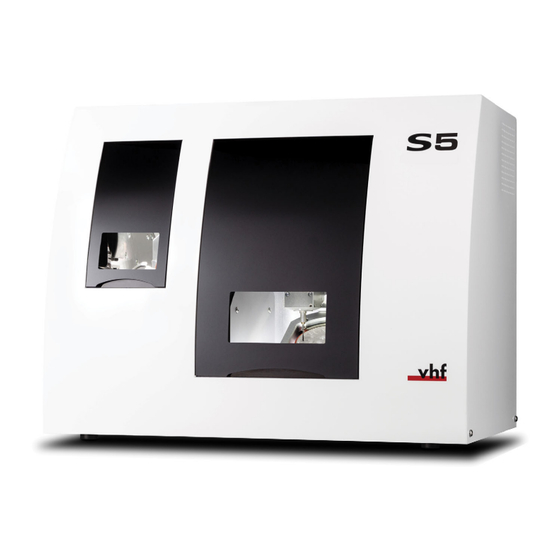
S5
VHF S5 Manuals
Manuals and User Guides for VHF S5. We have
1
VHF S5 manual available for free PDF download: Operating Instructions Manual
VHF S5 Operating Instructions Manual (320 pages)
Brand:
VHF
| Category:
Dental equipment
| Size: 4 MB
Table of Contents
English
3
Table of Contents
3
Welcome
5
About this Document
5
Used Symbols
5
Structure of Safety Notes
5
General Safety Instructions
6
Operating Regulations
9
Intended Use
9
Controlling the Machine through Software
9
Maintenance and Cleaning
9
Spindle
9
Unattended Operation
9
Transportation and Storage
10
Machine Overview
11
Front Side of the Machine
11
Connection Panel
11
Working Chamber Door
12
Working Chamber
12
Blank Magazine
13
CAM Computer
13
Anti-Soiling Concept
13
Sound Emission
14
Location of the Identification Plate & Serial Number
14
Axes
14
Technical Data
15
Installing the Machine
17
Checking the Scope of Delivery
17
Choosing the Installation Site
18
Machine Installation (Schema)
19
Establishing the Electric Connection
20
Removing the Transport Lock
20
Installing the Pneumatics
21
Overview Compressed Air Regulator
22
Installing the Pneumatic Hose
22
Adjusting the Air Pressure with the Compressed Air Regulator
23
Installing the Air Extraction System
24
Requirements for the Suction Unit
24
Installing the Suction Unit
24
Connecting the Suction Hose with the Optional Hose Connection
24
Installing the Switching Unit
25
Connecting the CAM Computer
25
Operation: Preparing Jobs
26
Starting the Machine
26
Starting the Machine with a Tool in the Collet Chuck
26
Switching off the Machine
27
Mounting & Removing Blanks
27
Mounting Blocks to the Block Holder
28
Using an Optional Abutment Holder
29
Operating the Blank Changer
29
Change Position of the Blank Magazine
30
Mounting Discs & Block Holders to the Blank Magazine
30
Managing Tools
33
Inserting and Exchanging Tools
33
Deactivating and Activating the Ionizer
35
Mounting and Removing the Ionizer Cover
35
Preparing the Machine for Wet Machining
36
Operation: Executing Jobs
38
Starting Jobs
38
Aborting Machining
38
Job Interruptions and Job Abortions
39
How to Proceed in Case of a Job Interruption
39
How to Proceed in Case of a Machine Malfunction
39
How to Proceed in Case of a Tool Breakage
39
How to Proceed in Case of a Power Failure
40
Emergency Opening of the Working Chamber Door
41
Manually Resetting the Blank Changer to Default Position
42
Maintenance and Do-It-Yourself
43
Where to Get Service
43
Definition of Wear Parts
43
Basic Maintenance
43
Preventive Maintenance
43
Maintenance Section
43
Cleaning the Working Chamber
44
Cleaning the Blank Magazine
45
Cleaning the Collet Chuck
46
Checking the Compressed Air Regulator
48
Checking the Water Separator for Condensate
48
Exchanging / Cleaning the Contaminated Filter Cart- Ridge
48
Cleaning the Housing
49
Exchanging the Main Fuse
50
Calibrating the Axes
50
Replacing the Tool Magazine Inserts
51
Updating the Software and Firmware
52
Updating the Firmware of the Machine
52
Updating the Manufacturing Software
52
Maintenance Table
53
Disposal
55
Disposing of the Cooling Liquid
55
Disposing of the Machine
55
Deutsch
65
Aufbau von Sicherheitshinweisen
67
Verwendete Zeichen
67
Willkommen
67
Über dieses Dokument
67
Allgemeine Sicherheitshinweise
68
Bedienvorschriften
71
Bestimmungsgemäße Verwendung
71
Spindel
71
Steuern der Maschine Per Software
71
Unbeaufsichtigter Betrieb
71
Wartung und Reinigung
71
Transport und Lagerung
72
Anschlusspanel
74
Maschinenübersicht
74
Vorderseite der Maschine
74
Arbeitsraum
75
Arbeitsraumtür
75
Anti-Verschmutzungskonzept
76
CAM-Rechner
76
Rohlingsmagazin
76
Achsen
77
Ort des Typenschilds & der Seriennummer
77
Schallemission
77
Technische Daten
78
Installation der Maschine
80
Lieferumfang Prüfen
80
Aufstellungsort Wählen
81
Maschineninstallation (Schema)
82
Die Transportsicherung Entfernen
83
Stromverbindung Herstellen
83
Druckluft Anschließen
84
Druckluftschlauch Anschließen
85
Überblick Druckminderer
85
Luftdruck Per Druckminderer Einstellen
86
Absauganlage Installieren
87
Absauggerät Anschließen
87
Anforderungen an das Absauggerät
87
Saugschlauch mit Optionalem Schlauchanschluss Anschließen
87
CAM-Rechner Verbinden
88
Schalteinheit Anschließen
88
Betrieb: Aufträge Vorbereiten
89
Maschine Starten
89
Maschine Ausschalten
90
Maschine mit einem Werkzeug in der Spannzange Hochfahren
90
Rohlinge Einspannen & Entnehmen
90
Blöcke in den Blockhalter Einspannen
91
Verwenden eines Optionalen Abutmenthalters
92
Rohlingswechsler Bedienen
93
Ronden & Blockhalter in das Rohlingsmagazin Ein- Spannen
93
Wechselposition des Rohlingsmagazins
93
Werkzeuge Einsetzen und Tauschen
97
Werkzeuge Verwalten
97
Ionisator Deaktivieren und Aktivieren
99
Ionisatorabdeckung Anbringen und Entfernen
99
Maschine auf Nassbearbeitung Vorbereiten
100
Aufträge Starten
102
Bearbeitung Abbrechen
102
Betrieb: Aufträge Ausführen
102
Auftragsunterbrechungen und Auftragsabbrüche
103
Wie man bei einer Auftragsunterbrechung Vorgeht
103
Wie man bei einer Maschinenstörung Vorgeht
103
Wie man bei einem Stromausfall Vorgeht
104
Wie man bei einem Werkzeugbruch Vorgeht
104
Not-Öffnung der Arbeitsraumtür
105
Rohlingsw Echsler Manuell in die Grundstellung Bringen
106
Definition Verschleißteile
107
Grundwartung
107
Planmäßige Wartung
107
Wartung und Do-It-Yourself
107
Wartungsbereich
107
Wo Erhalte ich Service
107
Arbeitsraum Reinigen
108
Rohlingsmagazin Reinigen
109
Spannzange Reinigen
109
Druckminderer Prüfen
111
Wasserabscheider auf Kondensat Prüfen
111
Filterpatrone bei Verschmutzung Tauschen / Reinigen
112
Gehäuse Reinigen
112
Achsen Kalibrieren
113
Hauptsicherung Tauschen
113
Werkzeugmagazineinsätze Wechseln
114
Die Fertigungssoftware Aktualisieren
115
Firmware der Maschine Aktualisieren
115
Software und Firmware Aktualisieren
115
Wartungstabelle
116
Entsorgung
118
Kühlflüssigkeit Entsorgen
118
Maschine Entsorgen
118
Français
191
Bienvenue
193
Composition des Consignes de Sécurité
193
Symboles Utilisés
193
À Propos du Présent Document
193
Consignes Générales de Sécurité
194
Broche
197
Commande de la Machine Par Logiciel
197
Entretien Et Nettoyage
197
Fonctionnement Sans Supervision
197
Règles D'exploitation
197
Utilisation Conforme
197
Transport Et Entreposage
198
Aperçu de la Machine
200
Côté Avant de la Machine
200
Panneau de Connexion
201
Porte de la Chambre de Travail
201
Chambre de Travail
202
Magasin de Pièces Brutes
202
Concept Antisalissure
203
Emplacement de la Plaque D'identification Et du Numéro de Série
203
Ordinateur FAO
203
Émission Sonore
203
Axes
204
Caractéristiques Techniques
205
Installer la Machine
207
Vérifier la Livraison
207
Choisir Le Site D'installation
208
Installation de la Machine (Schéma)
209
Raccordement Au Secteur
210
Retirer Le Verrou de Transport
210
Installer Les Pneumatiques
211
Aperçu du Régulateur D'air Comprimé
212
Installer Le Tuyau Pneumatique
212
Régler la Pression D'air Avec Le Régulateur D'air Comprimé
213
Connexion du Tuyau D'aspiration Avec la Connexion du Tuyau en Option
214
Exigences Pour L'unité D'aspiration
214
Installation de L'unité D'aspiration
214
Installer Le Système D'extraction D'air
214
Installer L'unité de Commutation
215
Raccorder L'ordinateur FAO
216
Démarrage de la Machine
217
Fonctionnement : Préparer Les Tâches
217
Arrêter la Machine
218
Démarrer la Machine Avec un Outil Dans la Pince de Serrage
218
Monter Et Démonter des Pièces Brutes
218
Montage de Blocs Sur Le Porte-Blocs
219
Utiliser un Support de Pilier Optionnel
220
Montage des Disques Et des Porte-Blocs Sur Le Magasin de Pièces Brutes
221
Position de Changement du Magasin de Pièces Brutes
221
Utilisation du Changeur de Pièces Brutes
221
Gérer des Outils
225
Insérer Et Remplacer des Outils
225
Désactiver Et Activer L'ioniseur
227
Montage Et Retrait du Couvercle de L'ioniseur
227
Préparation de la Machine Pour L'usinage en Milieu Humide
228
Commencer Les Tâches
230
Fonctionnement : Exécuter Les Tâches
230
Interruption de L'usinage
230
Interruptions Et Annulations de Travaux
231
Procédure À Suivre en Cas D'interruption D'une Tâche
231
Procédure À Suivre en Cas de Problème Machine
231
Procédure À Suivre en Cas de Panne de Courant
232
Procédure À Suivre en Cas de Rupture D'outils
232
Ouverture D'urgence de la Porte de la Chambre de Travail
233
Réinitialisation Manuelle du Changeur de Pièces Brutes Dans la Position Par Défaut
234
Définition des Pièces D'usure
235
Entretien de Base
235
Entretien Et " Fais-Le-Toi-Même " (DIY)
235
Entretien Préventif
235
Où Obtenir Le Service
235
Section Entretien
235
Nettoyer la Chambre de Travail
236
Nettoyage du Magasin de Pièces Brutes
237
Nettoyer la Pince de Serrage
238
Vérifier la Présence de Condensat Dans Le Séparateur D'eau
240
Vérifier Le Régulateur D'air Comprimé
240
Nettoyer Le Boîtier
241
Remplacer/Nettoyer la Cartouche Filtrante Conta- Minée
241
Paramétrage des Axes
242
Remplacement du Fusible Principal
242
Remplacer Les Inserts du Magasin D'outils
243
Mettre Le Logiciel de Fabrication À Jour
244
Mettre Le Logiciel Et Le Micrologiciel À Jour
244
Mettre Le Micrologiciel de la Machine À Jour
244
Tableau D'entretien
245
Mise Au Rebut
247
Élimination de la Machine
247
Élimination du Liquide de Refroidissement
247
10 Dépannage
248
Advertisement
Advertisement
Related Products
VHF S2
VHF E5
VHF K5+
VHF N4 Impression
VHF R5
VHF Z4
VHF Categories
Dental equipment
Power Tool
Lathe
More VHF Manuals
Login
Sign In
OR
Sign in with Facebook
Sign in with Google
Upload manual
Upload from disk
Upload from URL