Sign In
Upload
Manuals
Brands
Toshiba Manuals
All in One Printer
e-studio 2508a
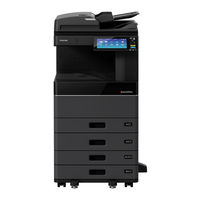
Toshiba e-studio 2508a Manuals
Manuals and User Guides for Toshiba e-studio 2508a. We have
3
Toshiba e-studio 2508a manuals available for free PDF download: Service Manual, Copying Manual, Safety Information Manual
Toshiba e-studio 2508a Service Manual (1012 pages)
MULTIFUNCTIONAL DIGITAL SYSTEMS
Brand:
Toshiba
| Category:
All in One Printer
| Size: 44 MB
Table of Contents
Specifications/Accessories/Options/Supplies
29
Internet Fax
41
System List
44
Outline of the Machine
49
Sectional View
49
Electric Parts Layout
52
Symbols and Functions of Various Components
60
Sensors and Switches
60
Electromagnetic Clutches
62
Lamps and Heaters
63
Thermistors and Thermostats
64
Description of Operation
69
Detection of Abnormality
72
Hibernation Function
77
Description of Operation
83
Process of Detection of Original Size
84
Laser Optical Unit
86
Laser Precautions
87
Drive System
97
Drum Related Section
99
Development System
102
Operation
109
Heater Control Circuit
110
Automatic Duplexing Unit (ADU)
114
Description of Operations
116
Drive of ADU
117
Power Supply Unit
118
Explanation of Functions
118
Operation of DC Output Circuits
119
Output Channel
121
Disassembly and Replacement
123
Front Cover
123
Left Cover
123
Receiving Tray
124
Tray Rear Cover
124
Left Rear Cover
125
Right Front Cover
126
Right Rear Cover
126
Front Top Cover
127
Front Right Cover
128
Rear Top Cover
128
Control Panel Unit
130
DSP Board
134
Scanner Unit
137
Original Glass
137
Lens Cover
137
Exposure Lamp (EXP)
142
Scan Motor (M1)
143
Bypass Feed Roller
157
Bypass Separation Roller
160
Bypass Paper Sensor (S8)
162
Feed Cover
171
Transport Roller
172
Upper Tray-Up Motor (M11)
187
Lower Tray-Up Motor (M12)
188
Registration Roller Clutch (CLT1)
198
Driving Section
203
Process Unit
205
Drum Cleaner Unit
206
Discharge LED
208
Main Charger
209
Main Charger Grid
210
Main Charger Cleaner
210
Needle Electrode
211
Drum Cleaning Blade
213
Drum Separation Finger
214
Recovery Blade
215
Temperature/Humidity Sensor (S19)
216
Developer Unit
219
Filling Developer Unit with Developer Material
222
Drum Thermistor (THMS4)
223
Guide Roller / Developer Sleeve
224
Replacement of Oil Seal
230
Transfer Unit
231
Transfer Roller Unit
233
Separation Needle
235
Ozone Filter
236
Fuser Unit
238
Front Side Cover
240
Rear Side Cover
240
Separation Finger
241
Exit Sensor (S5)
243
Fuser Center Thermostat (Thmo1)/Fuser Front Thermostat (THMO2)
244
Pressure Roller
251
Fuser Roller
252
Reverse Unit
254
Paper Exit Unit
256
Reverse Roller
266
Removal and Installation of Options
285
Dual Scan Document Feeder
285
Reversing Automatic Document Feeder
289
Paper Feed Pedestal
292
Large Capacity Feeder
294
Bridge Kit
298
Inner Finisher
300
Saddle Stitch Finisher
303
Job Separator
310
Self-Diagnostic Mode
315
Operation Procedure
321
Test Mode
323
Output Check
323
Input Check
323
List Print Mode
325
List Printing
327
Screen Transition
345
Operation Procedure
348
Pixel Counter
365
Applicable Codes
373
Setting Files
373
Result Files
374
Setting / Adjustment
377
Adjustment of Auto-Toner Sensor
378
Image Dimensional Adjustment
380
Paper Alignment at the Registration Roller
382
Image Dimensional Adjustment at the Printing Section
386
Scanner Related Adjustment
392
Image Quality Adjustment (Copying Function)
401
Density Adjustment
402
Gamma Balance Adjustment
403
Background Adjustment
404
Sharpness Adjustment
404
Setting Range Correction
405
Density Adjustment of Graphic Lines (1200Dpi)
411
Image Quality Adjustment (Scanning Function)
413
Background Adjustment (Black/Grayscale)
415
Judgment Threshold for ACS
415
Contrast Adjustment
416
Fine Adjustment of Black Density
416
RGB Conversion Method Selection
416
Adjustment of Saturation
417
Adjustment of the Capacity and Image Quality of Slimpdf
417
Surrounding Void Amount Adjustment
418
JPEG Compression Level Adjustment
419
Image Quality Adjustment (FAX Function)
420
Adjustment of High-Voltage Transformer
422
Belt Tension Adjustment of the Scan Motor
431
Adjusting the Clearance of the Paper and Side Guides
432
Separation Roller Pressure Force Adjustment
433
Adjustment of Developer Unit
434
Doctor-To-Sleeve Gap
434
Adjustment of Height
443
Adjustment of Skew
445
Adjustment of the Leading Edge Position
449
Adjustment of Horizontal Position
451
Adjustment of Copy Ratio
452
Platen Sheet
455
Adjustment of RADF Height
461
Alignment Position Adjustment
472
Punch Hole Position Adjustment
476
Adjusting the Alignment Position
477
Adjusting the Stapling Position
480
Stapling/Folding Position Adjustment in Saddle Stitch Unit
489
Folding Position Adjustment
491
Saddle Stitch Skew Adjustment
492
Adjustment of Hole Punch Unit
493
Preventive Maintenance (Pm)
497
General Description
497
PM Display Contents
499
Clearing Counter
499
General Descriptions for PM Procedure
500
Operational Flow and Operational Screen
501
Work Flow of Parts Replacement
506
EPU Replacement Mode
507
Operation Flow
507
Counters to be Cleared
509
Fuser Unit Status Detection Mode
511
Operational Flow
511
Preventive Maintenance Checklist
512
Laser Optical Unit
514
Paper Feeding Section
515
Drum Related Section
517
Developer Section
520
Fuser Unit
522
Paper Exit Section / Reverse Section
524
Automatic Duplexing Unit
525
Checking and Cleaning of Photoconductive Drum
540
Checking and Cleaning of Drum Cleaning Blade
541
Checking and Cleaning of Fuser Roller and Pressure Roller
541
Checking and Replacing the Transfer Roller
542
Maintenance Part List
544
Grease List
546
Error Code and Troubleshooting
547
General Descriptions
547
If a Problem Continues Even after Performing All Troubleshooting
548
Collection of Debug Logs with a USB Device
549
Traceability Label
551
Error Code List
553
Service Call
562
Topaccess Related Error/Communication Error with External Application
590
Error History
609
Diagnosis and Prescription for each Error Code
611
Paper Exit Jam
612
Paper Transport Jam
613
Paper Misfeeding
626
Cover Open Jam
633
Other Jam
640
Finisher Jam
656
Drive System Related Service Call
693
Paper Feeding System Related Service Call
694
Scanning System Related Service Call
700
Process Related Service Call
705
Fuser Unit Related Service Call
708
Optional Communication Related Service Call
711
Circuit Related Service Call
717
Communication Related Service Call
720
Laser Optical Unit Related Service Call
721
Finisher Related Service Call
722
Service Call for Others
745
Error in Internet FAX / Scanning Function
775
Printer Function Error
804
Topaccess Related Error
810
MFP Access Error
815
Maintenance Error
822
Network Error
831
Background Fogging
842
Moire/Lack of Sharpness
843
Toner Offset
844
Blurred Image
847
Poor Fusing
848
Blank Copy
849
Solid Copy
850
White Banding or White Void (in the Feeding Direction)
851
White Banding (at Right Angle with the Feeding Direction)
853
Skew (Inclined Image)
854
Black Banding (in the Feeding Direction)
855
Black Banding (at Right Angle with the Feeding Direction)
857
White Spots
858
Poor Image Transfer
859
Uneven Image Density
860
Faded Image (Low Density, Abnormal Gray Balance)
861
Image Dislocation in Feeding Direction
862
Jittering Image
863
Poor Cleaning
864
Uneven Light Distribution
865
Blotched Image
866
Black Streaks on Image Leading Edge During Scanning
867
Replacement of Pc Boards/Hdd
883
Removal and Installation of PC Boards/Hdd
883
SYS Board Cover
883
Hard Disk (HDD)
884
SYS Board
885
LGC Board
887
Switching Regulator
889
High-Voltage Transformer (HVT)
890
Precautions When Replacing PC Boards
894
Precautions and Procedures When Replacing the SYS Board
902
Procedures When Replacing the LGC Board
911
License Re-Registration Using the One-Time Dongle
916
Remote Service
919
Auto Supply Order
919
Setting Item
920
Setting Procedure
922
Order Sheet Format
934
Service Notification
938
Items to be Notified
945
Firmware Updating
961
Firmware Updating with USB Device
962
Folder Configuration of a USB Device
964
Update Procedure
966
Confirmation of the Updated Data
975
Backup Function
977
Data Cloning
977
General Description
977
Backup Files
978
Cloning Procedure
978
AES Data Encryption Function Setting
982
Procedure for Disabling Data Encryption Function
987
High Security Mode
988
Prior Confirmation
988
External Counters
991
Details of the Signals
992
Setting Code
996
Setting Value Change and Restrictions When Using the Coin Controller
996
Setting Value
997
Wire Harness Connection Diagrams
999
AC Wire Harness
999
Revision Record
1006
Advertisement
Toshiba e-studio 2508a Copying Manual (132 pages)
Multifunctional Digital Color Systems
Brand:
Toshiba
| Category:
Multifunction printer
| Size: 24 MB
Table of Contents
Preface
3
How to Read this Manual
3
Table of Contents
5
Important Information on Making Copies
10
Storage of Color Copies (Color Model Only)
10
Forgery Prevention Function
10
Simple Copy
10
Basic Menu of the Copier Function
11
Equipment Status Indication Area
13
Before Using Copier Functions
15
Default Settings
15
Confirming the Set Functions
16
Clearing the Set Functions
17
Restrictions on Function Combinations
17
Basic Copying Procedure
21
Stopping and Restarting Copying
23
Scanning the Next Original During Copying (Auto Job Start)
23
Interrupting Copying and Making Other Copies (Interrupt Copying)
24
Making One Copy as a Sample (Proof Copy)
25
Specifying the Orientation of Originals
26
Specifying the Paper Size
27
Automatic Paper Selection (APS)
27
Selecting the Drawer for Your Desired Paper Manually
28
Copying Mixed-Size Originals in One Operation
29
Specifying the Paper Type
31
Copying Onto Recycled Paper or Thick Paper
31
Copying Onto Thin Paper, Sticker Labels, or Special Paper
31
Specifying and Copying Cover Sheets or Paper to Insert
31
Bypass Copying
32
Bypass Copying on Standard Size Paper
33
Bypass Copying on Non-Standard Size Paper
38
Selecting Exit Tray
40
Changing the Exit Tray
40
Switching Color Modes (Color Model Only)
41
Adjusting Density
42
Adjusting Automatically (Automatic Density Adjustment)
42
Adjusting Manually
42
Enlarging or Reducing Images
43
Automatic Magnification Selection (AMS)
44
Specifying both the Original Size and the Copy Paper Size Separately
45
Specifying Reproduction Ratio Manually
48
Copying Photo Originals in the Optimal Reproduction Ratio for Copy Paper Size (Photo Zoom) (Color Model Only)
49
Reducing Images to Scan the Entire Original, Including the Edges (Full Image) (Color Model Only)
52
Reducing and Centering an Image (Centering Copy)
53
Selecting Finishing Mode
54
Finishing Modes and Optional Finishing Devices
54
Sort and Group Mode
55
Rotate Sort Mode
56
Staple Sort Mode
57
Magazine Sort / Center Fold / Saddle Stitch
58
Hole Punch Mode
61
Duplex Copying
62
Making a 1-Sided Copy
63
Making a 2-Sided Copy
64
Making a 2-Sided Copy from a Book-Type Original
65
Setting Original Modes
68
Displaying the Edit Menu
70
Creating Margins
71
Creating Top, Bottom, Left, and Right Margins
71
Creating Bookbinding Margins
73
Copying Multiple Originals Onto One Sheet (2 in 1 / 4 in 1)
74
Applying Different Settings for Cover Sheets (Cover Sheet)
77
Inserting a Sheet at a Desired Page (Sheet Insertion)
79
Adding a Date and Time on Copied Paper
82
Adding a Page Number on Copied Paper
83
Editing Scanned Images
84
Trimming and Masking
84
Mirror Image and Negative/Positive Reversal
87
Applying Separate Reproduction Ratios to Vertical and Horizontal Directions (XY Zoom)
88
Copying the same Image Repeatedly on One Sheet (Image Repeat) (Color Model Only)
89
Removing Blank Pages While Copying (Omit Blank Page)
91
Clearing Dirty Edges of Originals (Edge Erase)
92
Clearing Shadows in the Center of Book-Type Originals (Book Center Erase)
93
Copying the Sides of Book-Type Originals Separately (Dual Page)
95
Clearing Dark Parts Outside the Originals (Outside Erase)
97
Applying Multiple Settings (Job Build)
99
Switching Feeding Modes (ADF -> SADF)
102
Reducing Images to Scan the Entire Original, Including the Edges (Full Image)
103
Centering a Scanned Image (Centering Copy)
104
Displaying the Image Menu
106
Adjusting Color Balance (CMYK Adjustment) (Color Model Only)
107
Canceling Color Balance Adjustment
107
Adjusting RGB (Color Model Only)
108
Canceling RGB Adjustment
108
Adjusting the Image Quality with One Touch (Color Model Only)
109
Canceling One-Touch Adjustment
109
Avoiding Bleed-Through (Background Adjustment)
110
Canceling Background Adjustment
110
Adjusting the Sharpness
111
Canceling Sharpness Adjustment
111
Applying Twin Color Copying (Color Model Only)
112
Copying in Black and Specified Color
112
Copying in Red and Black
115
Applying Mono Color Copying (Color Model Only)
117
Canceling Mono Color Copying
117
Adjusting the Hue (Color Model Only)
118
Canceling Hue Adjustment
118
Adjusting the Saturation (Color Model Only)
119
Canceling Saturation Adjustment
119
Reducing the Scan Noise
120
Canceling the ADF Scan Noise Reduction
120
Saving Copied Data as a File
121
Copying and Saving as a File
122
Setting Share Folder
124
Index
127
Toshiba e-studio 2508a Safety Information Manual (25 pages)
multifunctional digital color systems
Brand:
Toshiba
| Category:
All in One Printer
| Size: 1 MB
Table of Contents
Official Names of Windows Operating System
3
Disclaimer Notice
4
Security Precautions
5
To General Users
5
Data Encryption Function
6
Notice to Users
6
Toshiba Quality Is Second to None
12
Supplies / Parts
12
How to Read this Manual
13
When Using the Multifunctional Digital Systems
17
During Maintenance or Inspection
21
When Handling Supplies
21
Environmental Information
22
Safety Information
24
Advertisement
Advertisement
Related Products
Toshiba E-STUDIO 2500C
Toshiba e-studio 2506
Toshiba E-Studio 2507
Toshiba e-studio 250
Toshiba e-Studio 2505H
Toshiba e-Studio 2505F
Toshiba e-studio 2500ac
Toshiba e-studio 2505ac
Toshiba E-STUDIO 2520AC
Toshiba estudio 256
Toshiba Categories
Laptop
Air Conditioner
TV
LCD TV
All in One Printer
More Toshiba Manuals
Login
Sign In
OR
Sign in with Facebook
Sign in with Google
Upload manual
Upload from disk
Upload from URL