Sign In
Upload
Manuals
Brands
Tektronix Manuals
Measuring Instruments
KEITHLEY 2450-EC
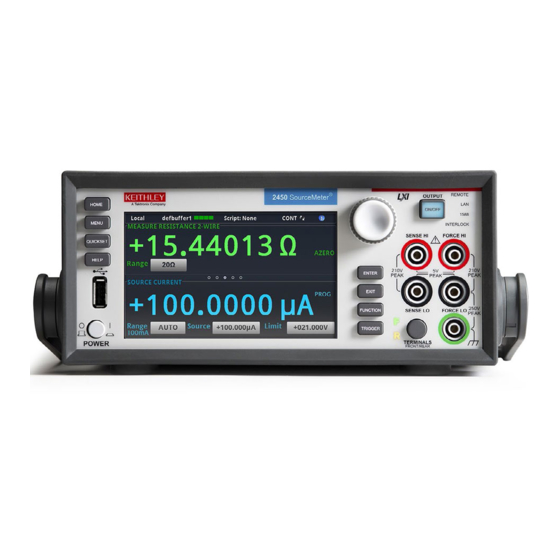
Tektronix KEITHLEY 2450-EC Potentiostat Manuals
Manuals and User Guides for Tektronix KEITHLEY 2450-EC Potentiostat. We have
3
Tektronix KEITHLEY 2450-EC Potentiostat manuals available for free PDF download: User Manual, Manual
Tektronix KEITHLEY 2450-EC User Manual (95 pages)
Brand:
Tektronix
| Category:
Test Equipment
| Size: 8 MB
Table of Contents
Table of Contents
5
Model 2450-EC and 2460-EC User's Manual
7
Introduction
7
Cyclic Voltammetry
9
Simplified Cyclic Voltammetry Basics
10
Device Connections
11
Test Script Parameters
13
Test Procedure Overview
14
Step 1: Select the TSP Command Set
14
Step 2: Place the Output in the High-Impedance Output-Off State
14
Step 3: Prepare the Analyte and Assemble the Electrochemical Cell
15
Step 4: Connect the Four Output Terminals of the Sourcemeter Instrument to the Three Electrodes of the Electrochemical Cell Using the Supplied Cable Assembly
15
Step 5: Execute the Cyclic Voltammetry Test Script
15
Step 6: Acquire the Open Circuit Potential (Eoc)
15
Step 7: Define the Potential Sweep Parameters
17
Step 8: Select the Scan Rate
19
Step 9: Select the Number of Scan Cycles
20
Step 10: Select the Current Measurement Range
21
Step 11: Select the Sampling Interval Units
22
Step 12: Save the Data to the USB Flash Drive on the Front Panel
23
Step 13: Start the Experiment
24
Step 14: View the Graph
24
Step 15: Finish the Experiment and Select the Next Action
25
Step 16: View the Results Saved to the USB Flash Drive
27
Open Circuit Potential
29
Device Connections
29
Test Procedure Overview
30
Test Script Parameters
30
Step 1: Select the TSP Command Set
30
Step 2: Place the Output in the High-Impedance Output-Off State
31
Step 3: Prepare the Analyte and Assemble the Electrochemical Cell
31
Step 4: Connect the Four Output Terminals of the Instrument to the Electrochemical Cell
31
Step 5: Execute the Open Circuit Potential Test Script
31
Step 6: Select a Settings Group to Adjust from the Main Menu
32
Step 7: Save the Data to the USB Flash Drive on the Front Panel
33
Step 8: Start the Experiment
34
Step 9: View the Graph
35
Step 10: View the Data
35
Step 11: View the Results Saved to the USB Drive
37
Potential Pulse and Square Wave
38
Device Connections
38
Test Procedure Overview
38
Test Script Parameters
39
Step 1: Select the TSP Command Set
40
Step 2: Place the Output in the High-Impedance Off-State
40
Step 3: Prepare the Analyte and Assemble the Electrochemical Cell
40
Step 4: Connect the Four Output Terminals of the Instrument to the Electrochemical Cell
40
Step 5: Execute the Potential Pulse and Square Wave Test Script
40
Step 6: Select and Adjust each Settings Group in the Main Menu
41
Step 7: Save the Data to the USB Drive on the Front Panel
48
Step 8: Start the Experiment
49
Step 9: View the Graph
49
Step 10: View the Data
50
Step 11: View the Results Saved to the USB Drive
51
Current Pulse and Square Wave
52
Device Connections
52
Test Procedure Overview
52
Test Script Parameters
53
Step 1: Select the TSP Command Set
54
Step 2: Place the Output in the High-Impedance Output-Off State
54
Step 3: Prepare the Analyte and Assemble the Electrochemical Cell
54
Step 4: Connect the Four Output Terminals of the Instrument to the Electrochemical Cell
54
Step 5: Execute the Current Pulse and Square Wave Test Script
54
Step 6: Select and Adjust each Settings Group in the Main Menu
55
Step 7: Save the Data to the USB Drive on the Front Panel
62
Step 8: Start the Experiment
63
Step 9: View the Graph
63
Step 10: View the Data
64
Step 11: View the Results Saved to the USB Drive
65
Chronoamperometry
66
Device Connections
66
Test Procedure Overview
66
Test Script Parameters
67
Step 1: Select the TSP Command Set
67
Step 2: Place the Output in the High-Impedance Output-Off State
67
Step 3: Prepare the Analyte and Assemble the Electrochemical Cell
67
Step 4: Connect the Four Output Terminals of the Instrument to the Electrochemical Cell
67
Step 5: Execute the Chronoamperometry Test Script
68
Step 6: Select and Adjust each Settings Group in the Main Menu
69
Step 7: Save the Data to the USB Drive on the Front Panel
75
Step 8: Start the Experiment
76
Step 9: View the Graph
77
Step 10: View the Data
77
Step 11: View the Results Saved to the USB Drive
79
Chronopotentiometry
80
Device Connections
80
Test Procedure Overview
80
Test Script Parameters
81
Step 1: Select the TSP Command Set
81
Step 2: Place the Output in the High-Impedance Output-Off State
81
Step 3: Prepare the Analyte and Assemble the Electrochemical Cell
81
Step 4: Connect the Four Output Terminals of the Instrument to the Electrochemical Cell
81
Step 5: Execute the Chronopotentiometry Test Script
82
Step 6: Select and Adjust each Settings Group in the Main Menu
83
Step 7: Save the Data to the USB Drive on the Front Panel
89
Step 8: Start the Experiment
90
Step 9: View the Graph
91
Step 10: View the Data
91
Step 11: View the Results Saved to the USB Drive
93
Remote Operation
94
Set up Remote Communications
94
Editing the Test Script
95
Advertisement
Tektronix KEITHLEY 2450-EC User Manual (93 pages)
Potentiostats And Galvanostats
Brand:
Tektronix
| Category:
Measuring Instruments
| Size: 11 MB
Table of Contents
Table of Contents
5
Introduction
7
Getting Started
8
Configure the SMU Instrument for TSP Scripts
9
Select the High-Impedance, Output-Off State
9
Copy a Script to the Instrument
10
Cable Assembly Details
11
Connections and Usage
12
Make the SMU Connections
12
Make the Device Connections
13
Attach the Alligator Clips
14
Prepare the Analyte and Assemble the Test Cell
14
Connect to the DUT
14
Home and Menu Screen Overview
15
Cyclic Voltammetry
16
Test Application Parameters
17
Run the Cyclic Voltammetry Test Application
18
Review the Menu Controls
19
Define the Potential Scan Parameters
20
Define the Scan Settings
22
Select the Sampling Rate Units, Sampling Rate, and Current Range
23
Save or Load the Test Parameter Data
25
Run the Test and View the Graph
27
Acquire the Open Circuit Potential (Eoc)
28
Save the Test Data to the Flash Drive
29
View the Results Saved to the Flash Drive
29
View the Test Reading Table
29
View the Event Log
30
End the Test Application
30
Cyclic Voltammetry Theory
31
Open Circuit Potential
35
Test Application Parameters
36
Run the Open Circuit Potential Test Application
36
Review the Menu Controls
37
Adjust the Measure Settings
38
Save or Load the Test Parameter Data
40
Run the Test and View the Graph
41
Save the Test Data to the Flash Drive
42
View the Results Saved to the Flash Drive
43
View the Reading Table or Measurement Statistics
43
View the Event Log
44
End the Test Application
44
Potential Pulse & Square Wave
45
Potential Pulse and Square Wave
45
Test Application Parameters
46
Run the Potential Pulse and Square Wave Test Application
47
Review the Menu Controls
48
Configure the Pulse Settings
48
Adjust the End Conditions
52
Save or Load the Test Parameter Data
53
Run the Test and View the Graph
55
Save the Test Data to the Flash Drive
56
View the Results Saved to the Flash Drive
56
View the Reading Table or Measurement Statistics
56
View the Event Log
57
End the Test Application
57
Current Pulse and Square Wave
58
Test Application Parameters
59
Run the Current Pulse and Square Wave Test Application
60
Review the Menu Controls
61
Configure the Pulse Settings
61
Adjust the End Conditions
64
Save or Load the Test Parameter Data
66
Run the Test and View the Graph
67
Save the Test Data to the Flash Drive
68
View the Results Saved to the Flash Drive
69
View the Reading Table or Measurement Statistics
69
View the Event Log
70
End the Test Application
70
Chronoamperometry
71
Test Application Parameters
72
Run the Chronoamperometry Test Application
72
Review the Menu Controls
74
Configure the Step and Measure Settings
74
Save or Load the Test Parameter Data
77
Run the Test and View the Graph
79
Save the Test Data to the Flash Drive
80
View the Results Saved to the Flash Drive
80
View the Reading Table or Measurement Statistics
80
View the Event Log
81
End the Test Application
81
Chronopotentiometry
82
Test Application Parameters
83
Run the Chronopotentiometry Test Application
83
Review the Menu Controls
85
Configure the Step and Measure Settings
85
Save or Load the Test Parameter Data
88
Run the Test and View the Graph
90
Save the Test Data to the Flash Drive
91
View the Results Saved to the Flash Drive
91
View the Reading Table or Measurement Statistics
91
View the Event Log
92
End the Test Application
92
Tektronix KEITHLEY 2450-EC Manual (3 pages)
Brand:
Tektronix
| Category:
Measuring Instruments
| Size: 0 MB
Advertisement
Advertisement
Related Products
Tektronix Keithley SourceMeter 2470
Tektronix Keithley SourceMeter 2410
Tektronix Keithley SourceMeter 2461
Tektronix KEITHLEY 2460-EC
Tektronix KEITHLEY 2461-EC
Tektronix 2756P
Tektronix 2715
Tektronix KEITHLEY 2604B
Tektronix KEITHLEY 2634B
Tektronix KEITHLEY 2380-120
Tektronix Categories
Test Equipment
Measuring Instruments
Amplifier
Portable Generator
Printer
More Tektronix Manuals
Login
Sign In
OR
Sign in with Facebook
Sign in with Google
Upload manual
Upload from disk
Upload from URL