Sign In
Upload
Manuals
Brands
Technicolor Manuals
Receiver
COM3000
Technicolor COM3000 Manuals
Manuals and User Guides for Technicolor COM3000. We have
3
Technicolor COM3000 manuals available for free PDF download: Integrator's Manual
Technicolor COM3000 Integrator's Manual (102 pages)
Brand:
Technicolor
| Category:
Receiver
| Size: 4 MB
Table of Contents
Table of Contents
3
Definitions
10
2 Introduction
13
Intended Usage
13
3 COM3000 Product Description
14
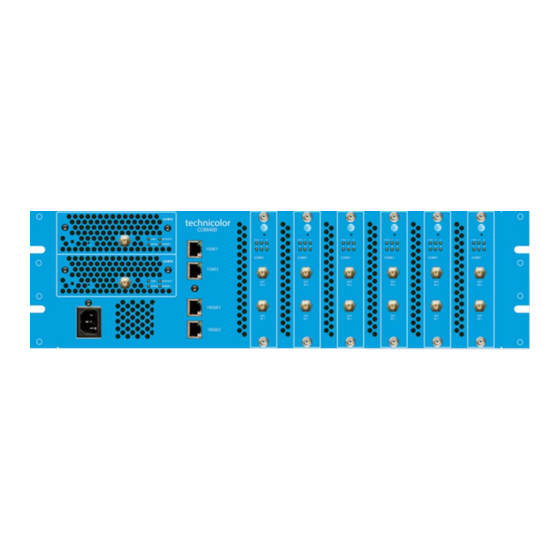
Figure 1 - Com3000
14
Additional Features
15
4 Compatibility with Previous Hardware
16
Figure 2 - Compatibility Matrix
16
5 Mechanical Overview
17
COM400 Chassis
17
6 COM51 Card
18
Com51A
19
7 Qam
20
Figure 5 - Qam20
20
8 System Connections
21
Pre-Installation
22
9 Training and Support
22
10 Required Tools
22
11 Pre-Installation Site Requirements
22
Site Survey
22
Distribution Networks
25
12 Channel Lineup
25
13 External Video Sources
26
14 TV Compatibility
26
15 Installation Guidelines
27
16 AT&T / DIRECTV Activation
27
17 Getting Started
28
Assembly
28
Figure 7 - Installation of the Qam20 and Com51
28
Setting up Multiple Chassis
29
Chassis Dipswitch
29
Figure 9 - Chassis ID Dipswitch
29
Chassis Dipswitch Settings
30
18 System Power up
30
System Startup LED Behavior
30
Boot up
31
LED Behavior after Boot up
32
Figure 11 - Operational Led Behavior
32
19 COM400 Chassis
33
Accessing the COM400 User Interface
33
Setting a Password
33
Figure 12 - Ethernet Switch Interface
33
Figure 13 - Network Switch Password
33
IGMP Activation
34
IGMP Port Settings
34
Save Changes to Startup Configuration
34
Figure 15-Save Start-Up Configuration
34
COM400 Software Version
35
COM400 Software Update
35
20 The COM3000 Web Interface
36
User Passwords
37
Figure 19 Password Challenge
37
Figure 20 - Lock Screen
37
21 COM51 Tuner Licensing
38
Figure 21 - Sysinfo Page Tuner Count
38
22 Overview Page
40
QAM Summary
41
Display Options
41
Channel Tuning Options
42
Figure 25 - Encryption Settings
42
Figure 26 - Channel Selection Drop down
43
Figure 27 - Output Mode
43
Figure 28 - Major/Minor Ch or IP and Port Settings
43
Figure 29 - Bitrate Display
44
23 Discover Page
45
Explanation of Discover
46
24 Advanced Edit
48
The Basic Channel Tune Screen
48
Advanced Tune
49
Figure 33 - Advanced Tune Screen
49
Informational Status
53
Figure 34 - "Info" Section of the Advanced Edit Page
53
Figure 35 - Network ID and Frequency Index
54
COM51 LED Control Feature
55
COM51 CAM Log Data
56
Figure 38 - Cam Log Report
56
COM51 Software Reset
57
COM51 File Transfer Utility
57
Figure 39 - Reset Interface
57
Figure 40 - File Transfer Interface
57
COM51 User Configuration Options
58
Figure 41 - User Config Interface
58
COM51 "Direct Tune" Feature
61
Remote Access Feature
61
Figure 42 - Direct Tune Interface
61
Figure 43 - Remote Access Feature
61
Using the Vidplay Feature
62
Setup for Vidplay.exe
62
Figure 44 - VID Play
62
Using the COM51 "Simulcrypt" Feature
64
Displaying COM3000 Status
64
25 Pairing Info
65
26 Tune All
69
27 Help
71
28 Sysinfo
71
Figure 48 - Help Tab
71
29 Healthinfo
72
30 Epg
73
31 Syslog
74
Figure 51 - Syslog Example
74
32 EPG Overview
75
Figure 52 - Sysinfo EPG
75
Guide.xml Overview
77
Getting Started with EPG
78
Figure 55- Com51 Epg Load
80
EPG Customization and Channel Mapping
81
EPG Editing
81
Figure 58 - Guide Channel with Custom Logo
82
Logo Creation and Upload
82
33 Welcome Screen
83
Welcome Screen Image Creation
83
Figure 59 Welcome Page Powerpoint Slide
83
Figure 60 - Welcome Screen Image Creation
83
Figure 61 - Welcome Screen Settings Using Microsoft Paint
85
Figure 62 - Correctly Sized Welcome Screen Image
85
Uploading Welcome Screens to COM3000
86
Figure 63 Upload File to Com51 Tftp
86
Figure 64 - Upload Welcome Screen Image to Epg
86
Adding Welcome Screens to Guide Data
87
Disabling Welcome Screens
87
Figure 65 - Adding Welcome Screen to Epg and Psip
87
Figure 66 - Verify Welcome Screen Is Streaming
87
34 Qam20
88
Accessing the QAM Page
88
Checking Software Version and License Count
89
Setting QAM Output Channels
89
Figure 70 - Setting Qam Outputs
89
Setting Unique RF Output to a QAM
92
Figure 73 - Changing a Single Qam Output
92
Figure 74 - Individual Qam Output Change
92
Setting Unique Outputs to a Group of Qams
93
Figure 75 - Changing Outputs Channels on a Group of Qams
93
35 Troubleshooting
94
Software Version
94
Verify RF
94
COM51 Reset Button
94
Troubleshooting Common Problems
95
Features and Licensing
95
36 Preventing Pro:idiom Key Loss
96
37 Simultaneous QAM and Multicast IP Output
96
38 Syslog Server Setup
98
39 Open Software Notification
101
Advertisement
Technicolor COM3000 Integrator's Manual (102 pages)
Brand:
Technicolor
| Category:
Receiver
| Size: 4 MB
Table of Contents
Table of Contents
3
1 Definitions
9
2 Introduction
12
Intended Usage
12
3 COM3000 Product Overview
13
Figure 1 - Com3000
14
Additional Features
15
Compatibility with Previous Hardware
16
Mechanical Overview
16
COM400 Chassis
16
COM51 Card
18
Com51A
19
Qam20
20
Com51 Card
20
Figure 4 - Qam20
20
4 Installation Overview
21
System Connections
21
Pre-Installation
21
Training and Support
21
Com51 System Diagram
21
Required Tools
22
Site Survey
22
Distribution Networks
23
Channel Lineup
23
External Video Sources
24
TV Compatibility
24
Installation Guidelines
25
AT&T / DIRECTV Activation
25
Component Assembly
26
Figure 6 - Installation of the Qam20 and Com51
26
Setting up Multiple Chassis
27
Com400 Dipswitch Access Panel
27
Figure 8 - Chassis ID Dipswitch
27
System Power up
29
System Startup LED Behavior
29
Boot up
29
LED Behavior after Boot up
30
Figure 10 - Operational Led Behavior
30
5 COM400 Chassis
31
Accessing the COM400 User Interface
31
Figure 11 - Ethernet Switch Interface
31
Port Definitions
32
Setting a Password
33
COM400 Software Update
33
Figure 13 - Network Switch Password
33
COM400 Settings for Multicast
34
IGMP Settings
35
Port Settings
36
Changing the Chassis Management IP Address (OPTIONAL)
37
Figure 20 - Add Ip Interface
37
Save Changes to Running Configuration
39
COM51 Card Discovery Issues
40
Debugging Tips
40
6 The COM51 Web Interface
41
User Password
41
Figure 23 Password Challenge
41
Figure 24 - Lock Screen
41
COM51 Licensing
42
Figure 25 - Sysinfo Page Tuner Count
42
Overview Tab
44
QAM Summary
45
Display Options
45
Channel Tuning Options
46
Figure 29 - Encryption Settings
46
Security Mode
47
Figure 30 - Channel Selection Drop down
47
Figure 31 - Output Mode
47
Figure 32 - Major /Minor C H or
47
Figure 33 - Bitrate Display
48
Discover Page
49
Explanation of Discover
49
The Basic Channel Tune Screen
51
Advanced Tune
52
Figure 37 - Advanced Tunes
52
Figure 38 - "Info " Section of the Figure 39 - Network Andf
55
Informational Status
55
Figure 42 - Cam Log Report
58
Figure 43 - Reset Interface
59
Figure 44 - File Transferi
59
Figure 45 - User Configi
60
Figure 46 - Get/Set Usage
62
Displaying COM3000 Status
63
Figure 47 - Direct Tunei
63
Pairing Info
64
Figure 49 Multicard Software
66
Tuneall
67
Figure 50 - Tune All
67
Help
69
Sysinfo
69
Figure 51 - Help Tab
69
Figure 52 - Sysinfo Tab
69
Healthinfo
70
Syslog
71
Figure 54 - Syslog Example
71
Epg
72
Figure 55 - Sys Info Epg I
72
Guide.xml Overview
74
Getting Started with EPG
75
Figure 58- Com51 Epg Load
77
EPG Customization and Channel Mapping
78
EPG for IP Multicast Systems
78
Figure 59 Multicast Guide
78
EPG Editing
79
Welcome Screen
80
Welcome Screen Image Creation
80
Uploading Welcome Screens to COM51
83
Adding Welcome Screens to Guide Data
84
Disabling Welcome Screens
84
7 Qam20
85
Accessing the QAM Page
85
QAM Software Version
86
Updating QAM20 Software
86
QAM License Count
86
Setting QAM Output Channels
87
Setting Unique RF Output to a QAM Index
89
Setting the Frequencies for a Group of QAM Carriers
90
Simultaneous QAM and Multicast IP Output
91
QAM20 Qamlog
93
QAM20 UDP Ports
93
Input of External Sources to QAM20
93
Steaming Multi Program Transport Stream to QAM20
93
8 Vidplay Software
94
9 Troubleshooting
95
Troubleshooting Common Problems
96
10 Preventing Pro:idiom Key Loss
96
11 Transcoder Operations
96
12 Receiverless HD
99
13 Syslog Server Setup
99
14 Open Software Notification
102
Technicolor COM3000 Integrator's Manual (96 pages)
Brand:
Technicolor
| Category:
Receiver
| Size: 4 MB
Table of Contents
Table of Contents
4
Definitions
7
Introduction
10
Intended Usage
10
COM3000 Product Overview
11
Com400
11
Com51
11
Qam20 / Qam4
11
Com421
11
Additional Features
13
Compatibility with Previous Hardware
13
Mechanical Overview
14
COM400 Chassis
14
Com421
15
COM51 Card
16
Qam20 / Qam4
17
Installation Overview
18
Pre-Installation
18
Required Tools
19
ODU Location
19
Distribution Networks
20
Installation Guidelines
22
DIRECTV Activation
22
Component Assembly
23
Setting up Multiple Chassis (COM400 Only)
24
System Power up
26
System Startup LED Behavior
26
LED Behavior after Boot up
27
COM400 Chassis
28
Port Definitions
29
Setting a Password
30
COM400 Software Update
30
COM400 Settings for Multicast
31
Changing the Chassis Management IP Address (OPTIONAL)
33
Save Changes to Running Configuration
35
COM51 Card Discovery Issues
36
Com421
37
Flextune
38
Operational Overview
38
IPTV End Point Devices
39
COM51 Settings
40
COM51 Operation
40
COM51 Syslog Entries for Tune Requests
41
The COM51 Web Interface
42
COM51 Licensing
43
Overview Tab
45
Discover Page
49
Pairing Info
61
Tuneall
64
Help
65
Sysinfo
66
Healthinfo
67
Syslog
68
Epg
69
Guide.xml Overview
71
EPG for IP Multicast Systems
75
Qam
81
Updating QAM20 / QAM4 Software
82
QAM License Count
82
Setting QAM Output Channels
83
Simultaneous QAM and Multicast IP Output
86
QAM20 / QAM4 Qamlog
88
Input of External Sources to QAM20 / QAM4
88
Vidplay Software
89
Troubleshooting
90
COM51 Reset Button
90
Troubleshooting Common Problems
91
Transcoder Operations
92
Receiverless HD
93
Syslog Server Setup
93
Legacy Equipment
96
Open Software Notification
96
Advertisement
Advertisement
Related Products
Technicolor COM421
Technicolor COM51
Technicolor COM2000
Technicolor COM1000
Technicolor COM400
Technicolor CGM4231
Technicolor CGA4131
Technicolor CGM4331 Series
Technicolor CGA4234
Technicolor CGA4131COM
Technicolor Categories
Network Router
Gateway
Modem
Wireless Router
Receiver
More Technicolor Manuals
Login
Sign In
OR
Sign in with Facebook
Sign in with Google
Upload manual
Upload from disk
Upload from URL