Sign In
Upload
Manuals
Brands
Roland Manuals
Printer
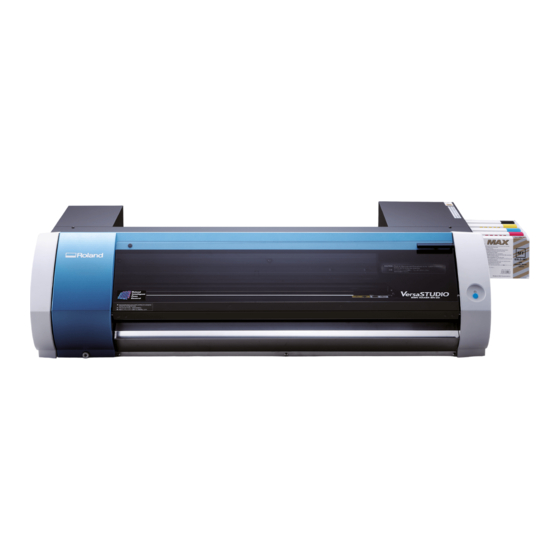
VersaSTUDIO BN-20A
Roland VersaSTUDIO BN-20A Manuals
Manuals and User Guides for Roland VersaSTUDIO BN-20A. We have
1
Roland VersaSTUDIO BN-20A manual available for free PDF download: User Manual
Roland VersaSTUDIO BN-20A User Manual (120 pages)
SIGN MAKER
Brand:
Roland
| Category:
Printer
| Size: 5 MB
Table of Contents
Table of Contents
2
The Basics
6
Basic Information
7
Introduction
8
Part Names
8
Roland BN-20A System Configuration
10
How to Open the BN-20 Driver's Printing Preferences Screen
11
How to Open the Utility Window / Exit the Utility
12
How to Open the Utility Window
12
Starting from the Windows Start Menu
12
How to Exit the Utility
12
How to Start the Versaworks
13
How to Open the BN-20 Driver / Versaworks Help
14
BN-20 Driver
14
Versaworks
14
About the Media Used
16
Types of Media
16
Usable Media
16
Four Different Output Methods
17
Important Points During Use
17
Basic Operations
18
Switching Power on and off
19
Precautions When Operating the Power Supply
19
Switching the Power on
19
Switching the Power off (Sub-Power Off)
20
About Sleep Mode (Power-Saving Mode)
20
Printing
21
Step 1: Loading Media
21
Step 2: Bidirectional Adjustment
28
Step 3: Printing Tests and Normal Cleaning
30
Step 4: Calibrate Sheet Feeding Amount
32
Step 5: Starting Print Output
33
About the Output-Start Location
34
Stopping Print Output
35
To Stop Output on the Printer Side
35
Canceling Output from the Computer
35
Fully Utilizing the Machine
37
Optimizing the Output Quality
38
Cutting / Printing and Cutting
39
Adjusting Cutting
39
Accurately Adjusting the Cutting-In Amount
41
Adjusting Printing and Cutting
42
Creating Data for Cutting / Printing and Cutting
43
Cautionary Note on Making Output with Cutting
46
Performing Printing and Cutting Separately
47
To Perform Printing and Cutting Separately
47
Media Sizes Allowing Automatic Crop Mark Detection
47
Printing with Crop Marks
48
Aligning Automatically and Cutting
50
Crop Cut Adjustment
52
Utility : Other Function
53
Performing Various Adjustments through a Sequence of Operations
53
Setting of Dry Time
54
Resetting All Adjustments to Factory Default Values
56
Maintenance
57
Introduction
58
Important Notes on Handling and Use
59
Automatic Maintenance Function: Points to Note
59
Maintenance Schedule
59
When Not in Use for a Prolonged Period
59
Checking Ink Levels and Replacing
61
Checking Ink Levels
61
How to Replace Ink Cartridges
62
Regular Maintenance
63
Daily Maintenance
64
Maintenance of Ink Cartridges
64
Cleaning
64
Replacing the Waste Cartridge
65
Care and Maintenance of the Print Heads
67
Periodical Cleaning Maintenance
68
About Periodical Cleaning Menus
68
Medium and Powerful Cleaning
69
Manual Cleaning
71
When Manual Cleaning Is Necessary
71
Manual Cleaning Method
72
Replacing Consumable Parts
74
Replacing Parts for Maintenance
75
Replacing the Wiper
75
Replacing the Felt Wiper
76
Replacing the Cutter Blade
77
Troubleshooting Methods
80
Output Quality Problems
81
Printed Results Are Coarse or Contain Horizontal Stripes
82
Do the Print Heads Show Nozzle Clogging
82
Have You Carried Out[Calibrate Sheet Feeding]
82
Have You Carried out [Bidirectional Adjustment]
82
Is the Temperature of the Room too Low
82
Is the Printer Installed in a Level and Stable Location
82
Is the Printer Installed in a Location out of Direct Sunlight
82
Is the Media Loaded and Set up Correctly
82
Colors Are Unstable or Uneven
83
DID You Shake the Ink Cartridges Gently before Installing Them
83
Is the Media Wrinkled
83
Is the Printer Installed in a Level and Stable Location
83
Is the Printer Being Used in a Location Subject to Severe Changes in the Operating Environment
83
Vironment
83
The Media Becomes Soiled When Printed
84
Are the Print Heads Dirty
84
Cutting Is Misaligned or Skewed
85
Is the Media Loaded and Set up Correctly
85
Are the Settings for the Cutting Conditions Appropriate
85
Is the Length of Output too Long
85
Are You Using Media that Exhibits Large Expansion and Contraction
85
The Printed Surface Is Damaged When Cutting
86
Does the Tip of the Blade Holder Cap Scrap the Printed Surface
86
Media Feed Problems
87
The Media Jams
88
Is the Media Warped or Wrinkled
88
Media Wrinkles or Shrinks
89
Is the Media Loaded and Set up Straight and Securely
89
Was Loaded Media Allowed to Stand for some Time
89
Was the Media Loaded While the Heater was Hot
89
Is the Temperature of Room too Low
89
Is the Humidity of the Room too High
89
Is the Using Media Deflected
89
Media Feed Is Not Straight
90
Is the Media Loaded and Set up Straight and Securely
90
Media Feed Is Not Smooth
91
Do the Media Strike some Other Object
91
Is the Media too Thick
91
Are the Grit Rollers Dirty
91
Machine Problems
92
The Print Heads Stop Moving
93
What to Do First
93
If the Print-Head Carriage Move to the Standby
93
The Printer Unit Doesn't Run
95
Is the Power Switched on
95
Does the [POWER] Key Stay Steadily Lighted
95
Is the [POWER] Key Flashing
95
Is the Cover Open
95
Has Ink Run out
95
Is a Message Displayed on the Utility Icon in the Task Tray or in the Utility Window
95
Is the Cable Connected
95
Is the Driver Installed Correctly
95
Are Two or more Machines Connected to a Single Computer
96
Is the Temperature of the Room too Low
96
DID You Forcibly Remove any Detachable External Storage Device Connected by USB
96
Driver Problems
97
Installation Is Impossible
98
Windows 10
98
Windows 8.1
98
Uninstalling the Driver
100
Windows 10
100
Windows 8.1
100
Important Notes When Performing Output from General Application
101
Important Notes When Performing Output from Adobe Illustrator
102
Important Notes When Performing Output from Coreldraw
103
Handling Messages and Error Messages
104
Messages
105
[XX Ink : Shake the Cartridge Well]
105
[The Waste Cartridge Is Full.]
105
[Replace the Wiper.]
105
[Replace the Felt Wiper.]
105
[The Connection to the Printer Has Been Released.]
105
[Clean the Printer Manually.]
105
Error Messages
106
[The Pinch Roller Position Is Incorrect.]
106
[Crop Marks Could Not be Printed. Output will be Canceled.]
106
[Motor Error]
106
[Crop Mark Detection Could Not be Started.] / [Crop Marks Were Not Found. Out- Put will be Canceled.]
106
The Printer Off.]
106
[Waste Cartridge Is Estimated to be Full]
107
[Temperature Error]
107
[Cover Open Error.]
107
[Sheet Setup Error]
107
[Data Error]
107
[Ink Has Run Out.]
107
[Pinch Lever was Returned.]
107
[No Sheet Is Present.]
108
[Printing Cannot Continue Because the End of the Sheet was Detected. Printing will be Canceled.]
108
[Servicecall No**]
108
[Ink Cartridge Error : *** Ink Cartridge ]
108
[BN-20 Utility Is Already Running.]
108
[The Cleaning Liquid Cartridge Is Empty. Replace the Cleaning Liquid Cartridge with a New One.]
108
Appendix
109
Operations When Moving the Unit
110
Preparing to Move the Machine
111
Procedures from Preparing to Move through Reinstalling
112
Main Specifications
113
Printing Area
114
Maximum Area
114
Maximum Area When Using Crop Marks
115
About the Blade
116
Dimensional Drawing
117
Specifications
118
Advertisement
Advertisement
Related Products
Roland VersaStudio BN-20
Roland VersaStudio BR-20
Roland VersaStudio BT-12
Roland VersaSTUDIO BN-20D
Roland VersaSTUDIO
Roland BT-1
Roland BR-8
Roland BluesCube BC-30/210
Roland Blues Cube Hot
Roland BOSS Flanger BF-3A
Roland Categories
Musical Instrument
Synthesizer
Recording Equipment
Drums
Electronic Keyboard
More Roland Manuals
Login
Sign In
OR
Sign in with Facebook
Sign in with Google
Upload manual
Upload from disk
Upload from URL