Sign In
Upload
Manuals
Brands
Ricoma Manuals
Sewing Machine
EM-1010
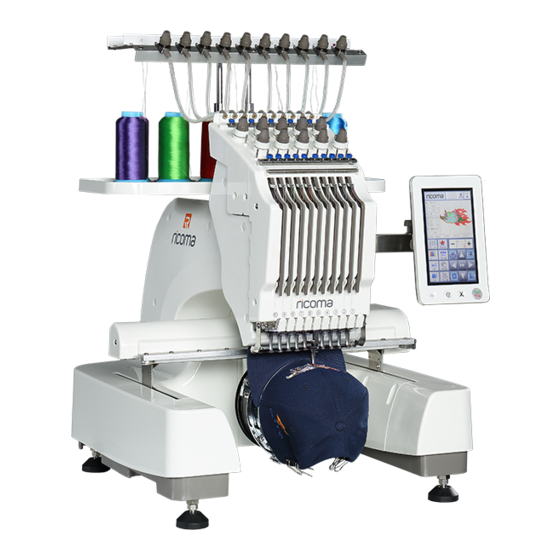
Ricoma EM-1010 Needle Embroidery Machine Manuals
Manuals and User Guides for Ricoma EM-1010 Needle Embroidery Machine. We have
3
Ricoma EM-1010 Needle Embroidery Machine manuals available for free PDF download: Operation Manual, Owner's Manual
Ricoma EM-1010 Operation Manual (98 pages)
Home embroidery machine
Brand:
Ricoma
| Category:
Sewing Machine
| Size: 7 MB
Table of Contents
Table of Contents
3
Introduction
8
Intel® License Agreement
9
Compliance & Wattage
9
Customer Service & Support & Training
10
Read All Instructions Prior to Operating
11
Important Safeguards and Warnings
12
Tool Box & Spare Parts
15
Embroidery Machine Assembly
16
Embroidery Machine Stand Assembly (Optional)
16
Thread Rack Assembly
19
Thread Stand Assembly
20
Unpacking Your Embroidery Machine
23
Adjust & Secure Your Embroidery Machine
24
Embroidery Machine & Embroidery Hoops Overview
25
Front View
25
14. Flat Frame Support
25
Rear View
26
Embroidery Hoop Specifications
28
Touch Screen
29
Bobbin Overview
31
Placing the Bobbin into the Bobbin Case
32
Placing the Bobbin Case into the Rotary Hook
33
Bobbin Removal
34
Bobbin Fiber Choices
35
Cotton
35
Nylon
35
Continuous Filament Polyester
35
Spun Polyester
36
Magna Glide
36
Thread Overview
37
Threading the Embroidery Machine/Top Threading
37
Threading a Needle
41
Changing the Spool
43
Knot Tying
44
Trimming
44
Thread Fiber Choices
45
Rayon Thread
45
Polyester Thread
45
Metallic Thread
46
Cotton Thread
46
Thread Consumption
46
Backing
47
Cut-Away
47
Tear-Away
48
Specialty Backing
48
Topping
48
Foam
48
Corduroy
48
Poly Mesh Backing
49
Fusible Backing
49
Backing & Needle Recommendations
50
Canvas
50
Canton Fleece
50
Coated or Waterproof
50
Cotton Sheeting
50
Denim
50
Dress Shirt (Woven)
50
Golf Shirt
50
Headwear
50
Leather and Vinyl
50
Lingerie or Silk
51
Lycra or Spandex
51
Nylon Windbreaker
51
Satin Jacket
51
Sweatshirt
85
Light Ballpoint
87
Medium Ballpoint
87
Needle Replacement
88
Completing a Flat Design (Start to Finish)
89
Prepare
89
Embroider
89
Completing a Caps Design (Start to Finish)
90
Prepare
90
Embroider
90
Maintenance & Care
91
Rotary Hook
91
Machine Head
91
Level Arms
91
Head Rail
92
Bobbin Case Maintenance
92
Troubleshooting
93
Thread Break
93
Reasons
93
Prevention
94
Needle Break
94
Bobbin Tension
94
Timing Overview
95
Adjusting the Timing of a Needle and Hook
95
Error Messages
96
Thread Break ("T-Break")
96
Needle Break
96
Main Axis Not at 100 Degrees
97
Quick Reference Guide/Checklist
98
Turning off
98
Advertisement
Ricoma EM-1010 Operation Manual (37 pages)
Brand:
Ricoma
| Category:
Sewing Machine
| Size: 4 MB
Table of Contents
Table of Contents
2
Insert Storage Medium (to USB Port on the Side of Operation Head) Enter Pattern Selection Interface by Touching , as Shown below
4
Danger-To Prevent Electric Shock
6
Important
6
Introduction
6
Safety Notes
6
Warning-To Prevent Burn, Fire, Electric Shock or Personal Injury
6
Please Pull out Power Plug from Socket
6
Mechanical Adjustment Accordingly
6
Design Setting Interface
6
Keep Work Area Clean
7
Precautions During Embroidery
7
Do Not Play the Machine as a Toy
7
Precautions for Prolonging Machine Life
7
Precautions for Repair or Adjustment
7
License Agreement
8
Warning Label
8
Chapter I Machine Structure and Functions
9
Ten-Needle Embroidery Machine
9
Other Functions
9
LCD that Can be Easily Read and Used
9
USB Port as Standard F Ittings
9
Move Needle Bar at any Time or Thread the Selected Needle Bar
10
Safety Device
10
Functions Available
10
Multiple Built-In Patterns
10
Removal of Bobbin Case
10
Chapter II Machine Part Name and Corresponding Functions
11
Front View
11
Right/Rear View
11
When Thread Is Led through Thread Distribution Plate Plate from Right to the Left, then through Position Guide Hole as Shown below
11
Operation Panel
12
Chapter III Accessories
13
Chapter IV Optional Accessories
13
Chapter V Machine Installation
13
Precautions for Installation and Transportation
13
Installation Position
14
Machine Installation
15
Keep Machine Stable by Regulating Four Anchors
15
Chapter VI Operation Precautions
19
Precautions for Cop Latch
19
Precautions for Needle
19
Precautions for Power Supply
19
Bobbin Installation
20
Open Bobbin Case
20
If Thread Hook Is Not Forward, Pull It Forward
20
Grab Bobbin Case Bolt, and Take out Bobbin Case
21
Add Oil for Machine
21
After Adding Engine Oil, Insert Bobbin Case into Bobbin and Screw on
21
Bobbin Installation
21
Put Bobbin into Bobbin Case
21
Lead Thread through Thread Trough and Tension Regulating Clip
21
Take Thread out from Opening of Tension Regulating Clip about 50Mm (2 In.)
21
Bobbin Case Installation
22
Insert Bobbin Case in Bobbin
22
Completely Insert Bobbin Case until Clamped in Place
22
Start-Up
22
Insert Power Cable into Machine
22
Insert Power Plug into Power Socket
22
Chapter VII Basic Steps
20
Turn Main Power Switch in the Rear of Machine to "I
22
(Namely Initial Position)
23
Operating Interface Description
23
To Prevent Injury, Keep Hands and Other Objects Away from Needle Bar Rack
23
Check if the File Copied to Machine Is Correct by Touching
24
Input Pattern
24
Select Pattern by Touching , Would Display Behind the Pattern Selected
24
Select Storage Medium Catalogue by Touching
24
Then the Pattern Input Is Completed
24
Select Embroidery Pattern
25
Select Machine Memory by Touching , and Touch to Select Pattern, Confirm It by Clicking on , after Picture Jumping, the Following Figure Would Show
25
View the Pattern Selected by Touching
25
Enter Embroidery Frame Dimension Selection Screen by Touching
26
Enter Pattern Card Setting Interface by Touching
26
Select Embroidery Frame
26
Select Embroidery Frame D by Touching , and Click on OK for Confirmation
26
Loosen Screws on the Outer Frame
27
Put Cloth in Embroidery Frame
27
Put Cloth on External Frame with Its Right-Side Upward
27
Put Internal Frame into External Frame
27
Tighten Screw Slightly, Pull Cloth Edge out
27
Tighten Screws and Confirm if Cloth Is Tight
27
Embroidery Frame Installation
28
Install Embroidery Frame on the Machine
28
Loosen Two Screws on Embroidery Frame Stand
28
Move Left Arm until Obvious Stagnation During Sliding Toward Right Side
28
Bottom Threading
29
Check Embroidery Area
29
Move Toward the Machine, and Keep the Hole of Embroidery Frame on the Location Pin of Frame Stand
29
Install both Ends of Thread Guide Onto Machine, and Install Respectively on and
30
Lead Threader through Thread Guide ,Clamp Thread with the Clip on Threader and Pull Thread out to Ensure Smooth Threading
30
Raise Clip to Press Thread and Complete Threading According to the Guide Line on Machine Case
30
Tension Regulating Clip to Press Thread Beneath, as Shown below
30
Pull Downward by Force to Cut Thread by the Cutter Inside
31
Start Embroidery
31
To Start Machine, Press down Start/Stop at the Bottom Right of Machine
31
Check Thread Tension
32
Correct Thread Tension
32
It will Continue until the Last Color Embroidery Is Completed, and then Embroidery Machine will Automatically Stop
32
Off, Needle Bar Case will Automatically Move to the Position of 2Nd Color and Start Embroidery
32
Grab the Left and Right Side of Embroidery Frame Stand Arm, Raise Frame Stand Slightly and Pull out Embroidery Frame Toward Oneself
33
Removal of Cloth
33
Take off Embroidery Frame and Cloth
33
Set Main Power Switch at "O
33
Pull out Power Cable from Power Socket
33
Pull out Power Cable from Machine, if Necessary
33
Quick Reference Guide for Interface
34
Main Interface
34
Design Selection and Management Interface
35
Needle Bar Color Setting Interface
35
Comprehensive Setting Interface
36
Other Basic Steps
37
Needle Replacement
37
Easy Replacement of Thread Cone
37
Ricoma EM-1010 Owner's Manual (51 pages)
Computized Embroidery Machine
Brand:
Ricoma
| Category:
Sewing Machine
| Size: 1 MB
Table of Contents
Table of Contents
2
Part 1 Control System Introduction
5
System Overview
5
Precautions
5
Working Environment
6
System Power Supply and Earthing
6
Operation Panel and Key Function Introduction
7
Key Function Introduction
7
Icons Description of Touch Keys
7
Function Introduction
8
Part 2 Embroidery Card Input Operation
10
Input U-Disk Embroidery Card to Memory
10
Delete U-Disk Embroidery Card
11
Part 3 Embroidery Card Management
12
Select Embroidery Card for Embroidering
12
Delete Single Embroidery Card
12
Output Embroidery Card to U-Disk
13
Part 4 Embroidery Card
14
Embroidery Status Switching
14
Preparation Status
15
Set Embroidery Card Parameters
15
Switch Tabouret
16
Working Status
17
Embroidery Card Origin (Starting Point) Setting
17
Offset Point (Highest Point of Tabouret Center) Setting
17
Return to Origin (Starting Point)
18
In and out Tabouret Operation
18
Return to Stop Point
18
Set Color Changing
18
6-1 Set Color Changing Sequences
19
6-2 Applique Offset, Low Speed Embroidering and Needle Bar Replacement
20
6-3 Multi-Tinsel Design
20
Change Working Mode
21
Embroidering Mode Switching
21
Embroidery Card Contour Operation
23
10 Operation of Returning to Embroidering Point in Power Failure
23
Embroidery Running Status
24
Bar Drawing Operation
24
Switch Control and Indicators of Tinsel Machine Head
24
Part 5 Tabouret Moving to Generate Embroidery Card
26
Part 6 Letters to Generate Embroidery Card
27
Part V7 Manual Operation for Color Changing
29
Part 8 Manual Trimming
30
Part 9 Tabouret Origin Operation
31
Manual Tabouret Origin Setting
31
Automatic Searching for Absolute Origin of Tabouret
31
Set Software Limits
32
Part 10 Tabouret Setting
33
Part 11 Production Statistics
34
Part 12 Spindle Jogging Operation
35
Part 13 Language Switching
36
Part 14 Embroidery Parameters
37
Part 15 Machine Parameters Setting
38
Part 16 User Management
39
Part 17 Restriction Releasing
40
Locking Removing
40
Part 18 System Test
41
Input Test
41
Output Test
41
Spindle Test
42
Machine Head Test
42
Part 19 System Information
43
System Number and Version Information Checking
43
System Update
43
Part 20 Ip Setting
44
Part 21 System Initialization
45
Part 22 Appendix
46
Parameter Table
46
System Errors and Countermeasures List
49
Advertisement
Advertisement
Related Products
Ricoma 8S
Ricoma CHT2
Ricoma MT-1502
Ricoma RCM 1201 PT
Ricoma RCM 1501 PT
Ricoma RCM-1201PT
Ricoma RCM-1201TC-7S
Ricoma RCM-1501TC-7S
Ricoma SWD Series
Ricoma TCS0601-TS
Ricoma Categories
Sewing Machine
Printer
Power Tool
Plotter
Paint Sprayer
More Ricoma Manuals
Login
Sign In
OR
Sign in with Facebook
Sign in with Google
Upload manual
Upload from disk
Upload from URL