Sign In
Upload
Manuals
Brands
Pioneer Manuals
Car Receiver
AVIC-HD3
Pioneer AVIC-HD3 Manuals
Manuals and User Guides for Pioneer AVIC-HD3. We have
8
Pioneer AVIC-HD3 manuals available for free PDF download: Service Manual, Operation Manual, Installation Manual, Hardware Manual, Quick Start Manual
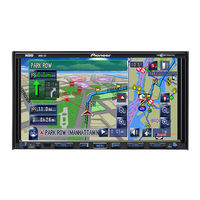
Pioneer AVIC-HD3 Operation Manual (202 pages)
HDD AV NAVIGATION HEAD UNIT
Brand:
Pioneer
| Category:
Car Navigation system
| Size: 13 MB
Table of Contents
Table of Contents
14
Manual Overview
3
How to Use this Manual
3
Overview for each Chapter
4
About the Definition of Terminology
6
Colour Difference of the Map Display between Day and Night
6
Terminology
6
Licence Agreement
7
Pioneer Avic-Hd3
7
Limitation of Liability
8
Tele Atlas End User Licensing Terms
9
About the Data for the Map Database
11
About Gracenote
12
End-User Licence Agreement
12
Other Precautions
13
Copyright
12
Chapter 1
19
Before Using the System
19
Important Safety Information
19
Additional Safety Information
20
To Ensure Safe Driving
20
Features (Characteristics of this Software)
21
Notes for Hard Disk Drive
21
Notes When Writing Data to the Hard Disk Drive at Low Temperature
21
Recording Equipment and Copyright
21
Data Saved or Recorded by the Customer
22
Points about Recording
22
In Case of Trouble
22
Visit Our Website
22
Chapter 2
23
Basic Operation
23
Flow from Startup to Termination
23
How to Use Navigation Menu Screens
24
Displaying the Navigation Menu
24
Navigation Menu Overview
24
Basic Navigation
25
Calculating Your Destination by Using Address Search
26
Checking and Modifying the Route
30
When the Route Guidance Starts
31
Cancelling the Route Guidance
31
Modifying the Route Calculation Conditions
32
Items that Users Can Operate
32
Checking the Current Route
33
Checking the Passing Streets with a List
33
Checking the Entire Route Overview on the Map
34
Editing Waypoints
34
Adding a Waypoint
34
Deleting a Waypoint
35
Skipping a Waypoint
35
Sorting Waypoints
35
How to Read the Map Display
37
How to Use the Map
37
How to View the Map of the Current Location
37
Switching the View Mode
37
Display During Motorway Driving
39
Display Items
40
Roads Without Turn-By-Turn Instructions
41
Changing the Scale of the Map
42
Scroll the Map to the Location You Want to See
42
Shortcut Menu
43
Setting the Vehicle Dynamics Display
44
Chapter 4
45
Entering the Map Menu
45
Modifying Map Configurations
45
Setting the Item on the Map Screen
45
Selecting the Shortcut
47
Displaying POI on the Map
48
Viewing the Map Colour Legend
48
Changing the Map Colour
49
Chapter 5
51
Changing the Setting of Navigation Interruption Screen
49
Changing the View Mode for the Navigation Map
49
Setting the Map Colour Change between Day and Night
49
Searching for Points of Interest (POI) Countrywide
51
Searching for a POI Directly from the Name of the Facilities
51
Searching for Pois by Specifying a Category First
52
Searching for Pois by Specifying a City Name First
53
Setting a Route to Your Destination
51
Finding a POI in the Vicinity
53
Searching for the Facilities Around the Current Position
53
Searching for the Facilities Around the Scroll Cursor
54
Finding Your Destination by Specifying the Postcode
55
Route Calculation to Your Home Location or to Your Favourite Location
55
Registering/Deleting POI Shortcuts
56
Registering a POI Shortcut
56
Deleting a POI Shortcut
57
Chapter 6
59
Selecting Destination from the Destination History and Address Book
56
Registering and Editing Locations
59
Registering Locations Overview
59
Registering Your Home and Your Favourite Location
59
Registering a Location into Address Book
60
Registering a Location by Address Book
60
Registering a Location by Scroll Mode
60
Editing the Entry in "Address Book
61
Viewing the Address Book
61
Deleting the Entry in "Address Book
64
Deleting the Entry in "Destination History
65
Chapter 7
67
Destination History Operations
65
Using RDS-TMC Information
67
Viewing Traffic List
67
Confirming Traffic Information on the Map
68
Setting an Alternative Route to Avoid Traffic Jams
69
Selecting Preferred RDS-TMC Service Provider Manually
70
Selecting Traffic Information to Display
70
Using Traffic Information
67
Hands-Free Phoning Overview
73
Preparing Communication Devices
73
Setting up for Hands-Free Phoning
74
Making a Phone Call
76
Receiving a Phone Call
76
Registering a Phone Number in "Dial Favourites
79
Transferring the Phone Book
79
Editing the Entry in "Phone Book
80
Editing the Received Call or Dialled Number History
81
Chapter 9
83
Using Hands-Free Phoning
73
Customising the Regional Settings
83
Changing the Language for Navigation Guidance and Menu
83
Setting the Keyboard Layout
84
Setting the Time Difference
84
Changing the Unit between Km and Miles
85
Changing the Virtual Speed of the Vehicle
85
Entering the Settings Menu
83
Modifying the General Settings for Navigation Functions
83
Setting the Volume for Guidance and Phone
83
Checking the Setting Related with Hardware
85
Checking the Connections of Leads and Installation Positions
85
Checking Sensor Learning Status and Driving Status
86
Checking the Device and Version Information
87
Checking the Hard Disk Information
87
Correcting the Installation Angle
87
Changing the Background Picture
88
Limitations for Importing Pictures
89
Registering the Home Location and Favourite Location
88
Correcting the Current Location
90
Restoring the Default Setting
90
Chapter 10
91
Using the Demonstration Guidance
90
Basic Operation
91
Selecting a Source
91
Switching the Audio Operation Screen
91
About Steering Remote Control
92
Viewing the Audio Operation Screen and Display- Ing the Audio Settings Menu
93
Using the AV Source (Built-In DVD Drive and Radio)
91
Operating a Music CD
94
About Auto Hard Disk Recording
94
Screen Configuration
94
Selecting [CD] as the Source
94
Touch Key Operation
95
Operating the CD-ROM (MP3 Disc)
96
Screen Configuration
96
Selecting [ROM] as the Source
96
Touch Key Operation
96
Notes on Playing MP3 Disc
98
Operating the DVD
98
Screen Configuration
98
Selecting [DVD] as the Source
98
Touch Key Operation
99
Back from a Specified Time
100
Searching for a Desired Scene, Starting Play
100
Entering the Numerical Commands
101
Operating the Radio (FM)
101
Screen Configuration
101
Selecting [FM] as the Source
101
Touch Key Operation
102
Storing the Strongest Broadcast Frequencies
103
Tuning in Strong Signals
103
Using Radio Text
103
Receiving Traffic Announcements
104
Searching for an RDS Station by PTY Information
104
Using News Programme Interruption
105
Receiving PTY Alarm Broadcasts
105
Selecting Alternative Frequencies (AF)
105
Limiting Stations to Regional Programming
106
Using Auto PI Seek for Preset Stations
106
Using PI Seek
106
PTY List
107
Operating the Radio (AM)
108
Screen Configuration
108
Selecting [AM] as the Source
108
Touch Key Operation
108
Frequencies
109
Storing the Strongest Broadcast
109
Tuning in Strong Signals
109
Chapter 11
111
Music Library Recording
111
Recording a CD Manually
112
Recording All Tracks in a CD
112
Recording Only the First Track of a CD
112
Stopping CD Recording
112
Notes on CD Recording
113
Using the AV Source (Music Library)
111
Music Library Play
113
Screen Configuration
113
Selecting [LIBRARY] as the Source
113
Touch Key Operation
114
Creating a Playlist with a Customised Order
116
Editing a Playlist or Tracks
117
6 Touch .
118
Touch
119
Changing the Pronunciation of a Playlist
119
Changing the Title of the Playlist or Track
119
Renaming an Artist Name in the Playlist or Track
120
Sorting the Playlists
120
Deleting a Playlist
121
Deleting a Track from the Playlist
121
Disk Drive
121
Assigning Another Candidate for Title
122
Information
122
Switching to the Edit Mode
122
Chapter 12
123
Operating the Multi-CD Player
123
Screen Configuration
123
Selecting [M-CD] as the Source
123
Touch Key Operation
123
Track
123
Using the AV Source (M-CD, Ipod®, TV)
123
Operating the Ipod
125
Screen Configuration
125
Selecting [Ipod] as the Source
125
Touch Key Operation
125
Browsing for a Song
126
Operating the TV Tuner
127
Screen Configuration
127
Selecting [TV] as the Source
127
Touch Key Operation
127
Selecting the Country Group
128
Sequentially
128
Storing and Recalling Broadcast Stations
128
Storing the Strongest Broadcast Stations
128
Chapter 13
129
Operating the AV Input Source (AV)
129
Selecting [AV INPUT] as the Source
129
Operating the External Unit (EXT)
129
Screen Configuration
129
Selecting [EXT 1] or [EXT 2] as the Source
129
Touch Key Operation
129
Key
130
Operate the External Unit by Using 1 Key
130
Operate the External Unit by Using Function 1 - Function 4
130
To Return to the Previous Screen, Touch [Back]
130
Switching the Automatic and Manual Function
131
Using the AV Source (AV, EXT, AUX)
129
Operating the aux Input Source (AUX)
131
Selecting [AUX] as the Source
131
Chapter 14
133
AV Setting Overview
133
How to Operate the Audio Settings Screen
133
Customising the Audio Setting Related with Audio Visual
133
Customising the Audio Settings Items
133
Using the Equaliser
133
Adjusting Equaliser Curves
134
Setting the Simulated Sound Stage
135
Using Balance Adjustment
135
Adjusting Loudness
136
Using Non Fading Output
136
Using Subwoofer Output
136
Using the High Pass Filter
136
Adjusting Source Levels
137
Customising the System Settings Items
137
How to View and Operate the System Settings
137
Setting up the Built-In DVD Drive
138
Changing the Wide Screen Mode
139
Setting for Rear View Camera
140
Setting the Video Input
140
Switching the Auxiliary Setting
141
Switching the Muting/Attenuation Level
141
Switching the Muting/Attenuation Timing
141
Changing the Voice Output of the Navigation Guidance
142
Setting the CD Recording Mode
142
Setting the Clock Display on the Video Image
142
Setting the Rear Output and Subwoofer Controller
142
Switching the Auto Aerial Setting
142
Selecting the TV Signal
143
Setting the FM Tuning Step
143
Switching Auto PI Seek
143
Other Functions
143
Selecting the Video for "Rear Display
143
Operating the Picture Adjustment
144
Switching the Backlight on or off
145
Language Code Chart for DVD
146
Basics of Voice Operation
147
Flow of Voice Operation
147
To Start Voice Operation
148
Operating Your Navigation System with Voice
147
To Ensure Safe Driving
147
An Example of Voice Operation
149
Search for POI in Vicinity
149
Search for the Playlist
150
Tips for Voice Operation
149
Available Voice Commands
151
Basic Commands for Voice Operation
152
Voice Commands Related to Navigation
152
Voice Commands Related to AV Operation
154
Voice Commands Related to Hands-Free Phoning
154
After Checking Traffic Information Manually
155
Location Screen (A) and (B)
155
Other Voice Commands
157
Other Voice Commands for Navigation Operation
157
Other Voice Commands for AV Operation
159
Category List for Vicinity Search
160
Appendix
165
Returning the Navigation System to the Default or Factory Settings
165
Setting Items to be Deleted
166
Completely Returning the Navigation System to the Initial State
167
If System Errors Frequently Occur
167
Adjusting the Response Positions of the Touch Panels (Touch Panel Calibration)
168
Positioning Technology
169
Positioning by Dead Reckoning
169
Positioning by GPS
169
How Do GPS and Dead Reckoning Work Together
170
Conditions Likely to Cause Noticeable Positioning Errors
171
Handling Large Errors
171
When the Positioning by GPS Is Impossible
171
Vehicles that Cannot Obtain Speed Pulse Data
171
Troubleshooting
174
Problems in the Screen
174
Messages and How to React to Them
178
Messages for Navigation Functions
178
Messages for Audio Functions
182
Built-In DVD Drive
182
Hard Disk Drive (Music Library)
182
Other Sources
183
Route Setting Information
184
Route Search Specifications
184
Displaying POI
185
Route Highlighting
185
Tracking
185
When the Hard Disk Drive Is Disconnected
184
Detail Information for Playable Media
185
DVD Discs and Other DVD Media Types
185
About Playing Dual Disc
186
CD-R/CD-RW Discs
186
MP3 Files
186
Glossary
188
Route Setting
189
Set Route
189
Voice Guidance
190
Voice Recognition
190
Display Information
191
Navigation Menu
191
Shortcut Menu
194
Menu in the Audio Screen
195
[Audio Settings] Menu
195
[System Settings] Menu (Page 1)
195
[System Settings] Menu (Page 2)
195
Index
196
Advertisement
Pioneer AVIC-HD3 Installation Manual (177 pages)
HDD AV NAVIGATION HEAD UNIT
Brand:
Pioneer
| Category:
Car Navigation system
| Size: 4 MB
Table of Contents
English
2
Table of Contents
2
Important Safety Information
3
About this Manual
3
Please Read All of These Instructions Regarding Your Navigation System and Retain Them for Future Reference
3
Precautions before Connecting the System
4
Connecting the System
5
System
5
Before Installing this Product
5
To Prevent Damage
5
Notice for the Blue Lead
5
Notice for the Blue/White Lead
6
Parts Supplied
6
Connecting the System
8
Connecting the Power Cord (1)
10
Connecting the Power Cord (2)
12
When Connecting to Separately Sold Power Amp
14
When Connecting a Rear View Camera
16
When Connecting the External Video Component
17
When Connecting the External Unit Featuring Video Source
17
When Connecting the Rear Display
18
When Using a Rear Display Connected to Rear Video Output
18
Installation
19
Precautions before Installation
19
Installation Precautions before Installation
19
To Guard against Electromagnetic Interference
20
Before Installing
20
Installing this Navigation System
20
Installation Notes
20
Parts Supplied
22
Before Installing this Navigation Unit
23
Installation with the Holder and Side Bracket
23
Installation Using the Screw Holes on the Side of the Navigation Unit
24
Installing the GPS Aerial
25
Installation Notes
25
Parts Supplied
25
When Installing the Aerial Inside the Vehicle (on the Rear Shelf)
25
When Installing the Aerial Outside the Vehicle (on the Body)
27
Installing the Microphone
28
Parts Supplied
28
Mounting on the Sun Visor
28
Installation on the Steering Column
28
Adjusting the Microphone Angle
29
After Installation
30
After Installing this Navigation System
30
Español
31
Acerca de Este Manual
32
Información Importante de Seguridad
32
Lea Todas Estas Instrucciones
32
Relacionadas con Su Sistema de
32
Emplearlas como Referencia en el
32
Futuro
32
Conexión del Sistema
33
Precauciones Antes de Conectar el
33
Antes de Instalar Este Producto
35
Para Impedir Daños
35
Aviso para el Cable Conductor Azul
35
Aviso para el Cable Conductor Azul/Blanco
36
Partes Suministradas
36
Conexión del Sistema
38
Conexión del Cable de Alimentación (1)
40
Conexión del Cable de Alimentación (2)
42
Conexión al Amplificador de Potencia que Se Vende por Separado
44
Conexión de una Cámara para Visión Trasera
46
Al Conectar el Componente de Vídeo Externo
47
Al Conectar la Unidad Externa con Fuente de Vídeo
47
Al Conectar la Pantalla Posterior
48
Al Usar una Pantalla Posterior Conectada a la Salida de Vídeo Trasera
48
Instalación
49
Precauciones Antes de la Instalación
49
Antes de la Instalación
50
Instalación de Este Sistema de Navegación
50
Notas Acerca de la Instalación
50
Partes Suministradas
52
Antes de Instalar Esta Unidad de Navegación
53
Instalación con el Soporte y el Soporte Lateral
53
Instalación Utilizando Los Orificios del Tornillo al Lado de la Unidad de Navegación
54
Para Impedir que Se Produzcan Interferencias Electromagnéticas
50
Instalación de la Antena GPS
55
Notas Acerca de la Instalación
55
Partes Suministradas
55
Cuando Instale la Antena en el Interior del Vehículo (en el Bandeja Trasero)
56
Cuando Instale la Antena en el Exterior del Vehículo (en la Carrocería)
57
Instalación del Micrófono
58
Partes Suministradas
58
Montaje en el Parasol
58
Instalación en la Columna de Dirección
58
Ajuste del Ángulo del Micrófono
59
Después de Instalar Este Sistema de
60
Después de la Instalación
60
Deutsch
61
Bitte Lesen Sie diese Anleitung zum
62
Navigationssystem Aufmerksam
62
Anleitung für Späteres
62
Nachschlagen auf
62
Wichtige Sicherheitshinweise
62
Über diese Anleitung
62
Anschluss des Systems
63
Vor dem Anschließen des Systems zu
63
Vor dem Einbau dieses Produkts
65
Zur Vermeidung von Schäden
65
Anmerkung zum Blauen Kabel
66
Anmerkung zum Blau/Weißen Kabel
66
Mitgelieferte Teile
67
Anschluss des Systems
68
Stromkabel Anschließen (1)
70
Stromkabel Anschließen (2)
72
Beim Anschluss an den Separat Erhältlichen Leistungsverstärker
74
Beim Anschluss einer Heckkamera
76
Bei Anschluss der Externen Videokomponente
77
Beim Anschluss der Externen Einheit mit Videoquelle
77
Bei Anschluss der Heckanzeige
78
Bei Verwendung einer Heckanzeige, die an den Hinteren Videoausgang Angeschlossen ist
78
Einbau
79
Vor der Installation zu Beachten
79
Einbau dieses Navigationssystems
80
Hinweise zum Einbau
80
Mitgelieferte Teile
82
Vor der Installation des Navigationsgerätes
83
Installation mit Halterung und Seitenbügel
83
Installation mit Hilfe der Schraubenbohrungen an der Seite des Navigationsgerätes
84
Vor dem Einbau
80
Zur Vermeidung Elektromagnetischen Rauschens
80
Einbau der GPS-Antenne
85
Hinweise zur Befestigung
85
Mitgelieferte Teile
85
Einbau der Antenne IM Fahrzeuginnenraum (auf der Hutablage)
86
Einbau der Antenne Außen am Fahrzeug (an der Karosserie)
87
Einbau des Mikrofons
88
Mitgelieferte Teile
88
Montage an der Sonnenblende
88
Montage auf der Lenksäule
88
Anpassen des Mikrofonwinkels
89
Nach dem Einbau dieses
90
Navigationssystems
90
Nach der Installation
90
Français
91
A Propos de Ce Manuel
92
Consignes Importantes de Sécurité
92
Veuillez Lire Toutes Les Explications
92
Navigation Et Les Conserver Pour
92
Branchement du Système
93
Précautions À Prendre Avant de Brancher Le
93
Avant de Raccorder Ce Produit
94
Pour Éviter Toute Détérioration
94
Remarque Concernant Le Câble Bleu
94
Remarque Concernant Le Câble Bleu/Blanc
95
Pièces Fournies
95
Branchement du Système
96
Branchement du Cordon D'alimentation (1)
98
Branchement du Cordon D'alimentation (2)
100
Branchement D'un Amplificateur de Puissance Vendu Séparément
102
Branchement D'une Caméra de Rétrovisée
104
Branchement D'un Appareil VIDéo Externe
105
Branchement de L'unité Externe Avec Source VIDéo
105
Connexion de L'écran Arrière
106
Utilisation D'un Écran Arrière Raccordé À la Sortie VIDéo Arrière
106
Installation
107
Précautions À Prendre Avant
107
L'installation
107
Avant de Procéder À L'installation
108
Installation de Ce Système de Navigation
108
Remarques Sur L'installation
108
Pièces Fournies
110
Avant D'installer Cette Unité de Navigation
111
Installation Avec Le Support Et Le Support Latéral
111
Installation en Utilisant Les Trous de Vis Sur Les Côtés de Cette Unité de Navigation
112
Pour Protéger Le Système de Navigation Contre Les Parasites Électromagnétiques
108
Installation de L'antenne GPS
113
Remarques Sur L'installation
113
Pièces Fournies
113
Installation de L'antenne À L'intérieur du Véhicule (Sur la Tablette Arrière)
114
Installation de L'antenne À L'extérieur du Véhicule (Sur la Carrosserie)
115
Installation du Microphone
116
Pièces Fournies
116
Installation Sur Le Pare-Soleil
116
Installation Sur la Colonne de Direction
116
Réglage de L'angle du Microphone
117
Après L'installation
118
Italiano
119
Informazioni Importanti Per la Sicurezza
120
Informazioni Sul Presente Manuale
120
Leggere Tutte Le Presenti Istruzioni
120
Riferimenti Futuri
120
Collegamento del Sistema
121
Precauzioni Prima DI Collegare Il
121
Per Evitare Danni
122
Informazione Sul Cavetto Blu
122
Informazione Sul Cavetto Blu/ Bianco
123
Prima DI Installare Questo Prodotto
122
Pezzi in Dotazione
123
Collegamento del Sistema
124
Collegamento del Cavo DI Alimentazione (1)
126
Collegamento del Cavo DI Alimentazione (2)
128
Quando si Collega Ad un Amplificatore in Vendita Separatamente
130
Quando si Collega con una Telecamera a Vista Posteriore
132
Quando si Collega Il Componente Video Esterno
133
Quando si Collega L'unità Esterna Munita DI
133
Quando si Collega Il Display Posteriore
134
Quando si Utilizza un Display Posteriore Collegato a Un'uscita Video Posteriore
134
Installazione
135
Precauzioni Prima Dell'installazione
135
Installazione DI Questo Sistema DI Navigazione
136
Note Sull'installazione
136
Pezzi in Dotazione
138
Prima DI Installare Questo Unità DI Navigazione
139
Installazione con Il Supporto E la Staffa Laterale
139
Installazione Usando I Fori Delle Viti Sul Lato del Unità DI Navigazione
140
Per Proteggere L'unità DI Navigazione da Disturbi Elettromagnetici
136
Prima Dell'installazione
136
Installazione Dell'antenna GPS
141
Note Sull'installazione
141
Pezzi in Dotazione
141
Quando si Installa L'antenna All'interno del Veicolo (Sul Ripiano Posteriore)
142
Quando si Installa L'antenna All'esterno del Veicolo (Sulla Carrozzeria)
143
Installazione del Microfono
144
Pezzi in Dotazione
144
Montaggio Sul Parasole
144
Installazione Sulla Colonna DI Sterzo
145
Regolazione Dell'angolazione del Microfono
145
Dopo L'installazione
146
Pioneer AVIC-HD3 Installation Manual (181 pages)
DVD AV NAVIGATION HEAD-UNIT
Brand:
Pioneer
| Category:
Car Navigation system
| Size: 5 MB
Table of Contents
English
3
Important Safety Information
2
About this Manual
2
System and Retain Them for Future Reference
2
Table of Contents
3
Connecting the System
4
Before Installing this Navigation System
5
To Prevent Damage
6
Connecting the System
6
Connecting the Power Cord (1)
10
Connecting the Power Cord (2)
12
When Connecting to Separately Sold Power Amp
14
When Connecting a Rear View Camera
16
When Connecting the External Video Component
17
When Connecting the External Unit Featuring Video Source
17
When Connecting the Rear Display
18
When Using a Rear Display Connected to Rear Video Output
18
Installation
19
To Guard against Electromagnetic Interference
20
Before Installing
20
Installing this Navigation System
21
Installation Notes
21
Parts Supplied
22
Before Installing this Navigation Unit
23
Installation with the Holder and Side Bracket
23
Installation Using the Screw Holes on the Side
24
Installing the GPS Aerial
25
Installation Notes
25
Parts Supplied
26
When Installing the Aerial Inside the Vehicle
26
When Installing the Aerial Outside the Vehicle
27
Installing the Microphone
28
Parts Supplied
28
Mounting on the Sun Visor
28
Installation on the Steering Column
29
Adjusting the Microphone Angle
29
After Installing this Navigation System
30
Español
33
Información Importante de Seguridad
32
Conexión del Sistema
34
Antes de Instalar Este Sistema de Navegación
35
Para Impedir Daños
36
Conexión del Sistema
36
Conexión del Cable de Alimentación (1)
40
Conexión del Cable de Alimentación (2)
42
Conexión al Amplificador de Potencia que Se Vende por Separado
44
Conexión de una Cámara para Visión Trasera
46
Al Conectar el Componente de Vídeo Externo
47
Al Conectar la Unidad Externa con Fuente de Vídeo
47
Al Conectar la Pantalla Posterior
48
Al Usar una Pantalla Posterior Conectada a la
48
Instalación
49
Para Impedir que Se Produzcan Interferencias Electromagnéticas
50
Antes de la Instalación
50
Instalación de Este Sistema de Navegación
51
Notas Acerca de la Instalación
51
Partes Suministradas
52
Antes de Instalar Esta Unidad de Navegación
53
Instalación con el Soporte y el Soporte Lateral
53
Instalación Usando Los Orificios Roscados
54
En el Lado de la Unidad de Navegación
54
Instalación de la Antena GPS
55
Notas Acerca de la Instalación
55
Partes Suministradas
56
Cuando Instale la Antena en el Interior del
56
Vehículo (en el Estante Trasero)
57
Cuando Instale la Antena en el Exterior del
57
Instalación del Micrófono
58
Partes Suministradas
58
Montaje en el Parasol
58
Instalación en la Columna de Dirección
59
Ajuste del Ángulo del Micrófono
59
Después de Instalar Este Sistema de Navegación
60
Wichtige Sicherheitshinweise
62
Ber diese Anleitung
62
Deutsch
63
Anschluss des Systems
64
Vor dem Einbau dieses Navigationssystems
65
Zur Vermeidung von Schäden
66
Anschluss des Systems
66
Stromkabel Anschließen (1)
70
Stromkabel Anschließen (2)
72
Beim Anschluss an den Separat Erhältlichen Leistungsverstärker
74
Beim Anschluss einer Heckkamera
76
Bei Anschluss der Externen Videokomponente
77
Beim Anschluss der Externen Einheit mit Videoquelle
77
Bei Anschluss der Heckanzeige
78
Bei Verwendung einer Heckanzeige, die an
78
Einbau
79
Zur Vermeidung Elektromagnetischen Rauschens
80
Vor dem Einbau
80
Einbau dieses Navigationssystems
81
Hinweise zum Einbau
81
Mitgelieferte Teile
82
Vor der Installation des Navigationsgerätes
83
Installation mit Halterung und Seitenbügel
83
Einbau unter Verwendung der
84
Gewindebohrungen an der Seite der
84
Navigationseinheit
84
Einbau der GPS-Antenne
85
Hinweise zur Befestigung
85
Mitgelieferte Teile
86
Einbau der Antenne IM Fahrzeuginnenraum
86
Einbau der Antenne Außen am Fahrzeug
87
Einbau des Mikrofons
88
Mitgelieferte Teile
88
Montage an der Sonnenblende
88
Montage auf der Lenksäule
89
Passen Sie den Mikrofonwinkel an
89
Nach dem Einbau dieses Navigationssystem
90
Français
93
Branchement du Système
94
Avant de Raccorder Ce Système de Navigation
95
Pour Éviter Toute Détérioration
96
Branchement du Système
96
Branchement du Cordon D'alimentation (1)
100
Branchement du Cordon D'alimentation (2)
102
Branchement D'un Amplificateur de Puissance Vendu Séparément
104
Branchement D'une Caméra de Rétrovisée
106
Branchement D'un Composant VIDéo Externe
107
Connexion D'une Unité Externe Avec Source VIDéo
107
Connexion de L'affichage Arrière
108
Connexion de L'affichage Arrière Sur la Sortie VIDéo Arrière
108
Installation
109
Pour Protéger Le Système de Navigation Contre Les Parasites Électromagnétiques
110
Avant de Procéder À L'installation
110
Installation de Ce Système de Navigation
111
Remarques Sur L'installation
111
Pièces Fournies
112
Avant D'installer Cette Unité de Navigation
113
Installation Avec Le Support Et Le Support
113
Installation en Utilisant Les Trous de Vis Sur
114
Installation de L'antenne GPS
115
Remarques Sur L'installation
115
Pièces Fournies
116
Installation de L'antenne À L'intérieur du
116
Installation de L'antenne À L'extérieur du
117
Installation du Microphone
118
Pièces Fournies
118
Montage Sur Le Pare-Soleil
118
Installation Sur la Colonne de Direction
119
Ajustement de L'angle du Microphone
119
Après Installation de Ce Système de Navigation
120
Italiano
123
Collegamento del Sistema
124
Prima DI Installare Questo Sistema DI Navigazione
125
Per Evitare Danni
126
Collegamento del Sistema
126
Collegamento del Cavo DI Alimentazione (1)
130
Collegamento del Cavo DI Alimentazione (2)
132
Quando si Collega Ad un Amplificatore in Vendita Separatamente
134
Quando si Collega con una Telecamera a Vista Posteriore
136
Quando si Collega Il Componente Video Esterno
137
Quando si Collega L'unità Esterna Munita DI Sorgente Video
137
Quando si Collega Il Display Posteriore
138
Quando si Utilizza un Display Posteriore
138
Installazione
139
Per Proteggere L'unità DI Navigazione da Disturbi Elettromagnetici
140
Prima Dell'installazione
140
Installazione DI Questo Sistema DI Navigazione
141
Note Sull'installazione
141
Pezzi in Dotazione
142
Prima DI Installare Questo Unità DI Navigazione
143
Installazione con Il Supporto E la Staffa Laterale
143
Installazione Per Mezzo Dei Fori Delle Viti
144
Presenti Sui Lati Dell'unità DI Navigazione
144
Installazione Dell'antenna GPS
145
Note Sull'installazione
145
Pezzi in Dotazione
146
Quando si Installa L'antenna All'interno del
146
Veicolo (Sul Ripiano Posteriore)
147
Quando si Installa L'antenna All'esterno del
147
Veicolo (Sulla Carrozzeria)
147
Installazione del Microfono
148
Pezzi in Dotazione
148
Montaggio Sul Parasole
148
Installazione Sulla Colonna DI Sterzo
149
Regolazione Dell'angolo del Microfono
149
Dopo L'installazione DI Questo Sistema DI Navigazione
150
Advertisement
Pioneer AVIC-HD3 Service Manual (317 pages)
HDD multimedia AV Navigation server
Brand:
Pioneer
| Category:
Car Receiver
| Size: 35 MB
Table of Contents
Table of Contents
13
Safety Information
9
Table of Contents
13
1 Specifications
14
2 Exploded Views and Parts List
16
Packing
17
Exterior(1)
19
Exterior(2)
21
Exterior(3)
23
DVD Mechanism Module
25
3 Block Diagram and Schematic Diagram
27
Block Diagram
27
Overall Connection Diagram
45
Gps Unit(Guide Page)
47
Audio Unit(P/S•I/F)(Guide Page)
53
Audio Unit(Fm/Am•Tmc Tuner)
59
DVD Core Unit(Ms3)(So-DC)(Guide Page)
61
DVD Core Unit(Ms3)(Cpu)(Guide Page)
67
Compound Unit(A) and Compound Unit(B)
75
Pu Unit(Reference)
76
Navi Mother Pcb(Syscom•P/S)(Guide Page)
77
Navi Mother Pcb(Navi Av•External I/F)(Guide Page)
83
Hdd Pelay Pcb
89
Panel Unit
91
Keyboard Unit
93
Monitor Unit(Monitor)(Guide Page)
95
Monitor Unit(Inverter)
101
Main Pcb Unit
103
4 Pcb Connection Diagram
105
Audio Unit
105
DVD Core Unit(Ms3)
109
Compound Unit(A) and Compound Unit(B)
113
Gps Unit
114
Navi Mother Pcb
115
Hdd Relay Pcb
119
Panel Unit
120
Monitor Unit
121
Main Pcb Unit
125
Keyboard Unit
127
5 Electrical Parts List
128
6 Adjustment
155
Jig Connection Diagram
155
DVD Adjustment
157
Video Level Adjustment
174
Pll Adjustment
176
Monitor Unit Adjustment
178
Contents
185
Test Mode
191
Test Disc
214
7 General Information
231
Diagnosis
231
Disassembly
231
Pcb Locations
239
Connector Function Description
240
8 Operations
253
Pioneer AVIC-HD3 Installation Manual (58 pages)
HDD AV NAVIGATION HEAD UNIT
Brand:
Pioneer
| Category:
Car Navigation system
| Size: 1 MB
Table of Contents
Important Safety Information
2
About this Manual
2
For Future Reference
2
System and Retain Them for Future Reference
2
Table of Contents
3
Connecting the System
4
Before Installing this Navigation System
5
To Prevent Damage
6
Parts Supplied
7
Connecting the System
8
Connecting the Power Cord (1)
10
Connecting the Power Cord (2)
12
When Connecting to Separately Sold Power Amp
14
When Connecting a Rear View Camera
16
When Connecting the External Video Component
17
When Connecting the External Unit Featuring Video Source
17
When Connecting the Rear Display
18
When Using a Rear Display Connected to Rear Video Output
18
Installation
19
To Guard against Electromagnetic Interference
20
Before Installing
20
Installing this Navigation System
21
Installation Notes
21
Parts Supplied
22
Of the Navigation Unit
22
Installing the GPS Aerial
24
Installation Notes
24
Parts Supplied
25
When Installing the Aerial Inside the Vehicle
25
When Installing the Aerial Outside the Vehicle
26
Installing the Microphone
27
Parts Supplied
27
Mounting on the Sun Visor
27
Installation on the Steering Column
28
Adjusting the Microphone Angle
28
After Installing this Navigation System
29
Pioneer AVIC-HD3 Hardware Manual (22 pages)
HDD AV NAVIGATION HEAD UNIT
Brand:
Pioneer
| Category:
Car Navigation system
| Size: 0 MB
Table of Contents
Table of Contents
2
Manual Overview
3
How to Use this Manual
3
Terminology
3
About the Definition of Terminology
3
Important Safety Information
4
Precautions
4
Additional Safety Information
5
To Avoid Battery Exhaustion
5
To Ensure Safe Driving
5
Chapter 1 Notes before Using the System
7
In Case of Trouble
7
Visit Our Website
7
About this System
7
Features
7
General
7
Music Library
7
Disc Playback
7
Others
8
About Dolby Digital
9
About DTS Sound
9
Notes for the Hard Disk Drive
9
Recording Equipment and Copyright
9
About Writing Data to the Hard Disk Drive at Low Temperature
9
When Recording, Pay Attention to the Following Points
9
About the Data Saved or Recorded by the Customer
9
Notes for the LCD Screen
10
To Protect the LCD Screen
10
For Comfortable LCD Viewing
10
Notes for Internal Memory
10
Before Removing the Vehicle Battery
10
Resetting the Microprocessor
10
Chapter 2 How to Use the Navigation System
11
Checking Part Names and Functions
11
About the Power Supply of the Navigation System
12
How to Turn the Power on or off
12
How to Turn off the Screen Temporarily
12
When Using the Navigation System for the First Time
13
Selecting a Source with the AV Button
13
Adjusting the Volume
13
Turning the Source off
13
Inserting/Ejecting a Disc
14
Inserting a Disc
14
Ejecting a Disc
15
Adjusting the LCD Panel Angle
15
Appendix
17
When the Hard Disk Drive Is Disconnected
17
Handling and Care of the Disc
17
Playable Discs
17
DVD-Video Disc Region Numbers
17
What the Marks on Dvds Indicate
18
Condition Memory
18
DVD Drive and Care
18
Ambient Conditions for Playing a Disc
18
Using the LCD Panel Correctly
18
Handling the LCD Panel
18
About the Liquid Crystal Display (LCD) Screen
19
Keeping the LCD Screen in Good Condition
19
About the Small Fluorescent Tube
19
Specifications
20
Pioneer AVIC-HD3 Hardware Manual (22 pages)
DVD AV NAVIGATION HEAD-UNIT
Brand:
Pioneer
| Category:
Car Navigation system
| Size: 0 MB
Table of Contents
Table of Contents
2
Manual Overview
3
How to Use this Manual
3
Terminology
3
About the Definition of Terminology
3
Precautions
3
Important Safety Information
4
Additional Safety Information
5
To Avoid Battery Exhaustion
5
To Ensure Safe Driving
5
Chapter 1 Notes before Using the System
7
In Case of Trouble
7
Visit Our Website
7
About this System
7
Features
7
General
7
Music Library
7
Disc Playback
7
Others
8
About Dolby Digital
9
About DTS Sound
9
Notes for the Hard Disk Drive
9
Recording Equipment and Copyright
9
About Writing Data to the Hard Disk Drive at Low Temperature
9
When Recording, Pay Attention to the Following Points
9
About the Data Saved or Recorded by the Customer
9
Notes for the LCD Screen
10
To Protect the LCD Screen
10
For Comfortable LCD Viewing
10
Notes for Internal Memory
10
Before Removing the Vehicle Battery
10
Resetting the Microprocessor
10
Chapter 2 How to Use the Navigation System
11
Checking Part Names and Functions
11
About the Power Supply of the Navigation System
12
How to Turn the Power on or off
12
How to Turn off the Screen Temporarily
12
When Using the Navigation System for the First Time
13
Selecting a Source with the AV Button
13
Adjusting the Volume
13
Turning the Source off
14
Inserting/Ejecting a Disc
14
Inserting a Disc
14
Ejecting a Disc
15
Adjusting the LCD Panel Angle
15
Appendix
17
When the Hard Disk Drive Is Disconnected
17
Handling and Care of the Disc
17
Playable Discs
17
DVD-Video Disc Region Numbers
17
What the Marks on Dvds Indicate
18
Condition Memory
18
DVD Drive and Care
18
Ambient Conditions for Playing a Disc
18
Using the LCD Panel Correctly
18
Handling the LCD Panel
18
About the Liquid Crystal Display (LCD) Screen
19
Keeping the LCD Screen in Good Condition
19
About the Small Fluorescent Tube
19
Specifications
20
Pioneer AVIC-HD3 Quick Start Manual (2 pages)
Brand:
Pioneer
| Category:
Car Navigation system
| Size: 0 MB
Table of Contents
Hardware Buttons
1
Switching the Screens
1
Search Function Overview
1
Searching for Your Destination by Address
1
Operation of the Music Library
2
Operation of Your Apple Ipod
2
Changing the AV Source
2
Basic Operation on the Map Screen
2
Setting the Guidance and Phone Volume
2
Hands-Free Phoning
2
Registering Your Phone
2
Making a Phone Call
2
Advertisement
Related Products
Pioneer AVIC-HD3/XU/EW5
Pioneer AVIC-HD1BT/EW5
Pioneer AVIC-N3
Pioneer AVIC-F30BT
PIONEER AVIC-F10BT
PIONEER AVIC-8DVD
PIONEER AVIC-F710BT
Pioneer AVIC-Z120BT
Pioneer AVIC-F950BT
Pioneer AVIC-Z2/XU/UC
Pioneer Categories
Car Receiver
Receiver
Stereo Receiver
Amplifier
CD Player
More Pioneer Manuals
Login
Sign In
OR
Sign in with Facebook
Sign in with Google
Upload manual
Upload from disk
Upload from URL