Sign In
Upload
Manuals
Brands
Olympus Manuals
Digital Camera
E-M10 Mark II
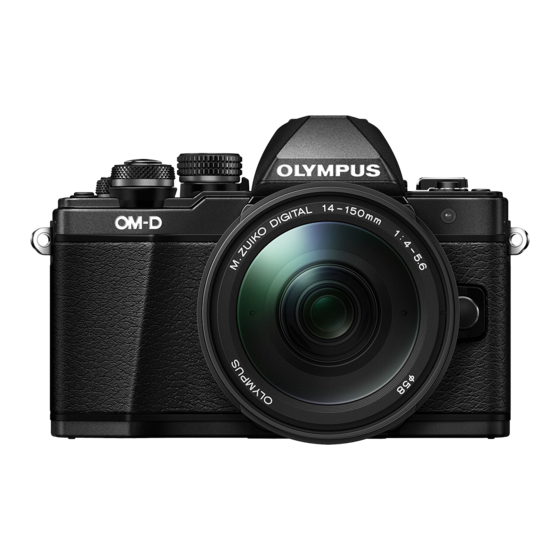
Olympus E-M10 Mark II Manuals
Manuals and User Guides for Olympus E-M10 Mark II. We have
2
Olympus E-M10 Mark II manuals available for free PDF download: Instruction Manual
Olympus E-M10 Mark II Instruction Manual (201 pages)
Brand:
Olympus
| Category:
Digital Camera
| Size: 4 MB
Table of Contents
Table of Contents
1
Shooting
3
Playback
4
Connecting the Camera to a Smartphone
6
Connecting the Camera to a
6
Computer and a Printer
6
Cautions
6
Information
6
Safety Precautions
7
Additions/Modifications by Firmware Update
7
Quick Task Index
8
Names of Parts
10
Preparation
12
Unpacking the Box Contents
12
Charging and Inserting the Battery
13
Inserting the Card
15
Attaching a Lens to the Camera
16
Using the Monitor
17
Turning the Camera on
18
Setting the Date/Time
19
Shooting
20
Information Displays While Shooting
20
Switching between Displays
22
Switching the Information Display
23
Shooting Still Pictures
24
Letting the Camera Choose Aperture and Shutter Speed (Program Mode)
26
Choosing Aperture (Aperture Priority Mode)
27
Choosing Shutter Speed (Shutter Priority Mode)
28
Choosing Aperture and Shutter Speed (Manual Mode)
29
Shooting with Long Exposure Time (BULB/LIVE TIME)
30
Live Composite Photography (Dark and Light Fi Eld Composite)
30
Letting the Camera Choose the Settings (Iauto Mode)
31
Using Art Fi Lters
33
Custom Modes (C1, C2, C3)
35
Shooting with Touch Screen Operations
35
Recording Movies
36
Using Movie Mode (N)
37
Using the Silencing Function When Shooting a Movie
38
Using Various Settings
39
Controlling Exposure (Exposure F)
39
Selecting the AF Target Mode (AF Target Settings)
39
Setting the AF Target
40
Face Priority AF/ Eye Priority AF
40
Zoom Frame Af/Zoom AF (Super Spot AF)
41
Changing ISO Sensitivity (ISO)
42
Adjusting Color (WB (White Balance))
42
Choosing a Focus Mode (AF Mode)
43
Choosing How the Camera Measures Brightness (Metering)
45
Locking the Exposure (AE Lock)
45
Performing the Sequential/Self- Timer Shooting
46
Shooting Without the Vibration Caused by Shutter Button Operations (Anti-Shock Z)
47
Shooting Without Shutter Sound (Silent [♥])
47
Shooting Without a Release Time Lag (Pro Capture Shooting)
48
Shooting Still Pictures in a Higher Resolution (High Res Shot)
48
Taking HDR (High Dynamic Range) Images
49
Setting in Super Control Panel
50
Making Fi Ne Adjustments to White Balance (WB Compensation)
52
Reducing Camera Shake (Image Stabilizer)
53
Setting the Image Aspect
54
Setting the Saving Method for Shooting Data (K Save Settings)
54
Selecting Image Quality (KK)
55
Selecting Image Quality (Nk)
56
Using a Fl Ash (Flash Photography)
57
Adjusting Fl Ash Output (Flash Intensity Control)
60
Processing Options (Picture Mode)
61
Making Fi Ne Adjustments to Sharpness (Sharpness)
62
Making Fi Ne Adjustments to Contrast (Contrast)
62
Making Fi Ne Adjustments to Saturation (Saturation)
63
Making Fi Ne Adjustments to Tone (Gradation)
63
Applying Fi Lter Effects to Monochrome Pictures (Color Filter)
64
Adjusting the Tone of a Monochrome Image (Monochrome Color)
64
Adjusting I-Enhance Effects (Effect)
65
Setting the Color Reproduction Format (Color Space)
65
Changing the Brightness of Highlights and Shadows (Highlight&Shadow)
66
Assigning Functions to Buttons (Button Function)
66
Adjusting Overall Color (Color Creator)
71
Shooting "My Clips
72
Editing "My Clips
73
Shooting Slow/Quick Motion Movies
75
Playback
76
Information Display During Playback
76
Playback Image Information
76
Switching the Information Display
77
Viewing Photographs and Movies
78
Index Display/Calendar Display
79
Viewing Still Images
79
Volume
80
Watching Movies
81
Protecting Images
81
Copying an Image (Copy)
81
Erasing an Image
82
Selecting Images (0, Copy Select, Erase Selected, Share Order Selected)
82
Setting a Transfer Order on Images (Share Order)
82
Audio Recording
83
Adding Still Pictures to My Clips (Add to My Clips)
83
Using the Touch Screen
84
Selecting and Protecting Images
84
Menu Functions
85
Basic Menu Operations
85
Using Shooting Menu 1/ Shooting Menu 2
86
Returning to Default Settings (Reset)
86
Registering Favorites Settings (Assign to Custom Mode)
87
Processing Options (Picture Mode)
88
Image Quality (KK)
88
Digital Zoom (Digital Tele- Converter)
88
Setting the Custom Self-Timer (J/Y)
89
Shooting Automatically with a Fi Xed Interval (I Time Lapse Shooting)
90
Varying Settings over a Series of Photographs (Bracketing)
91
Recording Multiple Exposures in a Single Image (Multiple Exposure)
95
Keystone Correction and Perspective Control (Keystone Comp.)
97
Setting Anti-Shock/Silent Shooting (Anti-Shock Z/Silent [♥])
98
Setting High Resolution Shooting (High Res Shot)
99
Shooting with Remote Control Wireless Fl Ash
99
Using the Video Menu
100
Adding Effects to a Movie
102
Setting the Record Mode (Nk)
102
Setting the Sound Recording for Movie (Movie K)
103
Recording Movie Audio with an IC Recorder
104
Using the Playback Menu
105
Displaying Images Rotated (R)
105
Editing Still Images
105
Saving a Still Image from a Movie (In-Movie Image Capture)
107
Trimming Movies (Movie Trimming)
108
Canceling All Protections
108
Copy All
108
Using the Setup Menu
109
Formatting the Card (Card Setup)
110
Deleting All Images (Card Setup)
110
Using the Custom Menus
111
J Af/Mf
111
K Af/Mf
112
L Af/Mf
112
M Button/Dial/Lever
113
N Release/J/Image Stabilizer
114
O Release/J/Image Stabilizer
114
P Disp/8/Pc
115
Q Disp/8/Pc
115
R Disp/8/Pc
116
S Disp/8/Pc
117
T Exp/Iso/Bulb/P
117
U Exp/Iso/Bulb/P
118
Exp/Iso/Bulb/P
118
W # Custom
118
K/Wb/Color
119
Y Record/Erase
120
Z Record/Erase
121
Evf
121
K Utility
122
Ael/Afl
123
MF Assist
124
K Fn Lever Function
124
Choosing the Control Panel Displays ( K Control Settings)
125
Adding Information Displays
127
Shooting Self-Portraits Using the Selfi E Assist Menu
129
Viewing Camera Images on TV
130
Shutter Speeds When the Fl Ash Fi Res
131
Combinations of JPEG Image Sizes and Compression Rates
131
Setting the Card to Record to
132
Saving Lens Info
132
Selecting the Display Style of the Viewfi Nder
133
Connecting the Camera to a Smartphone
134
Connecting to a Smartphone
135
Transferring Images to a Smartphone
136
Shooting Remotely with a Smartphone
136
Adding Position Information to Images
137
Changing the Connection Method
137
Changing the Password
138
Cancelling a Share Order
138
Initializing Wireless LAN Settings
138
Connecting the Camera to a Computer and a Printer
139
Connecting the Camera to a Computer
139
Copying Pictures to a Computer
140
Installing the PC Software
141
Installing the OLYMPUS Digital Camera Updater
141
User Registration
141
Direct Printing (Pictbridge)
142
Easy Printing
142
Custom Printing
143
Print Order (DPOF)
144
Creating a Print Order
144
Removing All or Selected Pictures from the Print Order
145
Cautions
146
Battery and Charger
146
Using the Optional AC Adapter
146
Using Your Charger Abroad
147
Usable Cards
147
Record Mode and Fi Le Size/Number of Storable Still Pictures
148
Interchangeable Lenses
149
HLD-9 Power Battery Holder
150
External Fl Ash Units Designated for Use with this Camera
152
Wireless Remote Control Fl Ash Photography
153
Other External Fl Ash Units
154
Principal Accessories
155
System Chart
156
Cleaning and Storing the Camera
158
Cleaning the Camera
158
Storage
158
Cleaning and Checking the Image Pickup Device
158
Pixel Mapping - Checking the Image Processing Functions
159
After Service
159
Information
160
Shooting Tips and Information
160
Error Codes
162
Menu Directory
165
Default Custom Mode Options
175
Specifi Cations
177
Advertisement
Olympus E-M10 Mark II Instruction Manual (171 pages)
Brand:
Olympus
| Category:
Digital Camera
| Size: 4 MB
Table of Contents
Table of Contents
3
Quick Task Index
7
Camera Settings
9
Names of Parts
10
Preparation
12
Unpack the Box Contents
12
Attaching the Strap
12
Charging and Inserting the Battery
13
Inserting the Card
14
Removing the Card
14
Attaching a Lens to the Camera
15
Power on
16
Setting the Date/Time
17
Shooting
18
Information Displays While Shooting
18
Monitor Display When Shooting
18
Switching between Displays
20
Switching between Shooting Using Live View and Shooting Using the Viewfi Nder
20
Switching the Information Display
21
Shooting Still Pictures
22
Shutter Button
23
Using Iauto Mode
24
Shooting in Scene Mode
26
Using Art Fi Lters
28
Using PHOTO STORY
30
Point-And-Shoot" Photography (P Program Mode)
32
Choosing Aperture (a Aperture-Priority Mode)
33
Choosing Shutter Speed (S Shutter-Priority Mode)
34
Choosing Aperture and Shutter Speed (M Manual Mode)
35
Shooting with Long Exposure Time (BULB)
35
Live Composite Photography (Dark and Light Fi Eld Composite)
36
Shooting with Touch Screen Operations
37
Recording Movies
38
Using Movie Mode (N)
39
Taking Photographs During Movie Recording (Movie+Photo Mode)
40
Using the Silencing Function When Shooting a Movie
40
Shooting "My Clips
41
Editing "My Clips
42
Shooting “My Clips”
43
Shooting Slow/Quick Motion Movies
43
Recording High-Speed Movies
44
Using Shooting Options
45
Calling Shooting Options
45
Available Settings
46
Controlling Exposure (Exposure Compensation)
47
Locking the Exposure (AE Lock)
47
Setting the AF Target (AF Area)
48
Using Small Target and Group Target (Setting AF Target)
48
Face Priority Af/Pupil Detection AF
49
Zoom Frame Af/Zoom AF (Super Spot AF)
50
Choosing a Focus Mode (AF Mode)
51
C-AF+TR (AF Tracking)
51
Changing the Brightness of Highlights and Shadows
52
Controlling Color (Color Creator)
52
Choosing How the Camera Measures Brightness (Metering)
53
ISO Sensitivity
53
Adjusting Color (White Balance)
54
Making Fi Ne Adjustments to White Balance (White Balance Compensation)
55
Reducing Camera Shake (Image Stabilizer)
56
Sequential Shooting/Using the Self Timer
57
Shooting Without the Vibration Caused by Shutter Button Operations (Anti-Shock Z)
58
Shooting Without Shutter Sound (Silent[♥])
58
Setting the Image Aspect
59
Selecting Image Quality (Still Image Quality Mode)
60
Movie Image Quality Mode
61
Using a Fl Ash (Fl Ash Photography)
62
Adjusting Fl Ash Output (Fl Ash Intensity Control)
64
Assigning Functions to Buttons (Button Function)
64
Test Picture
65
Processing Options (Picture Mode)
68
Making Fi Ne Adjustments to Sharpness (Sharpness)
69
Making Fi Ne Adjustments to Contrast (Contrast)
69
Making Fi Ne Adjustments to Saturation (Saturation)
69
Making Fi Ne Adjustments to Tone (Gradation)
70
Setting the Color Reproduction Format (Color Space)
71
Movie Sound Options (Recording Sound with Movies)
72
Adding Effects to a Movie
72
Playback
74
Information Display During Playback
74
Playback Image Information
74
Switching the Information Display
75
Viewing Photographs and Movies
76
Index Display/Calendar Display
77
Viewing Still Images
77
Volume
78
Watching Movies
79
Protecting Images
79
Erasing Images
79
Setting a Transfer Order on Images ([Share Order])
80
Selecting Images ([Share Order Selected], [0], [Erase Selected])
80
Using the Touch Screen
81
Selecting and Protecting Images
81
Menu Functions
82
Basic Menu Operations
82
Using Shooting Menu 1/ Shooting Menu 2
83
Formatting the Card (Card Setup)
83
Deleting All Images (Card Setup)
83
Returning to Default Settings (Reset)
84
Registering Favorites Settings (Myset)
84
Processing Options (Picture Mode)
85
Image Quality (K)
85
Digital Zoom (Digital Tele-Converter)
86
Setting the Self Timer (J/Y)
86
Shooting Automatically with a Fi Xed Interval (I Time Lapse Shooting)
87
Varying Settings over a Series of Photographs (Bracketing)
88
Taking HDR (High Dynamic Range) Images
91
Recording Multiple Exposures in a Single Image (Multiple Exposure)
92
Keystone Correction and Perspective Control (Keystone Comp.)
93
Setting Anti-Shock/Silent Shooting (Anti-Shockz/Silent[♥])
94
Wireless Remote Control Fl Ash Photography
94
Using the Playback Menu
95
Displaying Images Rotated (R)
95
Editing Still Images
95
Canceling All Protections
97
Using the Setup Menu
98
Date/Time Setting)
98
W (Changing the Display Language)
98
I (Monitor Brightness Adjustment)
98
Rec View
98
Wi-Fi Settings
98
Menu Display
98
Firmware
98
Using the Custom Menus
99
R Af/Mf
99
S Button/Dial
100
T Release/J
100
U Disp/8/Pc
101
Exp/P/Iso
103
W # Custom
104
K/Color/Wb
104
Y Record/Erase
105
Z Movie
106
Built-In EVF
108
Ael/Afl
109
K K Utility
109
MF Assist
110
Viewing Camera Images on TV
110
Using the Tv Remote Control
111
Choosing the Control Panel Displays (Kcontrol Settings)
112
Adding Information Displays
113
Shutter Speeds When the Fl Ash Fi Res Automatically
114
Combinations of Movie Image Sizes and Compression Rates
114
Selecting the Display Style of the Viewfi Nder
115
Connecting the Camera to a Smartphone
116
Connecting to a Smartphone
117
Transferring Images to a Smartphone
118
Shooting Remotely with a Smartphone
118
Adding Position Information to Images
119
Changing the Connection Method
120
Changing the Password
120
Cancelling a Share Order
121
Initializing Wireless LAN Settings
121
Computer and a Printer
122
Connecting the Camera to a Computer and a Printer
122
Connecting the Camera to a Computer
122
Copying Pictures to a Computer
122
Installing the PC Software
123
Direct Printing (Pictbridge)
125
Easy Printing
125
Custom Printing
126
Print Reservation (DPOF)
127
Creating a Print Order
127
Removing All or Selected Pictures from the Print Order
128
Battery, Battery Charger, and Card
129
Battery and Charger
129
Using Your Charger Abroad
129
Usable Cards
130
Record Mode and Fi Le Size/Number of Storable Still Pictures
131
Interchangeable Lenses
132
Using Separately Sold Accessories
133
External Fl Ash Units Designated for Use with this Camera
133
Wireless Remote Control Fl Ash Photography
133
Other External Fl Ash Units
134
Principal Accessories
135
System Chart
136
Information
138
Shooting Tips and Information
138
The Camera Does Not Turn on Even When a Battery Is Loaded
138
No Picture Is Taken When the Shutter Button Is Pressed
138
Functions that Cannot be Selected from Menus
139
Error Codes
140
Cleaning and Storing the Camera
142
Cleaning the Camera
142
Storage
142
Cleaning and Checking the Image Pickup Device
142
Pixel Mapping - Checking the Image Processing Functions
143
Menu Directory
144
Q Playback Menu
145
Setup Menu
145
Custom Menu
145
Quick Sleep Mode
150
Default Myset Options
151
Specifi Cations
153
Safety Precautions
156
Handling the Camera
157
Using the Wireless Lan Function
157
Battery Charger
159
Disclaimer of Warranty
159
Legal and Other Notices
159
Copyright Notice
160
Fcc Notice
160
Index
166
Iauto (A)
167
Advertisement
Related Products
Olympus E-M1
Olympus E M10 Pancake Kit Silver
Olympus E-M1 MARK II
Olympus E-M10 Mark III
Olympus E-M1X
Olympus E-M1 Mark III
Olympus E-M10 Mark IV
Olympus E-M5 Mark II
Olympus E-M5Mark II
Olympus E-M5 Mark III
Olympus Categories
Digital Camera
Voice Recorder
Microscope
Camera Accessories
Camera Lens
More Olympus Manuals
Login
Sign In
OR
Sign in with Facebook
Sign in with Google
Upload manual
Upload from disk
Upload from URL