Sign In
Upload
Manuals
Brands
Olivetti Manuals
Printer
d-COLOR MF652
Olivetti d-COLOR MF652 Manuals
Manuals and User Guides for Olivetti d-COLOR MF652. We have
12
Olivetti d-COLOR MF652 manuals available for free PDF download: Operation Manual, Quick Assist Manual, User Manual, Network Fax Operations, Quick Start Manual, Troubleshooting Manual
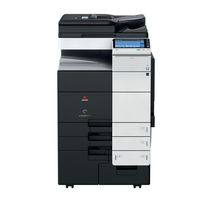
Olivetti d-COLOR MF652 Operation Manual (463 pages)
Box Operations
Brand:
Olivetti
| Category:
All in One Printer
| Size: 16.41 MB
Table of Contents
Table of Contents
3
1 About the Boxes
15
Box Screen
17
Available Operations with User Box
18
Available Operations with System Box
19
[Secure Print]
19
[Memory RX]
19
[ID & Print]
20
[Bulletin]
20
[Polling TX]
20
[Annotation]
21
6 Annotate Files ([Annotation])
21
Annotation]
21
[File Re-TX]
21
[Password Encrypted PDF]
21
[External Memory]
22
[Mobile/Pda]
22
[Relay User Box]
22
2 Store Documents as Files in MFP and Use Them Again When Necessary
23
Boxes for Document Storage and Readout (User Box)
25
Available Operations with User Box
25
Type of User Boxes
26
Rules to Use User Boxes
27
Public User Box
27
Personal User Box
27
Group User Box
28
When Using a Combination of Personal User Box and Group User Box
29
Create User Box
30
Create an Annotation User Box
30
Save File in a User Box
31
Save (Basic Operation Flow)
31
Save Files in Copy Mode
32
Save File in Fax/Scan Mode
32
Save Files from a PC
32
Save File from a USB Memory
33
Save File from Bluetooth Device
33
Print File in a User Box
34
Print (Basic Operation Flow)
34
Print Files in a User Box
34
Print Multiple Files at the same Time (Combine)
36
Send Files in a User Box
39
Sending (Basic Operation Flow)
39
Set a Destination
41
Select a Destination from the Address Book
41
Searching for Destination
42
Direct Input
43
Select File from the History
43
Search for Mail Address or Fax Number from the LDAP Server
44
Send Multiple Files at the same Time (Combine TX)
45
Specify the Destination (for Combine TX)
47
Select a Destination from the Address Book
47
Searching for Destination
48
Direct Input
49
Select File from the History
49
Search for E-Mail Address from the LDAP Server
50
Organize Files in a User Box
51
Operation Flow
51
Delete a File
52
Rename a File
52
Move File to Another User Box
53
Copy File to Another User Box
53
Edit a Page
54
Save File in a USB Memory
55
Store File as an Overlay Image
56
Check the File Information
57
Operate a User Box from the PC
58
Operate a User Box Via Web Connection
58
Open User Box
58
Print Files in a User Box
59
Send Files in a User Box
61
Download Files in a User Box to the PC
63
Move or Copy Files in a User Box to Another User Box
65
Delete Files from a User Box
66
Operate a User Box Using the Box Operator
67
3 Receive Fax in Memory and Print It Later ([Memory RX])
69
Memory RX]
71
Print Fax from the Memory RX User Box
72
Organize Faxes in a User Box
74
Operation Flow
74
Delete a File
75
Rename a File
76
Check the File Information
76
4 Retransmit Fax if Redialing Has Failed ([File Re-TX])
77
File Re-TX]
79
Send Fax from Fax Transmit User Box
80
Sending (Basic Operation Flow)
80
Set a Destination
82
Select a Destination from the Address Book
82
Searching for Destination
83
Direct Input
84
Select File from the History
84
Print Fax from the Memory RX User Box
85
Organize Faxes in a User Box
87
Operation Flow
87
Delete a File
88
Check the File Information
88
5 Print Classified Documents ([Secure Print])
89
Secure Print]
89
Secure Print]
91
Print Files in a User Box
92
Print (Basic Operation Flow)
92
Print (if [Prohibited Functions When Authentication Error] Is Set to [Mode 2])
94
Organize Files in a User Box
97
Operation Flow
97
Delete a File
98
Rename a File
99
Check the File Information
99
Annotation]
103
Save (Basic Operation Flow)
105
Save Files in Copy Mode
107
Print Files in a User Box
108
Send Files in a User Box
110
Set a Destination
113
Searching for Destination
114
Direct Input
115
Search for E-Mail Address from the LDAP Server
116
Organize Files in a User Box
117
Delete a File
118
Rename a File
119
Check the File Information
121
Password Encrypted PDF]
125
Store File in User Box, or Print File from User Box
126
Organize Files in a User Box
128
Delete a File
129
Polling TX]
133
11 Print on MFP under Authentication Control ([ID & Print])
134
Print Files in a User Box
134
Organize Files in a User Box
135
Delete a File
136
Check the File Information
138
Bulletin]
141
Create Bulletin Board User Box
142
Print Files in a User Box
143
Organize Files in a User Box
145
Delete a File
146
Relay User Box]
147
Create a Relay User Box
149
10 Use as Fax Transponder ([Relay User Box])
150
Operations Required to Use this Function
150
Register the Fax Recipients
150
Create a Relay User Box
151
Organize Files in a User Box
158
Delete a File
159
Check the File Information
160
External Memory]
163
12 Use a USB Memory Device ([External Memory])
164
Supported USB Memory Devices
164
Print a File from a USB Memory Device
165
Save Scanned Data on a USB Memory
168
Store USB Memory Files in External Memory User Box
170
Mobile/Pda]
175
13 Use Bluetooth Devices ([Mobile/Pda])
176
Supported Bluetooth Devices
176
Print File by Bluetooth Communication
177
Save File by Bluetooth Communication
179
Advertisement
Olivetti d-COLOR MF652 Operation Manual (253 pages)
Copy Operations
Brand:
Olivetti
| Category:
All in One Printer
| Size: 9.12 MB
Table of Contents
Table of Contents
3
1 Copy Operations
11
Making a Copy (Basic Operation Flow)
13
Interrupt Copy
16
Checking the Finish before Copying
18
Checking the Preview Image before Copying
18
Making a Trial Printing (Proof Copy)
21
Recalling a Program for Copying
24
Copy Program
24
Registering a Copy Program
24
Recalling a Copy Program for Copying
26
2 Recalling Frequently Used Functions with Simple Action
29
Collectively Displaying the Copy Settings
31
Arranging Frequently Used Copy Settings in the Main Screen
31
Arranging Frequently Used Finishing Settings in the Main Screen
32
3 Specifying the Color and Image Quality for Copying
33
Selecting the Copy Color ([Color])
35
Selecting the Appropriate Image Quality for the Contents of the Original ([Original Type])
35
Adjusting the Copy Density ([Density])
35
Adjusting the Background Density of the Original ([Bkgd. Removal])
36
Enhancing Text against the Background ([Text Enhancement])
36
Making the Image Glossy ([Glossy])
36
Reversing the Contrast and Color ([Neg-/Pos. Reverse])
36
Applying a Color to the Background ([Background Color])
37
Adjusting the Color Quality According to the Original ([Color Adjust])
37
4 Saving the Number of Print Sheets
39
Copying on both Sides of Paper ([Duplex])
41
Copying Multiple Pages on the same Side of a Single Sheet ([Combine])
43
Copying an Original Image Repeatedly on the same Side of a Single Sheet ([Image Repeat])
45
Skipping Blank Pages ([Blank
45
5 Specifying the Size or Type of the Paper to be Copied
47
Selecting the Size and Type of Paper ([Paper])
49
Copying on Paper of a Special Size ([Custom Size])
49
Copying on a Wide Paper ([Wide Paper])
49
Changing the Paper Setting of the Paper Tray ([Change Tray Settings])
49
6 Binding Copied Paper
51
Staple Papers ([Staple])
53
Punching the Printed Sheets ([Punch])
53
Folding/Biding ([Fold/Bind])
54
Outputting by Sets ([Group/Sort])
55
Outputting by Page Number or by Set ([Offset])
55
Printing in a Booklet Format ([Booklet])
55
Adding Margin on Pages
56
7 Specifying the Original Size and Scan Method
57
Specifying the Original Size ([Original Size])
57
Specifying the Binding Position of the Original ([Binding Position])
59
Specifying the Original Loading Direction ([Original Direction])
59
Scanning Originals of Different Sizes at One Time ([Mixed Original])
60
Scanning an Original Thinner than Normal Paper ([Thin Paper Original])
61
Scanning a Folded Original ([Z-Folded Original])
61
Scanning While Removing Dust in the Slit Glass ([Despeckle])
61
Scanning a Number of Originals in Several Batches ([Separate Scan])
62
Copying Multiple Originals in Different Settings Collectively ([Program Jobs])
63
8 Copying Various Types of Originals
67
Copying the Front and Back Sides of a Card on the same Side of a Single Sheet ([Card Shot])
69
Splitting the Left and Right Pages of a Book and Catalog ([Book Original])
70
Splitting the Left and Right Pages of Two-Page Spreads
71
Copying an Index Original on Index Paper ([Tab Original])
71
Copying a Catalog ([Booklet Original])
72
9 Adjusting the Layout for Copying
75
Enlarging or Reducing an Image for Copying ([Zoom])
77
Copying a Poster-Sized Image ([Poster Mode])
77
Copying the Original Image Without Margin ([Image Adjust])
77
Reversing the Left and Right of the Original Image ([Mirror Image])
78
Fine-Tuning the Print Position ([Image Shift])
78
Copying the Original in the Loading Direction with no Rotation ([Auto Rotate])
78
10 Inserting a Cover Sheet or Blank Sheet into Copied Documents
79
Inserting Front and Back Covers ([Cover Sheet])
81
Inserting Paper between Transparencies ([OHP Interleave])
81
Inserting a Different Sheet into the Specified Page ([Insert Sheet])
82
Arranging the First Page of the Chapter on the Front Side ([Chapters])
82
Inserting an Original into the Specified Page ([Insert Image])
83
11 Adding Text or an Image to the Original
85
Adding the Date and Time ([Date/Time])
87
Adding a Page Number
87
Adding a Stamp ([Stamp])
87
Adding a Watermark ([Watermark])
88
Add Information to Header/Footer ([Header/Footer])
88
Composing an Overlay Image ([Overlay])
88
Composing Stored Images ([Registered Overlay])
89
12 Erasing an Unnecessary Portion for Copying
91
Erasing Text and Shadows in the Margins of an Original ([Frame Erase])
93
Erasing Shadows Outside the Original ([Non-Image Area Erase])
93
13 Deterring Unauthorized Copying
95
Printing a Concealed Security Watermark ([Copy Protect])
97
Adding a Stamp on the Entire Page ([Stamp Repeat])
97
Add Copy Restriction Information ([Copy Guard])
98
Adding a Password ([Password Copy])
98
14 Saving Original Images to a User Box
103
Olivetti d-COLOR MF652 User Manual (285 pages)
Print Operations
Brand:
Olivetti
| Category:
All in One Printer
| Size: 8.16 MB
Table of Contents
Table of Contents
3
1 Printer Functions
11
Overview
13
System Environment Requirements
14
Cable Connection Locations on this Machine
15
2 Printing in the Windows Environment
17
Preparation for Printing (Network Connection)
19
Overview
19
Before Installing the Printer Driver (for Administrators)
19
Preparation Flow
19
Checking the LAN Cable Connection
20
Checking the Network Settings
20
Configuring the Network Printing Environment
20
Allowing Device Information to be Acquired from the Printer Driver
21
Easy Installation Process of the Printer Driver
21
Installation Flow
21
Checking the Printer Driver Type
21
Checking the Operating Systems Supported by the Printer Driver
21
Installation Procedure
23
Configuring the Default Settings of the Printer Driver
24
Configuring the Optional Environment of this Machine
24
Changing the Default Print Settings
25
Preparation for Printing (USB Connection)
26
Overview
26
Easy Installation Process of the Printer Driver
26
Installation Flow
26
Checking the Printer Driver Type
26
Checking the Operating Systems Supported by the Printer Driver
26
Changing the Installation Settings (Windows 7 or Windows Server 2008 R2)
28
Installation Procedure
29
Configuring the Default Settings of the Printer Driver
30
Configuring the Optional Environment of this Machine
30
Changing the Default Print Settings
31
Printing Procedure
32
Printing Operation Flow
32
Easily Recalling Frequently Used Print Settings
33
Registering Frequently Used Print Settings
33
Customizing the Setting Window
34
Useful Printing Functions
36
Changing the Paper Size or Type
36
Enlarging or Reducing to the Paper Size ([Paper Size])
36
Enlarging or Reducing by the Desired Zoom Ratio ([Zoom])
37
Printing on Custom Size Paper ([Original Size])
38
Specifying the Paper Type ([Paper Type])
39
Specifying the Paper Tray ([Paper Tray])
40
Printing on Postcards
41
Printing on Paper in Multiple Trays ([Carbon Copy])
42
Printing Multiple Sets of Copies
43
Specifying the Number of Copies ([Copies])
43
Printing by Sets ([Collate]/[Offset])
44
Saving the Number of Printed Sheets
45
Printing Multiple Pages on the same Side of a Single Sheet ([Combination])
45
Printing on both Sides of Paper ([2-Sided])
46
Skipping Blank Pages ([Skip Blank
47
Binding Printed Sheets
48
Adding Margin on Pages ([Binding Margin])
48
Staple Papers ([Staple])
49
Binding in the Center of the Paper ([Center Staple and Fold])
50
Punching the Printed Sheets ([Punch])
51
Folding Papers ([Fold])
52
Printing in a Booklet Format ([Booklet])
53
Specifying the Output Tray ([Output Tray])
53
Adjusting the Layout
54
Printing a Poster-Sized Image ([Combination]) (PCL Only)
54
Rotating the Image 180 Degrees ([Rotate 180])
55
Fine-Tuning the Print Position ([Image Shift])
56
Adding Text or an Image to the Original
57
Adding a Watermark ([Watermark])
57
Registering/Editing a Watermark
58
Composing an Overlay Image ([Overlay])
59
Creating an Overlay Image in the Computer
61
Creating an Overlay Image in a Shared Folder
62
Adding the Print Date/Time or Page Number ([Date/Time]
63
Add Information to Header/Footer ([Header/Footer])
65
Deterring Unauthorized Copying
66
Printing a Concealed Security Watermark ([Copy Protect])
66
Printing a Stamp on the Entire Page ([Stamp Repeat])
67
Add Copy Restriction Information ([Copy Guard])
67
Add a Password ([Password Copy])
68
Configuring the Print Settings for Copy Security
69
Inserting Paper into the Original
71
Inserting Front and Back Covers ([Front Cover]/[Back Cover])
71
Inserting Front and Back Covers ([Front Cover from Post Inserter]/ [Back Cover from Post Inserter])
72
Inserting Front/Back Covers
72
Inserting Paper between Transparencies ([Transparency Interleave])
73
Inserting Paper between Transparencies ([Transparency Interleave:])
73
Inserting Paper into the Specified Pages ([Per
74
Specifying the Color and Image Quality
76
Selecting Colors for Printing ([Select Color])
76
Selecting Colors for Printing ([Select Color:])
76
Fine-Tuning the Image Quality According to the Original ([Quality Adjustment])
77
Selecting the Optimum Color Representation for the Original ([Color Settings])
78
Selecting the Optimum Color Representation for the Original ([Color Settings:])
78
Specifying the Graphic Pattern Density ([Pattern]) (PCL/XPS Only)
78
Specifying the Compression Ratio of Graphic Images ([Image Compression]) (PCL Only)
79
Making the Image Glossy ([Glossy Mode])
79
Preventing the Generation of White Space Around Images ([Auto Trapping]/ [Black over Print]) (PS Only)
80
Saving Toner ([Toner Save])
80
Preventing the Generation of White Space Around Images ([Auto Trapping]/ [Black over Print:])
80
Sharpening the Border between Text Etc. ([Edge Enhancement])
81
Specifying Font Processing ([Font Settings]) (PCL/PS Only)
82
Preventing Failure in Printing Thin Lines ([Thin Line Support]) (PCL Only)
83
Convert Colors According to the RGB Values of the Original. ([Convert to Gray Scale]) (PCL Only)
83
Using ICC Profiles (PS Only)
84
Specifying the ICC Profiles for Printing
84
Using ICC Profiles
84
Adding ICC Profiles to the Printer Driver
85
Printing Microsoft Excel/Powerpoint Data
86
Printing Multiple Excel Sheets at One Time (in 32-Bit System Environment Only)
86
Composing and Printing an Image Correctly in Powerpoint (for PCL/XPS in 32-Bit System Environment Only)
87
Previewing the Print Image (XPS Only)
88
Printing Options
89
Making a Trial Printing ([Proof Print])
89
Proof Print
89
How to Print from the Computer
89
Operations on this Machine
90
Printing Highly Confidential Documents ([Secure Print])
91
Secure Print
91
How to Print from the Computer
91
Operations on this Machine
92
Saving Originals in the Box on this Machine ([Save in User Box])
93
Save in User Box
93
Operations Required to Use this Function
93
How to Print from the Computer
93
Using Data Saved in a Box
94
Attaching Authentication Information
95
Printing When Authentication Is Set
95
Operations Required to Use this Function
96
How to Print from the Computer
97
Printing at the same Time as Authentication (ID & Print)
98
Printing at the same Time as Authentication ([ID&Print])
98
ID & Print
98
How to Print from the Computer
99
Operations on this Machine
100
Operations on this Machine (When an Authentication Unit Is Used)
100
Printing in the Single Sign-On Environment of Active Directory
101
Single Sign-On
101
Operations Required to Use this Function
101
Printing Procedure
102
Printing on Banner Paper
103
Printable Paper
103
How to Print on Banner Paper
104
Changing the Encryption Passphrase
106
Encryption Passphrase
106
Operations Required to Use this Function (for Administrators)
107
Setting the Printer Driver
108
Printing Procedure
109
Printing Using the PPD Driver for Applications
109
PPD Driver for Applications
109
Setting Items in the Printer Driver
110
Properties] Window of the Printer Driver
110
How to Display the [Properties] Window
110
Tabs Provided by Windows
110
Available Operations in the [Configure] Tab
111
Available Operations in the [Settings] Tab
112
Printing Preferences] Window of the Printer Driver
114
How to Display the [Printing Preferences] Window
114
Items Common to each Tab
115
Available Operations in [My Tab]
116
Available Operations in
116
Available Operations in the [Basic] Tab
117
Available Operations in the [Layout] Tab
119
Available Operations in the [Finish] Tab
120
Available Operations in the [Cover Mode] Tab
121
Available Operations in the [Stamp/Composition] Tab
122
Available Operations in the [Quality] Tab
124
Available Operations in the [Other] Tab
126
Deleting the Printer Driver
127
Deletion Using the Deletion Program
127
Deletion Using the Installer
127
Appendix: Manual Installation Process of the Printer Driver
128
Checking the Connection Method
128
In Windows Vista/7/Server 2008/Server 2008 R2
128
In Windows Xp/Server 2003
129
Installation Using an Lpr/Port 9100 Connection
129
Operations Required to Use this Function (for Administrators)
129
In Windows Vista/7/Server 2008/Server 2008 R2
130
In Windows Xp/Server 2003
132
Installation Using a SMB Connection
133
Operations Required to Use this Function (for Administrators)
133
In Windows Vista/7/Server 2008/Server 2008 R2
133
In Windows Xp/Windows 2003
135
Installation Using an IPP/IPPS Connection
137
Operations Required to Use this Function (for Administrators)
137
In Windows Vista/7/Server 2008/Server 2008 R2
137
In Windows Xp/Server 2003
138
Installation Using a Web Service Connection
139
Web Service
139
Operations Required to Use this Function (for Administrators)
139
Installation Methods
139
Installation Using a USB Connection
141
In Windows Vista/7/Server 2008/Server 2008 R2
141
In Windows Xp/Server 2003
141
Updating the Printer Driver
142
Manually Deleting the Printer Driver
143
Advertisement
Olivetti d-COLOR MF652 Operation Manual (219 pages)
Scan Operations
Brand:
Olivetti
| Category:
All in One Printer
| Size: 9.02 MB
Table of Contents
Table of Contents
3
1 Scan-To-Send Function
9
Operations Available with Scan-To-Send Function
11
How to Send
12
Sending (Basic Operation Flow)
12
Checking the Finish before Sending
14
Sending a Fax by Recalling a Program
16
Fax/Scan Program
16
Registering a Fax/Scan Program
16
Sending a Fax by Recalling a Fax/Scan Program
19
Specifying a Destination
21
Selecting from Address Book
21
Specifying a Group
22
Searching for Destinations
23
Direct Input
24
Selecting from the History
25
Searching for an E-Mail Address through the LDAP Server
26
Scan Option Settings
27
Basic Options such as Color and Original Size
27
Scanning a 2-Sided Original ([Simplex/Duplex])
27
Specifying the Resolution of an Original for Scanning ([Resolution])
27
Selecting the Color Mode to Scan the Original ([Color])
27
Specifying the File Type Used to Save the Scanned Original Data ([File Type])
27
Specifying the Original Size for Scanning ([Scan Size])
28
Changing a File Name ([E-Mail Settings])
28
Changing a Subject and Message Text of an E-Mail ([E-Mail Settings])
29
Settings to Scan Various Types of Originals (Application Settings)
29
Scanning Originals of Varying Sizes in a Batch ([Mixed Original])
29
Scanning an Original that Is Thinner than Plain Paper ([Thin Paper Original])
29
Scan Originals with Folds ([Z-Folded Original])
30
Scanning a Long Original ([Long Original])
30
Specifying the Original Loading Direction ([Original Direction])
30
Specifying the Original Binding Position ([Binding Position])
31
Scanning While Removing Dust from the Slit Glass ([Despeckle])
31
Skipping Blank Pages ([Blank
31
Splitting the Left and Right Pages of a Book and Catalog ([Book Original])
31
Scanning a Number of Originals ([Separate Scan])
32
Adjusting Image Quality Level/Density (Application Settings)
34
Selecting the Appropriate Image Quality Level for the Original ([Original Type])
34
Adjusting the Density to Scan the Original ([Density])
34
Adjusting the Background Density of the Original ([Bkgd. Removal])
34
Adding a Stamp/Page Number (Application Settings)
35
Adding a Date and Time ([Date/Time])
35
Adding the Page Number
35
Adding a Stamp ([Stamp])
35
Adding Information to the Header/Footer ([Header/Footer])
36
Other Option Settings (Application Settings)
36
Scanning after Erasing Text and Shadows in the Margins of an Original ([Frame Erase])
36
Sharpening the Border between Text Etc. ([Sharpness])
36
Adding a Filing Number to Original Data ([Annotation User Box])
37
Sending and Printing at the same Time ([Save & Print])
37
2 Sending Original Data as an E-Mail Attachment (Scan to E-Mail)
39
Scan to E-Mail Function
41
Preparation for Scan to E-Mail (for the Administrators)
42
Preparation Flow
42
Operations Required to Use this Function
43
Checking a LAN Cable for Connection
43
Checking the Network Settings
43
Configuring the Environment to Use the Scan to E-Mail Function
43
Option Settings
43
Registering a Frequently Used Destination
43
Using an LDAP Server to Specify Addresses
43
Registering the Subject and Message Text of an E-Mail to be Sent
43
Registering a Prefix and Suffix of each Destination
44
Using SMTP Authentication
44
Using POP before SMTP Authentication
44
Using an SSL/TLS Communication
44
Using S/MIME
44
How to Send
45
Application Functions
47
Sending to Your Address (Scan to Me)
47
Scan to Me
47
Operations Required to Use this Function (for the Administrator)
47
Operation Flow
48
Encrypting an E-Mail and Adding a Digital Signature (S/MIME)
49
S/Mime
49
Operations Required to Use this Function (for the Administrator)
49
Operation Flow
50
3 Sending a File to a Shared Folder of a Computer (SMB Send)
53
SMB Send Function
55
Preparation for SMB Send
56
Preparation Flow
56
Computer Side: Steps Required to Use this Function
57
When Using Windows 7
57
When Using Windows Vista
58
When Using Windows XP
59
When Using Mac os X 10.6
60
Machine Side: Steps Required to Use this Function (for the Administrator)
61
Checking a LAN Cable for Connection
61
Checking the Network Settings
61
Configuring the SMB Send Environment
61
Option Settings
62
Registering a Frequently Used Destination
62
Using the WINS Server
62
Using the Direct Hosting SMB Service
62
Using LLMNR
62
Using in the DFS Environment
62
How to Send
63
Application Functions
65
Sending to Your Computer (Scan to Home)
65
Scan to Home
65
Operations Required to Use this Function (for the Administrator)
65
Operation Flow
66
Notifying Where to Save Original Data by E-Mail (URL Notification)
67
URL Notification
67
Operations Required to Use this Function (for the Administrator)
67
Operation Flow
68
Olivetti d-COLOR MF652 User Manual (194 pages)
Fax Operations
Brand:
Olivetti
| Category:
All in One Printer
| Size: 6.16 MB
Table of Contents
Table of Contents
3
1 Fax Functions
11
2 Setting up for Faxing (for the Administrator)
13
Preparation Flow
15
Operations Required to Use Fax Functions
16
Checking the Modular Cable Connection
16
Specifying the Type of Telephone Line
16
Making Preparations for Using the Machine in a Private Branch Exchange (PBX) Environment
16
Selecting a Receiving Method
16
Registering Header Position
16
Setting the Date and Time for the Machine
16
Option Settings
17
Registering Frequently Used Fax Numbers
17
Setting up the Usage of an Additional Line
17
Using an LDAP Server to Specify Addresses
17
3 How to Send a Fax
19
Sending (Basic Operation Flow)
21
Sending after Checking the State on the Recipient Side (Manual Transmission)
23
Manual Transmission
23
Faxing Manually
23
Checking the Finish before Sending
26
Sending a Fax by Recalling a Program
29
Fax/Scan Program
29
Registering a Fax/Scan Program
29
Sending a Fax by Recalling a Fax/Scan Program
31
Specifying a Destination
33
Selecting from Address Book
33
Specifying a Group Destination
34
Searching for a Destination
35
Direct Input
36
Selecting from the History
36
Searching for a Fax Number from the LDAP Server
37
Option Settings for Fax TX
38
Basic Option Settings
38
Scanning a Double-Sided Original ([Simplex/Duplex])
38
Specifying the Resolution to Scan the Original ([Resolution])
38
Specifying the Original Size ([Scan Size])
38
Settings to Scan Various Types of Originals (Application Settings)
39
Scanning Originals of Different Sizes at One Time ([Mixed Original])
39
Scanning an Original Thinner than Normal Paper ([Thin Paper Original])
39
Scanning a Folded Original ([Z-Folded Original])
39
Scanning a Long Original ([Long Original])
40
Specifying the Original Loading Direction ([Original Direction])
40
Specifying the Binding Position of the Original ([Binding Position])
40
Scanning While Removing Dust in the Slit Glass ([Despeckle])
40
Skipping Blank Pages ([Blank
41
Split the Left and Right Pages of a Book and Catalog ([Book Original])
41
Scanning a Number of Originals in Several Batches ([Separate Scan])
42
Adjusting the Image Quality or Density (Application Settings)
43
Selecting the Appropriate Image Quality for the Contents of the Original ([Original Type])
43
Specifying the Density to Scan the Original ([Density])
43
Adjusting the Background Density of the Original ([Bkgd. Removal])
43
Adding a Stamp or Page Number (Application Settings)
44
Add the Date and Time ([Date/Time])
44
Adding a Page Number
44
Adding a Stamp ([Stamp])
45
Adding the Header/Footer ([Header/Footer])
45
Printing TX Stamp on Scanned Originals ([TX Stamp])
46
Other Option Settings (Application Settings)
47
Scanning the Original by Erasing the Frame of the Original by the Specified Width ([Frame Erase])
47
Sharpen the Border between Text Etc. ([Sharpness])
47
Sending and Printing at a Time ([Save & Print])
47
4 Sending Options
49
Sending by Renaming the Sender ([Fax Header Settings])
51
Sender Information
51
Operations Required to Use this Function (for Administrators)
51
Operation Flow
52
Resending a Fax
53
Auto Resending (Auto Redial)
53
Manual Resending
54
Resending a Fax for Which the Fax Number Could Not be Redialed
55
Fax Retransmit
55
Operations Required to Use this Function (for Administrators)
55
Operation Flow
55
Sending a Fax at Preset Time ([Timer TX])
56
Timer TX
56
Operation Flow
56
Checking the Destination Fax Number before Sending a Fax ([Check Dest. and Send])
58
Check Dest. & Send
58
Operation Flow
58
Sending a Fax after Specifying a Relay Station ([F-Code TX])
59
Relay Distribution
59
Operation Flow
60
Sending a Confidential Fax ([F-Code TX])
61
Confidential Communication
61
Operation Flow
62
Sending a Fax Using an Additional Line ([Select Line])
63
Using an Additional Line
63
Operations Required to Use this Function (for Administrators)
63
Operation Flow
64
Sending a Fax after Canceling ECM Mode ([ECM])
65
Ecm
65
Operation Flow
65
Sending a Fax after Canceling the Super G3 Mode ([V.34])
66
V34
66
Operation Flow
66
Sending One Scanned Page at a Time ([Quick Memory Send])
67
Quick Memory TX
67
Operation Flow
67
Faxing Overseas ([Overseas TX])
68
Overseas TX
68
Operation Flow
68
Sending a Fax with a Password ([Password TX])
69
Password TX
69
Operation Flow
69
Registering a File for Polling ([Polling TX])
70
Polling TX
70
Operation Flow
71
Registering a File for Polling on the Bulletin Board ([Polling TX])
72
Polling TX (Bulletin Board)
72
Operations Required to Use Polling TX (Bulletin)
72
Operation Flow
73
Olivetti d-COLOR MF652 Quick Assist Manual (296 pages)
Brand:
Olivetti
| Category:
All in One Printer
| Size: 25.05 MB
Table of Contents
Table of Contents
3
1 About this Machine
7
Introduction to User's Guide
9
2 Print
11
Q1. Can I Print Data on an Envelope or Postcard
13
Q2. Although User Authentication Has Been Successful, the Input Screen in the Driver Is Grayed out
15
Q3. Can I Print on Custom Size Paper
16
Q4. How Can I Print out Highly Confidential Data Without a Risk of Exposure to Others
18
Q5. Can I Directly Print a File in a USB Memory Device
21
Q6. Characters Become Garbled When I Print. Can I Print Without Garbled Characters Being Produced
23
Q7. How Can I Print out Data as Clearly as Possible
24
Q8. How Can I Change the Paper Size and Type Settings
25
Q9. Can Printing be Restricted by User
26
Q10. Are There any Paper-Saving Printing Methods
29
Q11. Can the Printing Position be Adjusted
30
Q12. What Types Are Available for Printing Finish
33
Q13. Can I Print the Cover and Chapter Cover on a Different Type of Paper
35
Q14. Can I Print Characters and Images so as to Have Them Overlapped
39
Q15. Can I Customize the Print Settings Window
43
Q16. Can I Print on very Long Sheets of Paper such as a Banner
47
Q17. Is It Possible to Configure so that Black-And-White Printing Is Always Enabled
50
3 Scan
51
Q1. What Types of File Formats Are Available for Scanned Images
53
Q2. Can I Use the Scanning Function by Connecting to the Network with a USB Cable
54
Q3. Can I Send Scanned Data to My PC Without Disabling the Firewall Setting
55
Q4. the FTP TX Function Does Not Work for Sending Data to a Destination
56
Q5. Can Frequently Used Destinations be Registered
57
Q6. How Can I Send Clear Images of Text in a Fine Font or of Photos
60
Q7. Can I Send Data in a Selected File Type or Color Mode
62
Q8. Can I Send Scanned Data with Page Numbers and a Time Stamp
64
Q9. the Back of the Original Can be Seen Through. How Can I Make Adjustment so that the Back May Not Bleed into the Scanned Image
66
Q10. Can I Scan the Original with Its Headers and Punch Holes Erased
67
Q11. Can I Send an E-Mail to a Number of Destinations at One Time
69
Q12. Can I Send Scanned Data by E-Mail
71
Q13. Can I Send Scanned Data to My Computer
72
Q14. Can I Check the Transmission Log for Scanning
73
4 Fax
75
Q1. Can Frequently Used Fax Numbers be Registered
77
Q2. Can I Check Fax Transmission and Reception Logs
80
Q3. Can I Send a Fax to a Number of Destinations at One Time
81
Q4. Can I Register more than One Sender Name to Appear on Faxes so that Different Ones Can be Used in Different Use Cases
83
Q5. How Can I Send Clear Faxes
85
Q6. Can I Send a Fax Upon Request from a Remote Machine
87
Q7. How Can I Cut down on Communications Fees for Sending out Data
88
Q8. Is It Possible to Cut down on the Communications Expenses by Using a Network
90
Q9. How Can I Avoid Printing out Unwanted Faxes
92
Q10. How Can I Send a Confidential or Important Document by Fax
94
Q11. Can I Forward an Incoming Fax
95
Q12. Can I Directly Fax a File on My Computer Without Leaving My Desk
96
Q13. We Are Using Two Fax Lines. Can I Select a Line When Transmitting a Fax
97
Q14. Can I Specify a File Format for Internet Fax or IP Address Fax Transmission
98
Olivetti d-COLOR MF652 Network Fax Operations (166 pages)
Brand:
Olivetti
| Category:
All in One Printer
| Size: 5.28 MB
Table of Contents
Table of Contents
3
1 Network Fax Functions
9
Available Operations with Network Function
11
Internet Fax
11
IP Address Fax
11
How to Send a Fax
12
Sending (Basic Operation Flow)
12
Checking the Finish before Sending
14
Sending a Fax by Recalling a Program
16
Fax/Scan Program
16
Registering a Fax/Scan Program
16
Sending a Fax by Recalling a Fax/Scan Program
19
Specifying a Destination
21
Selecting from Address Book
21
Specifying a Group Destination
22
Searching for Destinations
23
Direct Input
24
Selecting from the History
24
Searching for an E-Mail Address from the LDAP Server
25
Option Settings for Fax Transmission
26
Basic Options such as Color and Original Size
26
Scanning a 2-Sided Original ([Simplex/Duplex])
26
Specifying the Resolution of Original for Scanning ([Resolution])
26
Selecting the Color Mode to Scan the Original ([Color])
26
Specifying the Original Size for Scanning ([Scan Size])
26
Changing a File Name ([E-Mail Settings])
27
Changing a Subject and Text of the Successful Reception E-Mail Message ([E-Mail Settings])
27
Settings to Scan Various Types of Originals (Application Settings)
28
Scanning Originals of Varying Sizes in a Batch ([Mixed Original])
28
Scanning a Thinner Original than Plain Paper ([Thin Paper Original])
28
Scan Originals with Folds ([Z-Folded Original])
28
Scanning a Long Original ([Long Original])
29
Specifying the Original Loading Direction ([Original Direction])
29
Specifying the Original Binding Position ([Binding Position])
29
Scanning While Removing Dust from the Slit Glass ([Despeckle])
29
Skipping Blank Pages ([Blank
30
Splitting the Left and Right Pages of a Book and Catalog ([Book Original])
30
Scanning a Number of Originals in Several Batches ([Separate Scan])
30
Adjusting Image Quality Level/Density (Application Settings)
32
Selecting the Appropriate Image Quality Level for the Original ([Original Type])
32
Selecting the Scanning Density of the Original ([Density])
32
Adjusting the Background Density of the Original ([Bkgd. Removal])
32
Adding a Stamp/Page Number (Application Settings)
33
Adding a Date and Time ([Date/Time])
33
Adding the Page Number
33
Adding a Stamp ([Stamp])
34
Adding the Header/Footer ([Header/Footer])
34
Printing TX Stamp on Scanned Originals ([TX Stamp])
35
Other Option Settings (Application Settings)
35
Scanning after Erasing Text and Shadows in the Margins of an Original ([Frame Erase])
35
Sharpening the Border between Text Etc. ([Sharpness])
36
Sending and Printing at the same Time ([Save & Print])
36
Changing the Sender Name before Sending a Fax ([Fax Header Settings])
36
2 Sending and Receiving an Internet Fax
37
Internet Fax Functions
39
Setting up for Internet Fax (for the Administrator)
40
Preparation Flow
40
Operations Required to Use this Function
41
Checking the LAN Cable Connection
41
Checking the Network Settings
41
Configuring the Internet Fax Environment
41
Registering Header Position
41
Setting the Date and Time for the Machine
41
Option Settings
42
Registering a Frequently Used Destination
42
Using an LDAP Server to Specify Addresses
42
Registering a Subject and Text of the Successful Reception E-Mail Message
42
Registering Prefixes and Suffixes for Destination
42
Using the SMTP Authentication
42
Using the POP before SMTP Authentication
42
SSL/TLS Communication
42
Checking a Fax Reception
43
How to Send a Fax
44
How to Receive a Fax
46
Auto Reception
46
Manual Reception
46
Receiving Options
47
Printing by Adding the Date and Time Received ([Footer Position])
47
Footer Position
47
Operations Required to Use this Function (for the Administrator)
47
Saving a Fax Which Cannot be Printed (In-Memory Proxy Reception)
47
Forcibly Saving a Received Fax in a User Box (Memory RX)
48
Memory RX
48
Operations Required to Use this Function (for the Administrator)
48
Printing a Received Fax
48
Forwarding a Received Fax to Another Destination (Forward TX)
49
Forward TX
49
Operations Required to Use this Function (for the Administrator)
49
Stopping the Fax Print During Lunch Breaks and at Night
49
Printing a Fax on both Sides of Sheets of Paper ([Duplex Print (RX)])
50
Duplex Print (RX)
50
Operations Required to Use this Function (for the Administrator)
50
Configuring the Fax Print Settings (for the Administrator)
50
Default Print Settings ([Print Paper Selection]/[Min. Reduction for RX Print])
50
Fixing the Print Paper Size ([Print Paper Size])
51
Fixing the Print Paper Tray ([Tray Selection for RX Print])
51
Splitting a Custom Size (Portrait) Fax for Printing ([Print Separate Fax
52
Printing a Report/List
53
Olivetti d-COLOR MF652 Quick Start Manual (131 pages)
d-COLOR MF652; d-COLOR MF752
Brand:
Olivetti
| Category:
All in One Printer
| Size: 12.35 MB
Table of Contents
Table of Contents
3
1 Introduction
7
Environmental Information
9
Energy Star
9
What Is an ENERGY STAR® Product
9
Environmental Benefits of Power Management
9
Recycled Paper
9
Duplex Printing
9
Safety Information
10
Warning and Precaution Symbols
10
Meaning of Symbols
10
Regulation Notices
14
CE Marking (Declaration of Conformity) for Users of the European Union (EU)
14
USER INSTRUCTIONS FCC PART 15 - RADIO FREQUENCY DEVICES (for U.S.A. Users)
14
INTERFERENCE-CAUSING EQUIPMENT STANDARD (ICES-003 ISSUE 4) (for Canada Users)
14
For Users in Countries Not Subject to Class B Regulations
14
Laser Safety
14
Internal Laser Radiation
14
CDRH Regulations
15
For European Users
15
For Denmark Users
15
For Finland, Sweden Users
15
For Norway Users
16
Laser Safety Label
17
Ozone Release
17
Acoustic Noise (for European Users Only)
17
For EU Member States Only
17
Telephone Cable (for Users in Countries Subject to Class B Regulations)
18
Caution Notations and Labels
19
Special Notice to User
20
For Europe
20
Space Requirements
21
Operation Precautions
23
Power Source
23
Operating Environment
23
Storage of Copies
23
Data Stored in this Machine
23
Legal Restrictions on Copying
24
2 About this Machine
25
Introduction to User's Guide
27
[Quick Start Guide]
27
[Quick Assist Guide]
27
User's Guides
27
About this Machine
27
Optional Components
29
Name of Parts (MFP)
31
Front Side
31
Rear Side
32
Name of Parts (Optional Units)
33
Finisher FS-535, Saddle Stitcher SD-512, Punch Kit PK-521
33
Job Separator JS-602
35
Z Folding Unit ZU-606
36
Post Inserter PI-505
37
Finisher FS-534/Saddle Stitcher SD-511/Punch Kit PK-520
38
Large Capacity Unit LU-301/LU-204
40
Power Supply
41
Turning the Power off and on
41
How to Restart
41
Operating the Power Key
42
Power Save Function
43
Manually Switching to the Power Save Mode
43
Control Panel
44
Name of Parts
44
Touch Panel
46
Main Menu
46
Layout of Main Menu
46
Customizing the Main Menu
47
Operating the Touch Panel
47
Tap
47
Double-Tap
47
Flick
48
Drag
48
Precautions on Using the Touch Panel
48
Entering Characters
49
When Typing in "Group1
49
Loading Paper
50
Loading Paper into Tray 1 or Tray 2
50
Applicable Paper Types
50
How to Load Paper
50
Loading Paper into Tray 3 or Tray 4
51
Applicable Paper Types
51
How to Load Paper
51
Loading Paper into the Large Capacity Unit
52
Applicable Paper Types
52
How to Load Paper
52
Bypass Tray
53
Applicable Paper Types
53
Applicable Paper Sizes
53
How to Load Paper
53
Olivetti d-COLOR MF652 User Manual (127 pages)
(Trademark Licenses)
Brand:
Olivetti
| Category:
All in One Printer
| Size: 5.52 MB
Table of Contents
Table of Contents
3
3 User's Guide
13
Notations and Symbols Used in this Manual
15
Procedural Instruction
15
Symbols Used in this Manual
15
Product and Key Names
16
Notations of Application Names
16
Original and Paper Indications
17
Original and Paper Sizes
17
4 Turning the Power on or off
19
Power Supply
21
Turn on the Main Power Switch
22
Turn off the Main Power Switch
22
Operating the Power Key (When Using this Machine in the Factory Default Status)
23
5 Load the Original
25
Loading the Original into the ADF
27
Original Available for ADF
27
Loading the Original into the ADF
28
Placing the Original on the Original Glass
29
Original Available on the Original Glass
29
Loading the Original into the Original Glass
29
6 Loading Paper
31
Paper
33
Confirm the Available Paper Types
33
Precautions for Correct Operations
35
Inapplicable Paper
35
Paper Storage
35
Loading Paper in Tray 1 or Tray 2
36
Loading Paper in Tray 3 or Tray 4
37
Loading Paper into the Bypass Tray
38
How to Load Paper into the Bypass Tray
38
Loading Postcards
39
Loading Transparencies
40
Loading Envelopes
41
Loading Label Sheets
42
Loading Index Papers
43
Loading Banner Papers
44
Loading Paper to the Large Capacity Unit
45
7 Trademarks and Copyrights
47
Trademark Acknowledgements
49
Openssl Statement
49
Netsnmp License
51
Kerberos
53
WPA Supplicant
55
Wide-Dhcpv6
56
Tcpdump
56
Libpcap
56
Python Software Foundation License Version 2
57
Beopen.com License Agreement for Python 2.0
57
Cnri License Agreement for Python 1.6.1
58
Cwi License Agreement for Python 0.9.0 through 1.2
58
Licenses and Acknowledgements for Incorporated Software
59
Linux Trademarks
61
Copyright
121
Note
121
Software License Agreement
122
About Adobe Color Profile
123
ICC Profile for TOYO INK Standard Color on Coated Paper (TOYO Offset Coated 3.0)
124
DIC Standard Color Profile License Agreement
125
I-Option LK-105 V3 (Searchable Pdfs) End User License Agreement
126
Olivetti d-COLOR MF652 Troubleshooting Manual (121 pages)
Brand:
Olivetti
| Category:
Printer
| Size: 13.64 MB
Table of Contents
Table of Contents
3
1 When a Paper/Staple Jam Is Occurring
5
Screen that Appears When a Paper/Staple Jam Has Occurred
7
When a Paper/Staple Jam Is Occurring
7
When a Paper Jam Is Occurring in the ADF
9
When a Paper Jam Is Occurring at the Right-Side Door
10
When a Paper Jam Is Occurring in a Paper Tray
11
When a Paper Jam Is Occurring on the Finisher FS-534
12
When a Paper Jam Is Occurring on the Finisher FS-535
12
When a Paper Jam Is Occurring on the Z Folding Unit ZU-606
16
When a Paper Jam Is Occurring on the Post Inserter PI-505
17
When a Paper Jam Is Occurring on the Job Separator JS-602
18
When a Staple Jam Is Occurring on the Finisher FS-534
19
When a Staple Jam Is Occurring on the Saddle Stitcher SD-511
20
When a Staple Jam Is Occurring on the Saddle Stitcher SD-512
20
2 Main Messages and Remedies
23
When a Message Appears to Replace Consumables or Carry out Cleaning
25
When a Paper Jam Message Persists
26
When an Error Message Appears
27
When [Stabilizing Image.] Appears
28
3 When Printing Quality Has Deteriorated
29
Cleaning the Electrostatic Charger Wire
31
Cleaning the Print Head Glass
32
4 When the Machine Cannot be Powered on
35
5 When the Touch Panel Is Not Visible
39
6 Cannot Print
43
Cannot Print
43
Main Messages and Remedies
50
Test Printing
51
Printing a File from a User Box
52
Setting an Encryption Passphrase for the Printer Driver
53
Enabling User Authentication or Account Track on the Printer Driver
54
Permitting Printing by Public Users
55
7 Cannot Perform Network Fax/Network Scan
57
Network Fax Error Code
62
Transmission System Error Code
62
Reception System Error Code
64
Printing a Destination List
65
8 Cannot Use the Fax Function
67
Cannot Transmit Faxes
69
Cannot Receive Faxes
70
G3 Fax Error Code
71
Transmission System Error Code
71
Reception System Error Code
72
Main Messages and Remedies
73
Setting [Dialing Method]
74
Setting [Check Dest. & Send]
75
Setting the Number of RX Call Rings
76
9 Cannot Copy
77
Cannot Copy
77
Main Messages and Remedies
82
Olivetti d-COLOR MF652 User Manual (95 pages)
Brand:
Olivetti
| Category:
Printer
| Size: 5.75 MB
Table of Contents
Table of Contents
3
1 Checking the Name and Function of each Part in this Machine
5
Front Side
7
Rear Side
9
Inside
11
2 Checking the Name and Function of each Optional Component
13
Checking the List of Optional Components
15
Finisher FS-535/Saddle Stitcher SD-512/Punch Kit PK-521
18
Job Separator JS-602
20
Z Folding Unit ZU-606
21
Post Inserter PI-505
23
Name and Function of each Part
23
Post Inserter Operations
23
Keys on Control Panel
24
Finishing Using Post Inserter
25
Finisher FS-534/Saddle Stitcher SD-511/Punch Kit PK-520
26
Large Capacity Unit LU-301/LU-204
29
3 Checking the Available Paper Types
31
4 Checking the Specifications of this Machine
35
Type of this Machine
37
Paper
37
Mechanical Specifications
39
Dual Scan Document Feeder
39
Operating Environment
39
Common Specifications
40
Copy Function
40
Scanner Functions
41
Printer Function
43
Network Function
46
5 Checking the Specifications of Optional Components
47
Fax Function (Fax Kit FK-511)
49
Large Capacity Unit LU-301
49
Large Capacity Unit LU-204
50
Finisher FS-535
51
Saddle Stitcher SD-512
53
Punch Kit PK-521
54
Job Separator JS-602
55
Z Folding Unit ZU-606
55
Post Inserter PI-505
56
Finisher FS-534
57
Saddle Stitcher SD-511
59
Punch Kit PK-520
60
Authentication Unit AU-102
60
Authentication Unit AU-201
61
6 Using the Authentication Unit (Biometric Type)
63
Authentication Unit (Biometric Type)
65
Status of Authentication Unit
66
Operations Required to Use this Function (for the Administrator)
67
Configuring Authentication Settings of this Machine
67
Registering User Authentication Information
70
Logging in to this Machine
73
Using Data Administrator (for the Administrator)
74
Data Administrator
74
Setting up the Operating Environment
74
Installing Biodriver (USB-Driver) (Windows 7)
74
Installing Biodriver (USB-Driver) (Windows Vista)
75
Installing Biodriver (USB-Driver) (Windows XP)
76
Installing Data Administrator Plugin for Biometric Authentication Unit AU-102
77
Registering User Authentication Information
77
Olivetti d-COLOR MF652 User Manual (80 pages)
PC-FAX Operations
Brand:
Olivetti
| Category:
All in One Printer
| Size: 1.91 MB
Table of Contents
Table of Contents
3
1 PC-Fax TX
5
Outline of PC-FAX TX Function
7
System Environment Requirements
8
Printer Cable Connection to this Machine
9
2 Preparation for PC-Fax TX (Via Network Connection)
11
Overview
13
Before Installing the Fax Driver (for the Administrator)
14
Preparation Flow
14
Check the LAN Cable Connection
14
Check the Network Settings
14
Set up the PC-Fax TX Environment
15
Enabling Device Information to be Obtained from the Fax Driver
15
Quick Installation of the Fax Driver
16
Installation Flow
16
Check the Operating System (OS) Version that Supports the Fax Driver
16
Installation Procedure
16
Initialize the Fax Driver
18
Set the Optional Operating Environment of this Machine
18
Change the Default Print Settings
18
3 Preparation for PC-Fax TX (Via USB Connection)
19
Overview
21
Quick Installation of the Fax Driver
22
Installation Flow
22
Check the Operating System (OS) Version that Supports the Fax Driver
22
Changing the Installation Settings (Windows 7 or Windows Server 2008 R2)
22
Installation Procedure
23
Initialize the Fax Driver
24
Set the Optional Operating Environment of this Machine
24
Change the Default Print Settings
24
4 PC-Fax TX
25
Transmission Flow
27
The [FAX Transmission Popup] Screen
29
Opening the [FAX Transmission Popup] Screen
29
The [FAX Transmission Popup] Screen Options
30
Select a Recipient from the Phone Book
31
Select a Recipient from the Address Book of this Machine
32
Search for a Recipient from LDAP Server
33
Set the Fax Transmission Functions
35
Add a Cover Sheet
36
Call the Frequently Used Settings
37
Managing the Recipient Information by the PC (Using the Phone Book)
39
Register Recipients in the Phone Book
39
Search for Destination
41
Edit the Recipient Information
43
Change the Recipient Group
43
Changing a Group Name
44
Control the Recipients Using Folders
44
5 Sending Options
45
Send a Fax with a Cover Sheet
47
Sending a Fax at Preset Time (Timer TX)
50
Timer Transmission
50
How to Send
50
Sending a Confidential Fax (Confidential Communication)
51
Confidential Communication
51
How to Send
51
Sending a Fax Via Relay Station (Relay Distribution)
52
Relay Distribution
52
How to Send
52
Send a Fax with Authentication Information
53
Fax Transmission for Authentication Setup
53
Operations Required to Use this Function
53
How to Send
54
Advertisement
Related Products
Olivetti d-COLOR MF752
Olivetti d-COLOR MF282plus
Olivetti d-COLOR MF452plus
Olivetti d-COLOR MF552plus
Olivetti D-color MF 350 Plus
Olivetti d-Color MF 3303
Olivetti d-Color MF 3302
Olivetti d-COLOR MF 2 Series
Olivetti d-Color MF282
Olivetti d-Color MF452
Olivetti Categories
All in One Printer
Printer
Cash Register
Copier
Fax Machine
More Olivetti Manuals
Login
Sign In
OR
Sign in with Facebook
Sign in with Google
Upload manual
Upload from disk
Upload from URL