Sign In
Upload
Manuals
Brands
Miranda Manuals
Computer Hardware
Kaleido-X16
Miranda Kaleido-X16 Manuals
Manuals and User Guides for Miranda Kaleido-X16. We have
5
Miranda Kaleido-X16 manuals available for free PDF download: User Manual, Hardware Description And Installation Manual, Hardware Description & Installation Manual, Quick Start Manual
Miranda Kaleido-X16 User Manual (462 pages)
Brand:
Miranda
| Category:
Portable Multimedia Player
| Size: 24 MB
Table of Contents
Table of Contents
3
New Features and Enhancements in Kaleido-X Version 7.00
9
2 Getting Started
11
About this Document
11
System Overview
12
Kaleido-MX
12
Kaleido-Modular-X
12
Kaleido-XQUAD
12
Kaleido-Modular KMV-3901/3911
13
Kaleido-X16
14
Kaleido-X16-D System Overview
15
Kaleido-X (4RU)
16
Kaleido-X (7RU)
16
Kaleido-X (14RU) Expansion
17
Cluster
18
Kaleido-X (14RU) Expansion System Overview
18
Detailed Directions
19
Cascade
19
Verifying Your System Configuration
19
Verifying a Kaleido-RCP2
25
Verifying an RCP-200
25
Verifying an Audio Bridge Terminal
25
To Verify that the ABT Is Functioning Normally
25
Loading a Layout
26
To Load a Layout on the Monitor Wall
26
Cabling Diagrams
28
Kmv-3901/3911
28
RS-422 Connection Diagram
30
Xedit Application Shortcuts
32
3 Operation of the Monitor Wall
33
Key Concepts
33
Logging on to the Monitor Wall Using a Remote Control Panel
37
Detailed Directions
37
Using On-Screen Wall Control
40
Locating the Mouse Pointer on the Monitor Wall
40
Displaying the Dashboard
40
Synchronizing the RCP-200’S Head View with the Monitor Wall
40
Hiding the Dashboard
41
To Display the Dashboard
41
Loading Layouts
42
To Hide All the Dashboards
42
Loading a Layout by Using the Mouse
42
Loading a Layout by Using the Kaleido-RCP2
43
Using Layouts Presets
43
Displaying a Source in Full Screen Mode
44
Loading a Layout by Using the RCP-200
44
Refreshing a Layout
44
To Close the Full Screen View
44
Changing a Source’s Aspect Ratio
45
Video Cropping/Zooming
45
To Change the Aspect Ratio Using the Kaleido-RCP2
45
To Change the Aspect Ratio Using the RCP-200
45
To Toggle the Cropping Mode Using the RCP-200
46
To Toggle the Cropping Mode Using the Mouse
46
Toggling Safe Area Markers
47
To Toggle the Safe Area Markers on a Video Using the Kaleido-RCP2
47
To Toggle the Safe Area Markers on a Video Using the RCP-200
47
To Toggle the Safe Area Markers on a Video Using the Mouse
47
Displaying Subtitles and Closed Caption Text
48
Setting the Text Mode
48
Switching Closed Captioning On/Off
49
To Switch CC (608) Closed Captioning On/Off
49
To Switch CC (708) Closed Captioning On/Off
49
Setting the DVB Subtitling Language from the Monitor Wall
50
To Set the Decoded DVB Subtitling Language for a Monitor on the Wall
50
To Switch DVB Subtitling off
50
Editing UMD Text
51
To Switch Teletext/Subtitling off
51
To Edit the Text on a UMD
51
Selecting an Input Method
52
Assigning Sources to Monitors
52
Assigning a Logical Source to a Monitor by Using the Kaleido-RCP2
52
Assigning a Logical Source to a Monitor by Using the RCP-200
53
Assigning a Logical Source to a Monitor by Using the Mouse
54
Changing Crosspoints
55
Viewing Assignment Information
56
Changing an Internal Router Crosspoint
57
To Change a Crosspoint in the Internal Router
57
Changing an External Router Crosspoint
58
To Change an External Router Crosspoint
58
Using Timers
59
To Configure an Interactive Timer Monitor on the Monitor Wall
60
Controlling a Timer by Using an External Numeric Keypad
61
Triggering Actions
62
Triggering GPI Output Events
62
Triggering an Action from the RCP-200
62
Triggering an Action from the Monitor Wall
62
Acknowledging Alarms
63
Acknowledging Alarms on the Monitor Wall
63
Triggering Audio Monitoring
64
Acknowledging Alarms by Using an Action
64
Setting a Display Monitor’s Output Resolution
66
Triggering Audio Monitoring by Using an Action
66
Specifying a Display Output Resolution from the Monitor Wall
66
To Enable EDID Auto-Detect for a Display
67
Enabling EDID Auto-Detection from the Monitor Wall
67
Changing the IP Address of a Multiviewer from the Monitor Wall
68
To Change the IP Address of the Multiviewer from the Monitor Wall
68
4 Managing Kaleido-X Systems
69
Key Concepts
69
Opening the Xedit Software
72
Detailed Directions
72
Using Xedit Online
75
Connecting to a Multiviewer
75
To Connect to a Multiviewer
75
Disconnecting from a Multiviewer
77
Enabling Access Control
77
To Disconnect from a Multiviewer
77
To Enable Access Control
77
Disabling Access Control
78
Importing a Database
78
To Import a Database
78
Exporting a Database
80
Exporting a Single-Multiviewer Database
80
To Export a Single-Multiviewer Database
80
Exporting a Cluster Database
81
To Export a Cluster Database
81
Creating a Backup
83
Backing up the Current Database
83
Backing up Resolutions
83
Restoring a Backup
84
Backing up Audio Scales
84
Restoring a Database from a Backup
84
Creating a Single Multiviewer System
85
Restoring Resolutions or Audio Scales from a Backup
85
Creating a Cluster
89
Adding Multiviewers to a Cluster
89
Creating a Cluster in Online Mode
89
Creating a Cluster in Offline Mode
91
Creating Rooms for a Cluster System
94
Creating Layouts for a Cluster System
94
Replicating RCP Users Across a Cluster System
94
Repairing a Cluster System
94
Configuring the System Representation
95
Managing Transport Streams in a Kaleido-IP System Representation
95
Importing a Stream Lineup
96
To Import a Set of Streams from a Spreadsheet File
96
Preparing a Spreadsheet with Stream Lineup Information
98
To Prepare the Spreadsheet File
98
Adding a Source-Specific or Source-Filtered Multicast Transport Stream
100
Adding an Any-Source Multicast Transport Stream
102
To Add an Any-Source Multicast (ASM) Transport Stream
102
Adding a Unicast Transport Stream
104
To Add a Unicast Transport Stream
104
Modifying a Transport Stream
106
Removing Transport Streams
107
To Remove Transport Streams from Your System Configuration
107
Managing Cards in a Kaleido-X System Representation
108
Emptying Card Slots
109
Populating Card Slots
109
Restoring Factory Defaults
110
Restoring Factory-Default Calibrations
111
Restoring the Xedit Factory Defaults for a Multiviewer
111
To Restore the Xedit Factory Defaults for a Multiviewer Model
112
Restoring Factory Defaults from a Specific Multiviewer
113
To Restore Factory Defaults from a Multiviewer
113
Restoring Factory Defaults from the Kaleido-X DVD
114
To Restore Factory Defaults from the Kaleido-X DVD
114
Factory Defaults by Multiviewer Model
114
Managing Multiple Databases Efficiently
116
Working Online
116
To Back up the Current Kaleido-X System
116
Working Offline
117
Applying a Backup Database to the Multiviewer
117
To Restore a Backup Database
117
5 Calibrating the Kaleido-X
119
Key Concepts
119
Multiviewer Input Calibrations
120
Calibrating the Brightness and Contrast
122
Gpi/Genlock Calibrations
122
Multiviewer Output Calibrations
122
To Calibrate the Brightness and Contrast Parameters
122
Detailed Directions
122
Calibrating the Color Saturation
124
To Calibrate the Color Saturation
124
Calibrating the DVI Keying Mode
125
To Calibrate the DVI Keying Mode
126
Calibrating the Audio Monitoring Delay
127
To Calibrate the Audio Monitoring Delay for a Head
127
Calibrating the Audio Monitoring Color
128
To Calibrate the Audio Monitoring Color
128
Calibrating Zero VU Reference Level for an Embedded Audio Source
129
Multiviewer Input Calibrations
129
To Calibrate an ABT Audio Source
130
To Calibrate an Audio Source
130
Calibrating Dolby VANC Loudness Measurement
131
Calibrating Dolby E Audio Metadata
133
To Calibrate Audio Metadata
133
Calibrating Aspect Ratio Decoding
134
To Select the AFD Source for an SD Signal
134
Calibrating Detail Enhancement and Dynamic Range
135
Calibrating Subtitling/Closed Captioning
135
To Configure Teletext/Subtitling Page Selection
135
Calibrating Metadata Holding Time
136
To Calibrate Metadata Holding Time
136
Calibrating Switch Field Selection
138
Router Output Calibrations
138
To Configure a GPI Line’s Direction as an Output
140
6 Configuring Alarms
141
General Status Manager (GSM)
141
Key Concepts
141
Alarm Browser
142
Alarm Status
142
External Alarm Provider
143
Lookup Service
143
Alarm Debouncing
143
Alarm Suppression
144
Global Alarms
144
Virtual Alarm
145
Sub-Alarm
145
Alarm Monitor
145
Teletext, Subtitles, and Closed Captions
146
Dolby E/AC-3 Metadata
147
Configuring Alarm Thresholds
148
Audio Format
148
Metadata
148
Logical Source Assignment
148
Detailed Directions
148
Configuring Alarm Debouncing
152
Managing Alarm Providers
152
To Add Alarm Providers to Your Kaleido-X System
152
Managing Virtual Alarms
153
Creating Virtual Alarms
153
Managing Alarm Logging
160
Enabling Logging for a Native Alarm
160
Publishing Alarms to SNMP Devices
161
Disabling Logging for a Virtual Alarm
161
Defining Target SNMP Managers
162
To Add a Trap Target to the List
163
To Modify an Existing Trap Target
163
To Remove a Trap Target from the List
163
Enabling SNMP Traps
163
7 Logical Sources
165
Creating and Configuring Logical Sources
165
Key Concepts
165
Detailed Directions
165
Automatically Adding Logical Sources
166
To Define Logical Sources for a Transport Stream
166
Removing Logical Sources for Removed Programs in a Transport Stream
168
Manually Adding a Logical Source
169
To Add a Logical Source
169
Adding a Level
170
Managing Levels
170
Configuring an Alarm Level’s Contribution
171
Defining Physical Assignments
173
To Make the Physical Assignments for a Logical Source
173
Configuring Alarm Level Assignments
174
Configuring Text Level Assignments
174
Configuring Logical Sources Based on External Alarm Providers
175
To Assign an Alarm or a Text Element from an External Provider
175
Making Further Assignments by Incremental Copy
176
Sorting the Sources Table
177
Monitoring Internal-Router Outputs on the Monitor Wall (Sample Scenario)
178
Resizing the Sources Table’s Columns
178
To Resize a Column Manually
178
To Resize a Column to the Width of Its Content
178
8 Setting up Rooms
181
Managing Rooms
181
Key Concepts
181
Detailed Directions
181
Creating Rooms
182
Opening Rooms
182
Adding Displays
184
Closing Rooms
184
Deleting Rooms
184
Adding Full Screen Zones
188
Configuring Displays
188
Removing Full Screen Zones
188
Enabling EDID Auto-Detection in Xedit
189
To Enable EDID Auto-Detection for a Display
189
Viewing Room Display Properties
189
Configuring Custom Resolutions from the Tools Menu
190
Configuring a Custom Resolution from a Specific Display in a Room
192
Changing Room Display Resolutions
194
To Change the Resolution for a Display in a Room
194
Configuring the HD-SDI Monitoring Output Format
195
Disabling the Dashboard
196
Enabling Phase Locking at the HD-SDI Monitoring Output
196
To Disable the Dashboard for a Specific Display
196
Changing a Display’s Aspect Ratio
197
Changing a Display’s Diagonal Size
197
Changing a Display’s Rotation
198
Changing a Display’s Width
198
Changing a Display’s Position
199
Managing Display Libraries
199
Adding Displays to Custom Libraries
200
Creating Custom Display Libraries
200
Closing Display Libraries
201
Removing Displays from Custom Libraries
201
Opening Display Libraries
202
9 Creating Layouts
203
Key Concepts
203
Aspect Ratio
205
Cropping Mode
205
Changing the Underscan/Overscan Mode Dynamically
206
Custom Overscan
206
Spanning
206
Managing Layouts
208
Opening Layouts
208
Layouts and Layout Elements
203
Detailed Directions
208
Closing Layouts
211
Creating Room Layouts
211
Creating Full Screen Layouts
212
Deleting Layouts
213
Adding Monitors to a Layout
214
To Add Monitors to a Layout
214
Automatically Populating a Grid-Type Layout
215
Duplicating Monitors
215
Removing Monitors
215
Copying Layouts
216
Assigning Logical Sources or Monitor Wall Destinations to Monitors
217
Selecting a Background Image for a Layout
217
To Assign a Logical Source to a Monitor
217
To Assign a Monitor Wall Destination to a Monitor
217
Setting up a Layout for Background Keying from the DVI Input
219
Configuring Video Monitors
221
Resizing a Video Monitor
221
Showing and Hiding the Layout Navigator
221
Zooming and Panning a View
221
Setting a Video Monitor’s Aspect Ratio
222
Adding a Custom Safe Area Image
223
Adding Safe Area Markers
223
To Set a Custom Aspect Ratio for a Video Monitor
223
To Add a Free-Form Safe Area Image to a Video Monitor
224
To Set the Underscan/Overscan Properties of a Video Monitor
227
Configuring Automatic Aspect Ratios
228
To Slave a Video Monitor to the Input Signal Aspect Ratio
228
Configuring the Default Aspect Ratio for HD and SD Signals
229
Configuring a Video Monitor’s Alarm Reporting Behavior
230
To Set the Subtitling Properties of a Video Monitor
232
Configuring Audio Monitors
235
To Configure an Audio Monitor
235
Configuring Audio Scales
237
Configuring Audio Scales from the Tools Menu
237
Configuring an Audio Scale from a Specific Audio Monitor
238
To Configure an Audio Scale from a Specific Audio Monitor
238
Configuring Time Code Monitors
240
Removing Audio Scales from the System
240
To Configure a Time Code Monitor in a Layout
240
Adding Timers to the System
242
Configuring Timers
242
Configuring a Umd’s Alarm Reporting Behavior
248
Configuring Umds
248
To Set the Alarm Reporting Features for a UMD (Text and Tallies)
249
Configuring Dynamic UMD Text
250
To Configure Dynamic UMD Text
250
To Configure Static Text for a Specific UMD in a Layout
250
To Configure Static UMD Text from the Sources Table
250
Setting the Text Font
251
Configuring Alarm Monitors
252
To Add an Alarm Monitor to a Layout
252
Configuring Subtitling Monitors
253
To Monitor Subtitling from a DVB Stream
253
Configuring Metadata Monitors
256
To Monitor XDS Data and Digital Content Advisory Descriptors
256
Configuring V-Chip Monitors
258
To Add a V-Chip Monitor to a Layout
258
Configuring Clocks
259
To Insert a Clock Logo
262
Creating a Composite Monitor
263
Working with Composite Monitors
263
Unlocking a Composite Monitor
268
Opening the Region Editor
269
Using the Region Editor
269
Configuring a Monitor’s Dimensions Using the Region Editor
270
Copying Properties from One Monitor to Another
270
Format Painting
270
Copying Size from One Monitor to Another
271
Creating a Widget Library
271
Managing Widget Libraries
271
Closing a Widget Library
273
Opening a Widget Library
273
10 Creating Actions
275
Overview
275
Key Concepts
275
Creating Monitor Wall Actions
277
Detailed Directions
277
Creating Background Actions
278
Creating a Background Action from the Actions Tab
278
Creating a Background Action from the System List
280
Creating an Action that Can be Triggered Via a Gateway Command
281
Editing an Action
283
Removing Action Items from an Action
283
Deleting an Action
283
11 Managing RCP Users
285
Xedit Quick Start Task List
285
Kaleido-RCP2
285
Rcp-200
285
Checklist
285
Key Concepts
285
Adding RCP Users
286
Removing RCP Users from the System
286
Detailed Directions
286
Managing Room Access
287
Setting Room Preferences
287
Granting Room Access to RCP Users
287
Removing RCP Users from Rooms
287
To Set Default Preferences for a Room
288
Assigning Room Layouts to the Kaleido-RCP2 Preset Buttons
288
To Assign Room Layouts to the Kaleido-RCP2 Preset Buttons
288
Enabling the Large Mouse Pointer for a Room
289
Assigning a Timer to a Room
290
Setting RCP User Preferences
290
To Modify the Preferences for an RCP User
290
Assigning Room Layouts to a Kaleido-RCP2 User’s Presets
291
Assigning a Full Screen Layout to an RCP User
291
To Assign a Full Screen Layout to an RCP User
291
Assigning Audio Output to an RCP User
292
To Assign an Audio Output to an RCP User
292
Setting the Keyboard Language
293
Assigning a Timer to an RCP User
294
To Assign a Timer to an RCP User
294
Changing an RCP User’s Name and Password
295
12 Routers & Kaleido-X
299
Overview
299
Key Concepts
299
Router Control Configurations
301
Router Configuration Scenarios
302
Controlling an External Router
302
Controlling External Routers in a Cascade
303
Translating Commands from External Router Controllers
304
Router Protocols
305
Optional Drivers for Controlling Routing Devices from the Multiviewer
305
Built-In Communications Protocols
306
Serial Connections
307
Q & a
308
Importing Router Configurations from an NV9000 System Controller
310
Detailed Directions
310
Renaming Physical Routers
316
Configuring an External Router
317
Defining a Physical Router
317
Adding Physical Levels
320
To Add One or more Physical Levels
320
To Add a Logical Router
323
Adding a Simple Router Controller
329
Configuring a Router Controller
329
Adding a Vikinx Compact Router Controller
330
To Add a Vikinx Compact (or Equivalent) Router Controller
330
Adding a Snell (Pro-Bel) SW-P-02 Router Controller
331
To Add a Snell (Pro-Bel) SW-P-08 (or Equivalent) Router Controller
332
Configuring a Multiviewer’s Internal Router
334
Configuring the Internal Router in a Kaleido-X (14RU)
341
Router Connections
341
To Configure Router Connections
343
13 Tally Interface Devices
345
Overview
345
Production Switchers
346
UMD Controllers
346
Automation Systems
346
Key Concepts
346
Detailed Directions
346
Configuring Serial Tally Systems
346
Ross Video Production Switcher
348
To Set up the Ross Video Production Switcher
349
To Set up the Multiviewer
349
Sony Production Switcher
353
Setting up a Sony Switcher
353
DVS-9000 Switchers
353
Setting up a Multiviewer to Interface with a Sony Production Switcher
355
Kahuna Production Switcher
356
Kayak Production Switcher
362
Configuring the Kayak Switcher
362
To Set up the Kayak Switcher
362
Configuring the Multiviewer
363
To Set up the Multiviewer’s Communication Parameters
363
Kayenne Production Switcher
368
Configuring Layout Elements
368
Configuring the Kayenne Switcher
369
Zodiak Production Switcher
376
Configuring the Zodiak Switcher
376
To Configure Your Logical Sources
380
Serial Port Test Agent
383
To Use a Serial Port Test Agent
383
14 Kaleido Remote Control Protocol
385
Overview
385
15 Using the Serial to TCP/IP Dispatcher
387
Overview
387
16 Administration and Servicing
389
Key Concepts
389
Default IP Settings
390
Hardware and Software Options
391
KMV-3901/3911 Default IP Settings
391
Kaleido-X16 Default IP Settings
391
Kaleido-X Default IP Settings
391
Kaleido-MX Input Options
392
Kaleido-MX Output Options
392
Kaleido-Modular-X Input Options
392
Kaleido-Modular-X Output Options
393
KMV-3901/3911 Input Options
393
KMV-3901/3911 Output Options
393
Kaleido-X (4RU, 7RU, and 14RU) Input Options
394
Kaleido-X16 Input Options
394
Kaleido-X16 Output Options
395
Dashboard Messages
395
Kaleido-X16 Router Options
395
Status Dashboard Messages
395
Network Considerations & Port Usage
399
TCP/UDP Port Usage
400
From Client to Multiviewer
400
From Multiviewer to Client
400
From Multiviewer to Multiviewer
400
From Icontrol to Multiviewer
401
From Multiviewer To/From Remote Control Panel
401
From Multiviewer to Peripheral Devices
402
From Peripheral Devices to Multiviewer
402
From Multiviewer To/From SNMP Devices
403
From Multiviewer To/From NTP Server
403
Assigning an IP Address to each Device in Your System
403
Configuring a Multiviewer’s IP Settings
403
Detailed Directions
403
Finding a Multiviewer’s System IP Address and Application Version
408
Changing an IP Address on Windows XP
409
Changing an IP Address on Windows 7
410
Configuring the RCP-200
410
Configuring the RCP-200’S IP Settings
410
Logging on to the RCP-200
411
Specifying Lookup Servers for the RCP-200
411
Specifying Multiviewers for the RCP-200
411
To Specify a Lookup Server for the RCP-200
411
To Log on to a Kaleido-X Room from the RCP-200
412
Configuring the Kaleido-RCP2
414
Assigning a Static IP Address to the Kaleido-RCP2
415
Selecting a Room for the Kaleido-RCP2
415
Connecting the Kaleido-RCP2 to Other Kaleido-X Systems
416
Logging on to the Kaleido-RCP2
416
To Configure a Unicast IP Address on the Kaleido-RCP2
416
To Log on to a Kaleido-X System from the Kaleido-RCP2
416
Configuring an Audio Bridge Terminal
417
Enabling Options
419
To Enable Options on a Multiviewer
419
Configuring Power Supply Redundancy on a Kaleido-X16
421
To Configure the PSU B Installed Option in Xadmin
421
Installing Xedit
423
Installing the Java Runtime Environment
427
Registering Your Multiviewer's Security Credentials with Your Browser
429
Suppressing Untrusted Connection Warning in Firefox
429
Suppressing Certificate Error in Internet Explorer or Chrome
430
To Register Your Multiviewer’s Security Credentials with Firefox
430
Enabling the Compatibility View in Internet Explorer 10
437
Obtaining EDID Data from Displays When Using the DXF-100 Interface
438
To Obtain a Display’s Timing Information in Xadmin
438
Generating a System Snapshot
439
Servicing
439
To View the Status Information for a Multiviewer
441
Viewing a Multiviewer’s Status Information
441
Viewing Kaleido-X Version Information
443
Restarting and Shutting down a Kaleido-IP Multiviewer
445
Restarting the Monitor Wall Software
445
Restarting a Kaleido-IP Multiviewer
447
Upgrading Your Multiviewer System
450
Index
451
Control Panel
452
Contact Us
461
Advertisement
Miranda Kaleido-X16 Hardware Description And Installation Manual (82 pages)
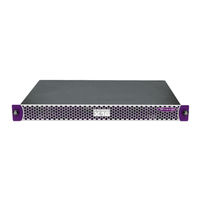
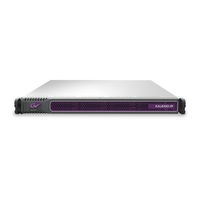
1RU, multi-image display processor
Brand:
Miranda
| Category:
Computer Hardware
| Size: 3 MB
Table of Contents
Electromagnetic Compatibility
3
Safety Compliance
3
Table of Contents
5
1 Kaleido-X16 Installation
7
Introduction
7
Features
8
Port Availability on the Kaleido-X16
8
Overview of the Kaleido-X16 System
9
Mechanical Installation
11
Unpacking
11
Rack-Mount Installation
11
Frame and Electrical Installation
11
Frame
12
Power Supplies
14
Ventilation
16
Compactflash
17
Signalling
18
Inputs
19
Video and Graphic Output over the MV-Out Connection
20
External Reference
20
Router
21
Audio I/O
21
Control
24
Maintenance
30
Cleaning the Air Filter
30
Replacing a Defective Power Supply
31
2 Peripheral Equipment
33
Kaleido-RCP2
33
Introduction
33
Description
33
Connections
34
Control Surface Layout
35
Configuration
38
Operation
50
Audio Bridge Terminal
52
Introduction
52
Description
53
Connections
55
Indicators
56
Controls
57
Operation
57
Web Interface
58
Firmware Updates
66
3 Specifications
67
Kaleido-X16 Inputs
67
Video Signal Inputs
67
DVI Graphic Inputs
69
Kaleido-X16 Outputs
69
MV Outputs
69
Router Outputs
71
Kaleido-X16 Audio I/O
73
SDTI Audio Input
73
Analog Audio Monitoring
73
AES Outputs
74
Kaleido-X16 Control
74
Time Code Inputs (LTC)
74
Gpi
74
Ethernet
75
Usb
75
Kaleido-X16 Frame
76
Kaleido-RCP2
76
Audio Bridge Terminal (ABT)
77
Analog Audio Inputs
77
Digital Audio Inputs
77
Processing Performance
78
Reference Input
78
SDTI Outputs
79
AES3 Output
79
AES3ID Output
79
Miscellaneous
79
Physical Dimensions
79
Contact Us
81
Miranda Kaleido-X16 Hardware Description & Installation Manual (45 pages)
Brand:
Miranda
| Category:
DVD Player
| Size: 0 MB
Table of Contents
Safety Compliance
3
Table of Contents
5
1 Kaleido-X16 Installation
7
Introduction
7
Mechanical Installation
11
Frame and Electrical Installation
12
Power Supplies
14
Compactflash
18
Signalling
18
Maintenance
31
2 Specifications
33
Outputs
36
Audio I/O
40
Control
42
Frame
43
Contact Us
45
Advertisement
Miranda Kaleido-X16 User Manual (37 pages)
Kaleido series Multi-Image Display Processor Remote Control Protocol (Gateway)
Brand:
Miranda
| Category:
Media Converter
| Size: 0 MB
Table of Contents
Table of Contents
3
1 Introduction
5
Software Versions
5
Remote Operation of the Kaleido-X Series or Kaleido-Alto/Quad/Quad-Dual Multi-Viewers
5
Gateway Options for the Kaleido-K2
5
Internal Gateway
6
MT-Gateway
6
Remote Operation of the Kaleido-K2 Via the Gateway
7
2 Gateway Commands
8
Index of Gateway Commands
8
Document Conventions
10
Gateway Command Descriptions
10
Configures the Specified Countdown Timer
20
Fires the Specified Action
22
Selects the Audio to be Monitored
25
3 Typical Session
31
4 Appendix: Kaleido-X Series Support History
35
Miranda Kaleido-X16 Quick Start Manual (33 pages)
Brand:
Miranda
| Category:
Portable Multimedia Player
| Size: 2 MB
Table of Contents
Table of Contents
5
Introduction
7
Overview
7
Getting Organized
8
Setting up the Kaleido-X16 Multi-Viewer
11
Overview
11
Step 1: Physical Setup
13
Mounting the Kaleido-X16 in a Rack
13
Powering up the Kaleido-X16
13
Setting up the Kaleido-X16 Hardware
14
Cabling Diagram
17
Changing the Output Resolution
17
Step 2: Networking Setup
18
Changing the IP Address from the Monitor Wall
19
Using the Kaleido-RCP2 with Default Settings
20
Loading a Layout
22
Configuring a Client PC
22
Step 3: Xedit Installation
24
Advertisement
Related Products
Miranda Kaleido-K2
Miranda Kaleido-Alto
Miranda Kaleido-Quad
Miranda Kaleido-X
Miranda Kaleido-Solo
Miranda Kaleido-IP
Miranda Kaleido Alto
Miranda Kaleido Quad-Dual
Miranda Kaleido-X 5.30
Miranda KXI-DVI-Bridge
Miranda Categories
Media Converter
Amplifier
Computer Hardware
Control Panel
Digital Camera
More Miranda Manuals
Login
Sign In
OR
Sign in with Facebook
Sign in with Google
Upload manual
Upload from disk
Upload from URL