Sign In
Upload
Manuals
Brands
Minicom Manuals
Switch
Minicom Smart 116 IP
Minicom Minicom Smart 116 IP KVM Switch Manuals
Manuals and User Guides for Minicom Minicom Smart 116 IP KVM Switch. We have
6
Minicom Minicom Smart 116 IP KVM Switch manuals available for free PDF download: User Manual, Start Manual, Quick Start Manual
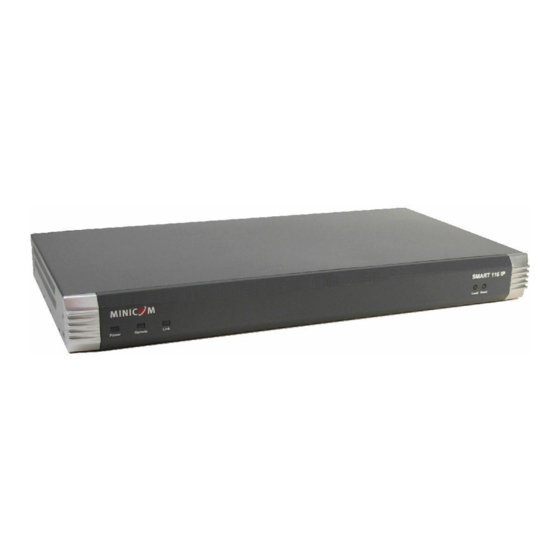
Minicom Minicom Smart 116 IP User Manual (92 pages)
Brand:
Minicom
| Category:
Network Hardware
| Size: 2 MB
Table of Contents
User Guide
1
Legal Notice
2
About this Document
3
Style Conventions
4
Table of Contents
5
Table of Figures
10
1 Introduction
12
Product Overview
12
Features and Benefits
12
Terminology
13
Compatibility
13
Client Computer Operating System
13
Technical Precautions
13
Safety
14
User Guide Feedback
14
Trademarks
14
Weee Compliance
14
2 Installation
16
Overview
16
System Components
16
The Smart 108/116 IP Unit
16
Figure 1 - Smart 108/116 IP Unit Front Panel
16
Figure 2 - Smart 116 IP Unit Rear Panel
17
Pre-Installation Guidelines
18
Rack Mounting the Smart 108/116 Ip Unit
18
Rack Mounting Safety Considerations
18
Mounting the Unit
19
Figure 3 - Bracket Positions
19
Figure 4 - Bracket Connected for Rear Facing
19
Connecting the System
20
Connecting to the Servers
20
Figure 5 - Smart 108/116 IP System Overview
20
Connecting a RICC/ROC PS/2
21
Figure 6 - ROC PS/2
21
Figure 7 - ROC USB
21
Connecting a RICC/ROC USB
22
Figure 8 - RICC PS/2 Connections
22
Connecting a RICC SUN
23
Figure 10 - RICC SUN
23
Figure 9 - RICC USB
23
Connecting to the Network
24
Connecting the Cat5 Cables
24
Connecting the Kvm Console
24
Connecting the Power Supply
24
3 Configuring the Network
25
Boot-Up Process
25
Assigning Static IP Addresses for a Number of Units
26
Figure 11 - Boot-Up Process
26
Logging Onto the Web Configuration Interface
27
Figure 12 - Web Page
27
Figure 13 - Logon Page
27
Figure 14 - Network Configuration - Device Tab
28
Web Configuration Interface Tabs
28
Web Configuration Toolbar Buttons
29
Configuring the Network Settings
29
Configuring Device ID Settings
29
Configuring the Device IP Address
30
Configuring Centralized Management Settings
30
Configuring Network Snmp Settings
31
Figure 15 - SNMP Settings
31
Configuring User Settings
32
Adding a User
32
Figure 16 - Users Page
32
Deleting User(S)
33
Figure 17 - Add User Page
33
Blocking a User
34
Editing User Information
34
Figure 18 - Delete User Confirmation
34
Configuring the Kvm Switch
35
Figure 19 - Edit User Page
35
Configuring the Security Settings
36
Figure 20 - KVM Switch Configuration Page for Smart 116 IP
36
Figure 21 - Security Page
37
Performing Additional Configuration Operations
38
Installing an SSL Certificate
38
Figure 22 - SSL Certificate Page
38
Upgrading Firmware
39
Figure 23 - Device Version Upgrade Page
39
Figure 24 - Reboot Confirmation Page
39
Restoring Factory Settings
40
Figure 25 - Restore Factory Settings Page
40
Reloading a Page
41
Saving Changes and Logging out
41
Figure 26 - Device Reboot Confirmation Message
41
Figure 27 - Save Succeeded Message
42
Figure 28 - Device Rebooting Progress Box
42
Figure 29 - Logon Page after Rebooting
42
4 Conducting a Remote Session
43
Starting a Remote Session
43
Figure 30 - Logon Page
44
Figure 31 - Remote Session Page
44
Remote Session Toolbar Buttons
45
Sharing a Remote Session
46
Exclusive Session
46
Displaying the Toolbar
46
Setting the Session Profile
46
Figure 32 - Shared Remote Session
46
Figure 33 - Session Profile Dialog Box
47
Full Screen Mode
47
Verifying Remote Presence Solutions Information
48
Figure 34 - Remote Presence Solutions Information
48
Changing the Video Performance Settings
49
Adjusting the Video
50
Refreshing the Video Image
50
Figure 35 - Performance Settings
50
Automatically Adjusting the Video Image
51
Manually Adjusting Video Settings
51
Figure 36 - Video Adjust Progress
51
Figure 37 - Manual Video Adjustments Controls
52
Managing Keyboard Sequences
53
Adding a Keyboard Sequence
53
Figure 38 - Special Key Manager
54
Figure 39 - Add a Predefined Key Dialog Box
54
Recording a New Custom Key
55
Figure 40 - Record Macro Box
55
Editing a Key Sequence
56
Deleting Key Sequence(S)
56
Synchronizing Mouse Pointers
56
Figure 41 - Delete Key(S) Confirmation Box
56
Figure 42 - Relative Mouse Settings
57
Manually Synchronizing the Mouse
57
Figure 43 - Windows 7 Mouse Properties
58
The USB Option
58
Advanced Mouse Emulation
59
Figure 44 - Mouse Emulation Box
59
Aligning the Mouse Pointers
60
Calibrating Mouse Pointers
60
Switching to a Different Server
60
Disconnecting the Remote Session
61
5 Troubleshooting - Safe Mode
62
Entering Safe Mode
62
Figure 45 - Safe Mode Procedure
62
Figure 46 - Login Page
63
Figure 47 - Safe Mode Menu
63
Restoring Factory Defaults
64
Restoring the Device Firmware
64
Figure 48 - Warning
64
Figure 49 - Additional Warning
64
Figure 50 - Reboot
64
Figure 51 - Upgrade Succeeded
65
6 Operating the Smart 108/116 Ip Switching System Locally
66
Using the Keyboard Hotkeys
66
Using the Osd
66
Navigating the OSD
67
Selecting a Computer
67
Figure 52 - OSD Main Window
67
Configuring the OSD Settings
68
Configuring the General Settings
68
Figure 53 - OSD Settings Window
68
Configuring Security Settings
69
Figure 54 - General Settings Window
69
Changing the OSD Hotkey
70
Activating Autoskip
70
Serial Port
71
Changing the Keyboard Language
71
Editing the Switch Name
71
Restoring OSD to Factory Defaults (F7)
71
Configuring the Ports Settings
71
Editing the Computer Name
72
Modifying the Keyboard Setting
72
Figure 55 - Ports Settings Window
72
Configuring the Time Settings
73
Setting the Scan, Label, and Timeout Period
73
Figure 56 - Time Settings Window
73
Configuring the Users Settings
74
Figure 57 - Users Settings Window
74
Configuring the Security Settings
75
Figure 58 - Security Settings Window
75
OSD Functions (F1)
75
Scanning Computers (F4)
76
Figure 59 - the OSD HELP Window
76
Tuning (F5)
77
Moving the Label ( F6)
77
Inputting and Updating DDC Information (F10)
77
Upgrading the Smart 108/116 Ip Firmware
78
Downloading Update Software and Latest Firmware
78
Update Software System Requirements
79
Connecting the Smart 108/116 IP System
79
Connecting the RS232 Download Cable
79
Installing the Software
80
Starting and Configuring the Update Software
80
Figure 60 - RS232 Cable
80
Figure 61 - Smart 108/116 IP Switch Update Window
81
Verifying the Version Numbers
82
Smart 108/116 IP Switch Version
82
Figure 62 - Communication Port Dialog Box
82
Figure 63 - Firmware Version Report
82
RICC/ROC Version
83
Obtaining New Firmware
83
Updating the Firmware
83
Figure 64 - Hardware Version Report
83
Figure 65 - Open Dialog Box
84
Manually Updating the Ricc/Rocs
85
Restoring Factory Settings
85
Troubleshooting - Update Software
85
Communication Error Message
85
Electricity Failure
86
7 Technical Specifications
87
8 Video Resolution and Refresh Rates
89
9 Snmp Events Table
90
Advertisement
Minicom Minicom Smart 116 IP User Manual (86 pages)
Brand:
Minicom
| Category:
Switch
| Size: 3 MB
Table of Contents
User Guide
1
Legal Notice
2
About this Document
3
C Onnecting the
3
Product
3
Style Conventions
4
Table of Contents
5
Table of Contents
6
Table of Figures
9
1 Introduction
11
Product Overview
11
Features and Benefits
11
Terminology
12
Compatibility
12
Client Computer Operating System
12
Technical Precautions
12
Safety
13
Trademarks
13
Weee Compliance
13
2 Installation
14
Overview
14
System Components
14
The Smart 108/116 IP Unit
14
Figure 1 - Smart 108/116 IP Unit Front Panel
14
C Onnecting to the
15
Figure 2 - Smart 116 IP Unit Rear Panel
15
Pre-Installation Guidelines
16
Rack Mounting the Smart 108/116 Ip Unit
16
Rack Mounting Safety Considerations
16
Mounting the Unit
16
C Onnecting the
16
Connecting the System
17
Figure 3 - Bracket Positions
17
Figure 4 - Bracket Connected for Rear Facing
17
Connecting to the Servers
18
Figure 5 - Smart 108/116 IP System Overview
18
Figure 6 - ROC PS/2
18
Connecting a RICC/ROC PS/2
19
Figure 7 - ROC USB
19
Figure 8 - RICC PS/2 Connections
19
Connecting a RICC SUN
20
Connecting a RICC/ROC USB
20
Figure 9 - RICC USB
20
Connecting to the Network
21
Connecting the Cat5 Cables
21
Connecting the Kvm Console
21
Figure 10 - RICC SUN
21
Connecting the Power Supply
22
3 Configuring the Network
23
Boot-Up Process
23
Assigning Static IP Addresses for a Number of Units
24
Logging Onto the Web Configuration Interface
24
Figure 11 - Boot-Up Process
24
Figure 12 - Web Page
25
Figure 13 - Logon Page
25
Figure 14 - Network Configuration - Device Tab
26
Web Configuration Interface Tabs
26
Web Configuration Toolbar Buttons
27
Configuring the Network Settings
27
Configuring Device ID Settings
27
Configuring the Device IP Address
28
Configuring Centralized Management Settings
28
Configuring Network Snmp Settings
29
Configuring User Settings
29
Adding a User
29
Figure 15 - SNMP Settings
29
Figure 16 - Users Page
30
Figure 17 - Add User Page
30
Deleting User(S)
31
Blocking a User
31
Editing User Information
31
Figure 18 - Delete User Confirmation
31
Configuring the Kvm Switch
32
Figure 19 - Edit User Page
32
Configuring the Security Settings
33
Figure 20 - KVM Switch Configuration Page for Smart 116 IP
33
Performing Additional Configuration Operations
34
Figure 21 - Security Page
34
Figure 22 - SSL Certificate Page
35
Installing an SSL Certificate
35
Upgrading Firmware
35
Figure 23 - Device Version Upgrade Page
36
Figure 24 - Reboot Confirmation Page
36
Restoring Factory Settings
37
Reloading a Page
37
Figure 25 - Restore Factory Settings Page
37
Saving Changes and Logging out
38
Figure 26 - Device Reboot Confirmation Message
38
Figure 27 - Save Succeeded Message
38
Figure 28 - Device Rebooting Progress Box
38
Figure 29 - Logon Page after Rebooting
39
4 Conducting a Remote Session
40
Starting a Remote Session
40
Figure 30 - Logon Page
41
Figure 31 - Remote Session Page
41
Remote Session Toolbar Buttons
42
Sharing a Remote Session
42
Exclusive Session
43
Displaying the Toolbar
43
Setting the Session Profile
43
Figure 32 - Shared Remote Session
43
Figure 33 - Session Profile Dialog Box
44
Full Screen Mode
44
Verifying Remote Presence Solutions Information
45
Changing the Video Performance Settings
45
Figure 34 - Remote Presence Solutions Information
45
Figure 35 - Performance Settings
46
Adjusting the Video
47
Refreshing the Video Image
47
Automatically Adjusting the Video Image
47
Manually Adjusting Video Settings
47
Figure 36 - Video Adjust Progress
47
Figure 37 - Manual Video Adjustments Controls
48
Managing Keyboard Sequences
49
Adding a Keyboard Sequence
49
Figure 38 - Special Key Manager
50
Figure 39 - Add a Predefined Key Dialog Box
50
Recording a New Custom Key
51
Editing a Key Sequence
51
Figure 40 - Record Macro Box
51
Deleting Key Sequence(S)
52
Synchronizing Mouse Pointers
52
Figure 41 - Delete Key(S) Confirmation Box
52
Figure 42 - Relative Mouse Settings
53
Manually Synchronizing the Mouse
53
Figure 43 - Windows 7 Mouse Properties
54
The USB Option
54
Advanced Mouse Emulation
55
Aligning the Mouse Pointers
55
Figure 44 - Mouse Emulation Box
55
Calibrating Mouse Pointers
56
Switching to a Different Server
56
Disconnecting the Remote Session
56
5 Troubleshooting - Safe Mode
57
Entering Safe Mode
57
Figure 45 - Safe Mode Procedure
57
Restoring Factory Defaults
58
Figure 46 - Login Page
58
Figure 47 - Safe Mode Menu
58
Restoring the Device Firmware
59
Figure 48 - Warning
59
Figure 49 - Additional Warning
59
Figure 50 - Reboot
59
Figure 51 - Upgrade Succeeded
60
6 Operating the Smart 108/116 Ip Switching System Locally
61
U Sing the K Eyboard H Otkeys
61
Using the Osd
61
Navigating the OSD
62
Selecting a Computer
62
Configuring the OSD Settings
62
Figure 52 - OSD Main Window
62
Configuring the General Settings
63
Figure 53 - OSD Settings Window
63
Configuring Security Settings
64
Figure 54 - General Settings Window
64
Changing the OSD Hotkey
65
Activating Autoskip
65
Serial Port
65
Changing the Keyboard Language
65
Editing the Switch Name
65
Restoring OSD to Factory Defaults (F7)
66
Configuring the Ports Settings
66
Editing the Computer Name
66
Figure 55 - Ports Settings Window
66
Modifying the Keyboard Setting
67
Configuring the Time Settings
67
Figure 56 - Time Settings Window
67
Setting the Scan, Label, and Timeout Period
68
Configuring the Users Settings
68
Figure 57 - Users Settings Window
68
Configuring the Security Settings
69
Figure 58 - Security Settings Window
69
Figure 59 - the OSD HELP Window
70
OSD Functions (F1)
70
Scanning Computers (F4)
71
Tuning (F5)
71
Moving the Label ( F6)
71
Inputting and Updating DDC Information (F10)
72
Upgrading the Smart 108/116 Ip Firmware
72
Downloading Update Software and Latest Firmware
72
Update Software System Requirements
73
Connecting the Smart 108/116 IP System
73
Connecting the RS232 Download Cable
73
Installing the Software
74
Starting and Configuring the Update Software
74
Figure 60 - RS232 Cable
74
Figure 61 - Smart 108/116 IP Switch Update Window
75
Verifying the Version Numbers
76
Smart 108/116 IP Switch Version
76
Figure 62 - Communication Port Dialog Box
76
Figure 63 - Firmware Version Report
76
RICC/ROC Version
77
Figure 64 - Hardware Version Report
77
Obtaining New Firmware
77
Updating the Firmware
77
Figure 65 - Open Dialog Box
78
Manually Updating the Ricc/Rocs
78
Restoring Factory Settings
79
Troubleshooting - Update Software
79
Communication Error Message
79
Electricity Failure
79
7 Technical Specifications
81
8 Video Resolution and Refresh Rates
83
9 Snmp Events Table
84
Minicom Minicom Smart 116 IP User Manual (62 pages)
Minicom Advanced Systems Smart 116 IP User Guide
Brand:
Minicom
| Category:
Switch
| Size: 1 MB
Table of Contents
User Guide
1
Table of Contents
2
1 Welcome
5
Technical Precautions
5
2 Introduction
6
3 Key Features
6
Centralized Management
6
4 System Components
7
5 Compatibility
7
6 Terminology
7
7 The Smart 108/116 IP Unit
7
LED and Button Table
8
Connector Table
8
8 Pre-Installation Guidelines
9
Avoiding General Rack Mounting Problems
9
Circuit Overloading
9
Rack Mounting the Smart 108/116 IP
9
9 Connecting the System
11
The Ricc/Rocs
11
Connecting a RICC/ROC PS/2
12
Connecting a RICC/ROC USB
13
Connecting a RICC SUN
13
Connecting to the Network
14
Connecting the CAT5 Cables
14
Connecting a KVM Console
14
Connecting the Power Supply
14
10 Initial Settings - Default IP Address
14
Static IP Addresses for a Number of Units
15
11 Logging into the Web Interface
16
SSL Certificate Notes
17
12 Network > Configuration
17
Lan
18
Centralized Management
19
13 Network > SNMP Settings
19
SNMP Events Recorded
20
14 Administration > User Settings
20
Adding a User
20
Editing a User
21
Deleting a User
21
Blocking a User
21
15 Administration > Switch Configuration
21
16 Administration > User Targets
22
17 Security > Settings
23
18 Security > SSL Certificate
24
19 Maintenance > Firmware Upgrade
24
20 Restore Factory Settings
25
22 Starting a Remote Session
26
Sharing a Remote Session
27
Private Remote Session
28
Displaying the Toolbar
28
Session Profile
28
Full Screen Mode
29
Changing the Performance Settings
29
Adjusting the Video Settings
30
Refresh
31
Video Adjust
31
Advanced
31
Power Cycle
32
Keyboard Key Sequences
32
Synchronizing Mouse Pointers
34
Aligning the Mice Pointers
34
Calibrating Mice Pointers
34
Manual Mouse Synchronization
34
Switching to a Different Server/Device
36
Disconnecting the Remote Session
36
21 Saving Changes and Logging out
26
23 Troubleshooting - Safe Mode
36
Entering Safe Mode
37
Restoring Factory Defaults
38
Restoring the Device Firmware
39
24 Switching between Computers
40
The Keyboard Hotkeys
40
25 The OSD
40
Navigating the OSD
41
Selecting a Computer
41
The OSD Settings - F2
41
The General Settings
42
Activating Password Protection
43
F7 Defaults
44
The Ports Settings
44
Editing the Computer Name
44
Keyboard (KB)
45
The Time Settings
45
Scan (SCN) - Label (LBL) - Time out (T/O)
45
Users
46
Security
47
The OSD HELP Window - F1
47
Scanning Computers - F4
48
Tuning - F5
48
Moving the Label - F6
49
DDC - F10
49
26 Upgrading the Smart 108/116 IP Firmware
50
Obtaining the Update Software and Latest Firmware
50
System Requirements for the Update Software
50
Connecting the Smart 108/116 IP System
50
Connecting the RS232 Download Cable
51
Installing the Software
51
Starting and Configuring the Update Software
51
Verifying the Version Numbers
53
Smart 108/116 IP Switch Version
53
RICC/ROC Version
54
Obtaining New Firmware
54
Updating the Firmware
54
Restoring Factory Settings
55
27 Update Software - Troubleshooting
56
Communication Error Message
56
Electricity Failure
56
28 Technical Specifications
57
29 Video Resolution and Refresh Rates
58
30 Safety
59
31 User Guide Feedback
59
32 WEEE Compliance
59
Appendix 1: SNMP Events Table
60
Advertisement
Minicom Minicom Smart 116 IP User Manual (56 pages)
Smart 116 IP
Brand:
Minicom
| Category:
Switch
| Size: 1 MB
Table of Contents
User Guide
1
Table of Contents
2
1 Welcome
5
Section I
6
2 Introduction
6
3 Key Features
6
4 System Components
7
5 Compatibility
7
6 Terminology
7
7 The Smart 116 IP Unit
7
LED and Button Table
8
Connector Table
8
8 Pre-Installation Guidelines
8
Avoiding General Rack Mounting Problems
9
Rack Mounting the Smart 116 IP
9
9 Client Computer Operating System
10
10 Connecting the System
10
Connecting to the Network
11
The Roc/Riccs
11
Connecting a Roc/Ricc PS/2
12
Connecting a Roc/Ricc USB
13
Connecting a RICC SUN
13
Connecting the CAT5 Cables
14
Connecting a KVM Console
14
Connecting the Power Supply
14
11 Initial Settings - Default IP Address
14
Static IP Addresses for a Number of Units
14
12 Logging into the Web Interface
15
SSL Certificate Notes
16
13 Network > Configuration
16
Lan 1
16
Kvm.net
16
14 Saving Changes
17
15 Administration > User Settings
17
Adding a User
18
Editing a User
18
Deleting a User
19
Blocking a User
19
16 Administration > Switch Configuration
19
17 Administration > User Targets
20
18 Security > Settings
21
19 Security > SSL Certificate
22
20 Maintenance > Firmware Upgrade
22
22 Logging out
23
21 Restore Factory Settings
23
23 Starting a Remote Session
24
Taking over a Busy Remote Session
25
Full Screen Mode
25
The Toolbar
26
Switching to a Different Server
26
Changing the Performance Settings
26
Adjusting the Video Settings
27
Refresh
28
Manual Video Adjust
28
Auto Video Adjust
29
Power Cycle
29
Keyboard Key Sequences
29
Synchronizing Mouse Pointers
31
Aligning the Mice Pointers
31
Calibrating Mice Pointers
31
Manual Mice Synchronization
31
Minicom Icon Menu Features
33
Disconnecting the Remote Session
34
24 Troubleshooting - Safe Mode
34
Entering Safe Mode
34
Restoring Factory Defaults
35
Restoring the Device Firmware
36
Section II
37
25 Switching between Computers
37
The Keyboard Hotkeys
37
26 The OSD
37
Navigating the OSD
38
Selecting a Computer
38
The OSD Settings - F2
38
The General Settings
38
F7 Defaults
41
The Ports Settings
41
Editing the Computer Name
41
Keyboard (KB)
42
Adding/Changing a Hotkey (HKEY)
42
The Time Settings
42
Scan (SCN) - Label (LBL) - Time out (T/O)
43
Users
43
Security
44
The OSD HELP Window - F1
45
Scanning Computers - F4
46
Tuning - F5
46
Moving the Label - F6
46
27 Upgrading the Smart 116 IP Firmware
47
System Requirements for the Update Software
47
Connecting the Smart 116 IP System
47
Connecting the RS232 Download Cable
47
Installing the Software
48
Starting and Configuring the Update Software
48
Verifying the Version Numbers
50
116 IP Switch Version
50
Roc/Ricc Version Number
51
Obtaining New Firmware
51
Updating the Firmware
51
28 Update Software - Troubleshooting
52
Resetting the Smart 116 IP or Roc/Riccs
52
Setting Default Values for the OSD
53
Get Status
53
Communication Error Message
53
Electricity Failure
53
29 Technical Specifications
54
30 Video Resolution and Refresh Rates
55
31 Safety
55
32 User Guide Feedback
55
Minicom Minicom Smart 116 IP Quick Start Manual (2 pages)
KVM Switch
Brand:
Minicom
| Category:
Extender
| Size: 0 MB
Table of Contents
System Components
1
Connecting the System
1
1. Introduction
1
3. Compatibility
1
4. the Smart 116 IP Unit
1
4.1 LED and Button Table
1
4.2 Connector Table
1
5. Pre-Installation Guidelines
1
6.1 the Rocs
1
6.1.1 Connecting a ROC PS/2
1
Logging into the Web Interface
2
The Osd
2
Starting a Remote Session
2
6.2 Connecting to the Network
2
6.3 Connecting the CAT5 Cables
2
6.4 Connecting the Power Supply
2
7. Initial Settings - Default IP Address
2
7.1 Static IP Addresses for a Number of Units
2
9.1 Navigating the OSD
2
9.2 Selecting a Computer
2
Minicom Minicom Smart 116 IP Start Manual (2 pages)
Quick Start Guide for 0SU70030 / 0SU70032 KVM Switches 933208
Brand:
Minicom
| Category:
Switch
| Size: 0 MB
Table of Contents
System Components
1
Logging into the Web Interface
2
The Osd
2
Starting a Remote Session
2
Advertisement
Related Products
Minicom Smart 108 IP
Minicom Smart 4
Minicom Smart CAT5 Switch 16 IP
Minicom Smart IP Access
Minicom Smart 232
Minicom Minicom Smart 216
Minicom Minicom Supervisor Phantom
Minicom Supervisor MU
Minicom Switches
Minicom Supervisor Smart
Minicom Categories
Switch
Extender
Transmitter
Network Hardware
Receiver
More Minicom Manuals
Login
Sign In
OR
Sign in with Facebook
Sign in with Google
Upload manual
Upload from disk
Upload from URL