Sign In
Upload
Manuals
Brands
MacDon Manuals
Farm Equipment
PW8
MacDon PW8 Pick-Up Header Manuals
Manuals and User Guides for MacDon PW8 Pick-Up Header. We have
4
MacDon PW8 Pick-Up Header manuals available for free PDF download: Operator's Manual, Unloading And Assembly Instructions
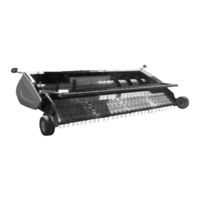
MacDon PW8 Operator's Manual (358 pages)
Pick-Up Header
Brand:
MacDon
| Category:
Farm Equipment
| Size: 20 MB
Table of Contents
Summary of Changes
7
Serial Number
8
Table of Contents
9
Chapter 1: Safety
17
Safety Alert Symbols
17
Signal Words
18
General Safety
19
Maintenance Safety
21
Hydraulic Safety
22
Safety Signs
23
Installing Safety Decals
23
Safety Sign Locations
24
Understanding Safety Signs
26
Chapter 2: Product Overview
33
Header Specifications
33
Header Dimensions
35
Component Identification
36
Definitions
37
Chapter 3: Operation
39
Owner/Operator Responsibilities
39
Operational Safety
40
Endshields
41
Opening Left Endshield
41
Closing Left Endshield
42
Removing Left Endshield
43
Installing Left Endshield
44
Removing Right Endshield
46
Installing Right Endshield
46
Header Lift Cylinder Safety Props
48
Engaging Hold-Down Lift Cylinder Safety Props
49
Daily Start-Up Check
50
Shutting down the Machine
51
Break-In Period
52
Changing Header Opening
53
Header Attachment and Detachment
54
Agco Ideal
54
Attaching Header to IDEAL ™ Series Combine
54
Detaching from AGCO IDEAL ™ Combine
57
Case IH
60
Attaching Header to Case IH Combine
60
Detaching Header from Case IH Combine
63
Challenger®, Gleaner®, and Massey Ferguson
66
Attaching Header to Challenger®, Gleaner®, and Massey Ferguson® Combines
67
Detaching Header from Challenger®, Gleaner®, and Massey Ferguson® Combine
72
John Deere 60, 70, S, and T Series
74
Attaching Header to John Deere 60, 70, S, or T Series Combine
74
Detaching Header from John Deere 60, 70, S, and T Series Combine
78
New Holland CR/CX Series Combine
80
Attaching Header to New Holland CR/CX Series Combine
80
Detaching Header from New Holland CR/CX Combine
84
Versatile
86
Attaching Header to Versatile Combine
86
Detaching Header from Versatile Combine
91
Header Transport
94
Transport Lights
94
Header Operation
95
Operating Speed
95
Adjusting Draper Speed
96
Auger Operation
96
Auger Speed
96
Checking Auger Position
96
Auger Float
97
Adjusting Auger Position
101
Stripper Plate Clearance
102
Adjusting the Stripper Bracket Width - Gleaner® Combines
103
Operating Height
106
Header Height
106
Pick-Up Height
107
Adjusting Header Float
109
Hold-Downs
111
Hold-Down Position
111
Adjusting Hold-Down Rod Angle
112
Crop Deflectors
112
Removing Crop Deflectors from Field Position
112
Installing Crop Deflectors
113
Driveline
114
Clutch
114
Driveline Guard
114
Unplugging the Header
116
Adjusting the Pan Seal Assembly
117
Storing the Header
118
Chapter 4: Auto Header Height Control
119
Auto Header Height Control System Overview
119
Auto Header Height Control Sensor Operation
120
Header Height Sensors
121
Removing Header Height Sensor Assembly - Left Side
121
Installing Header Height Sensor Assembly - Left Side
122
Removing Header Height Control System - Right Side
123
Installing Header Height Sensor Assembly - Right Side
125
Height Sensor Output Voltage Range - Combine Requirements
127
Manually Checking Voltage Range
127
Adjusting Header Height Sensor Voltage Range - Left Side
130
Adjusting Header Height Sensor Voltage Range - Right Side
130
Height Sensor Output Voltage Range - Combine Requirements, Page
130
Note
131
IDEAL Series Combines
133
Setting up the Header - IDEAL ™ Series
133
Setting up Automatic Header Controls - IDEAL Series
138
Calibrating the Header - IDEAL ™ Series
139
Operating the Header - IDEAL ™ Series
141
Reviewing Header In-Field Settings - IDEAL Series
143
Case IH 5130/6130/7130 and 5140/6140/7140 Midrange Combines
145
Setting up the Header on the Combine Display (Case IH 5130/6130/7130; 5140/6140/7140)
145
Checking Voltage Range from Combine Cab (Case IH 5130/6130/7130; 5140/6140/7140)
146
Calibrating Auto Header Height Control (Case IH 5130/6130/7130; 5140/6140/7140)
148
Setting Preset Cutting Height (Case IH 5130/6130/7130; 5140/6140/7140)
149
Case IH 7010/8010, 7120/8120/9120, 7230/8230/9230, and 7240/8240/9240 Combines
152
Checking Voltage Range from Combine Cab (Case 8010)
152
Checking Voltage Range from Combine Cab (Case IH 7010/8010; 7120/8120/9120; 7230/8230/9230; 7240/8240/9240)
154
Calibrating Auto Header Height Control
155
7240/8240/9240) - Software Versions below 28.00
155
Calibrating Auto Header Height Control
157
7240/8240/9240) - Software Versions above 28.00
157
Setting Preset Cutting Height (Case 7010/8010, 7120/8120/9120, 7230/8230/9230, 7240/8240/9240)
159
Challenger ® 6 Combines
161
Checking Voltage Range from Combine Cab - Challenger ® 6 and 7 Series
161
Engaging Auto Header Height Control - Challenger ® 6 Series
162
Calibrating Auto Header Height Control - Challenger ® 6 Series
163
Adjusting Header Height - Challenger ® 6 Series
165
Adjusting Header Raise/Lower Rate - Challenger ® 6 Series
165
Setting Sensitivity of Auto Header Height Control - Challenger ® 6 Series
167
Gleaner R65/R66/R75/R76 and S Series Combines - Except S9 Series
168
Checking Voltage Range from Combine Cab - Gleaner ® R65/R66/R75/R76 and S Series
168
Engaging Auto Header Height Control - Gleaner ® R65/R66/R75/R76 and S Series
169
Calibrating Auto Header Height Control - Gleaner ® R65/R66/R75/R76 and S Series
170
Turning Accumulator off - Gleaner ® R65/R66/R75/R76 and S Series
172
Adjusting Header Raise/Lower Rate - Gleaner ® R65/R66/R75/R76 and S Series
172
Adjusting Ground Pressure - Gleaner R65/R66/R75/R76 and S Series
173
Adjusting Sensitivity of Auto Header Height Control - Gleaner R65/R66/R75/ R76 and S Series
174
Troubleshooting Alarms and Diagnostic Faults - Gleaner ® R65/R66/R75/R76 and S Series
175
Gleaner S9 Series Combines
177
Setting up the Header - Gleaner ® S9 Series
177
Setting up Automatic Header Controls - Gleaner ® S9 Series
181
Calibrating Header - Gleaner S9 Series
183
Operating with a Gleaner ® S9 Series Combine
187
Header In-Field Settings for Gleaner ® S9 Series Combine
188
John Deere 60 Series Combines
191
Checking Voltage Range from Combine Cab (John Deere 60 Series)
191
Calibrating Auto Header Height Control (John Deere 60 Series)
192
Turning off Accumulator (John Deere 60 Series)
193
Setting Sensing Grain Header Height (John Deere 60 Series)
194
Setting Sensitivity of Auto Header Height Control (John Deere 60 Series)
195
Adjusting Threshold for Drop Rate Valve (John Deere 60 Series)
196
John Deere 70 Series Combines
197
Checking Voltage Range from Combine Cab (John Deere 70 Series)
197
Calibrating Feeder House Speed (John Deere 70 Series)
199
Calibrating Auto Header Height Control (John Deere 70 Series)
199
Setting Sensitivity of Auto Header Height Control (John Deere 70 Series)
201
Adjusting Manual Header Raise/Lower Rate (John Deere 70 Series)
201
John Deere S and T Series Combines
203
Checking Voltage Range from Combine Cab (John Deere S and T Series)
203
Calibrating Feeder House Fore-Aft Tilt Range (John Deere S and T Series)
205
Calibrating Auto Header Height Control (John Deere S and T Series)
207
Setting Sensitivity of Auto Header Height Control (John Deere S and T Series)
209
Adjusting Manual Header Raise/Lower Rate (John Deere S and T Series)
210
Setting Preset Cutting Height (John Deere S and T Series)
211
New Holland Combines CX/CR Series (CR Series - Model Year 2014 and Earlier)
214
Checking Voltage Range from Combine Cab (New Holland CX/CR Series)
214
Engaging Auto Header Height Control (New Holland CR/CX Series)
216
Calibrating Auto Header Height Control (New Holland CR/CX Series)
216
Calibrating Maximum Stubble Height
218
Adjusting Header Raise Rate (New Holland CR/CX Series)
219
Setting Header Lower Rate (New Holland CR/CX Series)
219
Setting Auto Header Height Control Sensitivity to 200 (New Holland CR/CX Series)
220
Setting Preset Cutting Height (New Holland CR/CX Series)
220
New Holland Combines (CR Series - Model Year 2015 and Later)
222
Engaging Auto Header Height Control (New Holland CR Series)
222
Checking Voltage Range from Combine Cab (New Holland CR Series)
224
Calibrating Auto Header Height Control (New Holland CR Series)
226
Setting Auto Height (New Holland CR Series)
228
Setting Maximum Work Height (New Holland CR Series)
229
Chapter 5: Maintenance and Servicing
231
Preparing Header for Servicing
231
Maintenance Requirements
232
Maintenance Schedule/Record
232
Preseason/Annual Service
234
End-Of-Season Service
235
Lubrication
236
Greasing Procedure
236
Greasing Points
237
Lubricating Auger Drive Chain
239
Installing Sealed Bearing
240
Drives
241
Header Driveshaft
241
Header Driveline
241
Removing Header Driveline
241
Installing Header Driveline
242
Replacing Driveline Clutch
244
Removing Driveline Guard
245
Installing Driveline Guard
247
Cleaning Driveline Splined Shaft
249
Draper Drives
249
Removing Front Hydraulic Motor
249
Installing Front Hydraulic Motor
251
Removing Rear Hydraulic Motor
252
Installing Rear Hydraulic Motor
253
Removing Hydraulic Motor Hoses
254
Installing Hydraulic Motor Hoses
256
Auger Drive
258
Auger Drive Chain
258
Auger Drive Sprockets
261
Auger Maintenance
267
Replacing Auger Fingers
267
Replacing Auger Finger Guides
268
Replacing Auger Finger Holder
270
Replacing Stripper Plates
273
Replacing Flighting Extensions
274
Decks
276
Draper Belts
276
Removing Front Draper Belt
276
Installing Front Draper Belt
277
Removing Rear Draper Belt
279
Installing Rear Draper Belt
281
Draper Fingers and Guides
283
Replacing Draper Fingers
283
Replacing Draper Guide
284
Draper Deck Roller Bearings
285
Replacing Drive Roller Bearing on Left Side of Rear Deck
286
Replacing Drive Roller Bearing on Right Side of Rear Deck
290
Replacing Idler Roller Bearing on Left Side of Rear Deck
294
Replacing Idler Roller Bearing on Right Side of Rear Deck
295
Aligning Rear Draper Deck Rollers
296
Replacing Drive Roller Bearing on Left Side of Front Deck
298
Replacing Drive Roller Bearing on Right Side of Front Deck
301
Replacing Front Deck Idler Roller Bearings
301
Aligning Front Draper Deck Rollers
303
Header Spring Float Assembly
308
Removing Header Spring Float Assembly
308
Installing Header Spring Float Assembly
309
Hold-Downs
312
Replacing Fiberglass Rods
312
Replacing Master Hold-Down Cylinder
313
Removing Master Cylinder
313
Installing Master Cylinder
315
Replacing Slave Hold-Down Cylinder
316
Removing Slave Cylinder
316
Installing Slave Cylinder
318
Bleeding Cylinders and Lines
319
Hydraulic Hoses and Lines
320
Removing Master Cylinder Hose
321
Installing Master Cylinder Hose
324
Draper Speed Sensor
326
Checking Draper Speed Sensor Position
326
Adjusting Draper Speed Sensor
327
Replacing Draper Speed Sensor
328
Wheels and Tires
330
Removing Wheel
330
Installing Wheel
331
Inflating Tires
332
Lights
333
Adjusting Transport Lights
333
Replacing Transport Light Bulb
333
Replacing Lens
334
Replacing Lamp Housing
334
Chapter 6: Options and Attachments
337
Hold-Down Performance Kit
337
Seed Saver Performance Kit
338
Auger Dent Repair Kit
339
Combine Completion Package Kits
340
Pivoting Caster Wheels Kit
343
Chapter 7: Troubleshooting
345
Chapter 8: Reference
349
Torque Specifications
349
Conversion Chart
350
Index
351
Recommended Fluids and Lubricants
357
Advertisement
MacDon PW8 Operator's Manual (304 pages)
Pick-Up Header
Brand:
MacDon
| Category:
Farm Equipment
| Size: 17 MB
Table of Contents
List of Revisions
7
Serial Number
8
Table of Contents
9
Chapter 1: Safety
15
Safety Alert Symbols
15
Signal Words
16
General Safety
17
Maintenance Safety
19
Hydraulic Safety
20
Safety Signs
21
Installing Safety Decals
21
Safety Sign Locations
22
Understanding Safety Signs
30
Chapter 2: Product Overview
35
Header Specifications
35
Header Dimensions
36
Component Identification
37
Definitions
38
Chapter 3: Operation
41
Owner/Operator Responsibilities
41
Operational Safety
42
Endshields
43
Opening Left Endshield
43
Closing Left Endshield
44
Removing Left Endshield
45
Installing Left Endshield
46
Removing Right Endshield
48
Installing Right Endshield
49
Header Lift Cylinder Safety Props
50
Engaging Hold-Down Lift Cylinder Safety Props
51
Daily Start-Up Check
52
Shutting down the Machine
53
Break-In Period
54
Changing Header Opening
55
Header Attachment and Detachment
56
Case IH
56
Attaching to Case IH Combine
56
Detaching from Case IH Combine
59
John Deere 60, 70, S, and T Series
63
Attaching to John Deere 60, 70, S, and T Series Combine
63
Detaching from John Deere 60, 70, S, and T Series Combine
67
New Holland CR/CX Series Combine
70
Attaching to New Holland CR/CX Series Combine
70
Detaching from New Holland CR/CX Combine
73
Versatile
75
Attaching to Versatile Combine
75
Detaching from Versatile Combine
79
Header Transport
83
Transport Lights
83
Header Operation
84
Operating Speed
84
Adjusting Draper Speed
85
Auger Operation
86
Auger Speed
86
Checking Auger Position
86
Adjusting Auger Position
87
Auger Float
88
Stripper Plate Clearance
91
Operating Height
93
Header Height
93
Pick-Up Height
94
Adjusting Header Float
96
Hold-Downs
98
Hold-Down Position
98
Adjusting Hold-Down Rod Angle
99
Crop Deflectors
99
Removing Crop Deflectors from Field Position
99
Installing Crop Deflectors
100
Draper Belt Tension
101
Checking Draper Belt Tension
101
Adjusting Front Draper Belt Tension
102
Adjusting Rear Draper Belt Tension
104
Driveline
105
Clutch
105
Driveline Guard
105
Unplugging the Header
106
Adjusting the Pan Seal Assembly
107
Storing the Header
108
Chapter 4: AHHC System
109
Auto Header Height Control (AHHC) System Overview
109
AHHC Sensor Operation
110
Header Height Sensors
110
Removing Header Height Sensor Assembly (Left Side)
111
Installing Header Height Sensor Assembly (Left Side)
112
Removing Header Height Control System (Right Side)
112
Installing Header Height Sensor Assembly (Right Side)
114
Height Sensor Output Voltage Range - Combine Requirements
116
Manually Checking Voltage Range
116
Adjusting Header Height Sensor Voltage Range (Left Side)
119
Adjusting Header Height Sensor Voltage Range (Right Side)
119
Case IH 5130/6130/7130 and 5140/6140/7140 Midrange Combines
121
Setting up the Header on the Combine Display
121
Checking Voltage Range from Combine Cab
122
Calibrating Auto Header Height Control (Case IH 5130/6130/7130, 5140/6140/7140)
124
Setting Preset Cutting Height (Case 5130/6130/7130, 5140/6140/7140)
124
Case IH 7010/8010, 7120/8120/9120, 7230/8230/9230, and 7240/8240/9240 Combines
127
Checking Voltage Range from Combine Cab (Case 8010)
127
Checking Voltage Range from Combine Cab
129
Calibrating Auto Header Height Control
130
Software)
132
Setting Preset Cutting Height
134
John Deere 60 Series Combines
136
Checking Voltage Range from Combine Cab (John Deere 60 Series)
136
Calibrating Auto Header Height Control (John Deere 60 Series)
137
Turning off Accumulator (John Deere 60 Series)
139
Setting Sensing Grain Header Height to 50 (John Deere 60 Series)
140
Setting Sensitivity of Auto Header Height Control (John Deere 60 Series)
141
Adjusting Threshold for Drop Rate Valve (John Deere 60 Series)
141
John Deere 70 Series Combines
142
Checking Voltage Range from Combine Cab (John Deere 70 Series)
142
Calibrating Feeder House Speed (John Deere 70 Series)
143
Calibrating Auto Header Height Control (John Deere 70 Series)
144
Setting Sensitivity of Auto Header Height Control (John Deere 70 Series)
146
Adjusting Manual Header Raise/Lower Rate (John Deere 70 Series)
148
John Deere S and T Series Combines
149
Checking Voltage Range from Combine Cab (John Deere S and T Series)
149
Calibrating Feeder House Fore-Aft Tilt Range (John Deere S and T Series)
149
Calibrating Auto Header Height Control (John Deere S and T Series)
152
Setting Sensitivity of Auto Header Height Control (John Deere S and T Series)
153
Adjusting Manual Header Raise/Lower Rate (John Deere S and T Series)
154
Setting Preset Cutting Height (John Deere S and T Series)
155
New Holland Combines CX/CR Series (CR Series - Model Year 2014 and Earlier)
158
Checking Voltage Range from Combine Cab (New Holland)
158
Engaging Auto Header Height Control (New Holland CR/CX Series)
159
Calibrating Auto Header Height Control (New Holland CR/CX Series)
160
Adjusting Header Raise Rate (New Holland CR/CX Series)
162
Setting Header Lower Rate to 50 (New Holland CR/CX Series)
163
Setting Sensitivity of Auto Header Height Control to 200 (New Holland CR/CX Series)
164
Setting Preset Cutting Height (New Holland CR/CX Series)
164
Configuring Reel Fore-Aft, Header Tilt, and Header Type (New Holland CR Series)
165
New Holland Combines (CR Series - Model Year 2015 and Later)
167
Engaging Auto Header Height Control (New Holland CR Series)
167
Checking Voltage Range from Combine Cab (New Holland CR Series)
169
Calibrating Auto Header Height Control (New Holland CR Series)
171
Setting Auto Height (New Holland CR Series)
173
Setting Maximum Work Height (New Holland CR Series)
175
Chapter 5: Maintenance and Servicing
177
Preparing Header for Servicing
177
Maintenance Requirements
178
Maintenance Schedule/Record
178
Preseason/Annual Service
179
End-Of-Season Service
180
Lubrication
181
Greasing Procedure
181
Greasing Points
182
Lubricating Auger Drive Chain
183
Installing Sealed Bearing
184
Drives
185
Header Driveshaft
185
Header Driveline
185
Removing Header Driveline
185
Installing Header Driveline
187
Replacing Driveline Clutch
189
Removing Driveline Guard
189
Installing Driveline Guard
191
Cleaning Driveline Splined Shaft
193
Draper Drives
194
Removing Front Hydraulic Motor
194
Installing Front Hydraulic Motor
195
Removing Rear Hydraulic Motor
196
Installing Rear Hydraulic Motor
197
Removing Hydraulic Motor Hoses
198
Installing Hydraulic Motor Hoses
200
Auger Drive
202
Auger Drive Chain
202
Auger Drive Sprockets
204
Auger Maintenance
211
Replacing Auger Fingers
211
Replacing Auger Finger Guides
212
Replacing Auger Finger Holder
214
Replacing Stripper Plates
217
Replacing Flighting Extensions
218
Decks
220
Draper Belts
220
Removing Front Draper Belt
220
Installing Front Draper Belt
221
Removing Rear Draper Belt
222
Installing Rear Draper Belt
224
Draper Fingers and Guides
225
Replacing Draper Fingers
225
Replacing Draper Guide
226
Draper Deck Roller Bearings
227
Replacing Drive Roller Bearing on Left Side of Rear Deck
228
Replacing Drive Roller Bearing on Right Side of Rear Deck
232
Replacing Idler Roller Bearing on Left Side of Rear Deck
236
Replacing Idler Roller Bearing on Right Side of Rear Deck
237
Aligning Rear Draper Deck Rollers
238
Replacing Drive Roller Bearing on Left Side of Front Deck
240
Replacing Drive Roller Bearing on Right Side of Front Deck
243
Replacing Front Deck Idler Roller Bearings
243
Aligning Front Draper Deck Rollers
245
Header Spring Float Assembly
250
Removing Header Spring Float Assembly
250
Installing Header Spring Float Assembly
252
Hold-Downs
254
Replacing Fiberglass Rods
254
Replacing Master Hold-Down Cylinder
255
Removing Master Cylinder
255
Installing Master Cylinder
257
Replacing Slave Hold-Down Cylinder
258
Removing Slave Cylinder
258
Installing Slave Cylinder
260
Bleeding Cylinders and Lines
261
Hydraulic Hoses and Lines
262
Removing Master Cylinder Hose
263
Installing Master Cylinder Hose
265
Draper Speed Sensor
268
Checking Draper Speed Sensor Position
268
Adjusting Draper Speed Sensor
269
Replacing Draper Speed Sensor
270
Wheels and Tires
271
Removing Wheel
271
Installing Wheel
272
Inflating Tire
272
Lights
273
Adjusting Transport Lights
273
Replacing Transport Light Bulb
274
Replacing Lens
274
Replacing Lamp Housing
275
Chapter 6: Options and Attachments
277
Hold-Down Performance Kit
277
Seed Saver Performance Kit
278
Combine Completion Package Kits
279
Auger Dent Repair Kit
280
Pivoting Caster Wheels Kit
281
Chapter 7: Troubleshooting
283
Chapter 8: Reference
287
Torque Specifications
287
Metric Bolt Specifications
287
Metric Bolt Specifications Bolting into Cast Aluminum
289
Flare-Type Hydraulic Fittings
290
O-Ring Boss (ORB) Hydraulic Fittings (Adjustable)
291
O-Ring Boss (ORB) Hydraulic Fittings (Non-Adjustable)
293
O-Ring Face Seal (ORFS) Hydraulic Fittings
294
Tapered Pipe Thread Fittings
295
Conversion Chart
296
Index
297
Recommended Fluids and Lubricants
303
MacDon PW8 Unloading And Assembly Instructions (170 pages)
Pick-Up Header. 2019 Model Year
Brand:
MacDon
| Category:
Farm Equipment
| Size: 8 MB
Table of Contents
Table of Contents
5
Chapter 1: Safety
9
Signal Words
9
General Safety
10
Safety Signs
12
Safety Sign Locations
13
Chapter 2: Shipping Data
21
Chapter 3: Unloading the Header
23
Unloading with a Forklift
23
Lowering Header
25
Removing Shipping Stands
26
Opening Left Endshield
28
Closing Left Endshield
28
Attaching Fixed Wheels
30
Attaching Caster Wheels
31
Setting Fixed Wheels to Field/Working Position
33
Setting Caster Wheels to Field/Working Position
34
Extending Hold-Down to Field/Working Position
35
Adjusting Transport Lights
36
Repositioning Driveline Storage Bracket
37
Chapter 4: Reconfiguring Headers
39
Configuring Headers for John Deere
39
Moving Stripper Assemblies
39
Removing Flighting Extensions
43
Installing Auger Fingers
44
Configuring Headers for Case IH
46
Moving Stripper Assemblies
46
Configuring Headers for New Holland CX
49
Moving Stripper Assemblies
49
Removing Flighting Extensions
52
Installing Auger Fingers
53
Configuring Headers for New Holland CR
55
Moving Stripper Assemblies
55
Installing Flighting Extensions
58
Removing Auger Fingers
60
Adjusting Stripper Plate Clearance
62
Chapter 5: Attaching Header to Combine
63
Attaching to Case IH Combine
63
Attaching to John Deere 60, 70, S, or T Series Combine
66
Attaching to New Holland CR/CX Series Combine
70
Attaching to Versatile Combine
74
Removing Deck Shipping Braces
79
Installing Crop Deflectors
80
Chapter 6: Predelivery Inspection
81
Auto Header Height Control (AHHC) System Overview
81
AHHC Sensor Operation
82
Height Sensor Output Voltage Range - Combine Requirements
82
Manually Checking Voltage Range
83
Adjusting Header Height Sensor Voltage Range (Left Side)
85
Adjusting Header Height Sensor Voltage Range (Right Side)
85
Case IH 5130/6130/7130 and 5140/6140/7140 Midrange Combines
87
Setting up the Header on the Combine Display
87
Checking Voltage Range from Combine Cab (Case IH 5130/6130/7130; 5140/6140/7140)
88
Calibrating Auto Header Height Control (Case IH 5130/6130/7130, 5140/6140/7140)
90
Setting Preset Cutting Height (Case 5130/6130/7130, 5140/6140/7140)
90
Case IH 7010/8010, 7120/8120/9120, 7230/8230/9230, and 7240/8240/9240 Combines
93
Checking Voltage Range from Combine Cab (Case 8010)
93
Checking Voltage Range from Combine Cab
95
Calibrating Auto Header Height Control
97
Software)
99
Setting Preset Cutting Height
101
John Deere 60 Series Combines
102
Checking Voltage Range from Combine Cab (John Deere 60 Series)
102
Calibrating Auto Header Height Control (John Deere 60 Series)
103
Turning off Accumulator (John Deere 60 Series)
105
Setting Sensing Grain Header Height to 50 (John Deere 60 Series)
106
Setting Sensitivity of Auto Header Height Control (John Deere 60 Series)
107
Adjusting Threshold for Drop Rate Valve (John Deere 60 Series)
108
John Deere 70 Series Combines
109
Checking Voltage Range from Combine Cab (John Deere 70 Series)
109
Calibrating Feeder House Speed (John Deere 70 Series)
109
Calibrating Auto Header Height Control (John Deere 70 Series)
110
Setting Sensitivity of Auto Header Height Control (John Deere 70 Series)
111
Adjusting Manual Header Raise/Lower Rate (John Deere 70 Series)
113
John Deere S and T Series Combines
114
Checking Voltage Range from Combine Cab (John Deere S and T Series)
114
Calibrating Feeder House Fore-Aft Tilt Range (John Deere S and T Series)
114
Calibrating Auto Header Height Control (John Deere S and T Series)
117
Setting Sensitivity of Auto Header Height Control (John Deere S and T Series)
119
Adjusting Manual Header Raise/Lower Rate (John Deere S and T Series)
120
Setting Preset Cutting Height (John Deere S and T Series)
121
New Holland Combines CX/CR Series (CR Series - Model Year 2014 and Earlier)
123
Checking Voltage Range from Combine Cab (New Holland)
123
Engaging Auto Header Height Control (New Holland CR/CX Series)
125
Calibrating Auto Header Height Control (New Holland CR/CX Series)
126
Adjusting Header Raise Rate (New Holland CR/CX Series)
129
Setting Header Lower Rate to 50 (New Holland CR/CX Series)
129
Setting Sensitivity of Auto Header Height Control to 200 (New Holland CR/CX Series)
130
Setting Preset Cutting Height (New Holland CR/CX Series)
130
Configuring Reel Fore-Aft, Header Tilt, and Header Type (New Holland CR Series)
131
New Holland Combines (CR Series - Model Year 2015 and Later)
133
Engaging Auto Header Height Control (New Holland CR Series)
133
Checking Voltage Range from Combine Cab (New Holland CR Series)
136
Calibrating Auto Header Height Control (New Holland CR Series)
138
Setting Auto Height (New Holland CR Series)
141
Setting Maximum Work Height (New Holland CR Series)
143
Wheels and Tires
144
Inflating Tire
144
Checking Draper Belt Tension
145
Adjusting Front Draper Belt Tension
146
Adjusting Rear Draper Belt Tension
148
Lubrication
149
Lubricating the Header
149
Lubricating Auger Drive Chain
150
Greasing Points
151
Manuals
152
Installing Endshield Decals
153
Running up the Header
154
Chapter 7: Reference
155
Definitions
155
Conversion Chart
157
Torque Specifications
158
Metric Bolt Specifications
158
Metric Bolt Specifications Bolting into Cast Aluminum
160
Flare-Type Hydraulic Fittings
161
O-Ring Boss (ORB) Hydraulic Fittings (Adjustable)
162
O-Ring Boss (ORB) Hydraulic Fittings (Non-Adjustable)
164
O-Ring Face Seal (ORFS) Hydraulic Fittings
165
Tapered Pipe Thread Fittings
166
Predelivery Checklist
167
Advertisement
MacDon PW8 Unloading And Assembly Instructions (146 pages)
Pick-Up Header
Brand:
MacDon
| Category:
Farm Equipment
| Size: 36 MB
Table of Contents
Summary of Changes
4
Unloading and Assembling Header
5
Table of Contents
7
Chapter 1: Safety
11
Safety Alert Symbols
11
Signal Words
12
General Safety
13
Hydraulic Safety
15
Safety Signs
16
Safety Sign Locations
17
Chapter 2: Shipping Dimensions and Weight
19
Chapter 3: Unloading Header
21
Unloading with a Forklift
21
Lowering Header to Field Position
23
Removing Shipping Stands
24
Opening Left Endshield
26
Closing Left Endshield
27
Chapter 4: Assembling the Header
29
Attaching Header Stands - Headers Configured for IDEAL ™ Combines
29
Attaching Fixed Wheels
32
Setting Fixed Wheels to Field Position
33
Attaching Caster Wheels
34
Setting Caster Wheels to Field Position
36
Installing Crop Deflectors
37
Repositioning Driveline Storage Bracket
38
Moving Hold-Down to Field Position
40
Adjusting Transport Lights
41
Chapter 5: Configuring Header for Combine
43
Configuring Header for AGCO Combines
43
Reducing Header Opening
43
Reducing Header Opening - Headers Configured for Challenger
44
And Massey Ferguson ® Combines
44
Reducing Header Opening - Headers Configured for IDEAL
47
Combines
47
Reducing Header Opening - Headers Configured for Gleaner® Combines
53
Installing Long Flighting Extensions - AGCO
59
Removing Auger Fingers - AGCO
61
Configuring Header for Case IH Combines
63
Moving Stripper Assemblies - Case IH
63
Configuring Header for John Deere Combines
66
Moving Stripper Assemblies - John Deere
66
Removing Flighting Extensions - John Deere
70
Installing Auger Fingers - John Deere
71
Configuring Header for New Holland CR Combines
74
Moving Stripper Assemblies - New Holland CR
74
Installing Long Flighting Extensions - New Holland CR
77
Removing Auger Fingers - New Holland CR
79
Configuring Header for New Holland CX Combines
81
Moving Stripper Assemblies - New Holland CX
81
Removing Flighting Extensions - New Holland CX
84
Installing Auger Fingers - New Holland CX
85
Adjusting Stripper Plate Clearance
88
Chapter 6: Attaching Header to Combine
89
Attaching Header to Case IH Combine
89
Attaching Header to Challenger®, Gleaner®, and Massey Ferguson® Combines
93
Attaching Header to IDEAL ™ Combine
98
Attaching Header to IDEAL
98
Combine
98
Attaching Header to John Deere 60, 70, S, or T Series Combine
102
Attaching Header to New Holland CR/CX Series Combine
106
Attaching Header to Versatile Combine
110
Removing Deck Shipping Braces
115
Chapter 7: Predelivery Inspection
117
Completing Predelivery Checklist
117
Wheels and Tires
118
Inflating Tires
118
Checking Draper Belt Tension
118
Adjusting Front Draper Belt Tension
119
Adjusting Rear Draper Belt Tension
123
Lubrication
124
Lubricating the Header
124
Lubricating Auger Drive Chain
125
Greasing Points
125
Checking Contents of Manual Storage Case
128
Installing Endshield Decals - Case and New Holland Combines Only
128
Running up the Header
129
Setting up Auto Header Height Control System
130
Chapter 8: Reference
131
Recommended Fluids and Lubricants
131
Definitions
131
Conversion Chart
133
Torque Specifications
134
Metric Bolt Specifications
134
Metric Bolt Specifications - Cast Aluminum
136
Flare-Type Hydraulic Fittings
137
O-Ring Boss Hydraulic Fittings - Adjustable
138
O-Ring Boss Hydraulic Fittings - Non-Adjustable
139
O-Ring Face Seal Hydraulic Fittings
140
Tapered Pipe Thread Fittings
141
Predelivery Checklist
143
Advertisement
Related Products
MacDon 1000
MacDon 170642
MacDon 2000-B
MacDon 268040
MacDon 3020
MacDon 311882
MacDon 338109
MacDon 5000
MacDon Categories
Farm Equipment
Tractor
Tractor Accessories
Lawn Mower
Lawn and Garden Equipment
More MacDon Manuals
Login
Sign In
OR
Sign in with Facebook
Sign in with Google
Upload manual
Upload from disk
Upload from URL