Sign In
Upload
Manuals
Brands
MacDon Manuals
Farm Equipment
NEW HOLLAND D2 Series
MacDon NEW HOLLAND D2 Series Manuals
Manuals and User Guides for MacDon NEW HOLLAND D2 Series. We have
3
MacDon NEW HOLLAND D2 Series manuals available for free PDF download: Operator's Manual, Unloading And Assembly Instructions
MacDon NEW HOLLAND D2 Series Operator's Manual (520 pages)
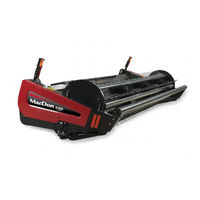
Draper Header with FM200 Float Module
Brand:
MacDon
| Category:
Farm Equipment
| Size: 62 MB
Table of Contents
Table of Contents
13
Chapter 1: Safety
21
Safety Alert Symbols
21
Signal Words
22
General Safety
23
Maintenance Safety
25
Hydraulic Safety
27
Tire Safety
28
Decommissioning and Disposing of Agricultural Equipment
29
Safety Signs
31
Installing Safety Decals
31
Safety Decal Locations
32
1.10 Understanding Safety Signs
37
Chapter 2: Product Overview
45
Definitions
45
D2 Series Draper Header Specifications
47
D2 Series Draper Header Dimensions
50
D2 Series Draper Header
51
FM200 Float Module Component Identification
52
Chapter 3: Operation
55
Owner/Operator Responsibilities
55
Operational Safety
56
Header Safety Props
56
Reel Safety Props
57
Engaging Reel Safety Props
57
Disengaging Reel Safety Props
58
Header Endshields
59
Opening Header Endshields
59
Closing Header Endshields
60
Checking and Adjusting Header Endshields
61
Removing Header Endshields
66
Installing Header Endshields
66
Reel Drive Cover
66
Removing Reel Drive Cover
66
Installing Reel Drive Cover
68
Daily Start-Up Check
70
Break-In Period
72
Shutting down the Combine
73
Cab Controls
74
Header Attachment/Detachment
75
New Holland Combines
75
Attaching Header to New Holland CR or CX Combine
75
Detaching Header from New Holland CR or CX Combine
80
Feeder Deflectors - New Holland CR Series Combines
85
Header Setup
86
Header Attachments
86
Header Settings
86
Optimizing Header for Straight-Combining Canola
98
Reel Settings
99
Floating Crop Divider Settings - Optional
101
Float Module Setup
104
FM200 Feed Auger Configurations
104
Ultra Narrow Configuration - Auger Flighting
106
Narrow Configuration - Auger Flighting
110
Medium Configuration - Auger Flighting
113
Wide Configuration - Auger Flighting
115
Ultra Wide Configuration - Auger Flighting
118
Auger Flighting
120
Removing Feed Auger Fingers
127
Installing Feed Auger Fingers
129
Setting Auger Position
131
Checking and Adjusting Feed Auger Springs
133
Stripper Bars
134
Header Operating Variables
135
Cutting off Ground
135
Adjusting Stabilizer Wheels
136
Adjusting Easymove ™ Transport Wheels
137
Cutting on Ground
138
Adjusting Inner Skid Shoes
138
Adjusting Outer Skid Shoes
139
Header Float
140
Checking and Adjusting Header Float
141
Changing Float Spring Configuration
146
Locking/Unlocking Header Float
151
Header Angle
151
Adjusting Header Angle from Combine
153
Reel Speed
153
Optional Reel Drive Sprockets
154
Ground Speed
155
Side Draper Speed
155
Adjusting Side Draper Speed
155
Feed Draper Speed
156
Knifehead Shield
157
Installing Knifehead Shield
157
Knife Speed Information
158
Checking Knife Speed
158
Reel Height
159
Checking and Adjusting Reel Height Sensor
160
Replacing Reel Height Sensor
163
Reel Fore-Aft Position
164
Adjusting Reel Fore-Aft Position
165
Repositioning Fore-Aft Cylinders
165
Checking and Adjusting Fore-Aft Position Sensor
170
Reel Tine Pitch
172
Reel Cam Settings
172
Adjusting Reel Cam
174
Upper Cross Auger
175
Adjusting Upper Cross Auger Position
175
Checking Upper Cross Auger for Interference
178
Crop Dividers
179
Removing Crop Dividers
179
Installing Crop Dividers
180
Removing Floating Crop Dividers
182
Installing Floating Crop Dividers
184
Adjusting Floating Crop Dividers
187
Crop Divider Rods
197
Removing Crop Divider Rods
197
Installing Crop Divider Rods
198
Optional Rice Divider Rods
199
3.10 Auto Header Height Control System
200
Auto Header Height Control Sensor Operation
201
Recommended Sensor Output Voltages for Combines
203
Manually Checking Voltage Limits
203
Replacing Float Height Sensor
207
Volt Adapter - New Holland Combines Only
208
New Holland CR and CX Series Combines - 2014 and Earlier
209
Checking Voltage Range from Combine Cab - New Holland CR and CX Series
209
Header Settings Quick Reference - New Holland CR Series
211
Setting up Auto Header Height Control - New Holland CR and CX Series
212
Calibrating Auto Header Height Control - New Holland CR and CX Series
213
Calibrating Maximum Stubble Height - New Holland CR and CX Series
214
Adjusting Header Raise Rate - New Holland CR and CX Series
215
Setting Header Lower Rate - New Holland CR and CX Series
216
Setting Auto Header Height Control Sensitivity - New Holland CR and CX Series
216
Setting Preset Cutting Height - New Holland CR and CX Series
217
New Holland Combines - CR Series, 2015 and Later
218
Checking Voltage Range from Combine Cab - New Holland CR Series
218
Setting up Auto Header Height Control - New Holland CR Series
221
Setting up Reel Speed - New Holland CR Series
224
Calibrating Auto Header Height Control - New Holland CR Series
225
Calibrating Reel Height Sensor and Reel Fore-Aft Sensor - New Holland CR Series
228
Checking Reel Height Sensor Voltages - New Holland CR Series
230
Setting Preset Cutting Height - New Holland CR Series
231
Setting Maximum Work Height - New Holland CR Series
233
Configuring Reel Fore-Aft, Header Tilt, and Header Type - New Holland CR Series
234
3.11 Leveling Header
237
3.12 Unplugging Cutterbar
239
3.13 Unplugging Float Module Feed Draper
240
3.14 Transport
241
Transporting Header on Combine
241
Towing
241
Attaching Header to Towing Vehicle
242
Precautions for Towing Header
242
Converting from Transport to Field Position (Option)
243
Removing Tow-Bar
243
Storing Tow-Bar
246
Moving Front (Left) Wheels into Field Position
248
Moving Rear (Right) Wheels into Field Position
250
Converting from Field to Transport Position (Option)
252
Moving Front (Left) Wheels into Transport Position
252
Moving Rear (Right) Wheels into Transport Position
253
Removing Tow-Bar from Storage
255
Attaching Tow-Bar
256
Chapter 4: Maintenance and Servicing
261
Preparing Machine for Servicing
261
Maintenance Requirements
262
Maintenance Schedule/Record
262
Break-In Inspection
265
Equipment Servicing - Preseason
265
Equipment Servicing - End-Of-Season
266
Checking Hydraulic Hoses and Lines
267
Lubrication
268
Lubrication Intervals
268
Every 10 Hours
268
Every 25 Hours
269
Every 50 Hours
270
Every 100 Hours
274
Every 250 Hours
276
Every 500 Hours
277
Greasing Procedure
278
Lubricating Reel Drive Chain
280
Lubricating Auger Drive Chain
281
Lubricating Header Drive Main Gearbox
282
Checking Oil Level in Header Drive Main Gearbox
282
Adding Oil to Header Drive Main Gearbox
283
Changing Oil in Header Drive Main Gearbox
283
Lubricating Header Drive Completion Gearbox
284
Checking Oil Level in Header Drive Completion Gearbox
284
Adding Oil to Header Drive Completion Gearbox
285
Changing Oil in Header Drive Completion Gearbox
286
Hydraulics
288
Checking Oil Level in Hydraulic Reservoir
288
Adding Oil to Hydraulic Reservoir
288
Changing Oil in Hydraulic Reservoir
289
Changing Oil Filter
290
Electrical System
291
Replacing Light Bulbs
291
Header Drive
292
Removing Driveline
292
Installing Driveline
294
Removing Driveline Guard
297
Installing Driveline Guard
299
Adjusting Chain Tension - Main Gearbox
301
Adjusting Chain Tension - Completion Gearbox
302
Auger
304
Adjusting Feed-Auger-To-Pan Clearance
304
Checking Feed Auger Chain Tension
306
Checking Feed Auger Drive Chain Tension - Quick Method
306
Checking Feed Auger Drive Chain Tension - Thorough Method
308
Removing Auger Drive Chain
310
Installing Auger Drive Chain
313
Adjusting Feed Auger Drive Chain Tension
316
Auger Flighting
318
Auger Fingers
318
Removing Feed Auger Fingers
318
Installing Feed Auger Fingers
321
Checking Auger Finger Timing
323
Adjusting Auger Finger Timing
324
Knife
326
Replacing Knife Section
326
Removing Knife
327
Removing Knifehead Bearing
328
Installing Knifehead Bearing
329
Installing Knife
330
Spare Knives
332
Pointed Knife Guards and Hold-Downs
332
Pointed Knife Guard Configuration on Single-Knife Headers
334
Pointed Knife Guard Configuration on Double-Knife Header - D235
335
Pointed Knife Guard Configuration on Double-Knife Header - D241
336
Pointed Knife Guard Configuration on Double-Knife Header - D245
337
Adjusting Knife Guards and Guard Bar
338
Replacing Pointed Knife Guards
340
Checking Hold-Down - Pointed Knife Guards
341
Adjusting Hold-Down - Pointed Knife Guards
342
Replacing Pointed Center Knife Guard - Double-Knife
343
Checking Center Hold-Down - Pointed Knife Guards
346
Adjusting Center Hold-Down - Pointed Knife Guards
347
Short Knife Guards and Hold-Downs
348
Short Knife Guard Configuration on Single-Knife Headers
349
Short Knife Guard Configuration on Double-Knife Headers - All Sizes Except D241)
350
Short Knife Guard Configuration on Double-Knife Header - D241
351
Replacing Short Knife Guards or End Knife Guards
352
Checking Hold-Down - Short Knife Guards
354
Adjusting Hold-Down - Short Knife Guards
354
Replacing Center Knife Guard - Double-Knife
355
Checking Center Hold-Down - Short Knife Guards
358
Adjusting Center Hold-Down - Short Knife Guards
358
Knife Drive System
360
Knife Drive Box
360
Checking Oil Level in Knife Drive Box
360
Checking Mounting Bolts
361
Changing Oil in Knife Drive Box
361
4.10 Feed Deck
363
Replacing Feed Draper
363
Checking and Adjusting Feed Draper Tension
367
Feed Draper Drive Roller
369
Removing Feed Draper Drive Roller
369
Installing Feed Draper Drive Roller
371
Removing Feed Draper Drive Roller Bearing
372
Installing Feed Draper Drive Roller Bearing
374
Feed Draper Idler Roller
375
Removing Feed Draper Idler Roller
375
Installing Feed Draper Idler Roller
377
Replacing Feed Draper Idler Roller Bearing
380
Lowering Feed Deck Pan
383
Raising Feed Deck Pan
384
Checking Link Holder Hooks
385
4.11 Stripper Bars
388
Removing Stripper Bars
388
Installing Stripper Bars
388
Replacing Feeder Deflectors on New Holland CR Combines
389
4.12 Header Side Drapers
391
Removing Side Drapers
391
Installing Side Drapers
392
Adjusting Deck Height
393
Adjusting Side Draper Tension
395
Adjusting Side Draper Tracking
397
Inspecting Draper Roller Bearing
398
Removing Side Draper Deck Idler Roller
398
Replacing Side Draper Deck Idler Roller Bearing
400
Installing Side Draper Deck Idler Roller
402
4.12.10 Removing Side Draper Drive Roller
403
4.12.11 Replacing Side Draper Drive Roller Bearing
405
4.12.12 Installing Side Draper Drive Roller
407
4.13 Reel
409
Reel-To-Cutterbar Clearance
409
Measuring Reel Clearance
409
Adjusting Reel-To-Cutterbar Clearance
411
Reel Frown
414
Adjusting Reel Frown
414
Centering Reel
414
Reel Fingers
416
Removing Steel Fingers
416
Installing Steel Fingers
417
Removing Plastic Fingers
418
Installing Plastic Fingers
419
Tine Tube Bushings
420
Removing Bushings from Reels
420
Installing Bushings Onto Reels
425
Reel Endshields
431
Replacing Reel Endshields at Outboard Cam End
432
Replacing Reel Endshields at Inboard Cam End
434
Replacing Reel Endshields at Outboard Tail End
436
Replacing Reel Endshields at Inboard Tail End
437
Replacing Reel Endshield Supports
439
4.14 Reel Drive
441
Reel Drive Chain
441
Loosening Reel Drive Chain
441
Tightening Reel Drive Chain
442
Reel Drive Sprocket
444
Removing Reel Drive Single Sprocket
444
Installing Reel Drive Single Sprocket
445
Changing Reel Speed Chain Position with Two Speed Kit Installed
445
Double-Reel Drive U-Joint
446
Removing Double-Reel Drive U-Joint
446
Installing Double-Reel U-Joint
447
Reel Drive Motor
448
Removing Reel Drive Motor
448
Installing Reel Drive Motor
449
Replacing Drive Chain
451
4.15 Transport System - Option
454
Checking Wheel Bolt Torque
454
Checking Transport Assembly Bolt Torque
454
Checking Tire Pressure
456
Changing Tow-Bar Hitch Connection from Pintle to Clevis
457
Changing Tow-Bar Hitch Connection from Clevis to Pintle
459
Vertiblade ™ Vertical Knife - Option
461
Replacing Vertical Knife Sections
461
Lubricating Vertical Knife
464
Chapter 5: Options and Attachments
467
Crop Delivery Kits
467
Crop Lifter Kit
467
Crop Lifter Storage Rack Kit
467
Crop Divider Storage Bracket Kit
468
Floating Crop Dividers
468
Full Length Upper Cross Auger
469
Lodged Crop Reel Finger Kit
470
Rice Divider Rod Kit
470
Sunflower Attachment
471
Vertiblade ™ Vertical Knife Kit
472
Cutterbar Kits
473
Rock Retarder Kit
473
Four-Point Knife Guard
473
FM200 Float Module Kits
474
10 V Sensor Adapter Kit
474
Crop Deflector Kits
474
Extended Center Filler
475
Feed Auger High-Wear Flighting Extension Kit
475
Full Interface Filler Kit
476
Hydraulic Reservoir Extension Kit
476
Lateral Tilt Plug Kit
477
Stripper Bars Kit
477
Header Kits
478
Easymove ™ Transport System
478
Inboard Steel End Finger Kit
478
Outboard Steel End Finger Kit
479
Steel Reel Finger Kit
479
Side Hill Stabilizer Kit
480
Stabilizer Wheel Kit
480
Steel Skid Shoes Kit
481
Chapter 6: Troubleshooting
483
Crop Loss at Cutterbar
483
Cutting Action and Knife Components
486
Reel Delivery
490
Troubleshooting Header and Drapers
493
Cutting Edible Beans
495
Chapter 7: Reference
499
Torque Specifications
499
Metric Bolt Specifications
499
Metric Bolt Specifications - Cast Aluminum
502
O-Ring Boss Hydraulic Fittings - Adjustable
503
O-Ring Boss Hydraulic Fittings - Non-Adjustable
504
O-Ring Face Seal Hydraulic Fittings
505
Tapered Pipe Thread Fittings
506
Conversion Chart
508
Index
509
Recommended Fluids and Lubricants
519
Advertisement
MacDon NEW HOLLAND D2 Series Operator's Manual (378 pages)
Draper Header for Windrowers
Brand:
MacDon
| Category:
Farm Equipment
| Size: 34 MB
Table of Contents
Model and Serial Number
8
Table of Contents
9
Chapter 1: Safety
17
Safety Alert Symbols
17
Signal Words
18
General Safety
19
Maintenance Safety
21
Hydraulic Safety
23
Welding Precaution
24
Decommissioning and Disposing of Agricultural Equipment
25
Safety Signs
27
Installing Safety Decals
27
Safety Decal Locations
28
Understanding Safety Signs
39
Chapter 2: Product Overview
49
Definitions
49
D2 Series Draper Header Specifications
51
D2 Series Draper Header Dimensions
53
D2 Series Draper Header Component Identification
54
Chapter 3: Operation
55
Owner/Operator Responsibilities
55
Operational Safety
56
Header Safety Props
56
Reel Safety Props
56
Engaging Reel Safety Props
57
Disengaging Reel Safety Props
58
Header Endshields
59
Opening Header Endshields
59
Closing Header Endshields
60
Checking and Adjusting Header Endshields
62
Removing Header Endshields
65
Installing Header Endshields
66
Reel Drive Cover
66
Removing Reel Drive Cover
66
Installing Reel Drive Cover
68
Daily Start-Up Check
70
Break-In Period
72
Shutting down Windrower
73
Cab Controls
74
Header Setup
75
Header Attachments
75
Header Settings
75
Reel Settings
85
Header Operating Variables
87
Cutting Height
87
Cutting off Ground
87
Adjusting Stabilizer Wheels
87
Adjusting Easymove ™ Transport Wheels
88
Cutting on Ground
89
Adjusting Inner Skid Shoes
90
Adjusting Outer Skid Shoes
90
Header Float
91
Header Angle
91
Controlling Header Angle
92
Reel Speed
93
Optional Reel Drive Sprockets
93
Ground Speed
94
Draper Speed
94
Knife Speed Information
95
Checking Knife Speed
95
Reel Height
96
Checking and Adjusting Reel Height Sensor
97
Replacing Reel Height Sensor
100
Reel Fore-Aft Position
101
Adjusting Reel Fore-Aft Position
102
Repositioning Fore-Aft Cylinders
102
Checking and Adjusting Fore-Aft Position Sensor
106
Reel Tine Pitch
108
Reel Cam Settings
108
Adjusting Reel Cam
110
Upper Cross Auger
111
Adjusting Upper Cross Auger Position
111
Checking Upper Cross Auger for Interference
114
Crop Dividers
114
Removing Crop Dividers
115
Installing Crop Dividers
116
Crop Divider Rods
118
Removing Crop Divider Rods
118
Installing Crop Divider Rods
119
Optional Rice Divider Rods
120
Delivery Opening
120
Adjusting Delivery Opening on Header with Hydraulic Deck Shift
121
Adjusting Hydraulic Deck Shift Chain Tension
122
Adjusting Size of Delivery Opening on Header with Manual Deck Shift
124
Double Windrowing
124
Shifting Decks Hydraulically
124
Shifting Decks Manually
125
Windrow Types
127
Haying Tips
130
Curing
130
Topsoil Moisture
130
Weather and Topography
130
Windrow Characteristics
130
Driving on Windrows
131
Raking and Tedding
131
Chemical Drying Agents
131
Leveling Header
132
Unplugging Cutterbar
133
Transport
134
Transporting Header on Windrower
134
Towing
134
Attaching Header to Towing Vehicle
135
Precautions for Towing Header
135
Converting from Transport to Field Position (Option)
136
Removing Tow-Bar
136
Storing Tow-Bar
139
Moving Front (Left) Wheels into Field Position
141
Moving Rear (Right) Wheels into Field Position
143
Converting from Field to Transport Position (Option)
145
Moving Front (Left) Wheels into Transport Position
145
Moving Rear (Right) Wheels into Transport Position
147
Removing Tow-Bar from Storage
149
Attaching Tow-Bar
150
Storing the Header
154
Chapter 4: Header Attachment/Detachment
155
Attaching Draper Header Boots
155
Attaching Header to M Series Windrower
157
Attaching Header to an M Series Windrower - Hydraulic Center-Link with Self-Alignment
157
Attaching Header to an M Series Windrower - Hydraulic Center-Link Without Self-Alignment
162
Attaching Header to an M Series Windrower - Mechanical Center-Link
168
Connecting Header Hydraulic and Electrical Systems to an M Series Windrower
173
Disconnecting Header Hydraulic and Electrical Systems from an M Series Windrower
175
Detaching Header from an M Series Windrower- Hydraulic Center-Link
177
Detaching Header from an M Series Windrower - Mechanical Center-Link
181
Attaching Header to M1 Series Windrower
184
Connecting Header Hydraulics to M1 Series Windrower
190
Detaching Header from an M1 Series Windrower
193
Chapter 5: Maintenance and Servicing
199
Preparing Machine for Servicing
199
Maintenance Requirements
200
Maintenance Schedule/Record
200
Break-In Inspection
201
Equipment Servicing - Preseason
202
Equipment Servicing - End-Of-Season
202
Checking Hydraulic Hoses and Lines
203
Lubrication
204
Lubrication Intervals
204
Every 10 Hours
204
Every 25 Hours
205
Every 50 Hours
206
Every 100 Hours
209
Every 250 Hours
209
Every 500 Hours
210
Greasing Procedure
211
Lubricating Reel Drive Chain
212
Electrical System
214
Replacing Light Bulbs
214
Knife
215
Replacing Knife Section
215
Removing Knife
216
Removing Knifehead Bearing
217
Installing Knifehead Bearing
218
Installing Knife
219
Spare Knives
221
Pointed Knife Guards and Hold-Downs
221
Pointed Knife Guard Configuration on Single-Knife Headers
223
Pointed Knife Guard Configuration on Double-Knife Header - D215-D235
224
Pointed Knife Guard Configuration on Double-Knife Header - D235
225
Pointed Knife Guard Configuration on Double-Knife Header - D241
226
Adjusting Knife Guards and Guard Bar
227
Replacing Pointed Knife Guards
229
Checking Hold-Down - Pointed Knife Guards
231
Adjusting Hold-Down - Pointed Knife Guards
232
Replacing Pointed Center Knife Guard - Double Knife
233
Checking Center Hold-Down - Pointed Knife Guards
236
Adjusting Center Hold-Down - Pointed Knife Guards
237
Short Knife Guards and Hold-Downs
238
Short Knife Guard Configuration on Single-Knife Headers
239
Short Knife Guard Configuration on Double-Knife Headers - All Sizes Except D241
240
Short Knife Guard Configuration on Double-Knife Header - D241
241
Replacing Short Knife Guards or End Knife Guards
242
Checking Hold-Down - Short Knife Guards
244
Adjusting Hold-Down - Short Knife Guards
245
Replacing Center Knife Guard - Double Knife
246
Checking Center Hold-Down - Short Knife Guards
248
Adjusting Center Hold-Down - Short Knife Guards
249
Knifehead Shield
250
Installing Knifehead Shield
250
Knife Drive System
252
Knife Drive Box
252
Checking Oil Level in Knife Drive Box
252
Checking Mounting Bolts
253
Changing Oil in Knife Drive Box
253
Electronically Timed Double-Knife System
255
Troubleshooting Touch Encoder - M Series Windrower Only
255
Troubleshooting Harvest Performance Tracker - M1 Series Windrower Only
257
Troubleshooting Timed Double-Knife Module
260
Header Side Drapers
262
Removing Side Drapers
262
Installing Drapers
263
Adjusting Draper Tension
264
Adjusting Draper Tracking
267
Draper Roller Maintenance
268
Inspecting Draper Roller Bearing
268
Removing Draper Idler Roller
268
Replacing Draper Idler Roller Bearing
270
Installing Draper Idler Roller
273
Removing Side Draper Drive Roller
274
Replacing Draper Drive Roller Bearing
277
Installing Side Draper Drive Roller
278
Draper Deflectors
279
Removing Wide Draper Deflectors
279
Installing Wide Draper Deflectors
281
Removing Narrow Draper Deflectors
283
Installing Narrow Draper Deflectors
284
Reel
286
Reel-To-Cutterbar Clearance
286
Measuring Reel to Cutterbar Clearance
286
Adjusting Reel-To-Cutterbar Clearance
288
Centering Reel
291
Reel Fingers
293
Removing Steel Fingers
293
Installing Steel Fingers
294
Removing Plastic Fingers
295
Installing Plastic Fingers
296
Tine Tube Bushings
297
Removing Bushings from Reels
297
Installing Bushings Onto Reels
299
Reel Endshields
305
Replacing Reel Endshields at Outboard Cam End
306
Replacing Reel Endshields at Inboard Cam End
308
Replacing Reel Endshields at Outboard Tail End
310
Replacing Reel Endshields at Inboard Tail End
311
Replacing Reel Endshield Supports
314
Reel Drive
316
Reel Drive Chain
316
Loosening Reel Drive Chain
316
Tightening Reel Drive Chain
317
Reel Drive Sprocket
319
Removing Reel Drive Single Sprocket
319
Installing Reel Drive Single Sprocket
320
Changing Reel Speed Chain Position with Two Speed Kit Installed
320
Transport System - Option
322
Checking Wheel Bolt Torque
322
Checking Transport Assembly Bolt Torque
322
Checking Tire Pressure
324
Changing Tow-Bar Hitch Connection from Pintle to Clevis
325
Changing Tow-Bar Hitch Connection from Clevis to Pintle
327
Vertiblade ™ Vertical Knife - Option
330
Replacing Vertical Knife Sections
330
Lubricating Vertical Knife
333
Chapter 6: Options and Attachments
335
Crop Delivery Kits
335
Crop Lifter Kit
335
Crop Lifter Storage Rack Kit
335
Crop Divider Storage Bracket Kit
336
Floating Crop Dividers
336
Full Length Upper Cross Auger
337
Lodged Crop Reel Finger Kit
338
Rice Divider Rod Kit
338
Swath Forming Rods - Center Delivery
339
Vertiblade ™ Vertical Knife Kit
339
Wide End Deflector Kit
340
Cutterbar Kits
341
Rock Retarder Kit
341
Four-Point Knife Guard
341
Header Kits
342
Easymove ™ Transport System
342
Inboard Steel End Finger Kit
342
Outboard Steel End Finger Kit
343
Steel Reel Finger Kit
343
Stabilizer Wheel Kit
344
Steel Skid Shoes Kit
344
Stubble Light Kit
345
Chapter 7: Troubleshooting
347
Crop Loss at Cutterbar
347
Cutting Action and Knife Components
349
Reel Delivery
352
Troubleshooting Header and Drapers
354
Cutting Edible Beans
355
Troubleshooting Windrow Formation
358
Chapter 8: Reference
359
Torque Specifications
359
Metric Bolt Specifications
359
Metric Bolt Specifications - Cast Aluminum
361
O-Ring Boss Hydraulic Fittings - Adjustable
362
O-Ring Boss Hydraulic Fittings - Non-Adjustable
363
O-Ring Face Seal Hydraulic Fittings
364
Tapered Pipe Thread Fittings
365
Conversion Chart
367
Index
369
Recommended Fluids and Lubricants
377
MacDon NEW HOLLAND D2 Series Unloading And Assembly Instructions (234 pages)
Draper Header for M and M1 Self-Propelled Windrowers
Brand:
MacDon
| Category:
Farm Equipment
| Size: 31 MB
Table of Contents
Table of Contents
5
Chapter 1: Safety
9
Safety Alert Symbols
9
Signal Words
10
General Safety
11
Hydraulic Safety
13
Welding Precaution
14
Safety Signs
15
Chapter 2: Unloading Header
17
Header Specifications for Unloading and Assembly
17
Unloading Header from Trailer
19
Removing Upper Cross Auger from Shipping Location - Option
21
Removing Parts from Shipping Location
23
Lowering Header to Field Position
25
Lowering Header to Field Position - Single Reel
25
Lowering Header to Field Position - Double Reel
27
Removing and Installing Hydraulic Hose Management System
29
Removing Shipping Stands and Supports
31
Chapter 3: Assembling Header
35
Installing Reel Lift Cylinders - Single Reel
35
Installing Reel Lift Cylinders - Double-Reel
41
Chapter 4: Attaching Header to M Series Windrower
49
Adding Tire Ballast
49
Attaching Draper Header Supports
50
Attaching Header to an M Series Windrower - Hydraulic Center-Link with Self-Alignment
51
Attaching Header to an M Series Windrower - Hydraulic Center-Link Without Self-Alignment
56
Attaching Header to an M Series Windrower - Mechanical Center-Link
60
Connecting Header Hydraulic and Electrical Systems to an M Series Windrower
64
Chapter 5: Attaching Header to M1 Series Windrower
67
Adding Rear Ballast Weights
67
Adding Tire Ballast
68
Attaching Draper Header Supports
69
Connecting Center-Link
70
Connecting Hydraulics
76
Chapter 6: Completing Header Assembly
81
Installing Clearance Lights
81
Installing Fore-Aft Indicator and Sensor Spring (Parts Bag MD #368002)
83
Connecting Reel to Fore-Aft Cylinders - Single-Reel
86
Connecting Reel to Fore-Aft Cylinders - Double-Reel (Parts Bags MD #347593, MD #347580)
91
Attaching Reel Height Sensor
97
Installing Reel Fore-Aft Hose Clamps - Double-Reel Headers
99
Attaching Cam Arms
100
Retrieving Single-Reel Endshields
101
Installing Single-Reel Endshields at Cam End
108
Installing Single-Reel Endshields at Tail End
112
Installing Double-Reel Endshields - Parts Bags MD #340985 (Five-Bat Reels) or MD #340986 (Six-Bat Reels)
117
Installing Double-Reel Endshields at Outboard Cam End
122
Installing Double-Reel Endshields at Inboard Tail End
128
Installing Double-Reel Endshields at Inboard Cam End
134
Installing Double-Reel Endshields at Outboard Tail End
140
Installing Single-Reel Endshields - Parts Bag MD #311363 (Nine-Bat Reel)
146
Installing Single-Reel Endshields at Cam End
147
Installing Single-Reel Endshields at Tail End
154
Removing and Installing Cutterbar Seal - D215, D220, D225, D230, D235
161
Removing and Installing Deck Cutterbar Seals - D241
163
Crop Dividers
165
Installing Crop Dividers
165
Installing Crop Divider Rods
167
Setting up Reel Position Sensors - M1 Series Only
168
Checking and Adjusting Reel Height Sensor
168
Checking and Adjusting Fore-Aft Position Sensor
170
Installing Options
173
Chapter 7: Performing Predelivery Checks
175
Checking Tire Pressure - Option
175
Checking Wheel Bolt Torque
176
Checking Oil Level in Knife Drive Box
177
Checking and Adjusting Reel Clearance
178
Lubricating Header
181
Greasing Procedure
181
Checking and Adjusting Header Float
183
Checking and Adjusting Draper Tension
184
Checking Draper Seal
186
Reel-To-Cutterbar Clearance
189
Measuring Reel Clearance
189
Adjusting Reel-To-Cutterbar Clearance
191
Guard Identification
194
Checking Hold-Down - Pointed Knife Guards
195
Adjusting Hold-Down - Pointed Knife Guards
196
Checking Center Hold-Down - Pointed Knife Guards
197
Adjusting Center Hold-Down - Pointed Knife Guards
198
Checking Hold-Down - Short Knife Guards
199
Adjusting Hold-Down - Short Knife Guards
200
Checking Center Hold-Down - Short Knife Guards
201
Adjusting Center Hold-Down - Short Knife Guards
201
Checking and Adjusting Header Endshields
203
Checking Manuals
207
Chapter 8: Running up Header
209
Post Run-Up Adjustments
209
Adjusting Draper Tracking
210
Checking Knife Position
211
Chapter 9: Reference
213
Reel Safety Props
213
Engaging Reel Safety Props
213
Disengaging Reel Safety Props
214
Header Endshields
216
Opening Header Endshields
216
Closing Header Endshields
217
Torque Specifications
219
Metric Bolt Specifications
219
Metric Bolt Specifications - Cast Aluminum
221
O-Ring Boss Hydraulic Fittings - Adjustable
222
O-Ring Boss Hydraulic Fittings - Non-Adjustable
223
O-Ring Face Seal Hydraulic Fittings
224
Tapered Pipe Thread Fittings
225
Conversion Chart
227
Definitions
228
Predelivery Checklist
231
Advertisement
Advertisement
Related Products
MacDon D215
MacDon D220
MacDon D225
MacDon D230
MacDon D235
MacDon D241
MacDon D1XL Series
MacDon D120X
MacDon D125X
MacDon D115
MacDon Categories
Farm Equipment
Tractor
Tractor Accessories
Lawn Mower
Lawn and Garden Equipment
More MacDon Manuals
Login
Sign In
OR
Sign in with Facebook
Sign in with Google
Upload manual
Upload from disk
Upload from URL