Sign In
Upload
Manuals
Brands
JAI Manuals
Digital Camera
Sweep Series
JAI Sweep Series Manuals
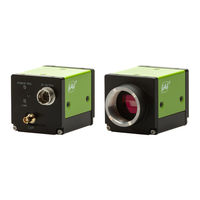
Manuals and User Guides for JAI Sweep Series. We have
5
JAI Sweep Series manuals available for free PDF download: User Manual
JAI Sweep Series User Manual (133 pages)
Digital CMOS Progressive Line Scan Camera (Bilinear and Monochrome)
Brand:
JAI
| Category:
Digital Camera
| Size: 6 MB
Table of Contents
Table of Contents
2
About Technical Note
6
Notice/Warranty
7
Notice
7
Warranty
7
Certifications
7
CE Compliance
7
Fcc
7
Warning
8
China Rohs
9
Usage Precautions
10
Notes on Cable Configurations
10
Notes on LAN Cable Connection
10
Notes on Attaching the Lens
10
Phenomena Specific to CMOS Image Sensors
11
Notes on Exportation
11
Features
12
Package Contents, Accessories
12
Parts Identification
13
Lens Mount (C-Mount)
13
Connectors
13
DC IN/TRIG Connector (12-Pin Round)
14
RJ-45 Connector
14
Leds
15
Mounting Holes
16
Recommended External Input Circuit Diagram
16
Preparation
17
Step 1: Install the Software (First Time Only)
17
Step 2: Connect Devices
18
① Lens
18
② Mounting
19
③ LAN Cable
19
➃ Network Card
19
⑤ DC in / Trigger in Connection Cable
20
⑥ AC Adapter (Power Supply, if Necessary)
20
Step 3: Verify Camera Operation
20
Step 4: Verify the Connection between the Camera and PC
21
Step 5: Configure Trigger, Exposure, and Line Rate Settings
23
Control Via External Triggers with the Specified Exposure Time
24
Control Via External Triggers Without Specifying the Exposuretime
25
Control Via External Triggers with Exposure Time Controlled by the Pulse Width of the Trigger Input Signal
26
Control Without External Triggers with the Specified Exposure Time
27
Control Without External Triggers Without Specifying the Exposure Time
27
Step 6: Adjust the Image Quality
28
DSNU Correction (Pixel Black Correct)
28
PRNU Correction (Pixel Gain Correct)
29
Adjust the Gain
32
Adjust the White Balance
34
Adjust the Black Level
37
Step 7: Save the Settings
37
To Save User Settings
38
To Load User Settings
38
Main Functions
39
ROI (Regional Scanning Function)
39
Binning Function
41
Image Flip Function (Reversex)
42
Pixel Format
43
Bicolorrgbg / Bicolorbgrg Steam Data Alignment
44
Bicolor Pixel Format Data Array
45
Acquisition Control
47
Change the Line Rate
47
Maximum Line Rates (Approximate)
48
Trigger Control
49
Image Output Delay
50
Frame Start Trigger
51
Framestart Trigger and Acquisitiontransferstart Trigger
52
Exposure Mode
53
Actual Exposure Time
55
Delay Time from Trigger Input to Start of Exposure
56
GPIO (Digital Input/Output Settings)
57
Linesource Items
58
Exposureactive Signal
58
Pulse Generator
59
Gain Control
60
Gamma Function
61
LUT (Lookup Table)
62
Color Space Conversion (Colortransformationcontrol)
63
Shading Correction
64
How to Configure the Shading Correction Function
65
Pixel Sensitivity Correction (DSNU, PRNU)
67
Chromatic Aberration Correction
68
Tilt View Correction
70
Noise Reduction Filter Functions
72
Spatial Compensation
73
Counter and Timer Control
75
Connecting Rotary Encoders
77
Encoderdivider Trigger Option
79
Edgedetection Trigger Option
81
Resume Scanning (Backward Counter)
82
Rotation Direction
82
Logic Block Control
83
Action Control Function
84
PTP (Precision Time Protocol)
85
Chunk Data Function
86
Event Control Function
86
Setting List (Feature Properties)
88
Devicecontrol
89
Transport Layer Control
91
Imageformatcontrol
95
Acquisitioncontrol
97
Digitaliocontrol
99
Pulsegenerator
101
Analogcontrol
103
LUT Control
105
Color Transformation Control
106
Shading
107
Correction
108
Spatialcontrol
111
Counter and Timer Control
112
Encodercontrol
113
Logic Block Control
115
Actioncontrol
116
Chunkdatacontrol
116
Eventcontrol
119
Usersetcontrol
122
Miscellaneous
123
Troubleshooting
123
Specifications
124
Spectral Response (Color Model)
129
Spectral Response (Monochrome Model)
129
Dimensions
130
Comparison of the Decibel Display and Multiplier Display
131
User's Record
132
Revision History
133
Advertisement
JAI Sweep Series User Manual (119 pages)
GigE Vision Interface
Brand:
JAI
| Category:
Machine Vision Systems
| Size: 7 MB
Table of Contents
Table of Contents
2
About Technical Note
6
Notice/Warranty
7
Notice
7
Warranty
7
Certifications
7
CE Compliance
7
Fcc
7
Warning
8
China Rohs
9
Usage Precautions
10
Notes on Cable Configurations
10
Notes on LAN Cable Connection
10
Notes on Attaching the Lens
10
Phenomena Specific to CMOS Image Sensors
11
Notes on Exportation
11
Features
12
Features Overview
12
Package Contents, Accessories
12
Optional Accessories (Sold Separately)
12
Parts Identification
13
Lens Mount (C-Mount)
13
Connectors
13
DC IN/TRIG Connector (12-Pin Round)
14
RJ-45 Connector
14
Leds
15
Mounting Holes
16
Preparation
17
Step 1: Install the Software (First Time Only)
17
Step 2: Connect Devices
18
① Lens
18
② Mounting
19
③ LAN Cable
19
➃ Network Card
19
⑤ DC in / Trigger in Connection Cable
20
⑥ AC Adapter (Power Supply, if Necessary)
20
Step 3: Verify Camera Operation
20
Step 4: Verify the Connection between the Camera and PC
21
Step 5: Configure Trigger, Exposure, and Line Rate Settings
21
Control Via External Triggers with the Specified Exposure Time
22
Control Via External Triggers Without Specifying the Exposuretime
23
Control Via External Triggers with Exposure Time Controlled by the Pulse Width of the Trigger Input Signal
24
Control Without External Triggers with the Specified Exposure Time
25
Control Without External Triggers Without Specifying the Exposure Time
25
Step 6: Adjust the Image Quality
26
DSNU Correction (Pixel Black Correct)
26
How to Configure
26
PRNU Correction (Pixel Gain Correct)
27
Adjust the Gain
29
Automatic Adjustment
29
Adjust the White Balance
30
Adjust the Black Level
32
Step 7: Save the Settings
32
To Save User Settings
33
To Load User Settings
33
Main Functions
34
ROI (Regional Scanning Function)
34
ROI Settings
34
Binning Function
36
Pixel Format
37
Acquisition Control
37
Change the Line Rate
38
Trigger Control
39
Trigger Delay Based on Encoder Input
40
Frame Start Trigger
41
Framestart Trigger and Acquisitiontransferstart Trigger
42
Exposure Mode
43
Exposure Time
45
Gain Control
46
Color Model
46
Gamma Function
47
LUT (Lookup Table)
48
Color Space Conversion (Colortransformationcontrol)
49
GPIO (Digital Input/Output Settings)
50
Exposureactive Signal
51
Counter and Timer Control
51
Connecting Rotary Encoders
53
Encoderdivider Trigger Option
55
Edgedetection Trigger Option
56
Rotation Direction
57
Logic Block Control
58
Action Control Function
59
PTP (Precision Time Protocol)
60
Event Control Function
61
Chunk Data Function
62
Pulse Generator
63
Shading Correction
64
How to Configure the Shading Correction Function
65
User Area be "Best Effort" Correction Example
67
Pixel Sensitivity Correction (DSNU, PRNU)
68
Chromatic Aberration Correction
69
Tilt View Correction
72
Noise Reduction Filter Functions
73
Spatial Compensation
74
Setting List (Feature Properties)
76
Devicecontrol
77
Transport Layer Control
79
Imageformatcontrol
83
Acquisitioncontrol
85
Analogcontrol
87
LUT Control
89
Color Transformation Control
90
Digitaliocontrol
91
Counter and Timer Control
93
Encodercontrol
94
Logic Block Control
96
Actioncontrol
97
Eventcontrol
97
Chunkdatacontrol
101
Usersetcontrol
102
Pulsegenerator
103
Shading
105
Correction
106
Spatialcontrol
109
Miscellaneous
110
Troubleshooting
110
Specifications
111
Spectral Response (SW-2005TL-5GE)
115
Spectral Response (SW-2005M-5GE)
115
Dimensions
116
Comparison of the Decibel Display and Multiplier Display
117
User's Record
118
Revision History
119
JAI Sweep Series User Manual (112 pages)
Digital CMOS Progressive Line Scan Camera
Brand:
JAI
| Category:
Digital Camera
| Size: 5 MB
Table of Contents
Table of Contents
2
About Technical Note
6
Notice/Warranty
7
Notice
7
Warranty
7
Certifications
7
CE Compliance
7
Fcc
7
Warning
8
China Rohs
9
Usage Precautions
10
Notes on Cable Configurations
10
Notes on Attaching the Lens
10
Phenomena Specific to CMOS Image Sensors
10
Notes on Exportation
11
Features
12
Features Overview
12
Package Contents, Accessories
12
Optional Accessories (Sold Separately)
12
Parts Identification
13
Lens Mount (C-Mount)
13
Connectors
13
DC IN/TRIG Connector (12-Pin Round)
14
CXP (Coaxpress) Connector
15
Leds
15
Mounting Holes
17
Recommended External Input Circuit Diagram
17
Preparation
18
Step 1: Connect Devices
18
① Lens
19
② Mounting
20
③ Coaxpress Cable
20
④ CXP Frame Grabber Board
20
⑤ DC in / Trigger in Connection Cable
20
⑥ AC Adapter (Power Supply, if Necessary)
20
Step 2: Verify Camera Operation
21
Step 3: Verify the Connection between the Camera and PC
21
Step 4: Configure Trigger, Exposure, and Line Rate Settings
22
Control Via External Triggers with the Specified Exposure Time
23
Control Via External Triggers Without Specifying the Exposuretime
24
Control Via External Triggers with Exposure Time Controlled by the Pulse Width of the Trigger Input Signal
25
Control Without External Triggers with the Specified Exposure Time
26
Control Without External Triggers Without Specifying the Exposure Time
26
Step 5: Adjust the Image Quality
27
DSNU Correction (Pixel Black Correct)
27
How to Configure
27
PRNU Correction (Pixel Gain Correct)
28
Adjust the Gain
31
Automatic Adjustment
32
Adjust the White Balance
33
Adjust the Black Level
36
Step 6: Save the Settings
36
To Save User Settings
37
To Load User Settings
37
Main Functions
38
ROI (Regional Scanning Function)
38
ROI Settings
38
Binning Function
39
Image Flip Function (Reversex)
40
Pixel Format
41
Bicolorrgbg / Bicolorbgrg Steam Data Alignment
42
Bicolor Pixel Format Data Array
43
Acquisition Control
44
Change the Line Rate
44
Maximum Line Rates (Approximate)
45
Trigger Control
46
Image Output Delay
47
Exposure Mode
48
Actual Exposure Time
50
Delay Time from Trigger Input to Start of Exposure
51
GPIO (Digital Input/Output Settings)
52
Linesource Items
53
Exposureactive Signal
53
Pulse Generator
54
Gain Control
55
Color Model
55
Gamma Function
56
To Use the Gamma Function
56
LUT (Lookup Table)
57
To Use the LUT Function
57
LUT Values
57
Color Space Conversion (Colortransformationcontrol)
58
How to Configure
58
Shading Correction
59
How to Configure the Shading Correction Function
60
Pixel Sensitivity Correction (DSNU, PRNU)
62
Chromatic Aberration Correction
63
Tilt View Correction
65
Noise Reduction Filter Functions
66
Spatial Compensation
67
Counter and Timer Control
68
Connecting Rotary Encoders
70
Encoderdivider Trigger Option
72
Edgedetection Trigger Option
74
Resume Scanning (Backward Counter)
75
Rotation Direction
75
Logic Block Control
76
Setting List (Feature Properties)
77
Devicecontrol
78
Transportlayercontrol
80
Imageformatcontrol
81
Acquisitioncontrol
83
Digitaliocontrol
85
Pulsegenerator
87
Analogcontrol
89
LUT Control
91
Color Transformation Control
92
Shading
93
Correction
94
Spatialcontrol
97
Counter and Timer Control
98
Encodercontrol
99
Logic Block Control
101
Usersetcontrol
102
Miscellaneous
103
Troubleshooting
103
Specifications
104
Spectral Response (Color Model)
108
Spectral Response (Monochrome Model)
108
Dimensions
109
Comparison of the Decibel Display and Multiplier Display
110
User's Record
111
Revision History
112
Advertisement
JAI Sweep Series User Manual (114 pages)
CoaXPress Interface
Brand:
JAI
| Category:
Recording Equipment
| Size: 7 MB
Table of Contents
Table of Contents
2
About Technical Note
6
Notice/Warranty
7
Notice
7
Warranty
7
Certifications
7
CE Compliance
7
Fcc
7
Warning
8
China Rohs
9
Usage Precautions
10
Heat Sink
10
Temperature Management
10
Max Line Rate at Which Camera Is Guaranteed to Operate
11
Notes on Cable Configurations
11
Notes on Attaching the Lens
11
Phenomena Specific to CMOS Image Sensors
12
Notes on Exportation
12
Features
13
Package Contents, Accessories
13
Parts Identification
14
Lens Mount (M95-Mount)
14
Connectors
14
DC IN/TRIG Connector (12-Pin Round)
15
AUX Connector (10-Pin)
16
CXP (Coaxpress) Connectors (1 ~4)
16
Leds
17
Mounting Holes
18
Recommended External Input Circuit Diagram
19
Preparation
20
Step 1: Connect Devices
21
① Lens
21
② Mounting
22
③ CXP Cable
22
④ CXP Frame Grabber Board
22
⑤ DC in / Trigger in Connection Cable
22
⑥ AC Adapter (Power Supply, if Necessary)
22
Step 2: Verify Camera Operation
23
Step 3: Verify the Connection between the Camera and PC
23
Step 4: Configure Trigger, Exposure, and Line Rate Settings
24
Control Via External Triggers with the Specified Exposure Time
25
Control Via External Triggers Without Specifying the Exposuretime
26
Control Via External Triggers with Exposure Time Controlled by the Pulse Width of the Trigger Input Signal
27
Control Without External Triggers with the Specified Exposure Time
28
Control Without External Triggers Without Specifying the Exposure Time
28
Step 5: Adjust the Image Quality
29
DSNU Correction (Pixel Black Correct)
29
PRNU Correction (Pixel Gain Correct)
30
Flatshading (Shading)
33
Adjust the Gain
33
Adjust the White Balance
35
Adjust the Black Level
38
Step 6: Save the Settings
38
To Save User Settings
39
To Load User Settings
39
Main Functions
40
ROI (Regional Scanning Function)
40
Binning Function
41
Pixel Format
42
Acquisition Control
42
Change the Line Rate
42
Trigger Control
43
Image Output Delay
44
Exposure Mode
45
Exposuretime Setting
47
GPIO (Digital Input/Output Settings)
48
Exposureactive Signal
49
Pulse Generator
50
Gain Control
51
Gamma Function
52
LUT (Lookup Table)
53
Color Space Conversion (Colortransformationcontrol)
54
Edge Enhancer
55
Shading Correction
56
How to Configure the Shading Correction Function
57
Pixel Sensitivity Correction (DSNU, PRNU)
59
Chromatic Aberration Correction
60
Tilt View Correction
63
Noise Reduction Filter Functions
64
Spatial Compensation
65
Counter and Timer Control
66
Connecting Rotary Encoders
68
Encoderdivider Trigger Option
70
Edgedetection Trigger Option
72
Resume Scanning (Backward Counter)
73
Rotation Direction
73
Logic Block Control
74
Event Control Function
75
Setting List (Feature Properties)
76
Devicecontrol
77
Transportlayercontrol
79
Imageformatcontrol
80
Acquisitioncontrol
82
Digitaliocontrol
84
Pulsegenerator
86
Analogcontrol
88
LUT Control
90
Color Transformation Control
91
Imagingcontrol
92
Shading
93
Correction
94
Spatialcontrol
97
Counter and Timer Control
98
Encodercontrol
99
Logic Block Control
101
Eventcontrol
102
Usersetcontrol
104
Miscellaneous
105
Troubleshooting
105
Specifications
106
Spectral Response (SW-16000TL-CXP4A-M95)
110
Spectral Response (SW-16000M-CXP4A-M95)
110
Dimensions
111
Comparison of the Decibel Display and Multiplier Display
112
User's Record
113
Revision History
114
JAI Sweep Series User Manual (102 pages)
With CoaXPress Interface
Brand:
JAI
| Category:
Digital Camera
| Size: 5 MB
Table of Contents
Table of Contents
2
About Technical Note
5
Notice/Warranty
6
Notice
6
Warranty
6
Certifications
6
CE Compliance
6
Fcc
6
Warning
7
China Rohs
8
Usage Precautions
9
Notes on Cable Configurations
9
Notes on Attaching the Lens
9
Phenomena Specific to CMOS Image Sensors
9
Notes on Exportation
10
Features
11
Features Overview
11
Package Contents, Accessories
11
Optional Accessories (Sold Separately)
11
Parts Identification
12
Lens Mount (C-Mount)
12
Connectors
12
DC IN/TRIG Connector (12-Pin Round)
13
CXP (Coaxpress) Connector
13
Leds
14
Mounting Holes
15
Preparation
16
Step 1: Connect Devices
17
① Lens
17
② Mounting
18
③ CXP Cable
18
④ CXP Frame Grabber Board
18
⑤ DC in / Trigger in Connection Cable
18
⑥ AC Adapter (Power Supply, if Necessary)
18
Step 2: Verify Camera Operation
19
Step 3: Verify the Connection between the Camera and PC
19
Step 4: Configure Trigger, Exposure, and Line Rate Settings
20
Control Via External Triggers with the Specified Exposure Time
21
Control Via External Triggers Without Specifying the Exposuretime
22
Control Via External Triggers with Exposure Time Controlled by the Pulse Width of the Trigger Input Signal
23
Control Without External Triggers with the Specified Exposure Time
24
Control Without External Triggers Without Specifying the Exposure Time
24
Step 5: Adjust the Image Quality
25
DSNU Correction (Pixel Black Correct)
25
How to Configure
25
PRNU Correction (Pixel Gain Correct)
26
Adjust the Gain
28
Automatic Adjustment
28
Adjust the White Balance
29
Adjust the Black Level
31
Step 6: Save the Settings
31
To Save User Settings
32
To Load User Settings
32
Main Functions
33
ROI (Regional Scanning Function)
33
ROI Settings
33
Binning Function
34
Pixel Format
35
Acquisition Control
35
Change the Line Rate
35
Trigger Control
36
Trigger Delay Based on Encoder Input
37
Exposure Mode
38
Exposure Time
40
Gain Control
41
Color Model
41
Gamma Function
42
LUT (Lookup Table)
43
Color Space Conversion (Colortransformationcontrol)
44
GPIO (Digital Input/Output Settings)
45
Exposureactive Signal
46
Counter and Timer Control
46
Connecting Rotary Encoders
48
Encoderdivider Trigger Option
50
Edgedetection Trigger Option
51
Rotation Direction
52
Event Control Function
53
Logic Block Control
54
Pulse Generator
55
Shading Correction
56
How to Configure the Shading Correction Function
57
User Area be "Best Effort" Correction Example
59
Pixel Sensitivity Correction (DSNU, PRNU)
59
Chromatic Aberration Correction
60
Tilt View Correction
63
Noise Reduction Filter Functions
64
Spatial Compensation
65
Setting List (Feature Properties)
67
Devicecontrol
68
Transportlayercontrol
70
Imageformatcontrol
71
Acquisitioncontrol
72
Analogcontrol
74
LUT Control
76
Color Transformation Control
77
Digitaliocontrol
78
Counter and Timer Control
80
Encodercontrol
81
Logic Block Control
83
Eventcontrol
84
Usersetcontrol
86
Pulsegenerator
86
Shading
88
Correction
89
Spatialcontrol
92
Miscellaneous
94
Troubleshooting
94
Specifications
95
Spectral Response (SW-2005TL-CXP)
98
Spectral Response (SW-2005M-CXP)
98
Dimensions
99
Comparison of the Decibel Display and Multiplier Display
100
User's Record
101
Revision History
102
Advertisement
Related Products
JAI SW-8000Q-10GE
JAI SW-8000Q-SFP
JAI SW-4000TL-SFP
JAI SW-8000T-10GE
JAI SW-8000T-SFP
JAI SW-2001Q-CL
JAI SW-4000TL-10GE-F
JAI SW-2005TL-CXP
JAI SW-2005M-CXP
JAI SW-4005M-CXP
JAI Categories
Digital Camera
Security Camera
Machine Vision Systems
CCD Cameras
Color Camera
More JAI Manuals
Login
Sign In
OR
Sign in with Facebook
Sign in with Google
Upload manual
Upload from disk
Upload from URL