Sign In
Upload
Manuals
Brands
Fostex Manuals
Recording Equipment
PD606
Fostex PD606 Manuals
Manuals and User Guides for Fostex PD606. We have
2
Fostex PD606 manuals available for free PDF download: Owner's Manual, Brochure & Specs
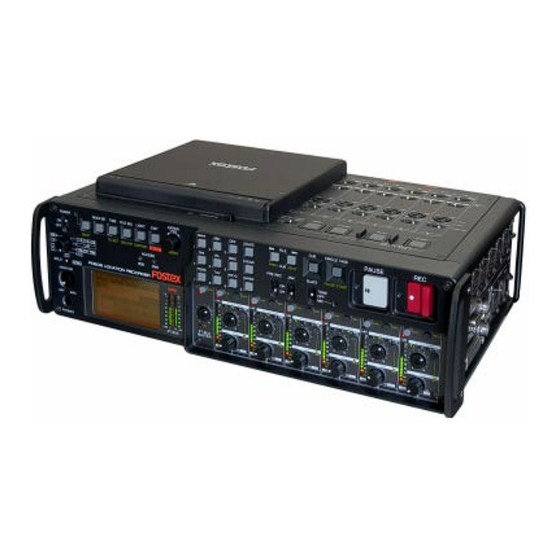
Fostex PD606 Owner's Manual (226 pages)
LOCATION RECORDER
Brand:
Fostex
| Category:
Recording Equipment
| Size: 8 MB
Table of Contents
Table of Contents
4
Important Safety Instructions
3
Caution
4
Caution
11
Introduction of this Manual
11
Precautions
11
Cautions for Use
13
Precautions of Installation
13
Chapter-1: Main Features
15
Main Features and Functions
16
What Is in the Box
19
PD606 Options and Related Fostex Products
19
Chapter 2: Preparation before Using the Pd606
21
Chapter-2: Preparation before Using the PD606
21
Preparation of Power Supply
22
Mounting the Battery
23
Important Settings for Using the Battery
24
Battery Priority Setting (Essential When Using more than One Battery)
24
Low Battery Warning Setting
24
Power Supply Priority Setting (Essential When Using both [DC-IN] and a Battery)
25
Protector Adjustment
25
Battery Condition Display
26
Saving the Battery Power
26
Dismounting the Battery
27
Important Settings for Using [DC IN]
28
Low Battery Warning Setting
28
Power Supply Priority Setting (Essential When Using both [DC-IN] and a Battery)
28
Power Supply Priority Setting (Essential When Using both [DC IN] and Battery)
28
Important Settings for Using [DC-IN]
28
Using [DC IN] (Connecting the AC Adaptor)
28
Using [DC-IN] (Connecting the AC Adaptor)
28
Turning on the Power
29
Display Backlight and Contrast
30
Turning on the Display Backlight
30
Adjusting the Display Contrast
30
Turning off the Power
30
Internal Clock Setting
31
Preparation of a DVD-RAM Disk
33
Inserting a Disk
33
Initial Format of a DVD-RAM Disk
34
Replacing the Internal Hard Disk Drive
37
Chapter 3: Names and Functions
39
Chapter-3: Names and Functions
39
Left Side Panel (Inputs/Outputs)
40
Left Side Panel
40
Right Side Panel (Inputs/Outputs)
42
Right Side Panel
42
Front Panel
45
Top Panel
53
Rear Panel
55
LCD Display Details
56
Home Screen
56
Time Display
56
Status Information
57
Current Drive/File Number
58
Disk Remaining
58
File Name/Next File Name
58
Protect Icon
58
BATTERY SETUP Menu Screen
59
DISK UTILITY Menu Screen
59
MENU List Screen
59
Screen Examples
59
SYS SETUP Menu Screen
59
TC SETUP Menu Screen
59
USB to PC Menu Screen
59
Audio File Select Screen
60
Contrast Adjustment Screen
60
CUE LIST Screen
60
Drive Select Screen
60
EDIT EDL FILE Menu Screen
60
Chapter 4: Basic Connections
61
Chapter-4: Basic Connections
61
Input Connection
62
Analog Audio Input Connection
62
Digital Audio Input Connection
63
Sync Signal Connection
63
Sync Signal Input Connection
63
Output Connection
64
Analog Audio Output Connection
65
Digital Audio Output Connection
65
STEREO BUS Output Connection
65
Time Code Output Connection
65
Word Clock Output Connection
65
Time Code Input Connection
63
Sync Signal Output Connection
65
Other Connections
66
USB Keyboard Connection
66
Other Connection
66
PC Connection
68
External Controller Connection
68
Power Connection
69
Power Supply Connection
69
Connection Examples
70
Connection Example for Recording (1)
70
Connection Example for Recording (2)
71
Chapter 5: Recording/Playback
73
Chapter-5: Recording/Playback
73
Preparation before Recording
74
Setup for Recording in Quick Setup Mode
74
How to Make Settings in the Quick Setup Mode
74
Frame Rate Selection for LTC (or External Time Code)
75
System Clock Reference Selection
75
Sampling Frequency and Bit Length Selection
76
TC Recording Mode Setting
76
Clock Pull Up/Pull down Setting
76
Power Source Priority Selection
77
Setting in the MENU Mode
77
Recording Source Setting
77
Pre/Post Fader Selection
77
Default File Name Setting
78
Maximum File Size Setting
78
Partition Link Setting
78
Error Tone Output Setting
78
Mixer Settings
79
Input Signal Selection
79
High-Pass Filter Setting
80
Limiter Setting
80
Adjusting the Input Gain (for Channels 1 through 6)
81
Input Channel Link
82
Phase Setting (for Channels 1 through 6)
83
Controlling Signals Sent to the Stereo Bus
83
Monitoring Recording Signals
84
Arming Tracks (Safe/Ready Setting)
85
Selecting the Drive for Recording
87
Recording Analog Audio
88
Starting Recording
88
Recording Analog Audio Signals
88
About Overloading During Recording
89
Canceling Recording (False Start)
89
Recording in Pre Rec Mode
90
Recording a Slate Tone/Slate MIC Signal
91
Recording Digital Audio
92
Selecting Recording Source
92
Selecting the Sampling Frequency/Bit Length
92
Selecting the System Clock
92
Recording Digital Audio Signals
92
Recording Time Code
93
Selecting the TC Frame Rate
93
Selecting the TC Generator Mode (TC Recording Mode)
93
Selecting the TC Generate Mode (TC Recording Mode)
93
Automatic Record Start by External Time Code
94
Setting the Time Code Output
94
Force Jam to External Time Code
95
Force Jamming to External Time Code (Jam Function)
95
Cue Point Setting
96
Setting a Cue Point on the Fly During Audio Recording
96
Viewing the Cue Point List
96
Editing a Cue Label
97
Editing a Cue Point
97
Editing Cue Point Data
97
Adding a New Cue Point to the Cue Point List
98
Deleting a Cue Point
98
Basic Playback
99
Normal Audio Playback
99
Playback
99
Cueing Playback
100
Time Code Playback
100
Skip/Locate Functions
101
Skipping by Cue Point
101
Skipping by File
101
Locating to the Beginning (ABS 0) of a File
102
Locating to the End (REC END) of a File
102
Locating to the Previous Locate Point
102
Locating to the Desired Time
103
Locating to the Desired Cue Point
104
Chapter 6: Advanced Operations
105
Chapter-6: Advanced Operations
105
Auto Copy Function
106
Setting a Partition
106
Selecting a Partition
106
Selecting Auto Copy Mode
107
Making Auto Copy
108
Disk Copy Function
109
Selecting Source Drive
109
Making Disk Copy
110
File Copy Function
112
Selecting Source Drive
112
Making File Copy
113
Dual Drive Recording
115
Formatting in the "DDR" Mode
115
Making Dual Drive Recording
117
Data Export to PC
118
Connecting PC to the Unit
119
How to Unmount the PD606 from the PC
119
Example of Copying Data to a Computer Hard Disk
120
Example of Exporting Data to a Computer Application
120
Chapter 7: Creating and Editing Ale Files
123
Chapter-7: Creating and Editing ALE Files (EDIT EDL FILE Menu)
123
Creating a New ALE File
124
Adding Audio File Entries to an ALE File
127
Viewing and Editing Audio File Entries
129
Viewing Audio File Entries
129
Adding an Audio File Entry to an Existing ALE File
130
Deleting an Audio File Entry
130
Editing an ALE File
131
Editing an ALE File Name
131
Remarking an ALE File
132
Remaking an ALE File
132
Deleting an ALE File
133
Chapter 8: Menu Mode
135
Chapter-8: MENU Mode
135
About MENU Mode
136
SYS SETUP Menu
138
Project Name Setting [Set Project Name]
139
Continuous Recording Function [Auto Part. Link]
156
Continuous Recording Function
156
False Start Mode Setting [False Start]
158
False Start Mode Setting
158
Limiter Parameter Setting [Limiter Parameter]
159
Limiter Parameter Setting
159
ST BUS out Nominal Level Setting [Stereo out Level]
161
ST BUS out Nominal Level Setting
161
Custom Settings for Monitoring [Monitor Custom]
162
Custom Settings for Monitoring
162
Monitor Speaker Mute Setting [Speaker Mute]
164
Monitor Speaker Mute Setting
164
Error Tone Output Setting [Error Tone]
165
Error Tone Output Setting
165
Chain Play Mode Setting [Chain Play]
168
Chain Play Mode Setting
168
Pre/Post Fader Selection [Disk Feed]
169
Pre/Post Fader Selection
169
ROM Version Checking [Version]
170
ROM Version Checking
170
Project Name Setting
139
Default File Name Setting
140
Default File Name Setting [Default File Name]
140
Default Track Name Setting
142
Default Track Name Setting [Default Trkname]
142
Next Event Number Setting
143
Next Event Number Setting [Next Event No]
143
Recording Fs/Bit Length Setting
144
Recording Fs/Bit Length Setting [Record Fs&Bit]
144
Pull Up/Down Setting
145
Pull Up/Down Setting [Pull Up/Down]
145
Recording Source Setting
146
Recording Source Setting [Rec Source Sel]
146
Digital Output Setting
147
Digital Output Signal Format Selection [Digital Out]
147
Diagnoses File Setting
148
Diagnoses File Setting [Diagnoses]
148
Peak Hold Time Setting
149
Peak Hold Time Setting [Peak Hold]
149
Slate Tone/Pop Tone Recording Mode Setting
150
Slate Tone/Pop Tone Recording Mode Setting [Tone Rec Mode]
150
Pause Cancel Time Setting
152
Pause Cancel Time Setting [Pause Time]
152
USB Keyboard Type Setting
153
USB Keyboard Type Setting [Keyboard]
153
Pre Rec Time Setting
154
Pre Recording Time Setting [Pre Rec Time]
154
Maximum File Length Setting
155
Maximum File Length Setting [Max File Length]
155
BATTERY SETUP Menu
171
Battery Low Voltage Warning Setting [BATT. Warning]
172
Battery Low Voltage Warning Setting
172
DC-IN Low Voltage Warning Setting [DC-IN Warning]
173
DC-IN Low Voltage Warning Setting
173
Power Supply Priority Setting [Power Priority]
174
Power Supply Priority Setting
174
Battery Priority Setting [Active Battery]
175
Battery Priority Setting
175
Battery Setting Examples
176
Battery Remaining Time [BATT. Remain]
178
Battery Remaining Time
178
Battery Status [BATT. Status]
179
Battery Status
179
TC SETUP Menu
180
System Clock Selection [Sync Clock]
181
System Clock Selection
181
TC Frame Rate Selection [Frame Rate]
182
TC Frame Rate Selection
182
Generator Mode Selection [Gen Mode]
183
Generator Mode Selection
183
Internal TC Generator Setting [Set Gen TC]
184
Internal TC Generator Setting
184
User Bit Setting [Set Gen Ubit]
186
User Bit Setting
186
Jam Mode Setting [JAM Mode]
188
Jam Mode Setting
188
Time Code Output Source Selection [Sel. TC Out]
189
Time Code Output Source Setting
189
Default LTC Start Time Setting [Default LTC Start]
190
Default LTC Start Time Setting
190
LTC Start Time Editing [Edit LTC Start]
191
LTC Start Time Editing
191
UBIT Setting of Playback Time Code [Ref TC Ubit]
192
UBIT Setting of Playback Time Code
192
Time Code Output While Paused [Rep Pause TC]
193
Time Code Output While Paused
193
Automatic Recording Start by External TC [Recin Via Exttc]
194
Automatic Recording Start by External TC
194
Internal TC Generator Power-Off Timer Setting [TC PWR Timer]
195
Internal TC Generator Power-Off Timer
195
DISK UTILITY Menu
196
Editing a File Name [Edit File Name]
197
Editing a File Name
197
Viewing a File Information and Editing Descriptor Information [File Info.]
198
Viewing a File Information and Editing Descriptor Information
198
Adding Descriptor Information
200
Deleting Descriptor Information
200
Editing Descriptor Information
200
Editing Ixml Chunk Data Information
201
Viewing Ixml Chunk Data Information
201
Deleting an Unnecessary Audio File
202
Deleting an Unnecessary Audio File [Delete File]
202
Restoring a Deleted Audio File
203
Restoring a Deleted Audio File [Restore Del. File]
203
Formatting a Disk (or a Hard Disk Partition)
204
Formatting a Disk (or a Hard Disk Partition) [Format]
204
Editing the Reel Number (Volume Label)
208
Editing the Reel Number (Volume Label) [Reel No.]
208
Record Protection On/Off Setting
209
Record Protection On/Off Setting [Rec Protect]
209
Resume Function On/Off Setting
210
Resume Function On/Off Setting [Resume]
210
Partition Protection On/Off Setting
211
Partition Protection On/Off Setting [Part. Protect]
211
HDD Operating Time Display
212
HDD Operating Time Display [HDD Ope. Time]
212
LOAD SETUP Menu
213
SAVE SETUP Menu
214
Chapter-9: Specifications
215
Inputs/Outputs
216
General
217
Recording/Playback
217
Physical Dimensions
218
Block Diagram
219
Index
220
Advertisement
Fostex PD606 Brochure & Specs (8 pages)
PD Series Professional DVD / HD Location Recorders, Multitrack DVD Recorder
Brand:
Fostex
| Category:
DVD Recorder
| Size: 3 MB
Advertisement
Related Products
Fostex PD-4
Fostex PC100USB-HR2
Fostex PC100USB-HR
Fostex PD-6/DV40
Fostex PD-6
Fostex PD-2
Fostex PD204
Fostex PX-6
Fostex PM0.5d
Fostex PM-0.4
Fostex Categories
Recording Equipment
Speakers
Music Mixer
Voice Recorder
Amplifier
More Fostex Manuals
Login
Sign In
OR
Sign in with Facebook
Sign in with Google
Upload manual
Upload from disk
Upload from URL