Sign In
Upload
Manuals
Brands
Dialog Semiconductor Manuals
Network Hardware
DA16 Series
Dialog Semiconductor DA16 Series Manuals
Manuals and User Guides for Dialog Semiconductor DA16 Series. We have
1
Dialog Semiconductor DA16 Series manual available for free PDF download: Getting Started Manual
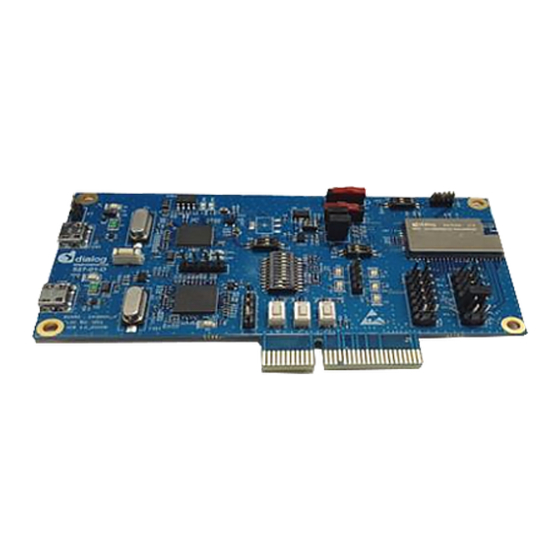
Dialog Semiconductor DA16 Series Getting Started Manual (80 pages)
FreeRTOS
Brand:
Dialog Semiconductor
| Category:
Network Hardware
| Size: 2 MB
Table of Contents
Table of Contents
2
Terms and Definitions
6
References
6
Overview
7
Evaluation Kits
8
Introduction
8
DA16200 Module EVK Ver 9.0_210205
8
Figure 1: DA16200 Module EVK Hardware Configuration
8
Table 1: Components on DA16200 EVK
8
Table 2: GPIO, SPI Selection Switch
9
DA16600 Module EVK Ver 4.0_201116
10
Figure 2: DA16600 Module EVK Hardware Configuration
10
Table 3: Components on DA16600 EVB
11
Table 4: Description of Switches
12
Connecting to the Evks
13
Configuring the DA16200/600 Serial Debug Interface
13
Figure 3: Windows - COM Ports
13
Configuring the DA14531 Serial Debug Interface (DA16600 EVK Only)
14
Table 5: Serial Port Configuration Values
14
Updating the Firmware
15
Table 6: Serial Flash Memory Map
16
Firmware Update Using Commands (Windows/Linux)
17
Table 7: FW Image Loady Commands
17
Firmware Update Using the Terra Term Script (Windows Only)
19
Figure 4. Open the Macro File
19
Multi-Download Tool
20
Figure 5. Download Bootloader
20
Figure 6. Download RTOS Image
20
Changing the Boot Index
21
Provisioning Wi-Fi
21
Setup for Station Mode
21
Setup for Soft-AP Mode
23
Setup for Wi-Fi Provisioning Using Bluetooth LE (DA16600)
25
Figure 7: Diagram of Provisioning Via Bluetooth LE
25
Software Development Kit
26
Introduction
26
System Requirements
26
Installing the GNU Arm GCC Cross Compiler
26
Installing the Eclipse IDE
26
Configuring the Eclipse IDE
27
Figure 8: Eclipse Installer Download
27
Figure 9: Eclipse Installer Run
27
Figure 10: Eclipse Open Preferences Dialog Box
28
Figure 11: [MCU] Global Arm Toolchains Paths
28
Figure 12: Xpack Selection Dialog Box
28
Importing the DA16200 Freertos SDK into Eclipse
29
Figure 13: Windows 10 [MCU] Global Build Tools Path
29
Figure 14: Import SDK to the Eclipse IDE
30
Figure 15: Select Folder to Import the SDK into the Eclipse IDE
31
Figure 16: Import SDK to the Eclipse IDE
32
Figure 17: Eclipse Project Explorer
32
Import and Build a Project
33
Figure 18: Import Scripts_Project
33
Figure 19: Import a Project
34
Figure 20: Build a Project
35
Figure 21: Generate Configuration Window
35
Figure 22: Generate Configuration Warning Pop-Up
35
Figure 23: Location of Firmware Image Files
36
Changing the Flash Configuration
37
Downloading the Firmware Images (Firmware Update)
37
Debugging with J-Link Debug Probe
37
Installing J-Link
37
Figure 23: Run Generate Configuration Window
37
Connect J-Link
38
Figure 24: Download J-Link Software
38
Figure 25. J-Link 9-Pin Cortex-M Adapter
38
Figure 26: J-Link 20 Pin
39
Figure 27: DA16200 Module External Connector
39
Table 8: DA16200 Module External Connector Mapping for J-LINK 20Pin
39
Run Debug Mode
40
Figure 28. Run Debug Mode
40
Figure 29. Select Debug Mode
41
5.10 Programming DA16200 with SEGGER J-Link in Eclipse
42
Requirements
42
Preparation
42
Setup
42
Figure 30: the Installation of the J-Link Software Package
42
Figure 31: the Flash Loader Files
43
Programming
44
Figure 32: the Path of J-Link Installation in Eclipse
44
Figure 33: Run Program_All_Jtag_Win Script
45
Test Procedures
46
Introduction
46
Ping Test
46
Test Setup
46
Figure 34: Ping Test Environment
46
Perform the Ping Test with DPM Enabled
47
How to Add an ARP Record
48
Throughput Test
49
Test Setup
49
Figure 35: Iperf Test Environment
49
Iperf Test with DA16200/600 as a Client
50
Figure 36: Disable Firewall for Iperf Test
51
Iperf Test with DA16200/600 as a Server
52
DPM Setup
53
What Is DPM
53
Enable DPM Mode
53
Hold/Disable DPM Mode
54
Current Measurement
56
Test Setup
56
Sleep 1
56
Sleep 2
56
Figure 37: Current Test Environment
56
Sleep 3
57
Figure 38: Current Measurement with DPM
58
Appendix A Configure DA16600 EVK to Use AT-CMD Via UART
59
Turn off Switch
59
Connect UART2 to FT2232H
59
Figure 39: SW3 and SW7 UART1 Connection
59
Figure 40: Connect UART2 to FT2232H
60
Figure 41: Setting for AT-CMD over UART2
60
Appendix B DA16200 Debug Interface Commands
61
Console Commands
61
Root Commands
62
Table 9: Root Commands
62
Network Commands
63
Table 10: Network Commands
63
CLI Command
64
Overview
64
CLI Format
64
Common Commands
65
Table 11: CLI Commands in Common Mode
65
STA Commands
67
Table 12: CLI Commands on STA Mode
67
Soft-AP Commands
68
Table 13: CLI Commands on Soft-AP Mode
68
Advanced Commands
71
MROM Commands
71
Common Commands
71
Table 14: Advanced CLI Commands
71
Table 15: Common Commands in MROM
71
Memory Access Commands
72
Download Commands
72
SFLASH Commands
72
Secure Commands
72
Additional Commands
72
Table 16: Memory Access Commands in MROM
72
Table 17: Download Commands in MROM
72
Table 18: SFLASH Commands in MROM
72
Table 19: Secure Commands in MROM
72
Table 20: Additional Commands in MROM
72
Appendix C SDK Memory Maps
73
Introduction
73
SFLASH Memory Map
74
SRAM Memory Map
74
Table 21: 4-MB SFLASH Memory Map
74
Appendix D Troubleshooting
75
Boot Failure
75
Check SFDP
75
Figure 42: System Memory Map
75
Appendix E Country Codes
77
Table 22: Country Codes
77
Revision History
79
Advertisement
Advertisement
Related Products
Dialog Semiconductor DA16200
Dialog Semiconductor DA16600
Dialog Semiconductor DA6021
Dialog Semiconductor DA14580
Dialog Semiconductor DA14586
Dialog Semiconductor DA14695 ProDK
Dialog Semiconductor DA14695-00HQDEVKT-P
Dialog Semiconductor DA14681
Dialog Semiconductor DA14683 USB Kit
Dialog Semiconductor DA14681-01
Dialog Semiconductor Categories
Microcontrollers
Motherboard
Network Hardware
Control Unit
Controller
More Dialog Semiconductor Manuals
Login
Sign In
OR
Sign in with Facebook
Sign in with Google
Upload manual
Upload from disk
Upload from URL