Sign In
Upload
Manuals
Brands
Daikin Manuals
Heat Pump
ERLA11D V3 Series
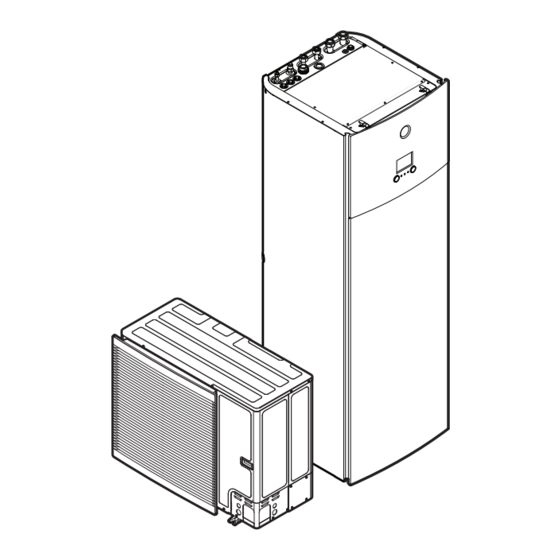
Daikin ERLA11D V3 Series Manuals
Manuals and User Guides for Daikin ERLA11D V3 Series. We have
2
Daikin ERLA11D V3 Series manuals available for free PDF download: Installer's Reference Manual
Daikin ERLA11D V3 Series Installer's Reference Manual (316 pages)
Brand:
Daikin
| Category:
Air Conditioner
| Size: 26 MB
Table of Contents
Table of Contents
2
About the Documentation
6
About this Document
6
Meaning of Warnings and Symbols
7
Installer Reference Guide at a Glance
8
General Safety Precautions
10
For the Installer
10
General
10
Installation Site
11
Refrigerant - in Case of R410A or R32
11
Water
13
Electrical
13
Specific Installer Safety Instructions
16
About the Box
22
Outdoor Unit
22
To Handle, Unpack and Remove Accessories - Outdoor Unit
22
To Remove the Transportation Stay
24
Indoor Unit
25
To Unpack the Indoor Unit
25
To Remove the Accessories from the Indoor Unit
25
To Handle the Indoor Unit
26
About the Units and Options
27
Overview: about the Units and Options
27
Identification
27
Identification Label: Outdoor Unit
27
Identification Label: Indoor Unit
28
Combining Units and Options
28
Possible Combinations of Indoor Unit and Outdoor Unit
28
Possible Options for the Outdoor Unit
29
Possible Options for the Indoor Unit
29
Application Guidelines
33
Overview: Application Guidelines
33
Setting up the Space Heating/Cooling System
34
Single Room
35
Multiple Rooms - One LWT Zone
39
Multiple Rooms - Two LWT Zones
45
Setting up Bivalent Heat Sources
49
Setting up a Direct Auxiliary Heat Source for Space Heating
49
Setting up an Indirect Auxiliary Heat Source for Domestic Hot Water and Space Heating
52
Setting up a Solar System Via Drainback Connection
53
Setting up a Solar System Via Bivalent Heat Exchanger
54
Setting up an Electric Backup Heater
55
Setting up the Storage Tank
55
System Layout - Integrated Storage Tank
55
Selecting the Volume and Desired Temperature for the Storage Tank
55
Setup and Configuration - Storage Tank
57
DHW Pump for Instant Hot Water
57
DHW Pump for Disinfection
58
Setting up the Energy Metering
58
Produced Heat
59
Consumed Energy
59
Normal Kwh Rate Power Supply
60
Preferential Kwh Rate Power Supply
61
Setting up the Power Consumption Control
62
Permanent Power Limitation
63
Power Limitation Activated by Digital Inputs
63
Power Limitation Process
64
BBR16 Power Limitation
65
Setting up an External Temperature Sensor
66
Unit Installation
67
Preparing the Installation Site
67
Installation Site Requirements of the Outdoor Unit
67
Additional Installation Site Requirements of the Outdoor Unit in Cold Climates
69
Installation Site Requirements of the Indoor Unit
70
Special Requirements for R32 Units
71
Installation Patterns
73
Opening and Closing the Units
82
About Opening the Units
82
To Open the Outdoor Unit
82
To Close the Outdoor Unit
83
To Open the Indoor Unit
83
To Lower the Switch Box of the Indoor Unit and Remove the Top Cover
84
To Close the Indoor Unit
86
Mounting the Outdoor Unit
86
About Mounting the Outdoor Unit
86
Precautions When Mounting the Outdoor Unit
86
To Provide the Installation Structure
86
To Install the Outdoor Unit
87
To Provide Drainage
88
To Install the Discharge Grille
89
Mounting the Indoor Unit
90
About Mounting the Indoor Unit
90
Precautions When Mounting the Indoor Unit
90
To Install the Indoor Unit
90
To Connect the Drain Hose to the Drain
90
Piping Installation
92
Preparing Refrigerant Piping
92
Refrigerant Piping Requirements
92
Refrigerant Piping Insulation
93
Connecting the Refrigerant Piping
93
About Connecting the Refrigerant Piping
93
Precautions When Connecting the Refrigerant Piping
94
Guidelines When Connecting the Refrigerant Piping
95
Pipe Bending Guidelines
95
To Flare the Pipe End
95
To Braze the Pipe End
96
Using the Stop Valve and Service Port
97
To Connect the Refrigerant Piping to the Outdoor Unit
98
To Connect the Refrigerant Piping to the Indoor Unit
101
Checking the Refrigerant Piping
101
About Checking the Refrigerant Piping
101
Precautions When Checking the Refrigerant Piping
102
Checking Refrigerant Piping: Setup
102
To Check for Leaks
102
To Perform Vacuum Drying
103
Charging Refrigerant
104
About Charging Refrigerant
104
Precautions When Charging Refrigerant
105
Charging Additional Refrigerant
106
Completely Recharging Refrigerant
106
To Fix the Fluorinated Greenhouse Gases Label
107
Preparing Water Piping
108
Water Circuit Requirements
108
To Check the Water Volume and Flow Rate
111
Connecting Water Piping
112
About Connecting the Water Piping
112
Precautions When Connecting the Water Piping
113
To Connect the Water Piping
113
To Connect a Pressure Vessel
116
To Fill the Heating System
117
To Fill the Heat Exchanger Inside the Storage Tank
118
To Fill the Storage Tank
118
To Insulate the Water Piping
119
Electrical Installation
121
About Connecting the Electrical Wiring
121
Precautions When Connecting the Electrical Wiring
121
Guidelines When Connecting the Electrical Wiring
122
About Electrical Compliance
124
About Preferential Kwh Rate Power Supply
124
Erla11~16D + Ebsh/X(B)11+16P30+50D
124
Overview of Electrical Connections Except External Actuators
124
Connections to the Outdoor Unit
125
Specifications of Standard Wiring Components
126
To Connect the Electrical Wiring to the Outdoor Unit
126
Connections to the Indoor Unit
129
To Connect the Electrical Wiring to the Indoor Unit
131
To Connect the Main Power Supply
133
To Connect the Backup Heater Power Supply
135
To Connect the Backup Heater to the Main Unit
138
To Connect the Shut-Off Valve
139
To Connect the Electricity Meters
140
To Connect the Domestic Hot Water Pump
141
To Connect the Alarm Output
142
To Connect the Space Cooling/Heating ON/OFF Output
143
To Connect the Changeover to External Heat Source
144
To Connect the Power Consumption Digital Inputs
145
To Connect the Safety Thermostat (Normally Closed Contact)
147
To Connect a Smart Grid
148
To Connect the WLAN Cartridge
153
To Connect the Solar Input
154
To Connect the DHW Output
154
Finishing the Outdoor Unit Installation
156
To Check the Insulation Resistance of the Compressor
156
To Finish the Outdoor Unit Installation
156
Configuration
157
Overview: Configuration
157
To Access the most Used Commands
158
To Connect the PC Cable to the Switch Box
160
Configuration Wizard
160
Possible Screens
162
Possible Screens: Overview
162
Home Screen
163
Main Menu Screen
165
Menu Screen
166
Setpoint Screen
166
Detailed Screen with Values
167
Schedule Screen: Example
168
Weather-Dependent Curve
172
What Is a Weather-Dependent Curve
172
2-Points Curve
172
Slope-Offset Curve
173
Using Weather-Dependent Curves
175
Settings Menu
177
Malfunctioning
177
Room
177
Main Zone
181
Additional Zone
191
Space Heating/Cooling
196
Tank
205
User Settings
211
Information
216
Installer Settings
218
Commissioning
245
User Profile
245
Operation
246
Wlan
246
Menu Structure: Overview User Settings
249
Menu Structure: Overview Installer Settings
250
Commissioning
251
Overview: Commissioning
251
Precautions When Commissioning
252
Checklist before Commissioning
252
Checklist During Commissioning
253
Minimum Flow Rate
253
Air Purge Function
254
Operation Test Run
256
Actuator Test Run
257
Underfloor Heating Screed Dryout
258
To Set up Bivalent Heat Sources
261
Hand-Over to the User
262
Maintenance and Service
263
Overview: Maintenance and Service
263
Maintenance Safety Precautions
263
Yearly Maintenance
264
Yearly Maintenance Outdoor Unit: Overview
264
Yearly Maintenance Outdoor Unit: Instructions
264
Yearly Maintenance Indoor Unit: Overview
264
Yearly Maintenance Indoor Unit: Instructions
264
Troubleshooting
266
Overview: Troubleshooting
266
Precautions When Troubleshooting
266
Solving Problems Based on Symptoms
267
Symptom: the Unit Is NOT Heating or Cooling as Expected
267
Symptom: Hot Water Does NOT Reach the Desired Temperature
268
Symptom: the Compressor Does NOT Start (Space Heating or Domestic Water Heating)
268
Symptom: the System Is Making Gurgling Noises after Commissioning
269
Symptom: the Pump Is Blocked
270
Symptom: the Pump Is Making Noise (Cavitation)
270
Symptom: the Pressure Relief Valve Opens
271
Symptom: the Water Pressure Relief Valve Leaks
271
Symptom: the Space Is NOT Sufficiently Heated at Low Outdoor Temperatures
272
Symptom: Tank Disinfection Function Is NOT Completed Correctly (AH-Error)
273
Solving Problems Based on Error Codes
273
To Display the Help Text in Case of a Malfunction
273
Error Codes: Overview
274
Disposal
278
To Recover Refrigerant
278
To Open the Stop Valves
279
To Manually Open the Electronic Expansion Valves
279
Recovery Mode - in Case of 3N~ Models (7-Segments Display)
280
Recovery Mode - in Case of 1N~ Models (7-Leds Display)
283
To Drain the Storage Tank
284
To Drain the Storage Tank Without a Connected Pressureless Solar System
284
To Drain the Storage Tank with a Connected Pressureless Solar System
286
Technical Data
288
Service Space: Outdoor Unit
288
Piping Diagram: Outdoor Unit
290
Piping Diagram: Indoor Unit
291
Wiring Diagram: Outdoor Unit
292
Wiring Diagram: Indoor Unit
293
ESP Curve: Indoor Unit
299
Name Plate: Indoor Unit
299
Glossary
301
Field Settings Table
302
Advertisement
Daikin ERLA11D V3 Series Installer's Reference Manual (304 pages)
Brand:
Daikin
| Category:
Heat Pump
| Size: 20 MB
Table of Contents
Table of Contents
2
About this Document
6
Meaning of Warnings and Symbols
7
Installer Reference Guide at a Glance
8
General Safety Precautions
10
For the Installer
10
General
10
Installation Site
11
Refrigerant - in Case of R410A or R32
11
Water
13
Electrical
13
Specific Installer Safety Instructions
16
About the Box
22
Outdoor Unit
22
To Handle, Unpack and Remove Accessories - Outdoor Unit
22
To Remove the Transportation Stay
24
Indoor Unit
25
To Unpack the Indoor Unit
25
To Remove the Accessories from the Indoor Unit
25
To Handle the Indoor Unit
25
About the Units and Options
27
Identification
27
Identification Label: Outdoor Unit
27
Identification Label: Indoor Unit
27
Combining Units and Options
28
Possible Options for the Outdoor Unit
28
Possible Options for the Indoor Unit
28
Possible Combinations of Indoor Unit and Outdoor Unit
31
Application Guidelines
32
Overview: Application Guidelines
32
Setting up the Space Heating/Cooling System
33
Single Room
34
Multiple Rooms - One LWT Zone
38
Multiple Rooms - Two LWT Zones
44
Setting up an Auxiliary Heat Source for Space Heating
48
Setting up the Domestic Hot Water Tank
50
System Layout - Integrated DHW Tank
50
Selecting the Volume and Desired Temperature for the DHW Tank
51
Setup and Configuration - DHW Tank
52
DHW Pump for Instant Hot Water
53
DHW Pump for Disinfection
53
Setting up the Energy Metering
54
Produced Heat
54
Consumed Energy
54
Normal Kwh Rate Power Supply
55
Preferential Kwh Rate Power Supply
56
Setting up the Power Consumption Control
57
Permanent Power Limitation
58
Power Limitation Activated by Digital Inputs
59
Power Limitation Process
60
BBR16 Power Limitation
61
Smart Grid Capacity Limitation Due to Buffering
61
Setting up an External Temperature Sensor
62
Unit Installation
63
Preparing the Installation Site
63
Installation Site Requirements of the Outdoor Unit
63
Additional Installation Site Requirements of the Outdoor Unit in Cold Climates
65
Installation Site Requirements of the Indoor Unit
66
Special Requirements for R32 Units
67
Installation Patterns
68
Opening and Closing the Units
76
About Opening the Units
76
To Open the Outdoor Unit
76
To Close the Outdoor Unit
77
To Open the Indoor Unit
77
To Lower the Switch Box on the Indoor Unit
79
To Close the Indoor Unit
80
Mounting the Outdoor Unit
80
About Mounting the Outdoor Unit
80
Precautions When Mounting the Outdoor Unit
80
To Provide the Installation Structure
80
To Install the Outdoor Unit
81
To Provide Drainage
82
To Install the Discharge Grille
83
Mounting the Indoor Unit
84
About Mounting the Indoor Unit
84
Precautions When Mounting the Indoor Unit
84
To Install the Indoor Unit
84
To Connect the Drain Hose to the Drain
85
Piping Installation
86
Preparing Refrigerant Piping
86
Refrigerant Piping Requirements
86
Refrigerant Piping Insulation
87
Connecting the Refrigerant Piping
87
About Connecting the Refrigerant Piping
87
Precautions When Connecting the Refrigerant Piping
88
Guidelines When Connecting the Refrigerant Piping
89
Pipe Bending Guidelines
89
To Flare the Pipe End
89
To Braze the Pipe End
90
Using the Stop Valve and Service Port
91
To Connect the Refrigerant Piping to the Outdoor Unit
92
To Connect the Refrigerant Piping to the Indoor Unit
95
Checking the Refrigerant Piping
95
About Checking the Refrigerant Piping
95
Precautions When Checking the Refrigerant Piping
96
Checking Refrigerant Piping: Setup
96
To Check for Leaks
96
To Perform Vacuum Drying
97
Charging Refrigerant
98
About Charging Refrigerant
98
Precautions When Charging Refrigerant
99
Charging Additional Refrigerant
100
Completely Recharging Refrigerant
100
To Fix the Fluorinated Greenhouse Gases Label
101
Preparing Water Piping
102
Water Circuit Requirements
102
Formula to Calculate the Expansion Vessel Pre-Pressure
105
To Check the Water Volume and Flow Rate
105
Changing the Pre-Pressure of the Expansion Vessel
107
To Check the Water Volume: Examples
108
Connecting Water Piping
108
About Connecting the Water Piping
108
Precautions When Connecting the Water Piping
109
To Connect the Water Piping
109
To Connect the Recirculation Piping
111
To Fill the Water Circuit
111
To Fill the Domestic Hot Water Tank
112
To Insulate the Water Piping
112
Electrical Installation
113
About Connecting the Electrical Wiring
113
Precautions When Connecting the Electrical Wiring
114
Guidelines When Connecting the Electrical Wiring
114
About Electrical Compliance
116
About Preferential Kwh Rate Power Supply
116
Overview of Electrical Connections Except External Actuators
117
Connections to the Outdoor Unit
117
Specifications of Standard Wiring Components
118
To Connect the Electrical Wiring to the Outdoor Unit
118
Erla11~16D + Ebvh/X11+16S18+23D
118
Connections to the Indoor Unit
120
To Connect the Main Power Supply
123
To Connect the Backup Heater Power Supply
125
To Connect the Shut-Off Valve
128
To Connect the Electricity Meters
129
To Connect the Domestic Hot Water Pump
130
To Connect the Alarm Output
131
To Connect the Space Cooling/Heating ON/OFF Output
132
To Connect the Changeover to External Heat Source
133
To Connect the Power Consumption Digital Inputs
134
To Connect the Safety Thermostat (Normally Closed Contact)
135
To Connect a Smart Grid
136
After Connecting the Electrical Wiring to the Indoor Unit
140
Finishing the Outdoor Unit Installation
141
To Check the Insulation Resistance of the Compressor
141
To Finish the Outdoor Unit Installation
141
Configuration
142
Overview: Configuration
142
To Access the most Used Commands
143
To Connect the PC Cable to the Switch Box
145
Configuration Wizard
146
Possible Screens
147
Possible Screens: Overview
147
Home Screen
148
Main Menu Screen
150
Menu Screen
151
Setpoint Screen
152
Detailed Screen with Values
153
Preset Values and Schedules
153
Using Preset Values
153
Using and Programming Schedules
154
Schedule Screen: Example
157
Setting the Energy Prices
161
Weather-Dependent Curve
163
What Is a Weather-Dependent Curve
163
2-Points Curve
164
Slope-Offset Curve
165
Using Weather-Dependent Curves
166
Settings Menu
168
Malfunctioning
168
Room
169
Main Zone
173
Additional Zone
183
Space Heating/Cooling
188
Tank
197
User Settings
205
Information
210
Installer Settings
211
Commissioning
233
User Profile
233
Operation
234
Wlan
234
Menu Structure: Overview User Settings
237
Menu Structure: Overview Installer Settings
238
Commissioning
240
Overview: Commissioning
240
Precautions When Commissioning
241
Checklist before Commissioning
241
Checklist During Commissioning
242
Minimum Flow Rate
242
Air Purge Function
243
Operation Test Run
245
Actuator Test Run
245
Underfloor Heating Screed Dryout
246
Hand-Over to the User
250
Maintenance and Service
251
Maintenance Safety Precautions
251
Yearly Maintenance
252
Yearly Maintenance Outdoor Unit: Overview
252
Yearly Maintenance Outdoor Unit: Instructions
252
Yearly Maintenance Indoor Unit: Overview
252
Yearly Maintenance Indoor Unit: Instructions
252
To Drain the Domestic Hot Water Tank
254
About Cleaning the Water Filter in Case of Trouble
255
To Remove the Water Filter
255
To Clean the Water Filter in Case of Trouble
256
To Install the Water Filter
257
Troubleshooting
258
Overview: Troubleshooting
258
Precautions When Troubleshooting
258
Solving Problems Based on Symptoms
259
Symptom: the Unit Is NOT Heating or Cooling as Expected
259
Symptom: Hot Water Does NOT Reach the Desired Temperature
259
Symptom: the Compressor Does NOT Start (Space Heating or Domestic Water Heating)
260
Symptom: the System Is Making Gurgling Noises after Commissioning
260
Symptom: the Pump Is Blocked
262
Symptom: the Pump Is Making Noise (Cavitation)
262
Symptom: the Pressure Relief Valve Opens
263
Symptom: the Water Pressure Relief Valve Leaks
263
Symptom: the Space Is NOT Sufficiently Heated at Low Outdoor Temperatures
264
Symptom: the Pressure at the Tapping Point Is Temporarily Unusually High
265
Symptom: Tank Disinfection Function Is NOT Completed Correctly (AH-Error)
265
Solving Problems Based on Error Codes
265
To Display the Help Text in Case of a Malfunction
266
Error Codes: Overview
266
Disposal
271
To Recover Refrigerant
271
To Open the Stop Valves
272
To Manually Open the Electronic Expansion Valves
272
Recovery Mode - in Case of 3N~ Models (7-Segments Display)
273
Recovery Mode - in Case of 1N~ Models (7-Leds Display)
276
Technical Data
278
Service Space: Outdoor Unit
279
Piping Diagram: Outdoor Unit
280
Piping Diagram: Indoor Unit
281
Wiring Diagram: Outdoor Unit
282
Wiring Diagram: Indoor Unit
283
ESP Curve: Indoor Unit
289
Glossary
290
Field Settings Table
291
Advertisement
Related Products
Daikin ERLA11DAV3
Daikin ERLA11DAW1
Daikin ERLA11D W1 Series
Daikin ERLA11-14DW1
Daikin ERLA11-14DV3
Daikin ERLA14DAV3
Daikin ERLA16DAV3
Daikin ERLA14DAW1
Daikin ERLA16DAW1
Daikin ERLA14D V3 Series
Daikin Categories
Air Conditioner
Heat Pump
Remote Control
Chiller
Air Handlers
More Daikin Manuals
Login
Sign In
OR
Sign in with Facebook
Sign in with Google
Upload manual
Upload from disk
Upload from URL