Sign In
Upload
Manuals
Brands
Canon Manuals
Printer
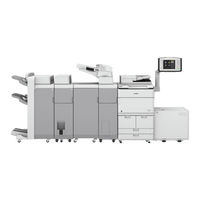
imageRUNNER ADVANCE DX 8795i
Canon imageRUNNER ADVANCE DX 8795i Manuals
Manuals and User Guides for Canon imageRUNNER ADVANCE DX 8795i. We have
3
Canon imageRUNNER ADVANCE DX 8795i manuals available for free PDF download: Installation Manual, Service Manual, Customer Expectation Document
Canon imageRUNNER ADVANCE DX 8795i Installation Manual (904 pages)
Brand:
Canon
| Category:
Printer
| Size: 68 MB
Table of Contents
Important Notices
2
Description on the Parts Included in the Package
3
Table of Contents
4
Safety Precautions
10
Toner Safety
11
About Toner
11
Handling Adhered Toner
11
Checking the Installation Environment
11
Points to Note before Servicing
11
Essential Items to be Performed before Installation
12
Checking Installation Space
12
Illustrations
13
Product Lineup
14
Scanning System Options
15
Function Expansion System Options
16
Option Combination Table
17
Pickup/Delivery System Option
18
Host Machine
22
How to Utilize this Installation Procedure
23
Description on the Parts Included in the Package
23
Symbols
23
Checking before Installation
24
Checking the Power Supply
24
Checking the Installation Environment
24
Points to Note at Installation Work
24
Points to Note When Moving this Host Machine
24
Order to Install the Host Machine and the Options
24
Installation of Host Machine
26
Unpacking
26
Checking the Contents
34
Installation Procedure
37
Setting the Paper Cassette
77
Image Position Adjustment
79
Leading Edge Margin Adjustment (1St Side)
82
Network Troubleshooting
98
Image Reading System Options
105
Printer Cover-H2
106
Points to Note before Installation
106
Checking the Contents
106
Installation Outline Drawing
106
Installation Procedure
107
Removing the Covers
107
Removing the ADF
111
Removing the Reader Unit
115
Installing the Covers
121
Operation Check
124
Auto Adjust Gradation
125
Reader Heater-P1
126
Points to Note before Installation
126
Checking the Contents
126
Installation Outline Drawing
127
Installation Procedure
127
Installing the Reader Heater
131
Host Machine Options
150
Upright Control Panel-J1
151
Installation Procedure
151
Installing the ADF
180
Pre-Checks
198
NFC Kit-E1/E2
202
Points to Note before Installation
202
Checking the Contents
202
Essential Items to be Performed before Installation
202
Points to Note When Turning ON/OFF the Main Power
203
Installation Outline Drawing
203
Installation Procedure
203
Connection Kit-A2/A3 for Bluetooth le
221
Points to Note before Installation
221
Checking the Contents
221
Essential Items to be Performed before Installation
221
Points to Note When Turning ON/OFF the Main Power
222
Installation Outline Drawing
222
Installation Procedure
222
Setting after Installation
230
Numeric Keypad-A1/A2
231
Points to Note before Installation
231
Checking the Contents
231
Essential Items to be Performed before Installation
231
Points to Note When Turning ON/OFF the Main Power
232
Installation Outline Drawing
232
Installation Procedure
232
Utility Tray-B1
242
Points to Note at Installation
242
Checking the Contents
242
Installation Outline Drawing
242
Installation Procedure
243
Copy Card Reader-F1
249
Points to Note at Installation
249
Essential Items to be Performed before Installation
249
Points to Note When Turning ON/OFF the Main Power
249
Installation Outline Drawing
250
Checking the Contents
250
Installation Procedure
252
Installing the Card Reader
254
Checking after Installation
265
Serial Interface Kit-K3 / Copy Control Interface Kit-A1
266
Points to Note at Installation
266
Checking the Contents
266
Essential Items to be Performed before Installation
267
Points to Note When Turning ON/OFF the Main Power
267
Installation Outline Drawing
268
Installation Procedure
268
Removing the Main Controller PCB
268
Voice Operation Kit-D1
275
Points to Note before Installation
275
Checking the Contents
275
Essential Items to be Performed before Installation
276
Points to Note When Turning ON/OFF the Main Power
276
Installation Outline Drawing
277
Installation Procedure
277
Checking after Installation
288
Operation Check
288
Voice Guidance Kit-G1
289
Points to Note at Installation
289
Checking the Contents
289
Essential Items to be Performed before Installation
290
Points to Note When Turning ON/OFF the Main Power
290
Installation Outline Drawing
291
Installation Procedure
291
Checking after Installation
300
Operation Check
301
When Using
301
HDD-Related Option
302
Pre-Checks
302
Removing the HDD Box Unit
303
[TYPE-1] Option HDD (1TB)
307
HDD Initialization Procedure
311
[TYPE-2] Standard HDD + Option HDD (250GB) + HDD Mirroring Kit
313
[TYPE-3] 2 Option Hdds (1TB) + HDD Mirroring Kit
324
Executing Auto Gradation Adjustment
336
Execution of the Minimum Installation Work
336
Super G3 FAX Board-AS1
337
Product Name
337
Points to Note at Installation
337
Essential Items to be Performed before Installation
337
Points to Note When Turning ON/OFF the Main Power
337
Installation Outline Drawing
337
Checking the Contents
338
Installation Procedure
338
Checking the Operation
343
Super G3 FAX Board-AS2
345
Product Name
345
Points to Note at Installation
345
Essential Items to be Performed before Installation
345
Points to Note When Turning ON/OFF the Main Power
345
Installation Outline Drawing
345
Checking the Contents
346
Installation Procedure
346
Checking the Operation
350
Super G3 2Nd Line Fax Board-AS1
352
Product Name
352
Points to Note at Installation
352
Essential Items to be Performed before Installation
352
Points to Note When Turning ON/OFF the Main Power
352
Installation Outline Drawing
352
Checking the Contents
353
Installation Procedure
355
Installing the Equipment
358
Checking the Operation
372
Super G3 2Nd Line Fax Board-AS2
374
Product Name
374
Points to Note at Installation
374
Essential Items to be Performed before Installation
374
Points to Note When Turning ON/OFF the Main Power
374
Installation Outline Drawing
374
Checking the Contents
375
Installation Procedure
376
Checking the Operation
391
Basic Settings
392
FAX Communication Test
392
Super G3 3Rd/4Th Line Fax Board-AS1
393
Product Name
393
Points to Note at Installation
393
Essential Items to be Performed before Installation
393
Points to Note When Turning ON/OFF the Main Power
393
Super G3 2Nd Line Fax Board-AS2
393
Installation Outline Drawing
394
Checking the Contents
395
Installation Procedure
396
Checking the Operation
403
Super G3 3Rd/4Th Line Fax Board-AS2
405
Product Name
405
Points to Note at Installation
405
Essential Items to be Performed before Installation
405
Points to Note When Turning ON/OFF the Main Power
405
Installation Outline Drawing
406
Checking the Contents
407
Installation Procedure
408
Checking the Operation
414
Double Feeding Detection Kit-B1
416
Pre-Checks
416
Installation Procedure
416
Paper Feed Options
427
Paper Deck Unit-E1
428
Checking before Installation
428
Unpacking Procedure
428
Checking the Contents
429
Installation Procedure
430
Checking after Installation
450
Front Cover Positioning Adjustment
454
Paper Deck Heater Unit-A1
456
Checking before Installation
456
Checking the Supplied Parts
456
Installation Procedure
457
Checking after Installation
471
POD Deck Lite-C1
472
Checking before Installation
472
Unpacking
472
Checking the Contents
473
Installation Procedure
475
Disposal Parts
495
Paper Positioning Check/Adjustment Procedure
495
Paper Deck Heater Unit for POD Deck Lite-C1
500
Checking the Parts to be Installed
500
Removing from the Host Machine
500
Installation Procedure
502
Cassette Heater Unit-38
509
Checking the Contents
509
Installation Outline Drawing
509
Essential Items to be Performed before Installation
509
Installation Procedure
509
Paper Output Options
516
Document Insertion Unit-N1
517
Checking before Installation
517
Unpacking Procedure
519
Checking the Contents
521
Installation Outline Drawing
523
Installation Procedure
524
Connecting the Power Cord
550
Adjustment
552
Height Adjustment
554
Inclination Adjustment
557
Checking after Installation
559
Operation Checks
559
Paper Folding Unit-J1
561
Checking before Installation
561
Unpacking
561
Checking the Contents
571
Installation Procedure
573
Adjustment
595
Checking after Installation
608
Staple Finisher-W1 Pro/Booklet Finisher-W1 PRO
610
Checking before Installation
610
Unpacking
611
Checking the Contents
615
Installation Procedure
616
Preparing the Finisher for Installation
616
Connecting to the Host Machine
618
Adjusting the Height
643
Connecting the Cable
648
Connection Check
652
Side Registration/Skew Adjustment
653
Peeling and Attaching the Labels
660
Puncher Unit-BT1/BS1/BU1
663
Points to Note at Installation
663
Points to Note before Installation
663
Checking the Contents
664
Installation Procedure
664
Affixing the A1 Labels
672
Adjustments
673
Staple Finisher-X1/Booklet Finisher-X1
686
Checking before Installation
686
Unpacking
687
Checking the Contents
696
Installation Procedure
697
Adjustment
717
Checking after Installation
722
Operation Check
723
Inner Booklet Trimmer-A1
724
Checking before Installation
724
Checking the Supplied Parts
724
Installation Procedure
725
Operation Check
744
Puncher Unit-BF1/BG1/BH1
745
Checking before Installation
745
Unpacking and Checking the Contents
745
Installation Procedure
746
Adjustment
767
Operation Check
768
Staple Finisher-AC1/ Booklet Finisher-AC1
769
Checking before Installation
769
Unpacking
770
Checking the Contents
773
Installation Procedure
774
Affixing the Labels
785
Making Adjustments
789
Making Checks after Completion of Installation Work
803
Detaching from the Upstream Connection Machine
805
2/3 2/4 4 Hole Puncher Unit-A1
808
Checking before Installation
808
Unpacking Procedure
808
Checking the Contents
810
Installation Procedure
810
Disposal Parts Check
825
Operation Check
825
Adjusting the Output Level of the Punch Waste Full Sensor
826
Checking and Adjusting the Punch Hole Position
827
Booklet Trimmer-F1
831
Pre-Checks
831
Unpacking
832
Checking the Contents
837
Installation Procedure
838
Adjusting the Height
848
Multi Function Professional Puncher-B1
868
Pre-Checks
868
Unpacking
869
Checking the Contents
872
Installation Procedure
872
Connecting the Cables
886
Finisher Jogger Kit-A1
892
Checking before Installation
892
Unpacking Procedure
892
Checking the Contents
893
Installation Procedure
894
Checking after Installation
902
Revision
904
Advertisement
Canon imageRUNNER ADVANCE DX 8795i Service Manual (121 pages)
Brand:
Canon
| Category:
Printer
| Size: 1 MB
Table of Contents
Table of Contents
4
Introduction
8
Overview
8
Features
10
Unified Firmware Platform
10
Imagerunner ADVANCE DX Series Platform Improvements
10
Configuration
11
Estimated Performance Standard
18
Optimum Performance Range and Monthly Copy/Print Volume
19
The Optimum Performance Range
19
Maximum Monthly Copy/Print Volume
19
Hardware Accessory Options
20
Printer Cover-H2
20
Paper Deck Unit-E1
20
POD Deck Lite-C1
20
Tab Feeding Attachment Kit-B1
20
Copy Card Reader-F1
20
Upright Control Panel-J1
20
Numeric Keypad-A1
21
Copy Tray-R2
21
Booklet Finisher-W1 PRO and Staple Finisher-W1 PRO
21
Booklet Finisher-X1 and Staple Finisher-X1
21
Booklet Finisher-AC1 and Staple Finisher-AC1
21
Puncher Unit-BS1
22
Puncher Unit-BF1
22
2/3 Hole Puncher Unit-A1
22
Booklet Trimmer-F1/-G1
22
Inner Booklet Trimmer-A1
22
Document Insertion Unit-N1
22
Paper Folding Unit-J1
23
Multi Function Professional Puncher-B1
23
System Features and Options
25
Copy and Print Options
25
Imagepass-Y3 V1.1
25
Barcode Printing Kit-D1
25
Secure Watermark
25
PCL International Font Set-A1
25
Universal Send
26
Universal Send Trace & Smooth PDF
26
Universal Send Security Feature
26
Universal Send Digital User Signature
26
Fax Options
26
Super G3 FAX Board-AS2
26
Super G3 2Nd Line Fax Board-AS2
26
Super G3 3Rd/4Th Line Fax Board-AS2
26
IP FAX Expansion Kit-B1
26
Remote Fax Kit-A1
27
Accessibility Options
27
Voice Guidance Kit-B2
27
Voice Operation Kit-D1
27
ADF Access Handle-A1
27
Document Storage Capabilities
28
Mail Box
28
Network
28
Memory Media
29
Advanced Box
29
Security Features and Options
30
Authentication and Usage Management
30
Universal Login Manager
30
Department ID Management
30
UA (Universal Authentication)
30
Card Reader Solutions
31
Access Management System
31
Uniflow Online
31
Uniflow Online Express
32
Data Management and Security
33
Initialize All Data/Settings Function
33
TPM (Trusted Platform Module)
34
HDD Data Erase
35
HDD Data Erase Scheduler
35
HDD Data Encryption Kit
35
HDD Data Mirroring Kit-J1
35
Document Security
36
Adobe Livecycle Rights Management es Server Integration
36
PDF/XPS Visible Digital Signature
36
Encrypted Secure Print Software
36
Ir-ADV Security Kit-AG1 for IEEE 2600 Common Criteria Certification
37
Network Security
38
Ipsec
38
Filtering by Port Number
38
Ipv6
38
Wired / Wireless Security and Authentication
38
Device Security
39
Security Policy Settings
39
Restrict Service Representative Access Function
39
Verify System at Startup
40
SIEM (Security Information and Event Management) Integration
40
Mcafee Embedded Control
40
Software Solutions
41
Document Management and Binding
41
Imagerunner ADVANCE Desktop
41
Imagerunner ADVANCE Quick Printing Tool
41
Therefore
42
Ecopy PDF Pro Office
42
Scan Management Software
43
Authorized Send
43
Ecopy Sharescan
43
Uniflow (Scanning)
43
Uniflow Online
43
Uniflow Online Express
43
Print/Output Management Software
44
Direct Print & Scan for Mobile
44
Uniflow
44
Uniflow Online
44
Uniflow Online Express
44
AA-PRINT (Advanced Anywhere Print)
45
EFI Printme
45
Canon Mobile Printing
45
Device Security and Management Software
46
AA-PROX (Advanced Authentication - Proximity Card)
46
Uniflow Device Security & Management
46
Uniflow Serverless Secure Print
46
Uniflow Online
46
Uniflow Online Express
46
Imageware Enterprise Management Console
47
Imageware Secure Audit Manager Express
47
MEAP Web Connection Kit
47
MDS Cloud
47
Business Workflow Software
48
Forms and Print Services for Salesforce
48
Enterprise Imaging Platform
48
Dealer Sales/Service Authorization and Educational Training
49
Learning Path for Existing Technicians
49
Learning Path for New Technicians
49
Foundational Prerequisites
50
Certification
50
Who Should Attend
50
Uniflow Online and Uniflow Online Express Training Courses
51
Uniflow Online
51
Uniflow Online Express
51
Data Backup Service Training Course
51
Multi Function Professional Puncher-A1/B1 Training
52
Learning Path for Technicians Certified on the Professional Puncher-B1
52
Learning Path for New Technicians
52
Training Facilities
52
Online Courses
52
Classroom Training Facilities
52
Course Equipment
52
Service Materials
53
Servicing Notes
54
Power and Plug Requirements
54
Installation Weight & Dimensions
57
Installation Space Requirements
59
Estimated Installation Times
61
Recommended System Engineer Requirements
63
Canon Remote Services
64
Imageware Remote
64
Optional Integration Applications
65
UGW Snapshot
65
Device Management Tool
66
Dealer Dashboard
66
Content Delivery System
67
Remote Operator's Software Kit
68
Device Configuration Management
69
Device Configuration Manager
69
Device Migration Navigator
69
Data Backup Service
70
Firmware Upgrade
71
Service Support Tool
71
Content Delivery System
71
LMS (License Management System)
72
Content Delivery System Website
72
Hard Disk Drive Handling
73
Special Tools, Solvents & Oils
73
Consumables
74
Consumable Parts
75
Periodically Replaced Parts
80
Periodic Maintenance
81
Soft Counter
83
MEAP Counter
84
Toner Bottle Counter
85
Limited Warranty Support
86
Imagerunner ADVANCE DX 8700 Limited Warranty Conditions
86
GPR-37/38 Drum Unit Limited Warranty
86
Warranty Programs
86
Service Parts Availability
87
Product Technical Support Offerings
88
Canon USA Technical Support Center
88
Technical Support Escalation
88
Internet Support
90
Appendix
91
Registered Paper Types and Weight
91
Specifications
92
Canon Imagerunner ADVANCE DX 8705I/8595I/8586I SERIES LIMITED WARRANTY
118
GPR-37/38 Drum Unit Limited Warranty
119
List of Tables
120
List of Figures
121
Canon imageRUNNER ADVANCE DX 8795i Customer Expectation Document (87 pages)
Brand:
Canon
| Category:
All in One Printer
| Size: 1 MB
Table of Contents
Table of Contents
2
1 Introduction
6
2 Product Overview
7
Summary of Functions
8
High-Resolution Imaging System for Copied and Printed Images
9
Image Stabilization Control
10
Automatic Gradation Adjustment
10
Registration Adjustment
10
Customer-Defined Image Quality Adjustments and Recommendations
11
Unified Firmware Platform
12
Unified Firmware Platform Improvements
13
Data Backup Service
14
Input and Output Accessories
15
Storage Capabilities
16
Mail Box
16
Advanced Box
17
Network
18
Memory Media
18
Security Features
19
Device Authentication
19
Device Security
21
Data Security
23
Document Security
26
Network Security
27
3 Machine Dimensions and Space Requirements
29
Dimensions
29
Weight
30
Installation and Service Space
31
Minimum Space Requirements to Transport the Machine and Turn Hallway Corners
31
Installation Space Diagrams
32
Recommended Floor Space Requirements
34
Floor Structure Requirements
34
Potential System Configurations
35
4 Power/Electrical Requirements
36
Power Requirements for the Main Unit and Optional Accessories
36
5 Environmental Factors and Requirements
38
Temperature and Humidity Conditions
38
Temperature Gradient
39
Ventilation
39
Elevation Limitations
39
Lighting
40
Sunlight
40
Ammonia
40
6 Specifications
41
Main Unit
41
Feeder
43
Paper Deck Unit-E1
44
POD Deck Lite-C1
44
Document Insertion Unit-N1
45
Paper Folding Unit-J1
46
Staple Finisher-AC1, Booklet Finisher-AC1, and 2/3 Hole Puncher Unit-A1
47
Staple Finisher-X1, Booklet Finisher-X1, Inner Trimmer, and Puncher Unit-BF1
49
Staple Finisher-W1 PRO, Booklet Finisher-W1 PRO, and Puncher Unit-BS1
52
Multi Function Professional Puncher-B1
55
Booklet Trimmer-G1
56
Copy Tray-R2
57
Copy Card Reader-F1
57
Imagepass-Y3 V1.1
58
Super G3 FAX Board-AS2
59
Send Function: Push Scan Specifications
60
Send Function: Pull Scan Specifications
60
Send Function: I-Fax Specifications
60
Network Environment: Wired LAN Specifications
61
Network Environment: Wireless LAN Specifications
61
Printer Software Specifications
62
7 System Options
63
Copy and Print Options
63
Imagepass-Y3 V1.1
63
Barcode Printing Kit-D1
63
PCL International Font Set-A1
63
Print and Output Management Software
64
Fax Options
65
Super G3 FAX Board-AS2
65
Super G3 2Nd Line Fax Board-AS2
65
Super G3 3Rd/4Th Line Fax Board-AS2
65
Remote Fax Kit-A1
65
IP FAX Expansion Kit
65
MEAP Web Connection Kit
66
Data Security and Wireless Options
67
Ir-ADV Security Kit-AG1 for IEEE 2600 Common Criteria Certification Set
67
HDD Mirroring Kit-J1
67
Inch/250 GB HDD-N1
68
Inch/1 TB HDD-P1
68
Connection Kit-A2 for Bluetooth le
68
Accessibility Options
69
Voice Guidance Kit-G1
69
Voice Operation Kit-D1
69
ADF Access Handle-A1
69
Numeric Keypad-A1
69
8 Installation Review
70
Installation Time
70
Customer Installation Responsibilities
72
9 Consumables
73
Usage Conditions
73
Estimated Life of Consumables
73
10 Toner Bottle Yields
74
11 Waste Toner Yields
74
12 Estimated Performance Standards
74
13 Optimum Monthly Product Performance
75
14 Machine Productivity
76
Print Speed
76
Mixed Media Productivity
80
Mixed Paper Weight Job Productivity
80
Paper and Toner Replacement
80
15 Media Usage/Compatibility
81
Media Characteristics by Media Library Parameters
81
Paper Handling and Storage
81
Paper Grain and Curl
82
Note for Customers Who Cut Their Own Paper
83
Media Feed Locations
83
Paper Sizes and Feed Location Chart
86
16 Responsibility Matrix
87
Advertisement
Advertisement
Related Products
Canon imageRUNNER ADVANCE DX 8700 Series
Canon imageRUNNER ADVANCE DX 8705i
Canon imageRUNNER ADVANCE DX 8786i
Canon imageRUNNER ADVANCE DX 8905
Canon imageRUNNER ADVANCE DX 8995
Canon imageRUNNER ADVANCE DX 8986
Canon imageRUNNER ADVANCE DX 6860i
Canon imageRUNNER ADVANCE DX C568iF
Canon imageRUNNER ADVANCE DX C5860
Canon imageRUNNER ADVANCE DX C5840
Canon Categories
Printer
Digital Camera
All in One Printer
Camcorder
Scanner
More Canon Manuals
Login
Sign In
OR
Sign in with Facebook
Sign in with Google
Upload manual
Upload from disk
Upload from URL