Sign In
Upload
Manuals
Brands
Canon Manuals
All in One Printer
imageRUNNER ADVANCE C356iF II
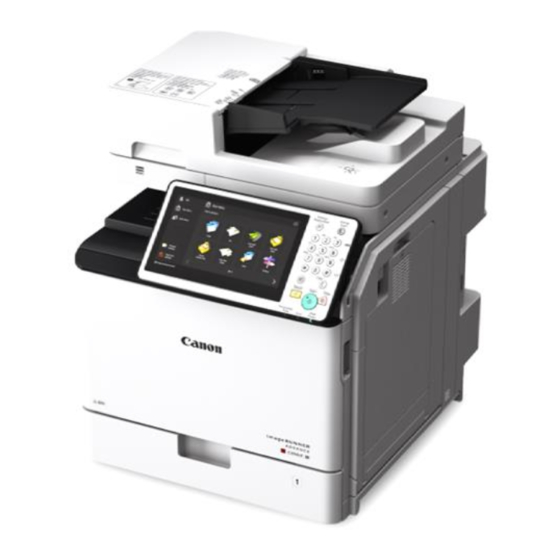
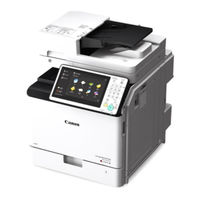
Canon imageRUNNER ADVANCE C356iF II Manuals
Manuals and User Guides for Canon imageRUNNER ADVANCE C356iF II. We have
3
Canon imageRUNNER ADVANCE C356iF II manuals available for free PDF download: Service Manual, Advance Maintenance Manual
Canon imageRUNNER ADVANCE C356iF II Service Manual (999 pages)
Brand:
Canon
| Category:
Printer
| Size: 57 MB
Table of Contents
Important Notices
2
Explanation of Symbols
3
Table of Contents
5
Safety Precautions
13
Laser
14
Laser Safety
14
Handling of Laser System
14
Power Supply / Lithium Battery
15
Turn Power Switch on
15
Power Supply Guidelines
15
Notes When Handling a Lithium Battery
15
Toner Safety
16
About Toner
16
Handling Adhered Toner
16
Notes on Works
16
Points to Note before Servicing
16
Points to Note at Cleaning
16
Notes on Assembly/Disassembly
17
Product Overview
18
Product Lineup
19
Host Machine
19
Machine Configuration
19
Model Type
19
Pickup/Delivery / Image Reading System Options
20
Function Expansion System Options
21
Hardware Products
21
Specifications
23
Weight and Size
24
Productivity
25
Paper Type
26
Parts Name
29
Cross Section View
29
Control Panel
30
Technology
31
Functional Configuration
32
Original Exposure System
33
Features
33
Specifications
33
Basic Configuration
34
List of Rollers
37
Dust Detection Control
38
Image Processing
39
Outline of Electric Circuits
42
ADF Scan Operation Sequence (Common to 2-Sided/1-Sided)
43
Scanner Unit
45
Pickup Feed System
46
Controller System
51
Overview
51
Startup Sequence
53
Shutdown Sequence
54
Motion Sensor
54
Laser Exposure System
56
Overview
56
Specifications
57
Laser ON/OFF Control
58
Horizontal Scanning Synchronization Control
59
Vertical Scanning Synchronization Control
60
Scanner Motor Control
61
APC (Auto Power Control)
62
BD Detection Correction Control
63
Dustproof Shutter
63
Image Formation System
65
Overview
65
Primary Charging
67
Drum Unit (Developing/Drum)
68
Transfer/Separation
72
Drum Cleaning
80
Image Stabilization Control
81
Toner Supply Assembly
88
Waste Toner Feeding Area
95
Other Controls
97
Fixing System
100
Overview
100
Specifications
100
Component Parts
100
Fixing Temperature Control
102
Standby Temperature Control
103
Print Temperature Control
104
Down Sequence Control
105
Fixing Film Unit Engagement/Disengagement Control
107
Pre-Fixing Arch Level Control
109
Protection Function
110
Pickup Feed System
112
Overview
112
Parts Configuration
113
Layout Drawing of Rollers
113
Cassette Pickup Assembly
115
Multi-Purpose Tray Pickup Assembly
119
Registration Area
120
Delivery Assembly
122
Reverse/Duplex Assembly
123
Jam Detection
126
External Auxiliary System
129
Software Counter
129
Fan
131
Power Supply
133
Power-Saving Function
133
Conditions for Not Entering Deep Sleep Mode (Check Items)
135
Quick Startup
135
Quick Start
136
Operating Conditions of the Heater Control
136
Periodical Service
137
Periodically Replacement Parts
138
Consumable Parts
139
Parts Replacement and Cleaning
140
Preface
141
Outline
141
Points to Note When Tightening a Screw
141
List of Parts
142
External / Internal Cover
142
List of Main Unit
146
Electrical Components
150
Parts Replacement and Cleaning
152
External Cover/Interior System
160
Removing the Front Cover
160
Removing the Rear Cover 1
161
Removing the Left Upper Cover
166
Removing the Left Lower Cover
166
Removing the Right Front Cover
167
Pre-Check Items
167
Removing the Right Rear Cover/Right Rear Lower Cover
168
Removing the Left Upper Cover
170
Removing the Right Cover Unit
171
Removing the Multi-Purpose Tray
177
Removing the Delivery Tray
178
Removing the Rear Upper Cover
179
Removing the Upper Cover
180
Removing the Control Panel Unit
183
Parts Replacement and Cleaning
187
Original Exposure/Feed System
189
Removing the ADF Unit
189
Removing the ADF Pickup Unit
193
Removing the ADF Separation Unit
194
Removing the Scanner Unit (Back)
196
Removing the Copyboard Glass Unit
203
Removing the Scanner Unit (Front)
204
Removing the Reader Motor
208
Removing the ADF Feed Frame
209
Removing the CIS Holder
218
Controller System
229
Removing the Main Controller Sub Cover /Main Controller Cover
229
Removing the Main Controller Unit
230
Removing the DC Controller PCB
234
Removing the Secondary Transfer High-Voltage Pcb/Developing High-Voltage PCB Unit
236
Removing the Primary Transfer High-Voltage PCB Unit
237
Removing the All-Night Power Supply PCB Unit
240
Removing the Low-Voltage Power Supply Unit
241
Removing the Control Panel CPU PCB Unit/Lcd Unit
246
Removing the HDD
251
Removing the Fax Speaker Unit
252
Removing the Fax Unit
252
Laser Exposure System
254
Removing the Laser Scanner Unit
254
Parts Replacement and Cleaning
257
Image Formation System
259
Removing the Waste Toner Container
259
Removing the Toner Container (Y/M/C/Bk)
259
Removing the Drum Unit (Y/M/C/Bk)
260
Removing the ITB Unit
263
Removing the Registration Patch Sensor Unit
268
Removing the Secondary Transfer Outer Roller Unit
270
Removing the Secondary Transfer Outer Roller Guide Unit
272
Removing the Registration Drive Unit
276
Removing the Main Drive Unit
278
Removing the Hopper Unit (Y/M/C/Bk)
279
Removing the ITB Pressure Release Switch
281
Removing the Bottle Drive Unit (Y/M/C/Bk)
282
Removing the Toner Bottle Mount (Y/M/C/Bk)
284
Fixing System
291
Removing the Fixing Assembly
291
Removing the Fixing Pressure Roller Unit
292
Removing the Fixing Drive Unit
296
Pickup/Feed System
298
Removing the Right Inner Cover Unit
298
Removing the Cassette Pickup Roller/Cassette Separation Roller/Cassette Feed Roller
299
Removing the Multi-Purpose Tray Pickup Roller /Multi-Purpose Tray Separation Roller /Multi-Purpose Tray Feed Roller
304
Assembling Procedure
307
Reassembling When the Multi-Purpose Tray Separation Roller Shaft Is Detached and Dropped Inside the Host Machine
312
Removing the Registration/Pickup Unit
316
Procedure after Replacement When Images with Uneven Density (White Spots) Are Generated after Replacing the Registration Unit
320
Removing the Delivery/Reverse Unit
326
Removing the Cassette 1 Lifter Drive Unit
327
Removing the Cassette 1 Pickup Drive Unit
330
Cleaning Procedure
333
Cleaning the Copyboard Glass/Reading Glass
333
Cleaning the Dustproof Glass
333
Cleaning When Installing/Removing the ITB Unit
334
Cleaning the Registration Patch Sensor Unit
335
Cleaning the Registration Front Guide
337
Cleaning the Registration Roller/Pre-Registration Roller
338
Cleaning the Secondary Transfer Guide
339
Cleaning the Fixing Inlet Guide
340
Adjustment
342
Actions at Parts Replacement
343
Main Controller PCB
343
DC Controller PCB
343
Hard Disk
344
Copyboard Glass
347
Scanner Unit (Paper Front)
347
Scanner Unit (Paper Back)
348
After Replacing Touch Panel/Control Panel CPU PCB/LCD Unit
351
Original Exposure System
352
Right Angle Adjustment
352
Pickup Feed System
353
Image Position Adjustment
353
Hardware Adjustment
353
Software Adjustment
356
Feed Direction
357
Troubleshooting
359
List of Initial Check Items
359
Test Print
360
Overview
360
Steps to Select a Test Print Type
360
How to Use the Test Print
361
Gradations (TYPE = 4)
361
Mcybk Horizontal Stripes (TYPE = 10)
363
Gradations (TYPE = 12)
363
List of Troubleshooting Items
364
Image Failure
364
Fixing Wrinkle in Envelopes Due to a Problem of Feedability between the Secondary Transfer Nip and the Fixing Nip
366
Category: Malfunction
370
Startup System Failure Diagnosis
377
Overview
377
Basic Flow
378
Controller Self Diagnosis
388
Boot Method
388
Diagnosis Result
389
Limitations
391
Debug Log
392
Function Overview
392
Saving and Collecting Debug Logs
395
Automatic Log Settings
398
Setting the Overwrite Function
399
Setting the Encryption Function
399
Setting the Filter Function
400
Setting the Startup Collection Function
400
Collecting into a USB Device
402
Service Mode Relating to Debug Logs
408
Error/Jam/Alarm
410
Overview
411
Location Code
411
Pickup Position Code
411
Pickup Size
411
Points to Note When Clearing MN-CON
413
Points to Note When Clearing HDD
413
Error Code
414
Error Code Details
414
Jam Code
501
Jam Type
501
Jam Screen Display Specification
502
Host Machine / Cassette
502
ADF / Reader
505
Staple Finisher
506
Alarm Code
508
Alarm Code Details
508
Service Mode
551
Overview
552
Basic Operations
552
Switching the Screen Display (Level 1 2)
553
SITUATION Mode
555
How to Use Parts Check
557
Security Support
560
Service Mode Backup
564
Output of Service Print Data
564
Moving the File in Service Mode
565
COPIER (Service Mode for Printer)
569
DISPLAY (State Display Mode)
569
I/O
600
ADJUST (Adjustment Mode)
600
FUNCTION (Operation / Inspection Mode)
703
OPTION (Specification Setting Mode)
726
TEST (Print Test Mode)
845
COUNTER (Counter Mode)
852
FEEDER (ADF Service Mode)
872
ADJUST (Adjustment Mode)
872
FUNCTION (Operation / Inspection Mode)
873
OPTION (Specification Setting Mode)
875
SORTER (Service Mode for Delivery Options)
876
ADJUST (Adjustment Mode)
876
OPTION (Specification Setting Mode)
876
BOARD (Option Board Setting Mode)
877
OPTION (Specification Setting Mode)
877
Installation
878
How to Utilize this Installation Procedure
879
Symbols
879
Installation of the Host Machine
880
Setting the Dehumidification Switch
880
Operation When Using Uniflow Online
880
Document Scan Lock Kit-B1/B2
881
Points to Note at Installation
881
Checking the Contents
881
Installation Outline Drawing
881
Essential Items to be Performed before Installation
882
Removing the Covers
882
Installation Procedure
884
Installing the Host Machine Covers
886
Checking after Installation
886
IC Card Reader BOX-D1
887
Points to Note at Installation
887
Checking the Contents
887
Installation Outline Drawing
888
Essential Items to be Performed before Installation
888
Installation Procedure
889
When Installing to the Finisher
901
Connecting the Power Supply
905
IC Card Reader Attachment-A1
906
Points to Note at Installation
906
Checking the Contents
906
Installation Outline Drawing
906
Essential Items to be Performed before Installation
906
Installation Procedure
906
Copy Card Reader-F1/Copy Card Reader Attachment-B4
911
Points to Note at Installation
911
Checking the Contents
911
Essential Items to be Performed before Installation
912
Installation Procedure
920
Setting after Installation
924
Points to Note at Installation
925
Checking the Contents
925
Installation Outline Drawing
925
Essential Items to be Performed before Installation
926
Setting after Installation
947
Service Tools
958
List of Special Tools
958
Solvents and Oils
958
Software Counter Specifications
974
Work Procedure
979
Advertisement
Canon imageRUNNER ADVANCE C356iF II Service Manual (103 pages)
Brand:
Canon
| Category:
Copier
| Size: 1 MB
Table of Contents
Table of Contents
4
I. Product Overview, New Features, Configuration, and Monthly Print/Copy Volume - 1
8
Overview
8
Unified Firmware Platform
9
Data Backup Service
10
Configuration
11
Monthly Copy/Print Volume
18
Hardware Accessory Options
19
Cassette Module-AE1
19
Cassette Feeding Unit-AJ1
19
Cassette Feeding Unit-AK1
19
FL Cassette-AV1
19
Staple Finisher-Z1
19
Copy Card Reader-F1
19
IC Card Reader Attachment-A1
19
System Options
20
Copy and Print Options
20
PCL International Font Set-A1
20
Barcode Printing Kit-D1
20
Universal Send and Fax Options
20
Universal Send Trace & Smooth PDF Kit-A1
20
Universal Send Digital User Signature Kit-C1
20
Super G3 2Nd Line Fax Board-AT1
20
IP FAX Expansion Kit-B1
20
Data Security and Wireless Options
21
Ir-ADV Security Kit-U1 for IEEE 2600.1 Common Criteria Certification
21
Document Scan Lock Kit-B1
21
Connection Kit-A1 for Bluetooth le
21
NFC Kit-C1
21
Accessibility Options
22
ADF Access Handle-A1
22
Braille Label Kit-F1
22
Storage Capabilities
23
Mail Box Simple
23
Advanced Box
24
Shared Folders
24
Personal Folders
24
Network
25
Memory Media
25
Security Features
26
Device Authentication
26
ULM (Universal Login Manager)
26
Department ID Management
26
UA (Universal Authentication)
27
Access Management System
27
Uniflow Online Express
27
Device Security
28
SIEM (Security Information and Event Management) Integration
28
Security Policy Function
29
Data Security
30
Initialize All Data/Settings Function
30
HDD Data Erase Kit
31
HDD Data Encryption Kit
31
HDD Data Erase Scheduler
31
Document Scan Lock Kit
31
TPM (Trusted Platform Module)
32
Document Security
33
Document Scan Lock and Tracking Function
33
Secure Watermark-B1
33
Encrypted Secure Print Software
33
PDF Visible Digital Signature
33
Adobe Livecycle Rights Management es Server Integration
34
Network Security
35
Ipsec
35
Filtering by Port Number
35
Encryption and Authentication
35
Network Port and Application Access Control
36
Software Solutions
37
Document Management and Binding Software
37
Imagerunner ADVANCE Desktop
37
Imagerunner ADVANCE Quick Printing Tool
37
Imageware Document Server
37
Imageware Scan Manager DS
38
Ecopy PDF Pro Office
38
Scan Management Software
39
Workflow Composer and Connectors
39
Authorized Send
39
Uniflow (Scanning)
39
ADVANCE Cloud Portal
40
Ecopy Sharescan
40
Print/Output Management Software
41
Direct Print & Scan for Mobile
41
Uniflow
41
Uniflow Online
42
AA-PRINT (Advanced Anywhere Print)
42
EFI Printme
43
Device Security and Management Software
44
Uniflow Device Security & Management
44
Uniflow Serverless Secure Print
44
Imageware Enterprise Management Console and Plug-Ins
44
Imageware Secure Audit Manager Express
45
MEAP Web
45
MDS Cloud
45
Business Workflow Software
46
Forms and Print Services for Salesforce
46
Canon Enterprise Imaging Platform
46
Dealer Sales/Service Authorization
47
Educational Training
47
Training Program Overview
47
Prerequisites
47
Certification
48
Who Should Attend
48
Course Format
48
Training Facilities
48
Course Equipment
48
Service Materials
49
Uniflow Online Training
49
Uniflow Online Express Training
49
Data Backup Service Training
49
Servicing Notes
50
Power and Plug Requirements
50
Installation Space Requirements
52
Estimated Installation Times
54
Serviceability
55
Remote Services
56
Imageware Remote
56
Content Delivery System
58
Remote Services Suite
61
Device Configuration Management
62
DCM (Device Configuration Manager)
62
Device Migration Navigator
62
LMS (License Management System)
63
Content Delivery System Website
64
Recommended System Engineer Requirements
65
Firmware Upgrades Using the Service Support Tool
66
Hard Disk Drive Handling
67
Special Tools, Solvents and Oils
67
Consumables
68
Consumable Parts
70
Periodically Replaced Parts
70
Counters
71
Soft Counters
71
MEAP Counter
72
Toner Bottle Counters
73
Less Maintenance for Service Cost and Downtime Reduction
74
Installation/Parts Replacement by Nontechnical Staff Option
75
Remote Support
84
Limited Warranty Support
86
End-User Limited Warranty Conditions
86
Drum Unit Limited Warranty
86
Warranty Programs
87
Flat-Rate Program
87
Warranty Parts for Repair
87
E-Tag
87
Parts Support Program
87
Product Technical Support Offerings
88
Canon USA Technical Support Center
88
Technical Support Escalation
89
Internet Support
90
Canon Usa's Partner Portal Website
90
Appendix
91
Specifications
91
Canon Imagerunner ADVANCE C356If II Series Limited Warranty
101
List of Tables
102
List of Figures
103
Canon imageRUNNER ADVANCE C356iF II Advance Maintenance Manual (14 pages)
preventative maintenance procedure
Brand:
Canon
| Category:
All in One Printer
| Size: 1 MB
Advertisement
Advertisement
Related Products
Canon imageRUNNER ADVANCE C356i III
Canon imageRUNNER ADVANCE C356P III
Canon imageRUNNER ADVANCE C356i
Canon imageRUNNER ADVANCE C356P
Canon imageRUNNER ADVANCE C355 Series
Canon imageRUNNER ADVANCE C355P
Canon imageRUNNER ADVANCE C350iF
Canon imageRUNNER ADVANCE C355iFC
Canon imageRUNNER ADVANCE C3520 III
Canon imageRUNNER ADVANCE C3520i III
Canon Categories
Printer
Digital Camera
All in One Printer
Camcorder
Scanner
More Canon Manuals
Login
Sign In
OR
Sign in with Facebook
Sign in with Google
Upload manual
Upload from disk
Upload from URL