Sign In
Upload
Manuals
Brands
Buchi Manuals
Industrial Equipment
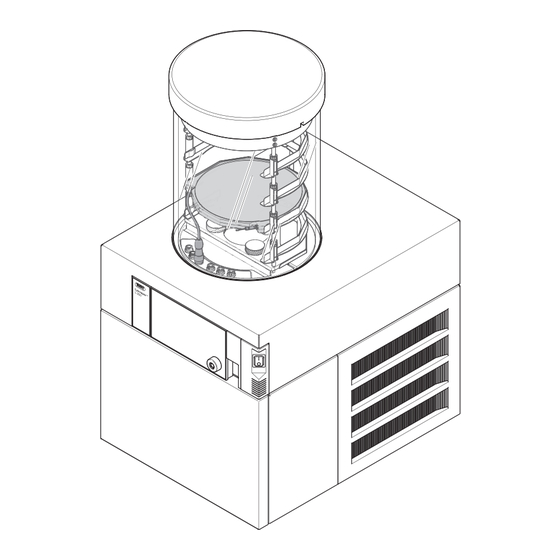
Lyovapor L-200 Pro
Buchi Lyovapor L-200 Pro Manuals
Manuals and User Guides for Buchi Lyovapor L-200 Pro. We have
4
Buchi Lyovapor L-200 Pro manuals available for free PDF download: Operation Manual
Buchi Lyovapor L-200 Pro Operation Manual (100 pages)
Brand:
Buchi
| Category:
Laboratory Equipment
| Size: 11 MB
Table of Contents
Table of Contents
3
About this Document
7
Connected Devices
7
Warning Notices in this Document
7
Symbols
7
Warning Symbols
7
Mandatory Directive Symbols
8
Mark-Ups and Symbols
8
Trademarks
8
Safety
9
Proper Use
9
Use Other than that Intended
9
Staff Qualification
9
Location of Warning Signs on the Product (Front View)
10
Residual Risks
10
Faults During Operation
10
Damage to the Ice Condenser
11
Glass and Acrylic Breakage
11
Low Internal Pressure
11
Cold and Hot Surfaces
11
Personal Protective Equipment
11
Modifications
11
Product Description
13
Description of Function
13
Freezing Phase
13
Main Drying Phase
13
Secondary-Drying Phase
14
Configuration
15
Front View
15
Rear View
16
Connections on the Rear Side
17
Control Panel
18
Pro Control Panel
18
Type Plate
18
Scope of Delivery
19
Refrigerant Specification
19
Technical Data
19
Ambient Conditions
20
Materials
21
Transport and Storage
22
Transport
22
Storage
22
Lifting the Instrument
22
Installation
24
Installation Site
24
Securing against Earthquakes
24
Putting the Instrument in Operation
25
Preparing the Instrument
25
Establishing Electrical Connections
25
Fitting the Advanced Vacuum Control Unit
26
Manual Switch on the Main Valve
27
Connecting the Inert Gas (Optional Feature)
29
Assembling Pressure Sensor PPG010 (Optional Accessory)
29
Assembling the Alternative Pressure Sensor (Optional Accessory)
29
Fitting the Drain Valve Strainer
30
Preparing the Condensate Drain Hose
30
Commissioning the Vacuum Pump
31
Establishing LAN Connection
32
Requirements for Local Network Settings
32
Preparing the Instrument for App Using
33
Enabling BUCHI Cloud Access
33
Insert SD Card (Pro Control Panel Only)
33
Operating the Control Panel
35
Layout of the Control Panel
35
Function Bar
36
Menu Bar
36
Start Menu
37
Favourites Menu
37
Configuration Menu
37
Messages Menu
40
Status Bar
41
Carrying out Freeze-Drying
42
Preparing the Instrument
42
Starting Freeze-Drying
43
Editing Parameters While the Process Is Running
43
Ending Freeze-Drying
44
Shutting down the Instrument
44
Switching off the Instrument
44
Operating Pro Control Panel
45
Layout of Pro Control Panel
45
Function Bar
45
Other Symbols on the Control Panel
47
Menu Bar
47
Start Menu
47
Favourites Menu
48
Method Menu
48
Configuration Menu
48
Messages Menu
51
Status Bar
52
Editing a Method
54
Creating a New Method
54
Changing the Name of a Method
55
Setting the Sample Collapse Temperature
55
Setting the Gas Type
55
Setting the Shelf Loading Temperature
56
Setting the Steps of a Method
56
Setting the Phases of a Method
57
Deleting a Method
60
Setting End Point Definitions
60
Connect the Sensors for Pressure Difference Test (Optional Feature)
60
Pressure Difference Test (Optional Feature)
61
Temperature Difference Test
62
Determining Offset Value
63
Performing Freeze-Drying Using a Method [Pro Control Panel]
64
Preparing the Instrument
64
Selecting a Method
64
Starting Freeze-Drying
64
Changing Parameters While the Process Is Running
65
Ending Freeze-Drying
65
Shutting down the Instrument
66
Switching off the Instrument
66
Performing Freeze-Drying Manually [Pro Control Panel]
66
7.10.1 Preparing the Instrument
66
7.10.2 Editing Parameters While the Process Is Running
67
7.10.3 Ending Freeze-Drying
67
7.10.4 Shutting down the Instrument
67
7.10.5 Switching off the Instrument
68
Operating Top-Mount Drying Racks
69
Operating Stoppering Acrylic Drying Chamber
69
Operating Manifold Acrylic Drying Chamber (Heatable Shelves)
72
Operating Manifold Acrylic Drying Chamber (Non-Heatable Shelf)
74
Operating Acrylic Drying Chamber (Heatable Shelf)
76
Operating Acrylic Drying Chamber (On-Heatable Shelf)
79
Operating Manifold Drying Rack
80
Operating Manifold Valves
81
Cleaning and Servicing
82
Regular Maintenance Work
82
Performing a Vacuum Test
83
Performing a Leak Test
84
Performing a Leak Test with a Drying Chamber
84
Performing Leak Test with a Manifold Drying Rack
85
Help with Faults
88
Troubleshooting
88
Faults, Possible Causes and Remedies
88
Locating Leaking Manifold Valve
89
Finding a Leaking Regulating Valve or Aeration Valve
89
Error Messages
90
Taking out of Service and Disposal
93
Disposal
93
Returning the Instrument
93
Appendix
94
Spare Parts and Accessories
94
12.1.1 Accessories
94
12.1.2 Further Accessories
95
12.1.3 Spare Parts
95
12.1.4 Top-Mount Drying Rack Accessories
96
12.1.5 Software
99
Advertisement
Buchi Lyovapor L-200 Pro Operation Manual (96 pages)
Brand:
Buchi
| Category:
Industrial Equipment
| Size: 25 MB
Table of Contents
Table of Contents
3
1 About this Document
7
Connected Devices
7
Warning Notices in this Document
7
Symbols
7
Mandatory Directive Symbols
7
Mark-Ups and Symbols
8
Available Languages
8
Trademarks
8
2 Safety
9
Proper Use
9
Use Other than that Intended
9
Staff Qualification
9
Location of Warning Signs on the Product
10
Residual Risks
10
Faults During Operation
10
Damage to the Ice Condenser
10
Glass and Acrylic Breakage
10
Low Internal Pressure
11
Cold and Hot Surfaces
11
Personal Protective Equipment
11
Modifications
11
3 Product Description
12
Description of Function
12
Freezing Phase
12
Main Drying Phase
12
Secondary-Drying Phase
13
Configuration
14
Front View
14
Rear View
14
Connections on the Rear Side
15
Control Panel
15
Pro Control Panel
16
Type Plate
16
Refrigerant Specification
16
Specifications Supplied
17
Technical Data
17
Lyovapor™ L-200
17
Ambient Conditions
18
Materials
18
4 Transport and Storage
19
Transport
19
Storage
19
Lifting the Instrument
19
5 Installation
21
Installation Site
21
Securing against Earthquakes
21
Putting the Instrument in Operation
22
Preparing the Instrument
22
Establishing Electrical Connections
22
Assembling the Cross Fitting (Optional Accessory)
24
Assembling the Main Valve (Optional Accessory)
25
Assembling Pressure Sensor PPG010 (Optional Accessory)
27
Assembling the Venting Valve (Optional Accessory)
28
Assembling the Pressure Regulating Valve (Optional Accessory)
29
Assembling the Alternative Pressure Sensor (Optional Accessory)
30
Preparing the Condensate Drain Hose
31
Commissioning the Vacuum Pump
32
Assembling the Drying Attachments
32
Fitting the 300 MM Dia. O-Ring
32
Fitting the Acrylic Drying Chamber
33
Fitting the Manifold Acrylic Drying Chamber
34
Fitting the Stopper Acrylic Drying Chamber
35
Assembling the Manifold Drying Rack
36
Fitting the Non-Heatable Shelf
37
Fitting Heatable Shelves
39
Assembling Manifold Valves
42
6 Operating the Control Panel
45
Layout of the Control Panel
45
Function Bar
45
Menu Bar
46
Start Menu
47
Favourites Menu
47
Configuration Menu
47
Messages Menu
47
Status Bar
50
Carrying out Freeze-Drying
52
Preparing the Instrument
52
Starting Freeze-Drying
52
Editing Parameters While the Process Is Running
52
Ending Freeze-Drying
53
Shutting down the Instrument
53
7 Operating Pro Control Panel
54
Layout of Pro Control Panel
54
Function Bar
54
Menu Bar
56
Start Menu
56
Favourites Menu
56
Method Menu
57
Configuration Menu
57
Messages Menu
60
Status Bar
60
Editing a Method
62
Creating a New Method
62
Changing the Name of a Method
62
Setting the Sample Collapse Temperature
62
Setting the Gas Type
63
Setting the Shelf Loading Temperature
63
Setting the Steps of a Method
63
Setting the Phases of a Method
65
Deleting a Method
67
Setting End Point Definitions
67
Pressure Difference Test
67
Temperature Difference Test
68
Performing Freeze-Drying Using a Method [Pro Control Panel]
69
Preparing the Instrument
69
Selecting a Method
69
Starting Freeze-Drying
70
Ending Freeze-Drying
71
Shutting down the Instrument
71
Performing Freeze-Drying Manually [Pro Control Panel]
71
Preparing the Instrument
71
Starting Freeze-Drying
72
Editing Parameters While the Process Is Running
72
Ending Freeze-Drying
73
Shutting down the Instrument
73
8 Mobile Connection
74
Setting up BUCHI Connect Solution
74
Handling Data
75
Connecting the Instrument to the LAN
75
Requirements for Local Network Settings
75
Assigning a Dynamic IP Address
76
Enabling the Control Panel on the BUCHI Cloud
76
Downloading the BUCHI Monitor App
76
Layout of BUCHI Monitor App
77
Connecting the Instrument and App Using a QR Code
77
Generating a QR Code
77
Scanning the QR Code
78
Connecting the Instrument and App Using a Password
79
Generating a Password
79
Entering the Password
79
Removing the Instrument from the App
80
Enabling Notifications
80
Remotely Retrieving Process Data
81
9 Cleaning and Servicing
82
Regular Maintenance Work
82
Performing a Leak Test
84
Performing a Vacuum Test
84
10 Help with Faults
86
Troubleshooting
86
Faults, Possible Causes and Remedies
86
11 Taking out of Service and Disposal
88
Disposal
88
Returning the Instrument
88
12 Appendix
89
Spare Parts and Accessories
89
Top-Mount Drying Rack Accessories
89
Accessories
91
Further Accessories
92
Spare Parts
93
Buchi Lyovapor L-200 Pro Operation Manual (94 pages)
Brand:
Buchi
| Category:
Laboratory Equipment
| Size: 8 MB
Table of Contents
Table of Contents
3
1 About this Document
7
Connected Devices
7
Warning Notices in this Document
7
Symbols
7
Warning Symbols
7
Mandatory Directive Symbols
8
Mark-Ups and Symbols
8
Trademarks
8
2 Safety
9
Proper Use
9
Use Other than that Intended
9
Staff Qualification
9
Location of Warning Signs on the Product
10
Residual Risks
10
Faults During Operation
10
Damage to the Ice Condenser
11
Glass and Acrylic Breakage
11
Low Internal Pressure
11
Cold and Hot Surfaces
11
Personal Protective Equipment
11
Modifications
11
3 Product Description
12
Description of Function
12
Freezing Phase
12
Main Drying Phase
12
Secondary-Drying Phase
13
Configuration
14
Front View
14
Rear View
14
Connections on the Rear Side
15
Control Panel
15
Pro Control Panel
16
Type Plate
16
Scope of Delivery
17
Refrigerant Specification
17
Technical Data
17
Lyovapor™ L-200
17
Ambient Conditions
18
Materials
18
4 Transport and Storage
19
Transport
19
Storage
19
Lifting the Instrument
19
5 Installation
21
Installation Site
21
Securing against Earthquakes
21
Putting the Instrument in Operation
22
Preparing the Instrument
22
Establishing Electrical Connections
22
Fitting the Advanced Vacuum Control Unit
23
Manual Switch on the Main Valve
24
Connecting the Inert Gas (Optional Feature)
25
Assembling Pressure Sensor PPG010 (Optional Accessory)
26
Assembling the Alternative Pressure Sensor (Optional Accessory)
26
Fitting the Drain Valve Strainer
27
Preparing the Condensate Drain Hose
27
Commissioning the Vacuum Pump
28
Establishing LAN Connection
29
Requirements for Local Network Settings
29
Preparing the Instrument for App Using
30
Enabling BUCHI Cloud Access
30
Insert SD Card (Pro Control Panel Only)
30
6 Operating the Control Panel
32
Layout of the Control Panel
32
Function Bar
32
Menu Bar
33
Start Menu
34
Favourites Menu
34
Configuration Menu
34
Messages Menu
34
Status Bar
37
Carrying out Freeze-Drying
39
Preparing the Instrument
39
Starting Freeze-Drying
39
Editing Parameters While the Process Is Running
40
Ending Freeze-Drying
40
Shutting down the Instrument
40
Switching off the Instrument
41
7 Operating Pro Control Panel
42
Layout of Pro Control Panel
42
Function Bar
42
Other Symbols on the Control Panel
44
Menu Bar
44
Start Menu
44
Favourites Menu
45
Method Menu
45
Configuration Menu
45
Messages Menu
48
Status Bar
49
Editing a Method
50
Creating a New Method
50
Changing the Name of a Method
51
Setting the Sample Collapse Temperature
51
Setting the Gas Type
52
Setting the Shelf Loading Temperature
52
Setting the Steps of a Method
52
Setting the Phases of a Method
54
Deleting a Method
56
Setting End Point Definitions
56
Connect the Sensors for Pressure Difference Test (Optional Feature)
56
Pressure Difference Test (Optional Feature)
56
Temperature Difference Test
58
Determining Offset Value
59
Performing Freeze-Drying Using a Method [Pro Control Panel]
59
Preparing the Instrument
59
Selecting a Method
59
Starting Freeze-Drying
60
Ending Freeze-Drying
61
Shutting down the Instrument
61
Switching off the Instrument
61
Performing Freeze-Drying Manually [Pro Control Panel]
62
Preparing the Instrument
62
Starting Freeze-Drying
62
Editing Parameters While the Process Is Running
63
Ending Freeze-Drying
63
Shutting down the Instrument
63
Switching off the Instrument
64
8 Operating Top-Mount Drying Racks
65
Operating Stoppering Acrylic Drying Chamber
65
Operating Manifold Acrylic Drying Chamber (Heatable Shelves)
68
Operating Manifold Acrylic Drying Chamber (Non-Heatable Shelf)
70
Operating Acrylic Drying Chamber (Heatable Shelf)
72
Operating Acrylic Drying Chamber (On-Heatable Shelf)
75
Operating Manifold Drying Rack
76
Operating Manifold Valves
77
9 Cleaning and Servicing
78
Regular Maintenance Work
78
Performing a Vacuum Test
79
Performing a Leak Test
80
Performing a Leak Test with a Drying Chamber
80
Performing Leak Test with a Manifold Drying Rack
81
10 Help with Faults
83
Troubleshooting
83
Faults, Possible Causes and Remedies
83
Locating Leaking Manifold Valve
84
Finding a Leaking Regulating Valve or Aeration Valve
84
11 Taking out of Service and Disposal
86
Disposal
86
Returning the Instrument
86
12 Appendix
87
Spare Parts and Accessories
87
Accessories
87
Further Accessories
88
Spare Parts
88
Top-Mount Drying Rack Accessories
90
Software
93
Advertisement
Buchi Lyovapor L-200 Pro Operation Manual (92 pages)
Brand:
Buchi
| Category:
Laboratory Equipment
| Size: 11 MB
Table of Contents
Table of Contents
3
About this Document
7
Connected Devices
7
Warning Notices in this Document
7
Symbols
7
Warning Symbols
7
Mandatory Directive Symbols
7
Mark-Ups and Symbols
8
Trademarks
8
Safety
9
Proper Use
9
Use Other than that Intended
9
Staff Qualification
9
Location of Warning Signs on the Product (Front View)
10
Residual Risks
10
Faults During Operation
10
Damage to the Ice Condenser
10
Glass and Acrylic Breakage
10
Low Internal Pressure
11
Cold and Hot Surfaces
11
Personal Protective Equipment
11
Modifications
11
Product Description
12
Description of Function
12
Freezing Phase
12
Main Drying Phase
12
Secondary-Drying Phase
13
Configuration
14
Front View
14
Rear View
14
Connections on the Rear Side
15
Control Panel
15
Pro Control Panel
16
Type Plate
16
Scope of Delivery
17
Refrigerant Specification
17
Technical Data
17
Ambient Conditions
18
Materials
18
Transport and Storage
19
Transport
19
Storage
19
Lifting the Instrument
19
Installation
21
Installation Site
21
Securing against Earthquakes
21
Putting the Instrument in Operation
22
Preparing the Instrument
22
Establishing Electrical Connections
22
Fitting the Advanced Vacuum Control Unit
22
Manual Switch on the Main Valve
24
Connecting the Inert Gas (Optional Feature)
25
Assembling Pressure Sensor PPG010 (Optional Accessory)
25
Assembling the Alternative Pressure Sensor (Optional Accessory)
25
Fitting the Drain Valve Strainer
26
Preparing the Condensate Drain Hose
26
Commissioning the Vacuum Pump
27
Establishing LAN Connection
28
Requirements for Local Network Settings
28
Preparing the Instrument for App Using
29
Enabling BUCHI Cloud Access
29
Insert SD Card (Pro Control Panel Only)
29
Operating the Control Panel
31
Layout of the Control Panel
31
Function Bar
31
Menu Bar
32
Start Menu
33
Favourites Menu
33
Configuration Menu
33
Messages Menu
36
Status Bar
36
Carrying out Freeze-Drying
38
Preparing the Instrument
38
Starting Freeze-Drying
38
Editing Parameters While the Process Is Running
39
Ending Freeze-Drying
39
Shutting down the Instrument
39
Switching off the Instrument
40
Operating Pro Control Panel
41
Layout of Pro Control Panel
41
Function Bar
41
Other Symbols on the Control Panel
43
Menu Bar
43
Start Menu
43
Favourites Menu
44
Method Menu
44
Configuration Menu
44
Messages Menu
47
Status Bar
47
Editing a Method
49
Creating a New Method
49
Changing the Name of a Method
50
Setting the Sample Collapse Temperature
50
Setting the Gas Type
50
Setting the Shelf Loading Temperature
51
Setting the Steps of a Method
51
Setting the Phases of a Method
52
Deleting a Method
54
Setting End Point Definitions
54
Connect the Sensors for Pressure Difference Test (Optional Feature)
55
Pressure Difference Test (Optional Feature)
55
Temperature Difference Test
56
Determining Offset Value
57
Performing Freeze-Drying Using a Method [Pro Control Panel]
58
Preparing the Instrument
58
Selecting a Method
58
Starting Freeze-Drying
58
Changing Parameters While the Process Is Running
59
Ending Freeze-Drying
59
Shutting down the Instrument
60
Switching off the Instrument
60
Performing Freeze-Drying Manually [Pro Control Panel]
60
Preparing the Instrument
60
Editing Parameters While the Process Is Running
61
Ending Freeze-Drying
61
Shutting down the Instrument
61
Switching off the Instrument
62
Operating Top-Mount Drying Racks
63
Operating Stoppering Acrylic Drying Chamber
63
Operating Manifold Acrylic Drying Chamber (Heatable Shelves)
66
Operating Manifold Acrylic Drying Chamber (Non-Heatable Shelf)
69
Operating Acrylic Drying Chamber (Heatable Shelf)
70
Operating Acrylic Drying Chamber (On-Heatable Shelf)
73
Operating Manifold Drying Rack
74
Operating Manifold Valves
75
Cleaning and Servicing
76
Regular Maintenance Work
76
Performing a Vacuum Test
77
Performing a Leak Test
77
Performing a Leak Test with a Drying Chamber
77
Performing Leak Test with a Manifold Drying Rack
79
Help with Faults
81
Troubleshooting
81
Faults, Possible Causes and Remedies
81
Locating Leaking Manifold Valve
82
Finding a Leaking Regulating Valve or Aeration Valve
82
Error Messages
83
Taking out of Service and Disposal
85
Disposal
85
Returning the Instrument
85
Appendix
86
Spare Parts and Accessories
86
Accessories
86
Further Accessories
87
Spare Parts
87
Top-Mount Drying Rack Accessories
89
Software
91
Advertisement
Related Products
Buchi Lyovapor L-200
Buchi Lyovapor L-300
Buchi Lyovapor L-300 Pro
Buchi Lyovapor L-250 Basic
Buchi Lyovapor L-250 Pro
Buchi B-295 SE
Buchi ProxiMate 11593981
Buchi Rotavapor R-187EL
Buchi Rotavapor R-220 EX
Buchi Categories
Laboratory Equipment
Water Pump
Dryer
Chiller
Industrial Equipment
More Buchi Manuals
Login
Sign In
OR
Sign in with Facebook
Sign in with Google
Upload manual
Upload from disk
Upload from URL