Sign In
Upload
Manuals
Brands
bioMerieux Manuals
Measuring Instruments
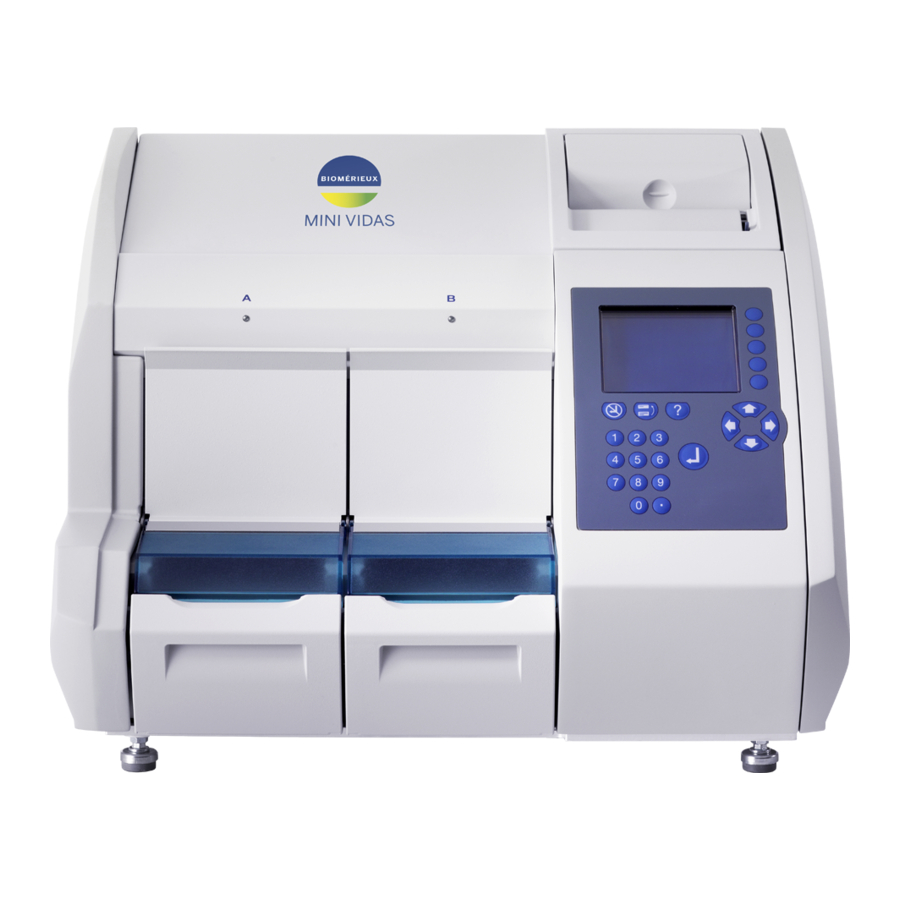
MINI VIDAS
bioMerieux MINI VIDAS Manuals
Manuals and User Guides for bioMerieux MINI VIDAS. We have
3
bioMerieux MINI VIDAS manuals available for free PDF download: User Manual, Simplified User Manual
bioMerieux MINI VIDAS User Manual (202 pages)
Brand:
bioMerieux
| Category:
Laboratory Equipment
| Size: 8 MB
Table of Contents
Table of Contents
3
Introduction to the System
11
Intended Use and Users
11
Benefits and Limitations of Use
11
Warning and Safety Messages
12
Statement Types
12
General Statements
13
Standard Symbols
16
Safety Information
19
System Compliance
19
Instrument Labels
20
SPR ® Block
20
Reagent Strip Tray
21
Strip Section
22
Rear Panel
23
Safety Precautions
24
Precautions for Use of Reagents
29
General Precautions
29
Preparing the Analyses
29
Precautions for Samples
30
At the End of the Run
30
System Description and Basic Operations
31
Mini VIDAS ® Analyzer Description
31
Screen and Keypad
32
Internal Printer
33
Rear Panel Components
33
Bar Code Readers
34
Memory Cards
34
Technical Data and Specifications
35
Dimensions
35
Weight
35
Physical Space Requirements
35
Electrical Specifications
36
Environmental Conditions
36
Temperature
37
Humidity
37
Altitude
37
Sound Level
37
Technical Features
37
Capacity
37
Motors
37
Pumping
37
Temperature Control
38
Absolute Accuracy
38
Relative Accuracy
38
Thermal Resistance
38
Optics
38
Optional Hardware
39
Accessories for Industry Use
39
Assay Kit Specifications
40
Vidas ® Spr
40
VIDAS ® Single Reagent Strip
40
Reagents
41
VIDAS ® Assay Kit
41
Single Reagent Strip
41
Single Reagent Strip for Immuno-Concentration (for Industry Use Only)
42
Dual Reagent Strip (for Clinic Use Only)
42
Reagent Strip Label
43
Spr
44
Standards / Calibrators and Controls
45
System Basics
46
Analysis Protocols
46
Principle of a VIDAS ® Assay
46
Analysis Methods
47
Qualitative Assays (Single Reagent Strips)
47
Qualitative Assays (Dual Reagent Strips)
48
Quantitative Assays
49
Principles of Calibration / Recalibration
50
Calibration
50
Recalibration
52
Overview of Operation Elements
55
Strip and SPR ® Sections
55
Strip Preparation Tray
57
Microprocessor
58
Incubator
58
Detection System
58
Central Processing Unit
58
Software Basics
59
Menu Structure
59
Selecting a Menu Option
60
The Status Screen
61
The First Status Screen
61
The Second Status Screen
62
The Third Status Screen
62
Online Help
63
Viewing Error Messages
63
Screen Paging
64
Using the Arrow Keys
64
Paging Bar
64
System Installation and Configuration
65
Unpacking
65
Storage Conditions
66
Choosing a Location
66
Electrical Connections
66
Checking Installation
66
Connecting an External Bar Code Reader
66
Starting the System
67
Shutting down the System
68
Introduction
68
Procedure
68
Configuring the Mini VIDAS ® Analyzer
69
Selecting a Language
69
Setting Dose Units
70
Setting User Ids
72
Setting the Report Header
73
Setting the Date and Time
74
Setting Display Contrast
75
Selecting the Printer
76
Setting the Date/Time Format
77
Defining the Sample ID Character Sets
78
Changing the Keyclick Volume
79
Changing the Beep Volume
80
Error Beeps
81
Setting the Final Error Volume
82
Enabling Display Blinking
83
Miscellaneous Items
84
Onscreen Warnings for Expired Standards
84
Printed Warnings for Expired Standards
84
Autoprint Errors
85
Check for any Standard at Assay Startup
85
Check for Current Standard at Assay Startup
85
Check for Master Lot at Assay Startup
85
Show All Assays
86
Beep after Printing
86
LIS User Options
87
Enable LIS Upload
87
Warn about Missing Ids
87
LIS Auto Validation
87
Creating Normal Ranges for Assays
88
Installing Paper in the Internal Printer
89
Print Screen
90
Workflow and Instructional Procedures
91
Routine Workflow
91
Planning a Run
92
Managing the Job List
92
Defining the Type of Run Required
92
Checking Assay Compatibility
92
Defining the Standards/Calibrators and Controls to be Used
93
Standards/Calibrators
93
Controls
93
Running Assays
94
Entering Master Lot Data
94
Scanning Master Lot Data on the Reagent Kit Label
95
Automatically Entering Master Lot Data Using the Master Lot Entry (MLE) Card
96
Manually Entering Master Lot Data Using the Master Lot Entry (MLE) Card
97
Running Assays in «Load and Go» Mode
102
Loading Reagent Strips and SPR
102
Starting a «Load and Go» Run
103
Running Assays in «Defined» Mode
105
Assigning Assays to a Position
105
Assigning Standards/Calibrators for Assays with One Standard/Calibrator
107
Assigning Standards/Calibrators for Assays with Two Standards/Calibrators (S1 and S2)
108
Assigning Controls to a Position
109
Assigning Sample Ids to a Position Using a Bar Code Reader
110
Assigning Sample Ids to a Position Manually
111
Defining the same Assay Type for the Next Position
112
Erasing Inputs for a Position or a Section
112
Loading Reagent Strips and SPR ® S
113
Starting a «Defined» Run
114
Unloading Reagent Strips and SPR S
115
Assigning a Dilution Factor
116
Running Internal Quality Controls (for Clinic Use Only)
118
Viewing Stored Standards/Calibrators
120
Viewing Master Lot Data
121
Stopping a Section
122
Results and Reports
123
The Assay Reports
124
Qualitative Assays Results
124
Quantitative Assays Results
126
Assay Report Errors
127
Reprinting an Assay Report
128
Reprinting an Assay Report Without Editing Data
128
Editing Data before Reprinting an Assay Report
129
Validating LIS Results
131
Canceling Uploads of Results to the LIS
132
Deleting the Remaining Non-Validated LIS Upload Data
132
Stopping Validation
132
Validating Internal Quality Controls Transfers (for Clinic Use Only)
133
Printing the Mini VIDAS ® Assay List
134
Miscellaneous Operations
135
Taking a Section off Line
135
Changing Factory Settings
135
Testing the Mini VIDAS ® Analyzer
136
Testing the Display
136
Testing the Keypad
137
Testing the Printer
138
Testing the Audio Output
138
Updating an Assay
139
Preliminary Instructions
139
Reading Assay Update Card Bar Codes
140
Displaying the Mini VIDAS ® Software Version
143
Printing the Mini VIDAS ® Software Version
143
Displaying the Assay Version
144
Section Counters
145
Printing the Assay Version
145
Updating the Mini VIDAS ® Software
146
Verifying the Memory Card Data
147
Parking Themini VIDAS ® Analyzer
147
Maintenance
148
Preventive Maintenance
148
User Maintenance
149
Cleaning and Disinfection Procedures
149
Cleaning the SPR Block (Monthly)
150
Cleaning the Reagent Strip Trays (Every 6 Months or if Needed)
154
Cleaning the Plastic Trays (Every 6 Months or if Needed)
155
Cleaning the Strip Preparation Trays (Every 6 Months or if Needed)
156
Cleaning the Outer Covers of the Instrument (Every 6 Months or if Needed)
157
Cleaning the Screen and Keypad (Every 6 Months or if Needed)
157
Cleaning the Bar Code Reader (Every 6 Months or if Needed)
157
Cleaning Optical Lenses (Monthly)
158
Checking the Pipetting System (Monthly)
159
Calibration and Adjustments
160
Optical System
160
Manual Optics Calibration
160
Self Diagnostics
160
Self-Calibration
160
Pipetting System
162
Calibration and Self Diagnostics
162
Temperature Validation
162
Self Diagnostics
162
Master Curve Establishment and Calibration
163
Establishing the Master Curve (Performed at the Manufacturer)
163
Establishing the Calibration Curve (Performed by the Customer)
163
Appendix - Maintenance Records
164
Maintenance Schedule
164
Maintenance Check-List
165
Appendix - Troubleshooting
167
Indication of Errors
167
Displaying Errors
167
Error Messages and Recovery Procedures
168
Start Errors
168
Manually Entering Bar Codes
171
Other Error Messages
173
Instrument Errors
173
Error Messages
174
Shut down the Mini VIDAS
177
Starting the System on Page
178
Analyzer
179
Problems that May Occur with the Bar Code Reader
181
The Reader Does Not Emit a Beam of Light
181
Reader Fails to Read Bar Codes
181
The Bar Codes Are Unreadable
181
The Reader Window Is Not Clean
181
The Reading Distance Is Incorrect
181
Assay Report Errors
182
Correcting Assay Report Errors
182
Assay Report Error Symbols
182
Error Messages on Assay Reports
183
Printer Errors
183
Viewing Saved Errors
184
Displaying and Printing Instrument Temperatures
184
Appendix - Installing External Hardware
185
External Printer
186
Equipment Required
186
Installation
186
Possible Error Message
186
Appendix - Computer Interface Information
188
Introduction
188
Configuration Information
189
Example of a Mini VIDAS ® Upload
190
Analyzers)
191
Appendix - Technical Data and Specifications (Previous Versions of Mini VIDAS Analyzers
191
Dimensions
191
Weight
191
Physical Space Requirements
191
Electrical Specifications
192
Environmental Conditions
193
Temperature
193
Humidity
193
Altitude
193
Sound Level
193
Technical Features
194
Capacity
194
Motors
194
Pumping
194
Temperature Control
194
Absolute Accuracy
194
Relative Accuracy
194
Thermal Resistance
194
Optics
195
Assay Kit Specifications
195
Vidas ® Spr
195
VIDAS ® Single Reagent Strip
195
Appendix - Glossary
196
Advertisement
bioMerieux MINI VIDAS User Manual (7 pages)
Brand:
bioMerieux
| Category:
Measuring Instruments
| Size: 3 MB
Table of Contents
System Overview
2
Menu Overview
2
How to Turn on MINI VIDAS?
2
How to Perform a Calibration
3
How to Run Standards (S) and Controls (C) for Calibration?
3
How to Scan MLE Data?
3
How to Identify Samples in Status Screen?
4
How to Run Samples?
5
How to Perform and Interpret QCV Test?
5
How to Perform User Maintenance?
5
Annotations
6
bioMerieux MINI VIDAS Simplified User Manual (5 pages)
Brand:
bioMerieux
| Category:
Medical Equipment
| Size: 2 MB
Table of Contents
How to Know if a Calibration Is Valid?
2
How to Update a Protocol?
2
Read the Protocole Barcode
3
How to Read a Mle Card?
3
How to Run Standards (S) and Controls (C) for Calibration?
3
How to Identify Samples in Status Screen?
4
How to Run Samples?
4
How to Perform Maintenance
5
Advertisement
Advertisement
Related Products
bioMerieux Categories
Laboratory Equipment
Test Equipment
Medical Equipment
Accessories
Transmitter
More bioMerieux Manuals
Login
Sign In
OR
Sign in with Facebook
Sign in with Google
Upload manual
Upload from disk
Upload from URL