Sign In
Upload
Manuals
Brands
Bio-tek Manuals
Laboratory Equipment
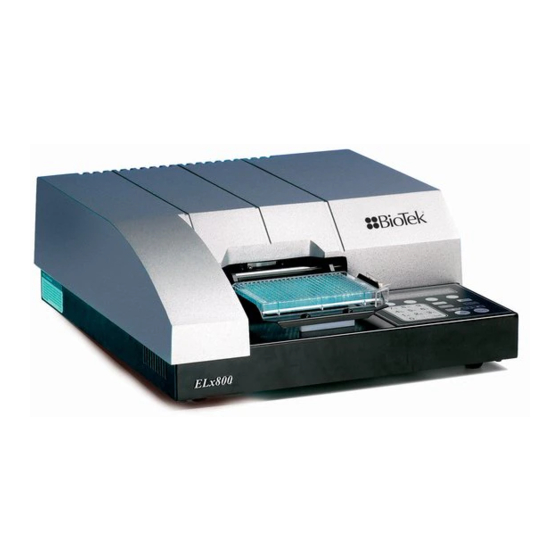
ELx800
User Manuals: Bio-tek ELx800 Microplate Reader
Manuals and User Guides for Bio-tek ELx800 Microplate Reader. We have
1
Bio-tek ELx800 Microplate Reader manual available for free PDF download: Operator's Manual
Bio-tek ELx800 Operator's Manual (214 pages)
Absorbance Microplate Reader
Brand:
Bio-tek
| Category:
Laboratory Equipment
| Size: 14 MB
Table of Contents
All Rights Reserved
6
Restrictions and Liabilities
6
Trademarks
6
Table of Contents
7
Contact Information
15
Customer Service and Sales
15
European Coordination Center
15
Service/Tac
15
Document Conventions
16
Revision History
17
Intended Use Statement
19
Quality Control
19
Repackaging and Shipping
19
General
20
Readers
20
Warnings
20
Hazards
21
Hazards and Precautions
21
Precautions
22
Directive 2002/96/EC: Waste Electrical and Electronic Equipment
23
Directive 73/23/EEC Low Voltage
23
Directive 89/336/Eec:electromagnetic Compatibility
23
Directive 98/79/EC: in Vitro Diagnostics
23
Electromagnetic Interference and Susceptibility
24
User Safety
24
Safety Symbols
25
Warranty
27
Registration Card
28
Chapter 1: Introduction
29
Introducing the Elx800 Automated Microplate Reader
30
Hardware Features
31
Software Features
31
Package Contents
32
Optional Accessories
33
Specifications
34
Standard Model
34
Ultraviolet/Uv Model
35
Narrow Beam/Nb Model
36
Technical Support
38
Phone Support
38
Electronic Communication
39
Facsimile Support
39
Written Communication
39
Shipping Address
39
Chapter 2: Installation
41
Unpacking and Inspecting the Elx800
42
Unpacking the Instrument and Its Accessories
43
Figure 1: Removing the Power Supply and Shelf
43
Figure 2: Removing the Foam End Caps
44
Figure 3: Removing the Top Cover Mounting Screws
45
Figure 4: Removing the Shipping Block
46
Setting up the Elx800
47
Operating Environment
47
Electrical Connections
47
Power-Up and System Test
48
Elx800 Main Menu
48
Configuring Global Default Options
49
Figure 5: Global Configuration Options Available under UTIL
49
Connecting a Printer to the Elx800
50
Figure 6: Connectors for Printer (Parallel), Computer (Serial), and Power
51
Supply
51
Setting up the Serial Port for Communications with Other Devices
52
Attaching the Cable
52
Setting Communication Parameters
52
Installing Additional Filters
54
Figure 7: Filter Wheel Assembly
54
Repackaging and Shipping the Elx800
58
Before Repackaging the Instrument
58
Repackaging the Elx800 and Its Accessories
59
Figure 8: Securing the Carrier
59
Figure 9: Hooking the Shipping Straps Around the Shaft
60
Figure 10: Installing the Shipping Block
61
Figure 11: Reinstalling the Top Cover
62
Figure 12: Reattaching the End Caps
63
Figure 13: Placing the Unit in the Box
64
Preparing the Shipping Container
65
Chapter 3: Operation
67
Elx800 Front Panel
68
Figure 14: Keyboard
68
Overview
70
Recommendations for Achieving Optimum Performance
70
System Startup
71
Main Menu
72
Figure 15: Options Available from the Main Menu
72
Define
74
Programming Note
75
Selecting an Assay to Define
76
Editing the Assay Name
76
Define (Method, Map, Formula and Curve)
77
Defining METHOD
77
Defining MAP
81
Defining FORMULA
97
Defining CURVE
109
Reading a Microplate
116
Selecting an Assay to Run
117
Printing Reports
121
Editing Standard Outliers
122
Printing Results
124
Using the Utility Options
125
Setting the Date and Time
125
Viewing/Editing the Filter Table
126
Specifying Data Output and Reporting Options
127
Selecting Read Options
129
Chapter 4: Performance Verification and IQ/OQ/PQ Procedures
131
Recommendations for Achieving Optimum Performance
132
Recommended Test Schedule
133
Table 1: Recommended Test Schedule
133
Qualification Procedures
134
System Test
135
Figure 16: Sample Output for the System Test (Sheet 1 of 2)
136
Checksum Test
137
Figure 17: Sample Output for the System Test - Autocal Analysis (Sheet 2 of 2)
137
Absorbance Plate Test
138
Figure 18: Sample Absorbance Test Plate Data Sheet
140
Figure 19: Sample Test Plate Analysis Report
140
Entering the Absorbance Plate Specifications
141
Entering the Absorbance Test Plate Specifications
141
Test Failures
143
Liquid Testing
144
Table 2: Typical Enzyme-Substrate Combinations and Stopping Solutions
144
Stock Solution Formulation
145
Liquid Test 1
147
Liquid Test 2
149
Table 3: Test Tube Dilutions
149
Liquid Test 3 (for "UV" Models Only)
153
Liquid Test 3
153
Table 4: PBS 10X Concentrate Solution
154
Chapter 5: Maintenance and Decontamination
157
Maintenance
158
Routine Cleaning Procedure
158
Purpose
158
Tools and Supplies
159
Procedure
159
Replacing the Bulb
160
Figure 20: Lamp Assembly
161
Decontamination Procedure
163
Tools and Supplies
164
Procedure
164
Chapter 6: Troubleshooting and Error Codes
167
Overview
168
System Test Description
168
Glossary of Terms
168
Error Codes
169
General Errors
170
Fatal Errors
176
Appendix A: Controlling the Reader with Kcjunior™ or KC4
177
Overview
178
Controlling the Reader with Kcjunior
179
Problems
180
Getting Started with Kcjunior
180
Controlling the Reader with KC4
181
Problems
182
Getting Started with KC4
182
Appendix B: Using 384-Well Geometry
183
Kcjunior
184
Figure 21: Kcjunior Main Menu, Setup|Reader 1 Dialog
184
Figure 22: Reader Setup 1 Dialog
184
Figure 23: Read Plate Dialog
185
Figure 24: Protocol Definition (General Information) Dialog
185
Figure 25: Protocol Definition (Read Method) Dialog
186
Kc4
187
Figure 26: KC4 Main Menu, System|Readers
187
Figure 27: Reader Selection Dialog
187
Figure 28: Data|New Plate Dialog
188
Figure 29: New Data File Dialog
188
Figure 30: Reading Parameters Dialog
189
Appendix C: Report Format
191
Figure 31: Samples with Calls on Matrix Report
192
Figure 32: Curve Fit Report
193
Figure 33: Samples with Calls on Column Report
194
Figure 34: Column Report Without Samples
195
Figure 35: Panel Report
196
Figure 36: Assay Detail Report (Sheet 1 of 2)
197
Figure 37: Assay Detail Report (Sheet 2 of 2)
198
Appendix D: Comparison of the Elx800 and the EL800
199
Appendix E: Instructions for Programming a New Assay
201
Sample ANA Screen Enzyme Immunoassay Kit
202
Intended Use
202
Background
202
Principle of the Assay
202
Materials
203
Quality Control and Results
204
Expected Values
204
Programming the ANA Screen Enzyme Immunoassay Kit
205
Sample Human Anticardiolipin Igg Enzyme Immunoassay Kit
207
Intended Use
207
Background
207
Principle of the Assay
207
Materials
208
Quality Control and Results
209
Expected Values
211
Programming the Human Anticardiolipin Igg Enzyme Immunoassay Kit
212
Programming the Human Anticardiolipin Igg
212
Enzyme Immunoassay Kit
212
Advertisement
Advertisement
Related Products
Bio-Tek ELx405
Bio-Tek ELx405 HT
Bio-tek Categories
Measuring Instruments
Washer
Card Reader
Laboratory Equipment
More Bio-tek Manuals
Login
Sign In
OR
Sign in with Facebook
Sign in with Google
Upload manual
Upload from disk
Upload from URL