Sign In
Upload
Manuals
Brands
Barco Manuals
Projection TV
Baron 908 R9040060
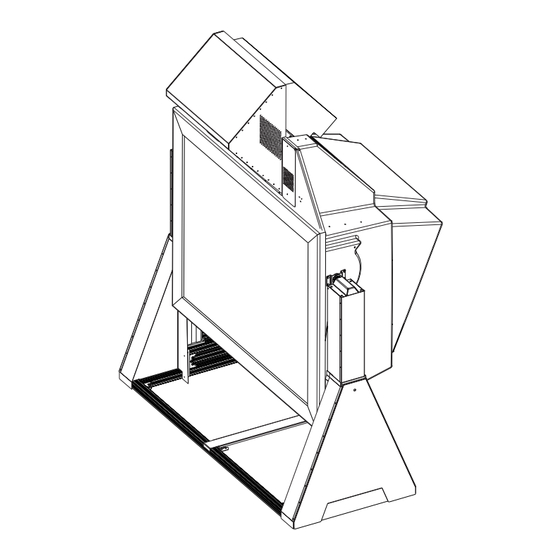
User Manuals: Barco Baron 908 R9040060 Projection Table
Manuals and User Guides for Barco Baron 908 R9040060 Projection Table. We have
1
Barco Baron 908 R9040060 Projection Table manual available for free PDF download: Owner's Manual
Barco Baron 908 R9040060 Owner's Manual (100 pages)
Projection table
Brand:
Barco
| Category:
Projection TV
| Size: 1 MB
Table of Contents
Table of Contents
5
Safety Instructions
13
Notice on Safety
13
Installation Instructions
13
Owner's Record
13
Safety Indication on the Product
13
Safety Warning
14
Federal Communication Commission (FCC Statement)
14
On Safety
14
Caution on Fire Hazard
15
On Installation
15
On Servicing
15
On Cleaning
15
On Repacking
16
On Illumination
16
Connections
17
AC Power
17
AC Power Cord Connection
17
Power Voltage
17
Switching On/Off
17
Source Connections
18
Input Locations
18
Input Facilities
18
Which Source to Which Input
18
RGB Analog Source to Port 3
19
Which Signal to Port 3
19
Pin Configuration D9 Connector of the Analog Input
19
Input Selection Port 3
19
RGB Analog Source with Composite Sync to Port 4/5
19
Which Signal to Port 4/5
19
RGBS or Rgsb Input Selection
19
Component Video Source to Port 4/5
20
Which Signal to Port 4/5
20
Component Video Input Selection
20
RGB Analog Source with Tri Level Sync to Port 4/5 (Option)
20
RGB3S or Rg3Sb Input Selection
20
Component Video Source with Tri Level Sync to Port 4/5 (Option)
20
(R-Y)Y(B-Y)3S or (R-Y)Y3S(B-Y) Input Selection
20
RS232 Connection
21
RS232 Input and RS232 Output of the Projector
21
Communication Port for Communication with Peripherals
21
Connecting a RCVDS 05 Switcher to the Projector
21
Getting Started
23
Remote Control Unit and Local Keypad
23
Battery Installation in the RCU
23
How to Replace the Batteries in the RCU
23
Overview of Functions
24
Operating the Projector
25
Switching on
25
Start up in Operational Mode
25
Start up in Stand-By Mode
25
Stationary Image Warning
25
RCU Commands to the Projector
26
Pointing the RCU to the Reflective Screen
26
Pointing the RCU Towards the IR Sensor in the Projector
26
RCU Used in a Hardwired Configuration
26
Projector Address
27
Why a Projector Address
27
Set up an Individual Projector Address
27
How to Control the Projector or Projectors
27
Common Address
27
Before Using the RCU
27
Display the Projector Address on the Screen
27
How to Program an Address into the RCU
27
Controlling the Projector
27
Input Selection Modes
28
When the Source Is Selected
28
Picture Controls
29
Sound Controls
29
The Pause Key
29
The Freeze Key (Only with Line Multiplier)
29
Entering the Adjustment Menus
31
Adjustment Menus
31
What Is Available in the Adjustment Menus
31
How to Enter the Adjustment Menus
31
Password Protection
31
Entering the Password
31
Random Access Adjustment Mode
33
Starting up
33
Overview Flowchart
33
Set up of the Selected Setup Pattern
35
Note
35
Internal Cross Hatch Pattern
35
When Using the Internal Pattern
35
Factory Preset Frequencies
36
Picture Tuning
37
Start up the Picture Tuning
37
Color Balance
37
What Can be Done
37
How to Select the Color Balance
37
Fixed Color Balance
38
Custom Color Balance
38
Color Select
38
Contrast Modulation
39
Why Contrast Modulation
39
Important Note
40
How to Select the Contrast Modulation
40
Why Contrast Equalisation
40
How to Adjust the Contrast Equalisation
40
Why Contrast Edge Correction
40
How to Adjust the Contrast Edge Correction (Hot Spot)
40
Note
41
Sync Fast/Slow Adjustment
41
What Can be Done
41
How to Setup the Sync Function
41
Peaking
42
What Can be Done with Peaking
42
How to Set up
42
Clamp Mode: Normal/Restoration
42
What Can be Done
42
Port 2 : Video/S-Video (Optional)
43
What Can be Done
43
How to Configure Port 2
43
Line Multiplier (Optional)
43
How to Activate
43
Motion Processing: On/Off
44
Why Motion Processing
44
How to Activate
44
Output Mode
44
What Can be Done
44
How to Select a New Scan Rate
44
Video Equalizing
45
What Can be Done
45
How to Select Video Equalizing
45
How to Adjust the Video Equalizing
45
Noise Reduction
45
How to Select and Adjust the Noise Reduction
45
Contrast Enhancement
46
What Can be Done
46
How to Select and Adjust the Contrast Enhancement
46
Split Screen: On/Off
46
How to Activate the Split Screen Function
46
Advanced Settings
46
How to Select the Advanced Settings
46
Time Base Correction
47
Luminace Delay
47
Vertical Sync Reference: Direkt/Indirekt
47
Clamp Gating: On/Off
48
Limo Pro Options
48
Coring
49
Lti
49
Cti
50
Factory Preset
50
Geometry Adjustments
51
What Can be Done
51
Start up
51
Important
51
Green Convergence: On/Off
51
Why Switching Your Green Convergence on or off
51
How to Switch off the Green Convergence
51
Horizontal Phase Adjustment
52
Start up
52
Note
52
How to Adjust
52
Raster Shift Adjustment
52
What Has to be Done
52
Caution
52
Warning
52
Left-Right (East-West) Adjustments
53
What Can be Adjusted
53
Start up
53
Note
53
Which Adjustment Can be Executed
54
How to Enter an Alignment
54
Warning
54
Fine Side Correction
56
What Can be Done
56
Top-Bottom (North-South) Adjustments
56
What Can be Adjusted
56
Start up
56
Note
56
Which Adjustment Can be Executed
56
How to Enter an Alignment
57
Size Adjustment
58
What Can be Done
58
Start up
58
Hint
58
Fine Horizontal Size Adjustment
59
What Can be Done
59
Start up
59
Linearity Adjustment
59
Coarse Linearity
60
Start up
60
Fine Vertical Linearity
60
Fine Horizontal Linearity
60
Blanking Adjustments
61
What Can be Done with Blanking
61
Start up
61
How to Adjust the Blanking
61
Convergence Adjustment
63
What Has to be Done
63
Adjustment Order
63
Start up
63
Coarse Convergence Adjustment
63
Fine Convergence Adjustment
64
What Can be Done
64
Start up
64
Focusing
65
What Can be Done
65
Start up
65
Midpoint Focusing
65
Top Image Focusing
65
Bottom Image Focusing
66
Digital Adjustment
66
Blue on Source
66
Color Select
67
What Can be Done
67
Start up
67
Driver Voltage (Optional)
68
When Available
68
What Can be Done
68
Start up
68
Service Mode
69
Start up
69
Overview Flowchart
69
Projector Set-Up
70
What Can be Done
70
Start up the Projector Set-Up
70
Identification
70
What Can be Seen
70
How to Start up
71
Total Run Time
71
What Can be Displayed
71
Run Time Note
71
How to Reset the CRT Run Times
71
Change Password
72
What Can be Done
72
Note
72
How to Select
72
How to Enter a New Password
72
Change Projector Address
72
How to Change that Address
72
Change Baudrate
73
What Can be Set up
73
How to Set up
73
Projector Warm up
73
What Can be Done
73
How to Select
73
Warm up On/Off
74
Power up Mode: Operating/Stand by
75
Memory Management
76
Copy Soft Edge Block
77
Deleting All Blocks
78
How to Set Convergence to Midposition ?
79
Undo Green Convergence Midposition
80
East-West to Midposition
81
How to Set the North-South Settings to Midposition ?
82
Undo Digital Vertical Linearity to Midposition
83
What Can be Done
83
How to Undo the Digital Vertical Linearity to Midposition
83
Digital Horizontal Linearity to Midposition
83
How to Set the Digital Horizontal Linearity to Midposition
83
Undo Digital Horizontal Linearity to Midposition
83
How to Undo the Digital Vertical Linearity to Midposition
84
Astigmatism Midposition
84
What Can be Done
84
How to Set the Astigmatism to Midposition
84
Undo Astigmatism to Midposition
84
How to Undo the Astigmatism Settings to Midposition
84
All Settings to Midposition
85
What Can be Done
85
How to Set to Midposition
85
Undo All Settings to Midposition
85
How to Cancel 'Set to Midposition
85
Common Settings
86
What Can be Done
86
How to Select
86
Dynaminc Astigmatism
86
Start up
87
How to Adjust
87
Focusing on Current Source
87
Gamma Corrections
88
Gamma Corrections Warning
88
Start up
88
CRT Run in Cycle
88
What Can be Done
88
How to Select CRT Run in Cycle
88
CRT Drive Mode
89
What Can be Done
89
Available Drive Modes
89
How to Change the Drive Mode
89
CRT Drive Mode Warning
89
Memory Banks
89
How to Select Memory Banks
89
How to Create a New Memory Bank
90
How to Recall a Specific Memorybank for the Actual Source
90
Flyback Turnover Point
90
What Can be Done
90
Set up of the Flyback Turnover Point
90
Menu Position
91
What Can be Done
91
How to Change the Position
91
Option 1
91
Real Time Clock
91
Voltage Diagnostics
92
What Can be Seen
92
How to Start up
92
I2C Diagnostics
92
How to Select
92
Projector Diagnostics
93
What Can be Seen
93
How to Display the Projector Diagnostics
93
Messages, Warnings and Failures
95
Sound Module
97
Sound Connections
97
Audio Input
97
Connecting Speaker Wires
97
Speaker Selection Switch
97
Sound Control with the RCU or the Local Keyboard
97
Index
99
Advertisement
Advertisement
Related Products
Barco Baron 908 R9040069
Barco BARON 908
Barco BarcoReality 909
Barco 90 00719
Barco 90 00972
Barco 90 00977
Barco 98 28070
Barco BARCOREALITY 912
Barco REALITY 9200 TCR+
Barco 9841111
Barco Categories
Projector
Monitor
Projector Accessories
Medical Equipment
Controller
More Barco Manuals
Login
Sign In
OR
Sign in with Facebook
Sign in with Google
Upload manual
Upload from disk
Upload from URL