Sign In
Upload
Manuals
Brands
Avidsen Manuals
Intercom System
112271
Avidsen 112271 Manuals
Manuals and User Guides for Avidsen 112271. We have
2
Avidsen 112271 manuals available for free PDF download: Manual
Avidsen 112271 Manual (176 pages)
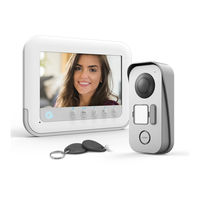
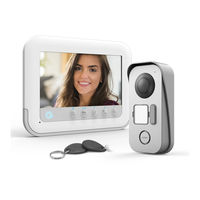
Colour videophone 7" 2 wires - RFID feature
Brand:
Avidsen
| Category:
Intercom System
| Size: 7 MB
Table of Contents
Français
2
Table of Contents
2
A - Consignes de Sécurité
5
Introduction
5
Recyclage
5
B - Description du Produit
6
Contenu du Kit
6
Moniteur
6
Platine de Rue
7
Support Mural
7
Adaptateur Secteur
7
C - Installation
8
Installation de la Platine de Rue
8
Installation du Moniteur
9
Les Connexions
10
Branchement entre Le Moniteur Et la Platine de Rue
11
Connexions
12
Connexions 2 Moniteurs + 2 Platine de Rue
12
Connexions 2 Moniteurs + 1 Caméra
12
Configuration Pour 2 Familles
13
Connexion À Une Gâche Électrique Avec Une Alimentation Supplémentaire
14
Mise en Service Et Utilisation des Badges
14
Initialisation
15
Ajout des Badges Utilisateur
15
Suppression de Tous Les Badges
16
Selection de L'action Liées Aux Badges Utilisateurs
16
D - Utilisation
17
Identifier Le Visiteur Et Lui Parler
17
Activer la Platine de Rue Depuis Moniteur
17
Ouverture D'une Serrure Électrique Et D'une Commande Automatique (en Option)
17
Fonction D'intercommunication
17
Paramètres Sur Le Moniteur
18
Deverrouillage À L'aide D'un Badge
18
Consultation des Photos Prises en Votre Absence
18
E - Informations Techniques Et Légales
19
Caractéristiques Techniques
19
Garantie
20
Assistance Et Conseils
20
Retour Produit - Sav
20
Déclaration de Conformite
20
English
24
A - Safety Instructions
27
Introduction
27
Recycling
27
B - Product Description
28
Monitor
28
Intercom Panel
29
Wall Bracket
29
C - Installation
30
Installing the Monitor
31
Connections
32
Connection between the Monitor and the Intercom Panel
33
Connections
34
Connections 2 Monitors + 2 Intercom Panels
34
Connections 2 Monitors + 1 Camera
34
Settings for 2 Families
35
Connection to an Electric Strike Plate with Additional Power Supply
36
Activation and Use of Badges
36
Initialisation
37
Adding User Badges
37
Deactivating All Badges
38
Selecting the Action Associated with the User Badges
38
D - Using the Product
39
Identify and Speak to the Visitor
39
Activate the Intercom Panel from the Monitor
39
Opening an Electric Lock and an Automatic Control System (Optional)
39
Intercom Feature
39
Monitor Settings
40
Unlocking Using a Badge
40
Checking Photos Taken in Your Absence
40
E - Technical and Legal Information
41
Technical Characteristics
41
Warranty
42
Product Returns/After Sales Service
42
Declaration of Conformity
42
Dutch
46
A - Veiligheidsvoorschriften
49
Inleiding
49
Recyclage
49
B - Beschrijving Van Het Product
50
Inhoud Van de Kit
50
Straatunit
51
Muursteun
51
C - Installatie
52
Installatie Van de Straatunit
52
Installatie Van Het Scherm
53
Aansluitingen
54
Aansluiting Tussen de Monitor en de Straatunit
55
Aansluitingen
56
Aansluitingen 2 Schermen + 2 Straatunits
56
Aansluitingen 2 Schermen + 1 Camera
56
Instelling Voor 2 Families
57
Aansluiting Op Een Elektrische Slotplaat Met Een Extra Voeding
58
Ingebruikneming Van Badges
58
Initialisatie
59
Gebruikersbadges Toevoegen
59
Verwijderen Van alle Badges
60
Selectie Van de Acties die Gekoppeld Zijn Aan Gebruikersbadges
60
D - Gebruik
61
Identificeren Van en Spreken Met de Bezoeker
61
Activeren Van de Straatunit Vanaf de Monitor
61
Opening Van Een Elektrisch Slot en Een Automatische Bediening (Optioneel)
61
Onderlinge Communicatiefunctie
61
Parameters Op de Monitor
62
Ontgrendeling Met Behulp Van Een Badge
62
Raadpleging Van Foto's Gemaakt Tijdens Uw Afwezigheid
62
E - Technische en Wettelijke Informatie
63
Garantie
64
Hulp en Tips
64
Retour Product - Service Na Verkoop
64
Conformiteitsverklaring
64
Deutsch
68
A - Sicherheitsanweisungen
71
Einleitung
71
Recycling
71
B - Produktbeschreibung
72
Inhalt des Sets
72
Monitor
72
Türsprechanlage
73
Wandhalterung
73
Netzadapter
73
C - Montage
74
Installation der Türsprechanlage
74
Montage des Monitors
75
Die Anschlüsse
76
Anschluss zwischen Monitor und Strassenseitiger Türsprechanlage
77
Anschlüsse
78
Anschlüsse 2 Monitore + 2 Türsprechanlagen
78
Anschlüsse 2 Monitore + 1 Kamera
78
Konfiguration für 2 Familien
79
Anschluss an Elektrischen Türöffner mit Zusätzlicher Versorgung
80
Inbetriebnahme und Verwendung der Nutzerkarten
80
Initialisierung
81
Nutzerkarten Hinzufügen
81
Alle Nutzerkarten Löschen
82
Auswahl des die Nutzerkarte Betreffenden Vorgangs
82
D - Verwendung
83
Den Besucher Identifizieren und mit Ihm Sprechen
83
Aktivierung der Türsprechanlage Ab dem Monitor
83
Betätigung eines Elektrischen Türöffners und eines Torantriebs (Optional)
83
Gegensprechfunktion
83
Parameter auf dem Monitor
84
Entriegelung Mithilfe einer Karte
84
Die in Ihrer Abwesenheit Aufgenommenen Fotos Ansehen
84
E - Technische und Gesetzliche Informationen
85
Technische Merkmale
85
Garantie
86
Hilfe und Support
86
Geräteumtausch - Kundendienst
86
Konformitätserklärung
86
Español
90
A - Normas de Seguridad
93
Introducción
93
Reciclaje
93
B - Descripción del Producto
94
Contenido del Kit
94
Placa Externa
95
Soporte de Pared
95
Adaptador de Red
95
C - Instalación
96
Instalación de la Placa Externa
96
Instalación del Monitor
97
Las Conexiones
98
Conexión entre el Monitor y la Placa Externa
99
Conexiones
100
Conexiones 2 Monitores + 2 Placas Externas
100
Conexiones 2 Monitores + 1 Cámara
100
Configuración para 2 Familias
101
Conexión a un Cerradero Eléctrico con Alimentación Adicional
102
Puesta en Servicio y Uso de las Llaves de Proximidad
102
Inicialización
103
Añadir Llaves de Proximidad de Usuario
103
Eliminación de Todas las Llaves de Proximidad
104
Selección de la Acción Relacionada con las Llaves de Proximidad de Los Usuarios
104
D - Uso
105
Identificar al Visitante y Hablarle
105
Activar la Placa Externa desde el Monitor
105
Apertura de una Cerradura Eléctrica y de un Accionamiento Automático (Opcional)
105
Función de Intercomunicación
105
Parámetros en el Monitor
106
Desbloqueo con una Llave de Proximidad
106
Consulta de las Fotos Tomadas Durante Su Ausencia
106
E - Información Técnica y Legal
107
Características Técnicas
107
Garantía
108
Asistencia y Asesoramiento
108
Devolución del Producto - Spv
108
Declaración de Conformidad
108
Português
112
A - Instruções de Segurança
115
Introdução
115
Reciclagem
115
B - Descrição Do Produto
116
Conteúdo Do Kit
116
Monitor
116
Placa de Rua
117
Suporte de Parede
117
Adaptador de Corrente
117
C - Instalação
118
Instalação da Placa de Rua
118
Instalação Do Monitor
119
As Ligações
120
Ligação entre O Monitor E a Placa de Rua
121
Ligações
122
Ligações 2 Monitores + 2 Placas de Rua
122
Ligações 2 Monitores + 1 Câmara
122
Configuração para 2 Famílias
123
Ligação a um Trinco Elétrico Com Uma Alimentação Suplementar
124
Inicialização
125
Adição Dos Crachás de Acesso Do Utilizador
125
Eliminação de todos os Crachás de Acesso
126
Seleção da Ação Ligada Aos Crachás de Acesso Dos Utilizadores
126
D - Utilização
127
Identificar os Visitantes E Falar
127
Ativar a Placa de Rua a Partir Do Monitor
127
Abertura de Uma Fechadura Elétrica E de um Comando Automático (Opcional)
127
Função de Intercomunicação
127
Parâmetros no Monitor
128
Desbloqueio Com um Crachá de Acesso
128
Leitura das Fotos Gravadas Durante a Sua Ausência
128
E - Informações Técnicas E Legais
129
Características Técnicas
129
Garantia
130
Assistência E Conselhos
130
Devolução Do Produto - Spv
130
Declaração de Conformidade
130
Italiano
134
Smaltimento
137
B - Descrizione del Prodotto
138
Contenuto del Kit
138
Monitor
138
Pulsantiera Esterna
139
Supporto a Parete
139
C - Installazione
140
Installazione Della Pulsantiera Esterna
140
Installazione del Monitor
141
Collegamenti
142
Collegamento Tra Il Monitor E la Pulsantiera Esterna
143
Collegamenti
144
Collegamenti 2 Monitor + 2 Pulsantiera Esterna
144
Collegamenti 2 Monitor + 1 Telecamera
144
Configurazione Per 2 Famiglie
145
Collegamento a una Bocchetta Elettrica con Un'alimentazione Supplementare
146
Messa in Servizio E Utilizzo Dei Badge
146
Inizializzazione
147
Aggiunta DI Badge Utente
147
Eliminazione DI Tutti I Badge
148
Selezione Dell'azione Collegata Ai Badge Utente
148
D - Utilizzo
149
Identificare Chi Ha Suonato Ecomunicare
149
Attivare la Pulsantiera Esterna Apartire Dal Monitor
149
(In Opzione)
149
Funzione Intercomunicazione
149
Impostazioni Sul Monitor
149
Apertura con Badge
150
Visualizzazione Delle Foto Scattate Quando si È Assenti
150
E - Note Tecniche E Legali
151
Caratteristiche Tecniche
151
Garanzia
152
Assistenza E Consigli
152
Reso del Prodotto - Servizio Post Vendita
152
Dichiarazione DI Conformità
152
Ελληνικά
156
Έισαγωγη
159
Ανακυκλωση
159
Β - Περιγραφή Προϊοντοσ
160
Πέριέχομένα Συσκέυασιασ
160
Οθονη
160
Θυροτηλέοραση
161
Έπιτοιχιο Στηριγμα
161
Τροφοδοτικο Ρέυματοσ
161
Γ - Εγκαταστασή
162
Έγκατασταση Τησ Θυροτηλέορασησ
162
Συνδέσέισ
164
Συνδέση Οθονησ Και Θυροτηλέορασησ
165
Συνδέσέισ
166
Συνδέσέισ 2 Οθονων + 2 Θυροτηλέορασέων
166
Συνδέσέισ 2 Οθονων + 1 Καμέρασ
166
Διαμορφωση Για 2 Οικογένέιέσ
167
Συνδέση Μέ Ηλέκτρικο Μηχανισμο Κλέιδωματοσ Μέ Συμπληρωματικο Τροφοδοτικο
168
Λέιτουργια Και Χρηση Των Μπρέλοκ
168
Έκκινηση
169
Προσθηκη Μπρέλοκ Χρηστων
169
Διαγραφη Ολων Των Μπρέλοκ
170
Έπιλογη Ένέργέιων Που Συνδέονται Μέ Τα Μπρέλοκ Χρηστων
170
Δ - Χρήσή
171
Αναγνωριση Έπισκέπτη Και Ομιλια
171
Ένέργοποιηση Θυροτηλέορασησ Απο Την Οθονη
171
Χέιρισμο (Προαιρέτικα)
171
Λέιτουργια Ένδοέπικοινωνιασ
171
Παραμέτροι Οθονησ
172
Απασφαλιση Μέ Μπρέλοκ
172
Προβολη Φωτογραφιων Που Έληφθησαν Έν Απουσια Σασ
172
Τέχνικα Χαρακτηριστικα
173
Βοηθέια Και Συμβουλέσ
174
Έπιστροφη Προϊοντοσ - Έμπ
174
Δηλωση Συμμορφωσησ
174
Advertisement
Avidsen 112271 Manual (22 pages)
Colour videophone 7" 2 wires - RFID feature
Brand:
Avidsen
| Category:
Telephone
| Size: 1 MB
Table of Contents
Table of Contents
2
A - Safety Instructions
5
Introduction
5
Maintenance and Cleaning
5
Recycling
5
B - Product Description
6
Kit Contents
6
Monitor
6
Intercom Panel
7
Wall Bracket
7
Mains Adaptor
7
C - Installation
8
Installation of the Intercom Panel
8
Installing the Monitor
9
Connections
10
Connection between the Monitor and the Intercom Panel
11
Connections
12
Connections 2 Monitors + 2 Intercom Panels
12
Connections 2 Monitors + 1 Camera
12
Settings for 2 Families
13
Connection to an Electric Strike Plate with Additional Power Supply
14
Activation and Use of Badges
14
Initialisation
15
Adding User Badges
15
Deactivating All Badges
16
Selecting the Action Associated with the User Badges
16
D - Using the Product
17
Identify and Speak to the Visitor
17
Activate the Intercom Panel from the Monitor
17
Opening an Electric Lock and an Automatic Control System (Optional)
17
Intercom Feature
17
Monitor Settings
18
Unlocking Using a Badge
18
Checking Photos Taken in Your Absence
18
E - Technical and Legal Information
19
Technical Characteristics
19
Warranty
20
Help and Advice
20
Product Returns/After Sales Service
20
Declaration of Conformity
20
Advertisement
Related Products
Avidsen 112273
Avidsen 112276
Avidsen 112279
Avidsen 112240
Avidsen 112241
Avidsen 112249
Avidsen 112290
Avidsen 112291
Avidsen 112296
Avidsen 122132
Avidsen Categories
Security Camera
Intercom System
Gate Opener
IP Camera
Telephone
More Avidsen Manuals
Login
Sign In
OR
Sign in with Facebook
Sign in with Google
Upload manual
Upload from disk
Upload from URL