Barco NH-12 Service Manual
Hide thumbs
Also See for NH-12:
- User manual (222 pages) ,
- Service manual (146 pages) ,
- Installation manual (54 pages)
Table of Contents
Advertisement
Quick Links
Advertisement
Table of Contents

Subscribe to Our Youtube Channel
Related Manuals for Barco NH-12


Summary of Contents for Barco NH-12
- Page 1 NH-12 Service manual R9010610 R59770158/00 20/02/2008...
- Page 2 Barco nv Presentations Noordlaan 5, 8520 Kuurne Phone: +32 56.36.82.11 Fax: +32 56.35.86.51 E-mail: presentations.bid@barco.com Visit us at the web: www.barco.com Printed in Belgium...
- Page 3 Changes Barco provides this manual ’as is’ without warranty of any kind, either expressed or implied, including but not limited to the implied war- ranties or merchantability and fitness for a particular purpose. Barco may make improvements and/or changes to the product(s) and/or the program(s) described in this publication at any time without notice.
-
Page 5: Table Of Contents
Description of the X-fan supply ....................53 R59770158 NH-12 20/02/2008... - Page 6 Optical relay ........................121 R59770158 NH-12 20/02/2008...
- Page 7 12.1 Error codes .........................179 R59770158 NH-12 20/02/2008...
- Page 8 13.1 Block diagram........................181 R59770158 NH-12 20/02/2008...
-
Page 9: Safety Guidelines
1. SAFETY GUIDELINES Overview • Safety Instructions • UV radiation Safety Instructions ARNING Before Removing/Replacing any projector components, turn off the Main Power Switch and un- plug the Main AC power cable. ARNING Only intended for qualified service personnel. R59770158 NH-12 20/02/2008... - Page 10 Keep the lamp away from your body. For continued explosion protection, replace the lamp only with one of the same type number. Always replace the lamp before the rated life time. R59770158 NH-12 20/02/2008...
-
Page 11: Uv Radiation
Use of a substitute replacement that does not have the same safety charac- teristics as the recommended replacement part in BARCO service data parts list might create shock, fire, and/or other hazards. Product Safety is under review continuously and new instructions are issued whenever appropriate. For the latest information, always consult the appropriate current BARCO service literature. - Page 12 1. Safety guidelines R59770158 NH-12 20/02/2008...
-
Page 13: Spare Parts
Desktop input board R765359K Mains filter R765424K Light pipe (LP HDTV) R8506032K Optical relay (Inf array) R850611K SPG (CNN power lamp) R850607K Lens holder R850608K CLO + LFR sensor R850606K Light feedback R7646331K Cold mirror R850613K Fan outlet R724950K R59770158 NH-12 20/02/2008... -
Page 14: Covers
Fan bottom lamp (fan 70x70) B32470291DK Fan top LPS Fan unit 1: fan LPS vertical assembly R850615K Fan unit 2: fan engine assembly R850616K Lamps Lamps Description Article number Lamp + new housing R9843080 Lamp + refurbished lamp housing R9843090 R59770158 NH-12 20/02/2008... -
Page 15: General Information
DLP™ digital light processor digital micro mirror device digital visual interface FPGA field programmable gate array HDSDI high definition serial digital interface HDTV high definition television infra red liquid crystal display R59770158 NH-12 20/02/2008... -
Page 16: General Instructions
If wires are not properly fixed to each other, to the chassis and/or to other components in the same way as it was done in production, damage can occur! Wires Due to the amount of cables, some of the procedures described below can become quite complicated. Make sure to take into account the following directions. R59770158 NH-12 20/02/2008... -
Page 17: Emc Shielding Clamps
Torx screwdriver T10 electronic parts Torx screwdriver T20 mechanical parts Phillips screwdriver Ph1 small covers Phillips screwdriver Ph2 mechanical parts Hex or Allen™ key 2.5 mm mechanical parts nut spanner 4.5 mm or 3/16” DVI connectors R59770158 NH-12 20/02/2008... - Page 18 5.5 mm mechanical parts nut spanner 7 mm mechanical parts nut spanner 10 mm lamp power wires cutting pliers (small) cable ties cable ties fixing wires slotted screwdriver 3 mm or 4 mm opening EMC shielding clamps R59770158 NH-12 20/02/2008...
-
Page 19: Covers
The cable basket is used to hide the input box front panel and the connected wires. 4.2.1 Removing the cable basket Necessary tools No tools. How to remove the cable basket? 1. Push the metal joggle to the front side of the projector R59770158 NH-12 20/02/2008... -
Page 20: Installing The Cable Basket
No tools. How to install the cable basket? 1. Fix the cable basket to the projector: the hooks of the cable basket must fit the slots of the projector Image 4-5 Cable basket: slots on the projector R59770158 NH-12 20/02/2008... -
Page 21: Rear Cover
2. Push the cable basket against the projector and then push it down until the joggle is locking (“click” sound) Image 4-7 Cable basket: two steps to fix it to the projector Image 4-8 Cable basket: the joggle must lock Rear cover Overview • Removing the rear cover • Installing the rear cover R59770158 NH-12 20/02/2008... -
Page 22: Removing The Rear Cover
Necessary tools Philip screwdriver Ph2 How to install the rear cover? 1. Put both clamps of the rear cover in the holes on the top cover Tip: The rear cover must be tilted to perform this step! R59770158 NH-12 20/02/2008... -
Page 23: Top Cover
3. Fix the rear cover using the fixing screw Image 4-17 Installing the rear cover: step 5 Top cover Overview • Removing the top cover • Installing the top cover Description The top cover protects the lens holder, LPS and engine controller. R59770158 NH-12 20/02/2008... -
Page 24: Removing The Top Cover
Image 4-18 Image 4-19 Top cover: front screws Top cover: left screw Image 4-20 Top cover: right screw 2. Lift the top cover to remove it Image 4-21 Top cover: lift to remove R59770158 NH-12 20/02/2008... -
Page 25: Installing The Top Cover
1. Put the top cover in the correct position Image 4-22 Top cover 2. Fix the top cover using four screws Image 4-23 Image 4-24 Top cover: left screw Top cover: right screw Image 4-25 Top cover: front screws R59770158 NH-12 20/02/2008... -
Page 26: Lamp Start Cover
1. Remove both screws on the top side of the lamp start cover Image 4-27 Lamp start cover: fixing screws 2. Tilt the top side of the cover down over 45° (see arrow 1 on the picture) R59770158 NH-12 20/02/2008... -
Page 27: Installing The Lamp Start Cover
4.5.2 Installing the lamp start cover Necessary tools Phillips screwdriver Ph1 How to install the lamp start cover? 1. Put the cover — slightly tilted — in the right position (see 1 and 2 on the picture) R59770158 NH-12 20/02/2008... -
Page 28: Folding Mirror Cover
• CLO-LFR assembly Before the lamp start cover can be taken off, the rear cover of the projector must be removed. See the con- cerning chapter to remove/install the rear cover. R59770158 NH-12 20/02/2008... -
Page 29: Removing The Folding Mirror Cover
3. Slide the cover towards the rear side of the projector (see arrow 2 on the picture above) 4. Slide down the cover to remove the bottom feet from their slots (see arrow 3 on the picture above) R59770158 NH-12 20/02/2008... -
Page 30: Installing The Folding Mirror Cover
Engine fan cover Overview • Description of the engine fan covers • Removing engine fan cover 1 • Installing the engine fan cover 1 • Removing engine fan cover 2 • Installing the engine fan cover 2 R59770158 NH-12 20/02/2008... -
Page 31: Description Of The Engine Fan Covers
Image 4-39 Engine fan cover 1: fixing screws 2. Unscrew the indicated screws a few revolutions Tip: Unscrew these screws that much that the engine fan cover 1 can pass while lifting it in the next step! R59770158 NH-12 20/02/2008... -
Page 32: Installing The Engine Fan Cover 1
How to install the engine fan cover 1? 1. Make sure the engine fan cover 2 is installed 2. Put the engine fan cover 1 in its correct location Image 4-42 Engine fan cover 1: installing 3. Tighten the indicated screws (3x) R59770158 NH-12 20/02/2008... -
Page 33: Removing Engine Fan Cover 2
To make it possible to remove or install the engine fan cover 2, make sure the engine fan cover 1 has been removed first! Necessary tools Torx screwdriver T20 How to remove the engine fan cover 2? 1. Remove the four fixing screws Image 4-45 Engine fan cover 2: fixing screws R59770158 NH-12 20/02/2008... -
Page 34: Installing The Engine Fan Cover 2
How to install the engine fan cover 2? 1. Put the engine fan cover 2 in its correct position 2. Fix the engine fan cover 2 using four fixing screws Image 4-46 Engine fan cover 2: fixing screws R59770158 NH-12 20/02/2008... -
Page 35: Software
In the appearing window, the projector software version is mentioned. 5.1.3 Upgrading the projector software Upgrade tool The name of the upgrade tool is according to this format: iCon NH- 12 v00.10.0001.exe device version Image 5-1 Upgrade tool Two main parts can be seen: R59770158 NH-12 20/02/2008... - Page 36 How to upgrade the projector? 1. Download the latest projector software version from the PartnerZone or from the Barco intranet 2. Save this upgrade file on a computer which can be connected to the same (local) network as the projector 3.
- Page 37 Note: In case of problems during the upgrade procedure, the following two buttons can be used for diagnostics: Save text will save the text inside the Barco Networked Projector Upgrade Tool in a file Screen shot will save a screen shot of the projected image at that particular time.
-
Page 38: Desktop Integration Software
1. On your computer, select START on the task bar 2. In the appearing window, select Control Panel 3. Select Add or Remove Programs in the appearing window 4. Scroll to the Barco program to see the version displayed. 5.2.4 Upgrading the Desktop Integration Software... -
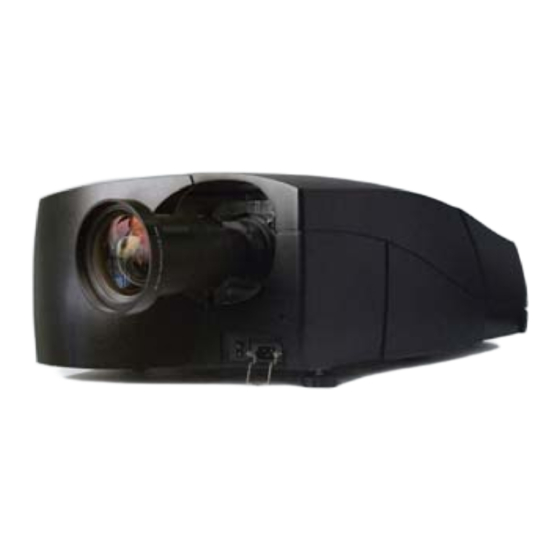
Page 39: Projector Layout
View 1 Image 6-1 Board location: view 1 Local keypad and IR receiver Engine controller Formatter board Motor connector board View 2 Image 6-2 Board location: view 2 Preformatter Local keypad and IR receiver Power box X-fan supply R59770158 NH-12 20/02/2008... -
Page 40: Component Location
Input module (the input module can look different according to the type of the projector) Desktop input Component location View 1 Image 6-4 Component location: view 1 Engine fan cover 1 Engine fan cover 2 Fan outlet Lamp Cold mirror (assembly) Engine controller frame assembly Engine Cooling liquid reservoir R59770158 NH-12 20/02/2008... - Page 41 Lamp power supply (LPS) Fan X-fan supply Fan top LPS Fan LPS vertical (fan unit 1) Fan engine top and bottom (fan unit 2) Optical array Light pipe Engine 10. Lens holder 11. Input module 12. Fan PMP R59770158 NH-12 20/02/2008...
- Page 42 6. Projector layout R59770158 NH-12 20/02/2008...
-
Page 43: Electronic Parts And Servicing Procedures
The mains switch is used to switch on and switch off the projector. Image 7-1 Mains switch Necessary tools Torx screwdriver T10 How to replace the mains switch? 1. Unscrew the right front foot of the projector (or remove it completely) R59770158 NH-12 20/02/2008... - Page 44 6. Push both clamps to release the mains switch and slide it out Image 7-4 Image 7-5 Mains switch: clamps Mains switch: slide out to remove Installing the new mains switch: follow the procedure above in reverse order. R59770158 NH-12 20/02/2008...
-
Page 45: Mains Filter
2. At the bottom of the projector, remove the three screws fixing the mains input assembly (see picture above) 3. Unplug the wires 4. Take out the mains input assembly 5. Unplug the connectors of the mains filter 3 connectors on one side 2 connectors on the other side R59770158 NH-12 20/02/2008... -
Page 46: Mains Pulse Filter
When installing a mains filter, make sure that the grounding connector (= 3 pin) points to the inside of the mains input assembly. 7.1.3 Mains pulse filter Description The mains pulse filter reduces or removes harmful pulses coming from the mains power. Image 7-10 Mains pulse filter R59770158 NH-12 20/02/2008... - Page 47 3. Unplug the wires 4. Take out the mains input assembly 5. Unplug the connectors Image 7-12 Mains pulse filter: connectors 6. Remove the fixing screws Image 7-13 Mains pulse filter: fixing screws 7. Remove the mains pulse filter R59770158 NH-12 20/02/2008...
-
Page 48: Mains Fuses
Make sure the new fuse has the same specifications as the original one! 4. Close the fuse holder, using a slotted screwdriver. Universal 12V power box Overview • Description of the power box • Diagnostics of the power box • Removing the power box • Installing the power box R59770158 NH-12 20/02/2008... -
Page 49: Description Of The Power Box
Since this power box is a universal unit, not all of the connectors are used in this projector. The following voltages are generated: • ++12V standby voltage • +12V for active projector state • 380VM for the lamp R59770158 NH-12 20/02/2008... - Page 50 The power box consists of three boards that are communicating through board to board connectors. For safety reasons, insulating plates have been mounted between the boards and on top of the SMPS: these plates must always be present! The three boards are: R59770158 NH-12 20/02/2008...
- Page 51 0..4 +12V / ++12V to the PMP, X-fan supply, preformatter, desktop input JTAG + communication X-fan supply I2C: communication with PMP pulse counters from fans 0..7 pulse counters from fans 8..15 R59770158 NH-12 20/02/2008...
-
Page 52: Diagnostics Of The Power Box
The way to remove the power box is to first remove the assembly {power box — X-fan supply — fan X-fan} as a unit and then to remove the {X-fan supply — fan X-fan}. 1. Remove the covers (see concerning chapters) : R59770158 NH-12 20/02/2008... - Page 53 20 to the lens shift board 5. Lift the unit (power bow + X-fan supply + fan) to remove it Image 7-25 Power box: lift to remove 6. Remove the four screws fixing the X-fan cover plate R59770158 NH-12 20/02/2008...
- Page 54 10.Remove the four spacer bolts and two screws fixing the X-fan supply to the power box Image 7-28 X-fan supply: fixing screws 11. Remove the X-fan supply from the power box 12.Remove the six spacer bolts from the power box R59770158 NH-12 20/02/2008...
-
Page 55: Installing The Power Box
Power box: spacer bolts 2. Fix the X-fan supply on top of the power box using two screws and four spacer bolts Image 7-32 X-fan supply: fixing screws 3. Make the connections between power box and X-fan supply R59770158 NH-12 20/02/2008... - Page 56 J513 to the fan bottom lamp house J730 to the ambient temperature and pressure sensor J740 to the ambient temperature and pressure sensor 9. Fix the power box to the projector using two screws and a spacer bolt R59770158 NH-12 20/02/2008...
-
Page 57: X-Fan Supply
The X-fan supply is an extension of the power box, mainly used to power and control the fan LPS vertical, the fan engine top, the fan engine bottom and the Peltier elements. Next to this functionality, the X-fan supply acts as an interconnection between the power box and the small fans. R59770158 NH-12 20/02/2008... -
Page 58: Removing The X-Fan Supply
X-fan supply can be removed from the power box without taking the assembly out of the projector! The way to remove the X-fan supply is exactly the same in both cases. How to remove the X-fan supply? 1. Remove the covers (see concerning chapters): R59770158 NH-12 20/02/2008... - Page 59 J740 to the ambient temperature and pressure sensor 6. Remove the four spacer bolts and two screws fixing the X-fan supply to the power box Image 7-38 X-fan supply: fixing screws 7. Remove the X-fan supply by lifting it R59770158 NH-12 20/02/2008...
-
Page 60: Installing The X-Fan Supply
J513 to the fan bottom lamp house J730 to the ambient temperature and pressure sensor J740 to the ambient temperature and pressure sensor 3. Put the X-fan cover plate on top of the X-fan supply and fix it using four screws R59770158 NH-12 20/02/2008... -
Page 61: Lamp Info Receiver
3. Unplug the connectors 4. Remove both screws fixing the lamp info receiver assembly Image 7-41 Lamp info receiver: fixing screws 5. Remove the lamp info receiver unit 6. Remove both screws fixing the guiding pin plate R59770158 NH-12 20/02/2008... - Page 62 Image 7-44 Lamp info receiver: fixing nuts and spacers 9. Slide off the lamp info receiver 10.Put the new lamp info receiver in the correct position 11. Fix it to the lamp info receiver frame using two nuts R59770158 NH-12 20/02/2008...
- Page 63 14.Fix the lamp info receiver assembly to the bottom of the projector using two screws Image 7-47 Lamp info receiver: fixing screws 15.Plug in the connector 16.Install the lamp (see concerning chapter) 17.Install the rear cover (see concerning chapter) R59770158 NH-12 20/02/2008...
-
Page 64: Lamp Power Supply (Lps)
The LFR sensor measures the lamp flicker and provides a signal for the light feedback board, which is part of the LPS assembly. This signal is used to reduce the lamp flicker. In case of failure the LPS assembly is replaced as a unit. Image 7-48 LPS: lamp power supply R59770158 NH-12 20/02/2008... -
Page 65: Removing The Lps
M6 to disconnect the wires to the lamp and to the SPG unplug both wires coming from the mains power unplug both wires coming from the engine controller (LFR + I2C) 4. Remove three fixing screws R59770158 NH-12 20/02/2008... -
Page 66: Installing The Lps
4. Install the lamp power cover (see concerning chapter) 5. Install the fan outlet (see concerning chapter) 6. Install the covers (see concerning chapters): top cover rear cover 7.5.4 Replacing the Light feedback board Necessary tools Trox screwdriver T10 R59770158 NH-12 20/02/2008... - Page 67 4. Disconnect the wires on the light feedback board J1: to LPS J2: to sensor J3: to LPS Image 7-54 Light feedback board: connectors 5. Remove the fixing screws of the light feedback board to take it off. R59770158 NH-12 20/02/2008...
- Page 68 2. Connect the wires on the light feedback board J1: to LPS J2: to sensor J3: to LPS Image 7-57 Light feedback board: connectors 3. Gently flip back the cover of the light feedback board and fix it using two screws R59770158 NH-12 20/02/2008...
-
Page 69: Start Pulse Generator (Spg)
LPS voltage drops to 25V again and the SPG stops its activity. If, after three attempts, the lamp is still not on, the projector switches back to standby mode. Image 7-59 SPG: start pulse generator R59770158 NH-12 20/02/2008... -
Page 70: Diagnostics Of The Spg
3. Remove the lamp (see concerning chapter) 4. Remove the four screws fixing the lamp power cover Image 7-60 Lamp power cover: fixing screws 5. Remove the lamp power cover 6. Disconnect the lamp power cables on the LPS by removing the nuts R59770158 NH-12 20/02/2008... -
Page 71: Installing The Spg
Nut spanner 10 mm • Allen key 4 mm How to install the SPG? 1. Guide the power cables underneath the lamp to the LPS 2. Put in the SPG in its housing and push it into its sockets R59770158 NH-12 20/02/2008... - Page 72 3. Fix the SPG using two bolts and spacers Image 7-64 SPG: fixing screws and spacers 4. Connect the power cables to the LPS using the fixing nuts Image 7-65 LPS: power cables 5. Install the lamp power cover and fix it using four screws R59770158 NH-12 20/02/2008...
-
Page 73: Input Module
5 (= top layer): free optional layer LVDS interface analog input layer DVI / D15 input layer output and comm. layer Image 7-67 Input module You can find the description of each of these boards in the concerning chapters. R59770158 NH-12 20/02/2008... -
Page 74: Removing The Input Module
4. Remove the screw fixing the three grounding wires 5. Flip over the preformatter unit Unplug the other connectors on the preformatter unit and remove the unit 6. Remove both fixing screws on the front panel of the input module R59770158 NH-12 20/02/2008... -
Page 75: Installing The Input Module
J2 and J3 on the LVDS interface (which is mounted on the PMP): data from connectors J200 and J300 on the desktop input Lower the input module until it is in its final position and fix it using three fixing screws R59770158 NH-12 20/02/2008... - Page 76 5. Use one screw to fix the three grounding wires to the preformatter 6. Fix the preformatter unit to the input module using four screws Image 7-73 Preformatter unit: fixing screws 7. Install the covers (see concerning chapters): engine fan cover 1 top cover rear cover R59770158 NH-12 20/02/2008...
-
Page 77: Construction Of The Input Module
Analog input layer 7.7.4.1.2 Removing the analog input layer Necessary tools Torx screwdriver T10 How to remove the analog input layer? 1. Remove the input module (see considering chapter) 2. Remove the front screws of the analog input layer R59770158 NH-12 20/02/2008... -
Page 78: Installing The Analog Input Layer
Analog input layer: unplug the board-to-board connectors to remove 7.7.4.1.3 Installing the analog input layer Necessary tools Torx screwdriver T10 How to install the analog input layer? 1. Make the board-to-board connection between analog input layer and PMP R59770158 NH-12 20/02/2008... -
Page 79: Dvi / D15 Input Layer
4. Install the input module (see concerning chapter) 7.7.4.2 DVI / D15 input layer Overview • Description of the DVI / D15 input layer • Removing the DVI / D15 input layer • Installing the DVI / D15 input layer R59770158 NH-12 20/02/2008... -
Page 80: Description Of The Dvi / D15 Input Layer
1. Remove the input module (see concerning chapter) 2. Remove the front nuts of the DVI / D15 input layer Image 7-82 DVI / D15 input layer: front screws 3. Remove the side screw, fixing the DVI / D15 input layer to the PMP R59770158 NH-12 20/02/2008... -
Page 81: Installing The Dvi / D15 Input Layer
Installing the DVI / D15 input layer Necessary tools • Torx screwdriver T10 • Nut spanner 3/16” or 4,5 mm How to install the DVI / D15 input layer? 1. Make the board-to-board connection between DVI / D15 input layer and PMP R59770158 NH-12 20/02/2008... - Page 82 DVI / D15 input layer: plug in the board-to-board connectors 2. Fix the DVI / D15 input layer to the PMP using a screw Image 7-86 DVI / D15 input layer: side screw 3. Fix the input board to the front panel using four bolts R59770158 NH-12 20/02/2008...
-
Page 83: Output And Communication Layer
DVI output: image as it leaves the PIP on the PMP. Not enabled in case of stereo Monitors connected to the DVI output may show a bad image if Full screen representation is ON in the OSD (see User’s Guide for details on how to toggle between ON and OFF) R59770158 NH-12 20/02/2008... -
Page 84: Removing The Output And Communication Layer
1. Remove the input module (see considering chapter) 2. Remove the front nuts of the output and communication input layer Image 7-89 output and communication input layer: front screws 3. Remove the side screw, fixing the output and communication input layer to the PMP R59770158 NH-12 20/02/2008... -
Page 85: Installing The Output And Communication Layer
Installing the output and communication layer Necessary tools • Torx screwdriver T10 • Nut spanner 3/16” How to install the output and communication input layer? 1. Make the board-to-board connection between output and communication input layer and PMP R59770158 NH-12 20/02/2008... - Page 86 2. Fix the output and communication input layer to the PMP using a screw Image 7-93 output and communication input layer: side screw 3. Fix the input board to the front panel using four bolts R59770158 NH-12 20/02/2008...
-
Page 87: Optional Input Layer
2. Remove the screws fixing the optional input layer to the front panel 3. Remove the side screw fixing the optional input layer to the PMP Note: This screw can be reached from the left side of the projector without taking out the input module. R59770158 NH-12 20/02/2008... -
Page 88: Installing An Optional Input Layer
The desktop input board receives the desktop image through a DVI connector. This data is sent to the LVDS interface after conver- sion. This board also receives information from the PMP and sends it to the LCD panel to be displayed. The desktop input board is mounted inside the desktop input unit, which also includes the LCD module. R59770158 NH-12 20/02/2008... -
Page 89: Removing The Desktop Input Board
2. Pull out the desktop unit until the connectors can be reached 3. Unplug the connectors: J320: I2C going to the PMP J360: power supply from the power box J200 and J201: data going to the LVDS interface 4. Slide out the desktop input unit R59770158 NH-12 20/02/2008... -
Page 90: Installing The Desktop Input Board
Installing the desktop input board Necessary tools • Torx screwdriver T10 • Nut spanner 3/16” How to install the desktop input board? 1. Fix the desktop input board to the unit using two bolts and two screws R59770158 NH-12 20/02/2008... -
Page 91: Lcd Module
1. Remove the desktop input unit (see chapter Desktop input board) 2. Disconnect the LCD from the desktop input board: J300: data to the LCD module J301: backlight to the LCD module 3. Remove the screws fixing the LCD module to the desktop input module R59770158 NH-12 20/02/2008... -
Page 92: Lvds Interface
The LVDS interface is used to convert the desktop input signal into LVDS signals before it is sent to the PMP. It is fixed to the PMP. 7.10.2 Removing the LVDS interface Necessary tools Torx screwdriver T10 R59770158 NH-12 20/02/2008... - Page 93 6. Remove both fixing nuts Image 7-106 LVDS interface: fixing nuts Note: In this picture the input module has been removed but this is not needed to remove the LVDS interface. 7. Remove the LVDS interface by unplugging the board-to-board connector R59770158 NH-12 20/02/2008...
-
Page 94: Installing The Lvds Interface
2. Plug in the board-to-board connector of the LVDS interface into the connector on the PMP Image 7-108 LVDS interface: installing Note: In this picture the input module has been removed but this is not needed to remove the LVDS interface. 3. Fix the LVDS interface using bolts and nuts R59770158 NH-12 20/02/2008... -
Page 95: Pixel Map Processor (Pmp)
• Description of the PMP • Diagnostics of the PMP • Removing the PMP • Installing the PMP 7.11.1 Description of the PMP Description The pixel map processor (PMP) receives the input signals in a digital format: R59770158 NH-12 20/02/2008... - Page 96 When going from standby state to active state, the rest of the PMP is powered and both FPGA’s (PIP and WARP) are getting configured. A red LED is indicating this stage. After the configuration is loaded, both red LEDs are turned off. R59770158 NH-12 20/02/2008...
-
Page 97: Diagnostics Of The Pmp
7. Electronic parts and servicing procedures 7.11.2 Diagnostics of the PMP LED diagnostics 9 10 Image 7-114 Image 7-115 PMP: diagnostic LEDs (rear side) PMP: diagnostic LEDs (front side) number LED ID color description PIP not configured WARP not configured CYCLONE not configured green POWER +3.3V...
Need help?
Do you have a question about the NH-12 and is the answer not in the manual?
Questions and answers