Pfaff Coverlock 3.0 Owner's Manual
Hide thumbs
Also See for Coverlock 3.0:
- Brochure (10 pages) ,
- Owner's manual (40 pages) ,
- Owner's manual (44 pages)
Table of Contents
Advertisement
Quick Links
Download this manual
See also:
Owner's Manual
Advertisement
Table of Contents

Subscribe to Our Youtube Channel
Related Manuals for Pfaff Coverlock 3.0


Summary of Contents for Pfaff Coverlock 3.0
- Page 1 O w n e r ’ s M a n u a l...
- Page 2 This household sewing machine is designed to comply with IEC/EN 60335-2-28 and UL1594 IMPORTANT SAFETY INSTRUCTIONS When using an electrical appliance, basic safety precautions should always be followed, including the following: Read all instructions before using this household sewing machine. DANGER - To reduce the risk of electric shock: •...
-
Page 3: Table Of Contents
Table of contents Introduction Stitches & Sewing techniques Parts of the machine ............4 Stitch overview ..............22 Accessories ................5 Start sewing ..............28 Pin placement ..................28 Optional accessories from INSPIRA™ ......6 Chain off .....................28 Preparations Rolled edge sewing ............29 Connecting the foot control Coverstitch sewing ............ -
Page 4: Introduction
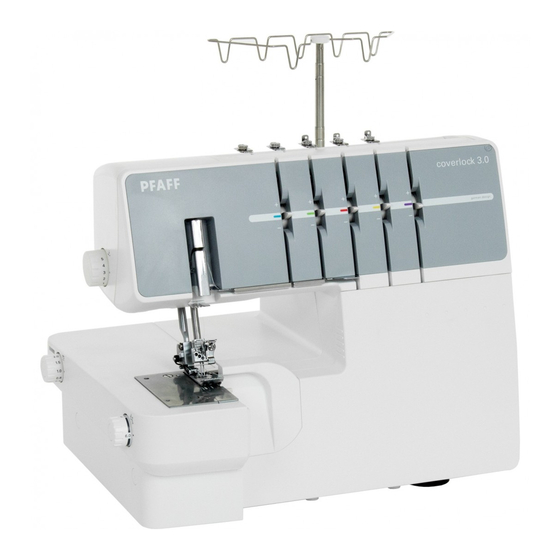
Parts of the machine 3 4 5 6 7 12 13 1. Telescopic thread stand 2. Handle (purple) 9. Flat bed extension 10. Cutter cover A 11. Front cover 12. Power & light switch 20. Presser foot pressure adjusting dial 13. -
Page 5: Accessories
28. Moveable upper cutter 31. Chainstitch/Coverstitch looper 32. Lower looper 33. Upper looper 34. 2-thread converter 35. Upper looper clutch 36. Chain/coverstitch thread guide Accessories Accessories are contained in the accessory box. 1. Accessory box 3. Knife blade (for the movable upper cutter) 4. -
Page 6: Optional Accessories From Inspira
Optional accessories from INSPIRA™ Optional presser feet specially prepared for this machine are available at your PFAFF® dealer. The snap-on type presser foot used on this machine allows easy removal and replacement. Elastic Foot 620 08 65-96 Blindhem & Lace Foot 620 08 69-96 The Blindhem Foot is perfect for sewing invisible hems and for applying lace. -
Page 7: Preparations
Connecting the foot control and the power supply Foot control to use with this machine: Before plugging your machine in, make sure the voltage is the same as indicated on the plate under the machine. • Connect the foot control/electric power cord to the socket on the machine. -
Page 8: Front Cover
Front cover Open First push the cover to the right as far as it will go and then pull it downward toward you. Close First pull the cover upward and then slide it to the left until it locks. Note: The front cover has a safety switch and the machine will Attaching the waste tray Position the machine so the front is nearly aligned with the edge of the table. -
Page 9: Needle Information
Needle information A. Overlock left needle eliminates the possibility of inserting the needle backwards. B. Overlock right needle Do not attempt to use a standard household sewing machine C. Coverstitch left needle needle of any size or type in this overlock. D. -
Page 10: 2-Thread Overlock Converter
2-thread overlock converter Engaging 2-thread overlock stitches are sewn using one needle thread and the lower looper thread. Before sewing, the 2-thread converter must be attached to the upper looper. The 3-thread stretch overlock stitch is also sewn with the 2-thread overlock converter engaged. -
Page 11: Threading
overlock sewing. To sew rolled edge you need to retract lever as far as it will go in each direction. General threading information upper looper, followed by the lower looper and then the needles from right to left. Re-threading if a thread breaks If the two loopers are not threaded in the correct order they will not create a stitch. -
Page 12: Threading The Upper Looper (Red)
Threading the upper looper (red) • Raise the presser foot to release tension discs. • Pass the thread from back to front through the thread guide on the thread stand (1). • Thread the top cover thread guide by pulling the thread towards the right until it slips under the guide. -
Page 13: Threading The Lower Looper (Yellow)
Threading the lower looper (yellow) • Raise the presser foot to release tension discs. • Pass the thread from back to front through the thread guide on the thread stand (1). • Thread the top cover thread guide by pulling the thread towards the right until it slips under the guide. -
Page 14: Threading Chainstitch Looper (Purple)
Threading chainstitch looper (purple) • Raise the presser foot to release tension discs. • Pass the thread from back to front through the thread guide on the thread stand (1). • Thread the top cover thread guide by pulling the thread towards the right until it slips under the guide. -
Page 15: Threading The Right Needle
Threading the right needle (green, B on needle clamp) • Raise the presser foot to release tension discs. • Pass the thread from back to front through the thread guide on the thread stand (1). • Thread the top cover thread guide by pulling the thread towards the right until it slips under the guide. -
Page 16: Threading The Left Needle
Threading the left needle (blue, A on needle clamp) • Raise the presser foot to release tension discs. • Pass the thread from back to front through the thread guide on the thread stand (1). • Thread the top cover thread guide by pulling the thread towards the right until it slips under the guide. -
Page 17: Threading The Chainstitch Needle
Threading the chainstitch needle (blue, D on needle clamp) • Raise the presser foot to release tension discs. • Pass the thread from back to front through the thread guide on the thread stand (1). • Thread the top cover thread guide by pulling the thread towards the right until it slips under the guide. -
Page 18: Threading The Coverstitch Needles
Threading the coverstitch needles Threading the right coverstitch needle (red, E on the needle clamp) • Raise the presser foot to release tension discs. • Pass the thread from back to front through the thread guide on the thread stand (1). •... - Page 19 Threading the middle coverstitch/chainstitch needle (green, D on the needle clamp) • Raise the presser foot to release tension discs. • Pass the thread from back to front through the thread guide on the thread stand (1). • Thread the top cover thread guide by pulling the thread towards the right until it slips under the guide.
- Page 20 Threading the coverstitch left needle (blue, C on the needle clamp) • Raise the presser foot to release tension discs. • Pass the thread from back to front through the thread guide on the thread stand (1). • Thread the top cover thread guide by pulling the thread towards the right until it slips under the guide.
-
Page 21: Needle Threader
The following is an easy way to change threads: • Cut the thread in use near the spool, behind the guides PFAFF coverlock 3.0 on the telescopic thread stand. • Remove the thread spool and place the new thread on german design the spool pin. -
Page 22: Stitches & Sewing Techniques
Stitch overview The settings shown in this table are our recommendations based on normal conditions. The correct tension is set automatically by the use of the Auto Tension Dial (ATD). It may be necessary to adjust the thread tension according to the stitch, type of fabric and thread you are using. - Page 23 Threading path Stitch A and • • • • 4-thread safety stitch, wide B and • • • • 4-thread safety stitch, narrow • • • 3-thread overlock, wide For sewing two layers of stretchy fabric or overcasting a single layer of light to medium fabric. Use heavier threads in the loopers to create decorative braids.
- Page 24 Threading path Stitch • • • 3-thread narrow edge* upper looper with a decorative thread, such as 40 weight rayon for a beautiful satin edge. Read more on page • • • side. Create varying effects by threading the upper looper with decorative thread. Read more on page 30. •...
- Page 25 Threading path Stitch • • • 3-thread rolled edge* rolled edge, thread the upper looper with decorative thread and the needle and lower looper with lightweight regular thread. Read more on page 29. • • 2-thread overlock, wide • • 2-thread overlock, narrow •...
- Page 26 Threading path Stitch • • more on page 30. • • 2-thread wrapped overlock, wide • • 2-thread wrapped overlock, narrow • • 2-thread rolled edge* Read more on page 29. * Not recommended for heavyweight woven fabrics or medium to heavyweight stretch fabrics. Stitches &...
- Page 27 Threading path Stitch C, D • • • • and E Coverstitch, triple For hems on stretch fabrics and for decorative effects on all kind of fabrics. Use decorative thread in looper for embellishment. Read more on page 29. C and •...
-
Page 28: Start Sewing
Start sewing Pin placement When securing the fabric pieces using pins, insert straight pins to the left of the presser foot. The pins will be easy to remove and are away from the cutters. cutting edge of the cutters. • When the machine is completely threaded, close the front cover and bring all of the threads over the stitch plate and slightly to the left under the presser foot. -
Page 29: Rolled Edge Sewing
Rolled edge sewing The rolled edge stitch is appropriate for lightweight fabrics such as lawn, voil, organdy, crepe, etc. The rolled edge is achieved by adjusting the thread tension to make the fabric edge roll under the fabric while overlocking. Adjust the page 11) regular thread. -
Page 30: Flatlock Sewing
Flatlock sewing look, or with the right sides together, to create a ladder stitch. • Use the left or the right needle. • Engage the 2-thread converter (see page 10). Thread the lower looper and the left (A) or right (B) needle. Thread the lower and upper looper and the left (A) or right (B) needle. -
Page 31: Chainstitch Sewing
Chainstitch sewing The chainstitch is sewn with two threads, one needle and one looper. Normally, the machine trims the fabric edge while the seam is being sewn. However, a chainstitch seam can be placed at a desired distance from edge of fabric by Machine set up •... -
Page 32: Stitch Adjustments
Stitch width adjustment A) Left needle B) Right needle C) Chainstitch needle The stitch width can be increased or decreased by 6 mm 4 mm 9 mm changing the needle position or with the cutting width dial. Width adjustment by changing needle position A) When only the left needle, or when both needles are used the stitch width is 6 mm. -
Page 33: Differential Feed Adjustment
Differential feed adjustment The differential feed system consists of two sets of feed teeth arranged one behind the other. Both feed teeth work independently of each other to give perfect results when sewing on speciality fabrics. When the amount of feed by the front feed teeth is changed in relation to the feed by Use the differential feed to prevent stretching of knit fabrics and puckering of lightweight fabrics. -
Page 34: Thread Overlock
Thread tension is automatically set when selecting a stitch type with the Auto Tension Dial (ATD), but it may have to • Type and thickness of the fabric • Needle size 2-thread overlock When the lower looper thread lies on the underside of the fabric (yellow) toward a higher position. - Page 35 4-thread overlock When the upper looper thread lies on the underside of the Move the upper looper thread tension lever (red) toward a fabric higher position. (yellow) toward a lower position. When the lower looper thread appears on the top of the fabric (yellow) toward a higher position.
-
Page 36: Maintenance
Machine maintenance than a conventional machine mainly for two reasons: • A lot of lint is produced when the cutters are cutting the the fabric. • An overlock runs at a very high speed and needs to be Cleaning • Open the front cover and remove all the lint using the lint brush. -
Page 37: Changing The Light Bulb
Changing the light bulb Only use light bulbs of the same type rated 15W. Light bulbs are available at your authorized PFAFF® dealer. • Remove the light cover screw and while pushing the cover lightly to the rear, swing cover to the left and remove from machine as shown in the illustration. -
Page 38: Trouble Shooting
Trouble shooting Problem Solution Fabric does not feed well - Lengthen stitch length. - Increase presser foot pressure for heavyweight fabric. - Decrease presser foot pressure for lightweight fabric. - Check the differential feed. Needle breaks - Insert needle correctly. - Do not pull fabric while sewing. -
Page 39: Intellectual Property
Sewing speed 1100 stitches/min Stitch length 1.0 - 4.0 mm Differential feed ratio 0.6 - 2.0 Overlock stitch width Left needle: 5 - 7 mm Right needle: 3 - 5 mm Coverstitch: 3 - 6 mm Presser foot rise 4.5 mm Needles system ELx705 size: #14/90, #12/80... - Page 40 www.pfaff.com...
Need help?
Do you have a question about the Coverlock 3.0 and is the answer not in the manual?
Questions and answers