Table of Contents
Advertisement
Quick Links
Advertisement
Table of Contents

Related Manuals for Details Adjustables 7

Summary of Contents for Details Adjustables 7
- Page 1 7 / 8 / 9...
- Page 2 HEIGHT ADJUSTMENT CONTROLLERS Flush-Mount Activation Buttons OPERATING THE CONTROLLER The flush-mount activation has two buttons for user control. • Press and hold either the Raise Lower buttons to reach the desired height. • As a safety feature, the user must continuously hold down the button in order for the table to move.
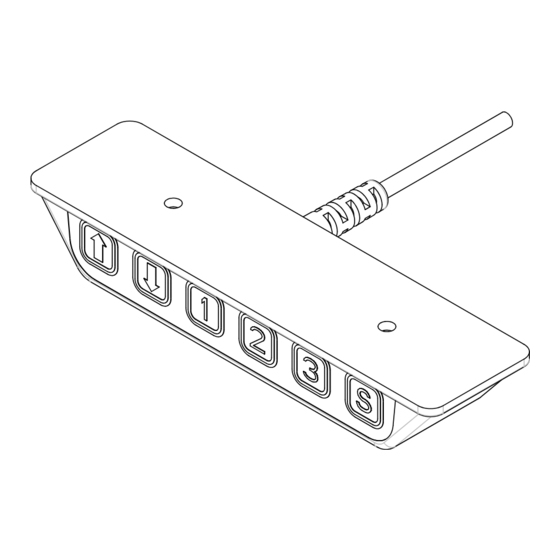
- Page 3 HEIGHT ADJUSTMENT CONTROLLERS 3- Pre-Set Programmable with Digital Display OPERATING THE CONTROLLER • Press and hold either the to reach the desired height. Down arrow The digital controller will display the current height of the table. • To switch to a stored height in memory, use the three pre-set buttons. Press the numbered button that has the pre-set height stored into memory once.
- Page 4 CABLE MANAGEMENT When installing equipment, either on the worksurface or below, be sure that the connecting cables are free of obstruction. A trough is provided to manage excess base controller wires and can be found on the underside of the worksurface. Use this trough to minimize possible entanglements.
- Page 5 TROUBLE SHOOTING If you are having trouble with your table, try the simple steps outlined below. If problems persist, please refer to the Series 7/8 or Series 9 Troubleshooting Guide. POWER-SAVING CONTROL BOX: • The Control Box automatically powers down into ‘Standby’ mode after approximately 10 seconds of inactivity.
- Page 6 Để tải xuống tài liệu này bằng tiếng Việt, hãy vào steelcase.com/series7/userguide/vn For further information, please visit steelcase.com/details or call 888.783.3522. P.O. Box 1967 / CD-5E / Grand Rapids / MI 49501-1967 9/14 ©2014 Steelcase Inc. All rights reserved. All specifications subject to change without notice.
Need help?
Do you have a question about the Adjustables 7 and is the answer not in the manual?
Questions and answers