
Related Manuals for Sylvania SCR1986BT


Summary of Contents for Sylvania SCR1986BT
- Page 1 MODEL NO. SCR1986BT BLUETOOTH CLOCK RADIO INSTRUCTION MANUAL PLEASE READ BEFORE OPERATING THIS EQUIPMENT...
- Page 2 Warnings and Precautions TO PREVENT FIRE OR SHOCK HAZARDS, DO NOT EXPOSE THIS UNIT TO RAIN OR MOISTURE. This symbol, located on back or bottom of the unit, is Do not mix old and new batteries. intended to alert the user to the presence of uninsulated Do not mix alkaline, standard (carbon-zinc), or “dangerous voltage”...
- Page 3 Important Safety Instructions 1. Read Instructions - All the safety and feature. If you are unable to insert the plug receptacles as this can result in a risk of fire or operating instruction should be read before the fully into the outlet, try reversing the plug. If electric shock.
-
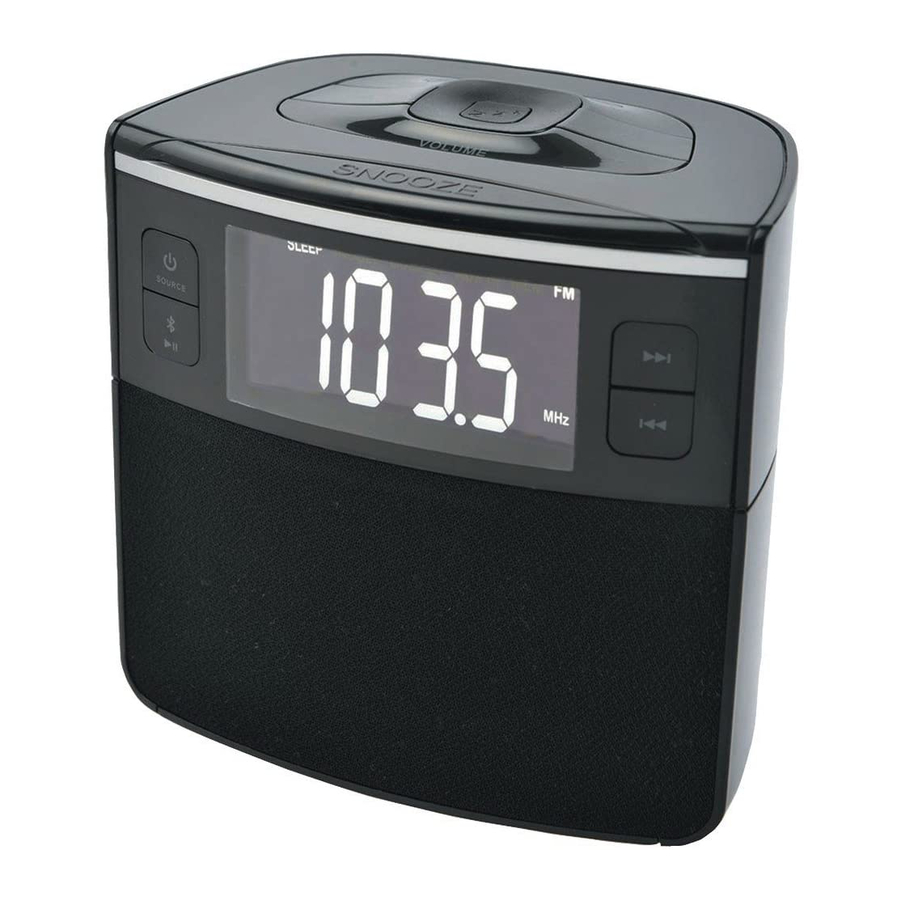
Page 4: Location Of Controls
LOCATION OF CONTROLS DIMMER USB CHARGER... -
Page 5: Power Source
LOCATION OF CONTROLS 1. POWER / SOURCE BUTTON 2. PAIR BLUETOOTH / PLAY / PAUSE BUTTON 3. SKIP / TUNE FORWARD BUTTON 4. SKIP / TUNE BACKWARD BUTTON 5. DIMMER BUTTON 6. ALARM ONE BUTTON 7. VOLUME DOWN BUTTON 8. SLEEP BUTTON 9. -
Page 6: Setting The Clock/Sleep Timer
CLOCK AND SLEEP Setting the Clock 1. With the power off, press and hold the MEMORY/CLOCK BUTTON. Press the SKIP/TUNE BUTTON to select 12HR or 24HR mode. 2. Press the SKIP/TUNE BUTTON to adjust the hour. 3. Press the MEMORY/CLOCK BUTTON again to adjust the minutes. The minutes on the display will begin flashing. -
Page 7: Radio
When pairing remain within 3 feet of the unit. 4. Using the native controls on your Bluetooth device, select the SCR1986BT in your Bluetooth settings to pair. 5. If your device requrests a password, enter the default password 0000. -
Page 8: Usb Charge
Playing Audio through Bluetooth 1. After successfully pairing to a device, use the native controls on the connected Bluetooth device to select a track 2. To play or pause the selected track, use the native controls on the connected Bluetooth device, or the PAIR BLUETOOTH / PLAY / PAUSE BUTTON on the unit. 3. -
Page 9: Limited Product Warranty
LIMITED PRODUCT WARRANTY This quality product is warranted to be free from manufacturer’s defects in material and workman-ship, provided that the unit is used under the normal operating conditions intended by the manufacturer. Should you have any problem with this product, please and it is highly recommended to visit our website www.curtisint.com before you take any other steps as we have additional copies of instruction manuals, operating manuals and trouble shooting tips on our website which gives you the answer on most of the...