Intova ConneX User Manual
Waterproof hd video camera with hardwire port
Hide thumbs
Also See for ConneX:
- Quick start manual (2 pages) ,
- Quick start manual (2 pages) ,
- Quick start manual (2 pages)

Related Manuals for Intova ConneX


Summary of Contents for Intova ConneX
- Page 1 Born in Hawaii – Built for the World ConneX Waterproof HD Video Camera with Hardwire Port User’s Manual...
-
Page 2: Table Of Contents
Table of Contents: Preface……………………………..………………………………………….2 Computer requirements for 1080P HD video …………..…………………4 Getting to know your camera ………………...…………...………………..5 Getting Started……………………………..…………………………………5 Using ConneX……………………………………………………………….7 Basic Operations of ConneX camera…………………………………….8 2.4G remote operations……………………………………………………9 Camera Settings………………………..…………………………………….9 Video Menu………………………...………...……………………………….9 Photo Menu………………………….……………………………………12 Setting Menu…………………………………………….………………..14 View Photos or Playback Videos……………………….…………………15 Deleting Files………………………………………………………………..16... -
Page 3: Preface
VGA (composite) format and provides live video output and 12 volt DC power input. The system is compatible with many Marine Electronics monitors or Intova’s 7” water resistant 12 volt DC monitor. A 2.4G remote is included for surface control of camera. NOTE: The remote does not function below water and is only waterproof to 6 feet. -
Page 4: Fcc Statement
Consult the dealer or an experienced radio/TV technician for help. Changes or modifications not expressly approved by the party responsible for compliance could void the user's authority to operate the equipment. Product Name: ConneX Camera Model Name: ConneX FCC ID: 2AE2B-ConneX... -
Page 5: Computer Requirements For 1080P Hd Video
Important notice: Use only with approved mount systems that will not put pulling pressure directly on cable connector. Improper pulling on cable/connector can damage connector and is not covered by warranty. WARNING: Do not attempt to take apart the camera-there are high voltage parts and dangerous electric shock can occur. -
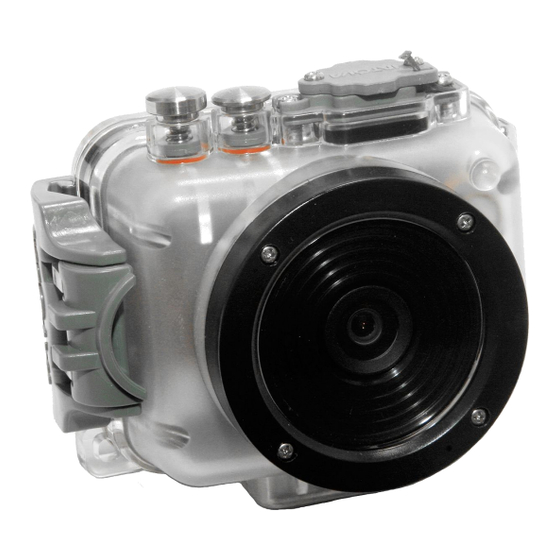
Page 6: Getting To Know Your Camera
GETTING TO KNOW YOUR CAMERA (13) Cable port cover (7) Recording (1) POWER (2) SHUTTER indicator LED (8) UP, (3) LED ZOOM out, LCD icons off, LCD off (4) LOCK (9) DOWN, ZOOM in, (12) MENU Front LED off/on (5) Wrist strap (11) MODE (10) OK (6) Tripod mount... - Page 7 LCD screen. Push down until card clicks into place. To remove, press down on inserted card to click and then release. ConneX uses Micro SD card up to 32 GB. For HD video, speed class 10 is required.
-
Page 8: Using Connex
USING CONNEX Insert Micro SD memory card (class 10 required for HD video) before turning on. The camera cannot record video or take photos without a properly inserted memory card. To turn camera on, press and hold power ON/OFF button for 2 seconds and then release (if camera is in... -
Page 9: Basic Operations Of Connex Camera
Date/Time stamp on Exposure value Time Date Photos remaining Basic Operations of ConneX camera BUTTON BASIC OPERATION PROCEDURES POWER Press and hold for 2 seconds and release button to turn on or turn off camera. Press “SHUTTER” button to start and stop video recording or to take a photo. -
Page 10: 2.4G Remote Operations
2.4G REMOTE OPERATIONS Using 2.4G remote 1) To start and stop video recording, press the video record button 2) To take a photo, press the photo button. 3) To turn camera off, long press (about 3 seconds) the Power OFF button. 4) To replace batteries, please unscrew back cover and remove spent batteries and replace with two fresh CR2016, 3V batteries. - Page 11 2) RESOLUTION: Setting sub-menu choices are explained in chart below. RESOLUTION NTSC/PAL fps DESCRIPTION 1080P30 30/25 Highest resolution 16:9 HD video @ 1920x1080 pixels. 30/25 frames per second rate for both action and when mounted on stable object. 720P60 60/50 High resolution 16:9 HD video @ 1280x720 pixels.
- Page 12 20’-50’/ 6 M-15 M in salt water. Below 50’/15 M, it is recommended to deactivate DIVING mode and use a physical red filter such as Intova IFRED SP1. 10) FLICKER: This setting allows the camera to be adjusted to AUTO, 60Hz or 50Hz to prevent video flickering caused by fluorescent lights.
-
Page 13: Photo Menu
15) EXPOSURE VALUE: This setting adjusts the brightness or darkness of the video/photo between ±2 f stops. Setting to positive values will brighten imagery, while negative values will darken imagery. 16) AF MODE: This setting selects the general area in a scene that the cameras uses when calculating image exposure. - Page 14 20’-50’/ 6 M-15 M in salt water. Below 50’/15 M, it is recommended to deactivate DIVING mode and use a physical red filter such as Intova IFRED SP1. 9) FLICKER: This setting allows the camera to be adjusted to AUTO, 60Hz or 50Hz to prevent video flickering caused by fluorescent lights.
-
Page 15: Setting Menu
VGA cable or HD if using an HD cable. Camera LCD will turn off and show live view on a remote monitor connected to the cable. Select LCD in CONNEX MODE or turn camera OFF and ON to return to live view on camera’s built-in LCD. -
Page 16: View Photos Or Playback Videos
3) TIME SETUP: This setting allows current date and time to be set. With sub-menu item highlighted, press OK button to enter setting. Press UP or DOWN button to change number and press MENU button to scroll to next. When done, press OK button to confirm and go back to sub-menu. 4) AUTO POWER OFF: This setting turns off camera after a specific time period when 30 sec, 1 min or 3 minutes is selected. -
Page 17: Deleting Files
Disconnect incoming power when attaching or removing ConneX waterproof cable. Multi Bracket: Weighted camera mount allows ConneX to be mounted with 2 video lights (Model AVL) or 4 cameras. Model# CONNEX WC MT. Bare wire adapter (12V DC): 5.5mm (OD)/2.1mm (ID) power connector plug with bare wires to 12V DC power source. - Page 18 Cigarette Charger (12V DC): 5.5mm (OD)/2.1mm (ID) power connector plug to cigarette lighter adapter plug for 12V DC. Model# CONNEX CIG CHGR. WARNING: DANGER OF ELECTRIC SHOCK. Disconnect incoming power when attaching or removing cigarette lighter adapter plug. Monitor: Connect to waterproof cable via RCA plug(s) to view live video feed.
-
Page 19: Connex Camera Live View Setup
CIG CHGR (optional accessories). 3. Connect the ConneX cable’s RCA type male video out plug to the RCA type female video in plug of a VGA monitor such as the ConneX water-resistant 7” monitor (optional accessory) or other compatible marine VGA monitor. -
Page 20: Specifications
(3) damage occurring during shipment; (4) damage caused by repair or service performed by persons not authorized by Intova; (5) products on which the serial number has been altered, defaced or removed; (6) products not purchased from an Authorized Intova Dealer. To obtain warranty service, contact Intova for a Return Authorization number. - Page 21 © 2015 Intova, LLC • All Rights Reserved 1100 Alakea St., 18th Floor Honolulu, Hawaii 96813 USA For questions or customer service please call: (808) 837-0074 or (877) 837-0074 toll free USA only www.intova.net rev 6-15-15...
Need help?
Do you have a question about the ConneX and is the answer not in the manual?
Questions and answers