Table of Contents
Advertisement
Quick Links
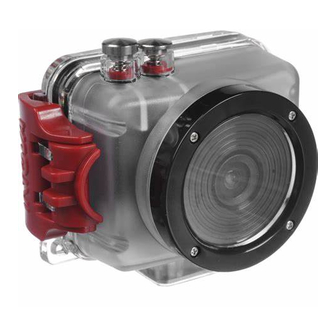
Sport HD II
Xtreme Imaging
Table of Contents:
Preface...............................................................1
Main features .........................................................1
Computer operating system requirements......................1
Prestart Guide..................................................3
Basic installation....................................................3
Video mode...........................................................6
Settings.........................................................13
Photo mode..........................................................17
Settings.........................................................24
Playback mode.....................................................28
Specifications......................................................29
Notes: This manual contains important safety and operating information. Please read all
the information carefully before you use the device to avoid accidents and keep it for
future reference.
0
Advertisement
Table of Contents

Subscribe to Our Youtube Channel
Related Manuals for Intova Sport HD II


Summary of Contents for Intova Sport HD II
-
Page 1: Table Of Contents
Sport HD II Xtreme Imaging Table of Contents: Preface………………………………………………………1 Main features ……………………………………………..1 Computer operating system requirements..……………..1 Prestart Guide…………………………………...3 Basic installation…………………………………………….3 Video mode………………………………………………..6 Settings…………………………………………………13 Photo mode...……………………………………………..17 Settings…………………………………………………24 Playback mode..…………………………………………...28 Specifications………………………………………………29 Notes: This manual contains important safety and operating information. Please read all the information carefully before you use the device to avoid accidents and keep it for future reference. -
Page 2: Preface
SP1 N include: 1080P Full HD, built in LCD screen, full menu control buttons for easy operation, a rugged, ergonomic and compact outer casing that is waterproof to 60 meters/200 feet and floats Sport HD II will help you enjoy high quality video and photos for all your recreational activities... - Page 3 • If camera becomes hot during use, turn off the power immediately • For storage, remove the memory card and keep camera in a cool, dry place with housing door slightly open • SPI floats Intova flotation strap (optional accessory) is recommended as extra precaution for water use...
-
Page 4: Prestart Guide
Product Structure: Basic: Open the housing: Follow the indicated directions in the figure below to open the housing Sometimes a vacuum seal may occur, use thumb press system to open... - Page 5 Insert memory card: Follow the indicated direction in the figure below to insert Micro SD memory card After the card is inserted, the icon will be shown on the LCD * Please turn off the power when inserting or removing the memory card. Notice:...
-
Page 6: Basic Operations
Basic operations: Video Mode- Idle Recording Video Picture Mode FUNCTIONS: Video Photo Playback POWER: Short Press “POWER” button to turn on, and long press “POWER” button to turn off MODE SWITCH: Press the “MODE” button to switch between VIDEO/PHOTO VIDEO/CAMERA: Press “SHUTTER”... -
Page 7: Video Mode
Video mode: Press “Shutter” button to begin recording and The default setting of SP1 N is video mode press again to stop recording Digital zoom: Use the “Down” button to zoom in on the scene while selecting targets The zoom factor will be displayed on the LCD, and can be increased to a maximum of 4X (NOTE: resolution drops as image is magnified) * Zoom function cannot be used in 1080P mode. - Page 8 : Settings In the Video mode, press “MENU Button”, and use the “UP / DOWN” buttons to select the option of the desired adjustment setting The following screens show the adjustable settings in the Video mode They include QUALITY / RESOLUTION / MOTION DETECTION / VIDEO DURATION/ LOOP VIDEO / UPSIDE DOWN / MUTE / IMAGE EFFECT / SCENE MODE / FLICKER / CONTRAST / SHARPNESS / ISO / WHITE BALANCE / EXPOSURE VALUE / AF MODE...
- Page 9 1. VIDEO *QUALITY: This option adjusts the quality of the picture between normal and super fine Use the “UP / DOWN” buttons to select “QUALITY”, and press “OK” button to enter into the setting There are SUPER FINE/FINE/NORMAL/ After selection, press “OK button” to confirm, then press “MENU”...
- Page 10 *VIDEO DURATION: This option adjusts the duration of each video file recorded Use the “UP / DOWN” buttons to select “VIDEO DURATION”, and press “OK” button to enter the setting There are ANY DURATION / 3MIN / 5MIN / 10MIN / 15MIN After selection, press “OK button”...
- Page 11 *MUTE: In the setting list, use the “UP / DOWN” buttons to select “MUTE”, and press “OK button” to enter into the setting There are YES and NO to turn on / off audio recording After selection, press “OK button” to confirm, then press “MENU” button twice to return to main screen * IMAGE EFFECT: In the setting list, use the “UP / DOWN”...
- Page 12 *FLICKER: This option adjusts the video between 60 Hz and 50 Hz use the “UP / DOWN” buttons to select “Flicker”, and press “OK” button to enter into the setting There are 50Hz/60Hz After selection, press “OK button” to confirm, then press “MENU” button twice to return to main screen *CONTRAST: This option adjusts the contrast of the video recording In the setting list,...
- Page 13 *ISO: This option adjusts the sensitivity of the sensor The higher the value the brighter and In the setting list, use the “UP / DOWN” buttons to select “ISO”, and grainier the video press “OK” button to enter into the setting There are AUTO/100/200/400/800 After selection, press “OK button”...
-
Page 14: Settings
*AF MODE: use the “UP / DOWN” buttons to select “AF MODE”, and press “OK” button to enter into the setting There are CENTER/AVERAGE/SPOT After selection, press “OK button” to confirm, then press “MENU” button twice to return to main screen SETTINGS: In the Video mode, press “MENU”... - Page 15 *TIME SETUP: This option lets you set up the time and date In the setting list, use the “UP / DOWN” buttons to select “TIME SETUP”, and press “OK” button to enter into the setting Use UP/DOWN buttons to change, and “MENU” button to go to next selection Press “OK”...
- Page 16 *RESET SYSTEM SETTINGS: This option resets all options back to default In the setting list, use the “UP / DOWN” buttons to select “RESET SYSTEM SETTINGS”, and press “OK” button to enter into the setting There are YES and NO After selection, press “OK button”...
- Page 17 *TV SYSTEM: use the UP / DOWN buttons to select “TV SYSTEM”, and press “OK” button to enter into the setting There are NTSC and PAL After selection, press “OK button” to confirm, then press “MENU” button twice to return to main screen *STAMP: This option turns on or off the time stamp while recording the video In the setting list, use the “UP / DOWN”...
-
Page 18: Photo Mode
*FIRMWARE VERSION: This option checks the firmware version of the camera Photo mode: Press the MODE button to enter the Photo mode Adjust the SP1 to take photos of the objects (viewed from the LCD), press the Shutter button to take photos Digital zoom:... - Page 19 Settings: In the Photo mode, press the “MENU Button”, and use the UP / DOWN buttons to select the option of the desired adjustment setting The following icons represent all of the functional settings in the Photo mode They include QUALITY / SIZE / SELF CAPTURE / CONTINUOUS / TIME LAPSE / UPSIDE DOWN / IMAGE EFFECT / SCENE MODE / FLICKER / CONTRAST / SHARPNESS / ISO / WHITE BALANCE / EXPOSURE VALUE / AF MODE...
- Page 20 Use the “UP / *QUALITY: This option adjusts the compression of the JPEG picture DOWN” buttons to select “QUALITY”, and press “OK” button to enter into the setting There are SUPER FINE/FINE/NORMAL/ After selection, press “OK button” to confirm, then press “MENU” button twice to return to main screen *SIZE: This option adjusts the resolution of the picture between 3-12 megapixel Use the “UP / DOWN”...
- Page 21 *CONTINUOUS: use the “UP / DOWN” buttons to select “CONTINUOUS”, and press “OK button” ” to enter into the setting There are OFF / 3 PIC / 5 PIC / 10 PIC Press “OK button” to confirm, then press “MENU” button twice to return to main screen *TIME LAPSE: use the “UP / DOWN”...
- Page 22 *IMAGE EFFECT: use the UP / DOWN buttons to select “DIGITAL EFFECT”, and press “OK button” to enter into the setting There are OFF/ VIVID / BLACK-WHITE / After selection, press “OK button” to confirm, then press NEGATIVE / SEPIA / ART MENU button twice to return to main screen *SCENE MODE: use the UP / DOWN buttons to select “SCENE MODE”, and press “OK button”...
- Page 23 * CONTRAST: This option adjusts the contrast of the picture use the UP / DOWN buttons to select “CONTRAST”, and press “OK button” to enter into the setting There are STANDARD / ENHANCE / SOFT / After selection, press “OK button” to confirm, then press MENU button twice to return to main screen *SHARPNESS: This option adjusts the sharpness of the picture use the UP / DOWN buttons to select “SHARPNESS”, and press “OK button”...
- Page 24 Use the “UP / *WHITE BALANCE: This option adjusts the white balance of the picture DOWN” buttons to select “White Balance”, and press “OK” button to enter into the setting There are AUTO / SUNNY/ CLOUDY / FLUORESCENT / INCANDESCENT / MANUAL After selection, press “OK”...
-
Page 25: Settings
SETTINGS: use the UP / DOWN buttons to select “setting”, and press “OK” button to enter into the setting *LCD OFF: This option adjusts the time it takes for the LCD to automatically turn off the setting list, use the “UP / DOWN” buttons to select “LCD OFF”, and press “OK” button After selection, press “OK to enter into the setting There are OFF/30 sec/1 min/3 min... - Page 26 *AUTO POWER OFF: This option adjusts the time it takes for the DV to automatically In the setting list, use the “UP / DOWN” buttons to select “AUTO POWER OFF”, turn off and press “OK” button to enter into the setting There are OFF / 30 sec / 1min / 3 min After selection, press “OK button”...
- Page 27 *FORMAT: This option formats the Micro SD card, thereby erasing all data In the setting list, use the “UP / DOWN” buttons to select “FORMAT”, and press “OK” button to enter After selection, press “OK button” to confirm, into the setting There are YES and NO then press “MENU”...
- Page 28 *STAMP: This option turns on or off the time stamp when taking pictures In the setting list, use the “UP / DOWN” buttons to select “STAMP”, and press “OK” button to enter into There are DATE/TIME or OFF After selection, press “OK button” to confirm, the setting then press “MENU”...
-
Page 29: Playback Mode
Playback mode: *VIDEO PLAYBACK: Under video mode, press “OK” button to enter into playback mode Use “UP/DOWN” buttons to scroll and press “OK” button to select the video to be viewed Press “OK” button Also, press “OK” button once again to stop the video, or press “DOWN” button to play it to fast forward and “UP”... -
Page 30: Specifications
Specifications: Effective Sensor 1/ 2.5 5.0MP CMOS SENSOR LCD Screen TFT-LCD 480*240 12M 4000*3000 about 1000pcs /4GB Photo Resolution 3200*2400 about 1300pcs/4GB & Possible number of 2592*1944 about 1800pcs/4GB shots 2048*1536 about 3100pcs/4GB Mode of QUALITY: QUALITY QUALITY:Normal :Fine Video Super Fine 1920*1080P About 50... - Page 31 NOTE: As a result of continual improvements, the design and specifications of the product within may differ slightly to the unit illustrated on the packaging. © 2014 Intova • All Rights Reserved 1100 Alakea St., 18th Floor Honolulu, Hawaii 96813 USA...
Need help?
Do you have a question about the Sport HD II and is the answer not in the manual?
Questions and answers