Marantz ST7001 User Manual
Marantz st7001 fm / am tuner user guide
Hide thumbs
Also See for ST7001:
- Service manual (40 pages) ,
- User manual (35 pages) ,
- Specification sheet (14 pages)
Table of Contents
Advertisement
Advertisement
Table of Contents

Related Manuals for Marantz ST7001


Summary of Contents for Marantz ST7001
- Page 1 Model ST7001 User Guide FM / AM Tuner...
- Page 2 CAUTION: TO REDUCE THE RISK OF ELECTRIC SHOCK, REFER SERVICING TO QUALIFIED SERVICE PERSONNEL WARNING TO REDUCE THE RISK OF FIRE OR ELECTRIC SHOCK, DO NOT EXPOSE THIS PRODUCT TO RAIN OR MOISTURE. CAUTION: BLADE OF PLUG TO WIDE SLOT, FULLY INSERT. ATTENTION: INTRODUIRE LA LAME LA PLUS LARGE DE LA FICHE DANS LA BORNE CORRESPONDANTE DE LA PRISE ET POUSSER...
-
Page 3: Important Safety Instructions
IMPORTANT SAFETY This product was designed and manufactured to meet strict quality and safety standards. There are, however, some installation and operation precautions which you should be particularly aware of. 1. Read Instructions – All the safety and operating instructions should be read before the product is operated. - Page 4 20. Servicing – Do not attempt to service this product yourself as opening or removing covers may expose you to dangerous voltage or other hazards. Refer all servicing to qualified service personnel. 21. Damage Requiring Service – Unplug this product from the wall outlet and refer servicing to qualified service personnel under the following conditions: a.
-
Page 5: Table Of Contents
CONTENTS FEATURES ...1 BEFORE USE ...2 PART NAMES AND FUNCTIONS ...4 FRONT PANEL ...4 REAR PANEL ...5 REMOTE CONTROL UNIT ...6 CONNECTIONS...8 CONNECTING THE ANTENNA TERMINALS ...8 CONNECTING THE AMPLIFIER ...9 OPERATION ...10 LISTENING TO FM/AM ...10 LISTENING TO XM SATELLITE RADIO ...14 SEARCH MODE ...17 OTHER OPERATION ...19 SETTING THE CLOCK ...19... -
Page 6: Before Use
This section must be read before any connection is made to the mains supply. 7 EQUIPMENT MAINS WORKING SETTING Your Marantz product has been prepared to comply with the household power and safety requirements that exist in your area. ST7001 can be powered by 120V AC only. -
Page 7: Loading Batteries
BEFORE USE 7 Loading batteries Before using the supplied remote control unit for the first time, load the batteries in the remote control unit. The batteries provided are used to verify the operations of the remote control unit only. Take hold of the tab on the battery cover which is found on the back side of the remote control unit, and pull it up. -
Page 8: Part Names And Functions
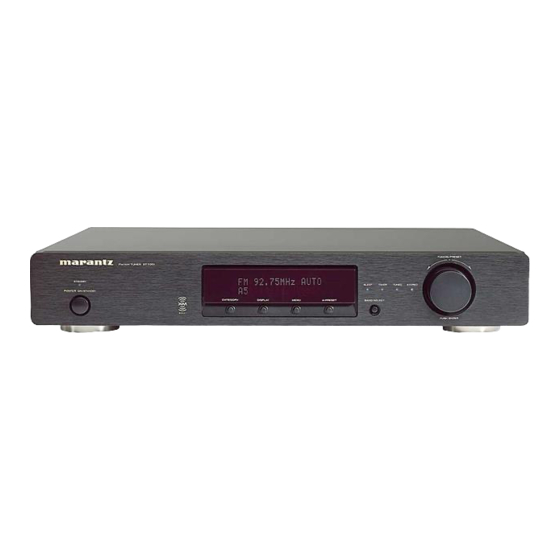
PART NAMES AND FUNCTIONS FRONT PANEL For details on the functions of these parts, refer to the pages given in parenthesis. FM/AM TUNER ST7001 STANDBY STANDBY POWER POWER ON/STANDBY ON/STANDBY q Power ON/STANDBY switch This is used to turn the unit’s power ON and STANDBY. -
Page 9: Rear Panel
The audio signals are output from these connectors. e RS-232C The RS-232C port is to be used in conjunction with an external controller to control the operation of the ST7001 by using an external device. f FLASHER IN (Flasher input terminal) This terminal is to control the unit from another zone. -
Page 10: Remote Control Unit
PART NAMES AND FUNCTIONS REMOTE CONTROL UNIT For details on the functions of these parts, refer to the pages ☞ given in parenthesis ( page 10 ~ 22). STANDBY DIMMER DISPLAY TUNING BAND MENU A-PRESET SHIFT /A-TUNE CHANNEL/ CONTROL T-MODE SLEEP TIMER MEMO... -
Page 11: Remote Control Code Setting
PART NAMES AND FUNCTIONS 7 Remote control code setting The remote control unit contains 3 sets of remote control codes, and it can be used to control up to 3 tuners in one location. To control a second or third tuner, select the remote control code as explained below. -
Page 12: Connections
(Supplied) Ground ANTENNA ANTENNA ANALOG OUT MODEL MODEL NO. NO. ST7001 GND AM RS-232C 7 Connecting the antenna wire to the antenna adaptor Loosen the screws and attach the wire terminals, then tighten the screws with a screwdriver. Bend in the reverse direction. -
Page 13: Connecting The Amplifier
When making the connections, insert the plugs securely into the connectors. Failure to insert the plugs securely may result in noise. ANTENNA MODEL NO. MODEL NO. ST7001 FM(75Ω) GND AM (White) Audio connecting cord (supplied) (Red) -
Page 14: Operation
OPERATION LISTENING TO FM/AM 7 FM Auto preset memory Press the POWER ON/STANDBY switch q or ON button , to turn on the power. Watching the display, press the BAND SELECT button !0 or BAND button c to select the FM band. Press the A-PRESET button i or A-PRESET/A-TUNE button b. -
Page 15: Manual Tuning (Fm/Am)
Either turn the TUNING/PRESET knob !4 or press the TUNING button ⁄1 to tune in the desired station. • The frequency changes continuously when the TUNING button ⁄1 on the remote control unit is held in. FM/AM TUNER ST7001 FM/AM TUNER ST7001 STANDBY STANDBY... -
Page 16: Recalling Preset Stations (Fm/Am)
OPERATION 7 Preset stations (FM/AM) Use the “Auto tuning” or “Manual tuning” operation to tune in the station to be preset in the memory. Press the MENU button u or ⁄2 to select menu. Either turn the TUNING/PRESET knob !4 or press the CHANNEL/CONTROL button ⁄4 to select “Memory”. -
Page 17: Registering Station Names
Use the procedure described at “Auto tuning”, “Manual tuning” or “Recalling preset stations” to tune in the desired frequency. Example: To register “MARANTZ” as the FM station name at preset channel “A2”. Press the MENU button u or ⁄2 to select menu. -
Page 18: Listening To Xm Satellite Radio
When making connections, also refer to the operating instructions of the XM Connect-and-Play antenna. ANTENNA MODEL NO. MODEL NO. ST7001 FM(75Ω) GND AM Note • Keep the power supply cord unplugged until the XM Connect-and-Play antenna connection have been completed. - Page 19 XM Connect-and-Play antenna may not be connected to the XM terminal on the rear panel of this unit properly. • You can not select channel “0” if the All channel search mode is not selected. FM/AM TUNER ST7001 FM/AM TUNER ST7001 STANDBY STANDBY...
-
Page 20: Front Panel Display
16 characters, the information scrolls from right to left. • If the information contains a character that cannot be recognized by that unit, the character will be displayed with “ ” (space). FM/AM TUNER ST7001 FM/AM TUNER ST7001 STANDBY STANDBY POWER... -
Page 21: Search Mode
OPERATION SEARCH MODE You can search for the channel you want to listen to using one of three search modes. You can also enter the number directly to select the desired channel (For details, see “Direct Number Access mode” on page 18). 7 All Channel search mode Press the MENU u or ⁄2 button to select menu. - Page 22 • To preset other channels, repeat steps 2 to 6. • A total of 100 XM Satelite Radio Channels can be preset — 10 channels (channels 1 to 10) in each of groups A to J. FM/AM TUNER ST7001 FM/AM TUNER ST7001 STANDBY STANDBY...
-
Page 23: Other Operation
You must reset the clock. 7 Displaying present time A present time can be displayed for 5 seconds by holding down the TIMER button ⁄7 more than 3 seconds. FM/AM TUNER ST7001 FM/AM TUNER ST7001 STANDBY STANDBY... -
Page 24: Timer Programs
OTHER OPERATION TIMER PROGRAMS 7 About the Timer Programs • This unit has three timer programs so that you can turn it on and off automatically at certain times and on certain days of the week. • Timer programs can be set for single operation (Once) or everyweek operation (Everyweek) or everyday operation (Everyday) or the days of the week operation (Weekday). - Page 25 Press the TUNING/PRESET knob !4 or ENTER button v to turn off the timer program. Note • To turn a timer program back on again, repeat this procedure and select “TIMER PROGRAM x ON”. FM/AM TUNER ST7001 FM/AM TUNER ST7001 press STANDBY STANDBY...
-
Page 26: Sleep Timer
• If step 3 does not work,start over from step 1. • If the microprocessor has been initialized all function settings are reset to the default values (the values set upon shipment from the factory). FM/AM TUNER ST7001 FM/AM TUNER ST7001 STANDBY STANDBY... -
Page 27: Troubleshooting
TROUBLESHOOTING If a problem should arise, first check the following. 1. Are the connections correct? 2. Have you operated the receiver according to the operating instructions? 3. Are the speakers and other components operating properly? If this unit is not operating properly, check the items listed in the table below. Should the problem persist, there may be a malfunction. -
Page 28: Specifications & Dimensional Drawings
AM loop antenna ...1 FM indoor antenna ...1 FM antenna adaptor...1 Remote Control Connecting Cord ...1 User Guide ...1 Warranty Card for USA ...1 Warranty Card for CANADA...1 TUNING/PRESET TUNING/PRESET FM/AM TUNER ST7001 FM/AM TUNER ST7001 STANDBY STANDBY SLEEP SLEEP TIMER TIMER TUNED... -
Page 29: Others
In the event of difficulty, refer to your dealer or write directly to the nearest location to you that is listed on the Marantz Authorized Service Station list. If writing, please include the model and serial number of the equipment together with a full description of what you think is abnormal about the equipment's behaviour. - Page 30 You can find your nearest authorized distributor or dealer on our website. U.S.A. Marantz America, Inc. EUROPE Marantz Europe B.V. Printed in China 1100 Maplewood Drive, Itasca, IL 60143, U.S.A. P.O. Box 8744, 5605 LS Eindhoven, The Netherlands is a registered trademark.
Need help?
Do you have a question about the ST7001 and is the answer not in the manual?
Questions and answers