Marantz CC4300 User Manual
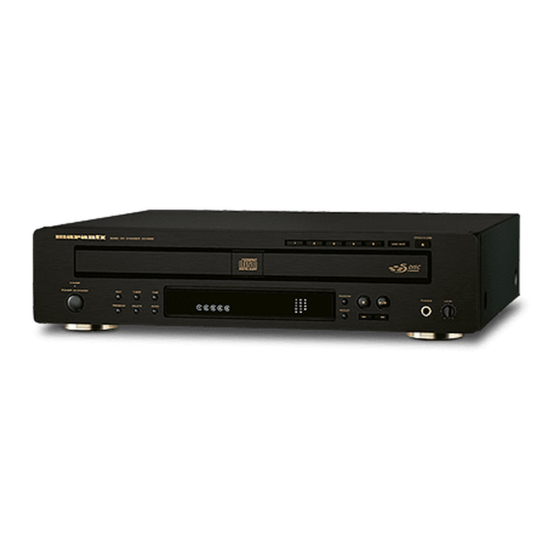
5 disc cd changer
Hide thumbs
Also See for CC4300:
- Service manual (26 pages) ,
- Specification sheet (1 page) ,
- Full line catalog (39 pages)
Table of Contents
Advertisement
Advertisement
Table of Contents

Related Manuals for Marantz CC4300


Summary of Contents for Marantz CC4300
- Page 1 Model CC4300 User Guide 5 Disc CD Changer...
-
Page 2: Note To Catv System Installer
CAUTION: TO REDUCE THE RISK OF ELECTRIC SHOCK, REFER SERVICING TO QUALIFIED SERVICE PERSONNEL. WARNING TO REDUCE THE RISK OF FIRE OR ELECTRIC SHOCK, DO NOT EXPOSE THIS APPLIANCE TO RAIN OR MOISTURE. CAUTION: TO PREVENT ELECTRIC SHOCK, MATCH WIDE BLADE OF PLUG TO WIDE SLOT, FULLY INSERT. ATTENTION: POUR ÉVITER LES CHOCS ÉLECTRIQUES, INTRODUIRE LA LAME LA PLUS LARGE DE LA FICHE DANS LA BORNE CORRESPON DANTE DE LA PRISE ET POUSSER JUSQU’AU FOND. -
Page 3: Important Safety Instructions
This product was designed and manufactured to meet strict quality and safety standards. There are, however, some installation and operation precautions which you should be particularly aware of. 1. Read Instructions – All the safety and operating instructions should be read before the product is operated. 2. - Page 4 lightning storm, or when it is left unattended and unused for long periods of time, unplug it from the wall outlet and disconnect the antenna or cable system. This will prevent damage to the product due to lightning and power-line surges.
-
Page 5: Table Of Contents
Contents General Information ...2 Unpacking ...2 For Your Safety...2 Compact Discs...3 Placement ...3 Functional Overview ...4 Front Panel Controls ...4 Rear Panel Controls...6 Remote Control Unit (RC4300CC)...7 Connections...9 Connecting other Audio Equipment ...9 Connecting the Remote Control...10 Operations ...11 Playing CDs ...11 Changing Discs during Play...12 Skip and Search Play...12 Playing Tracks in Random Sequence (Random Play)...13... -
Page 6: General Information
Unlike conventional turntables for playing analog discs, the CC4300 reads the information recorded on the disc from underneath without contacting it using a beam of laser light. Therefore, the performance of a compact disc will not degrade like conventional analog records. -
Page 7: Playing Cd-Rw Discs
❖ Playing CD-RW discs This unit can play back the CD-RW (ReWritable) discs as well as ordinary music CD and CD-R (Recordable) discs. • The CD-R and CD-RW discs should contain properly-recorded TOC information so that they can be played back. With the CD recorder system, writing the TOC information in a disc is referred to as finalizing the disc. -
Page 8: Functional Overview
Functional Overview Front Panel Controls 5DISC CD CHANGER CC4300 STANDBY EDIT T.SIZE POWER ON/STANDBY PROGRAM DELETE INTRO q q POWER ON/STANDBY button Press this switch to turn the power on and press again to turn to stand by. w w STANDBY indicator Lights up red when the CD player is in Stand-by mode. -
Page 9: Fluorescent Display
§ ! ! 8 8 (Forward skip/Search) button • Press this button to play from the beginning of a next track. • Press and hold down this button to search for a specific passage in fast forward. ! ! 9 9 (Play/Pause) button •... -
Page 10: Rear Panel Controls
For the D-BUS cable connection, use supplied remote control cable or a commercially available RCA-type pin lead. • By connecting this CD player to a Marantz auto reverse cassette deck (such as the SD4050), automatic recording from the CD player to the cassette deck can be carried out. -
Page 11: Remote Control Unit (Rc4300Cc)
Remote Control Unit (RC4300CC) DISC POWER REPEAT RANDOM PROGRAM DELETE INTRO EDIT T.SIZE DIMMER TIME REMOTE CONTROL UNIT RC4300CC q POWER button Press this button to turn the power on and press again to turn to stand by. w REPEAT button Press this button to play a track, a disc or all discs repeatedly. -
Page 12: Operation Of Remote Control Unit
1. Remote control The distance between the transmitter of the remote control unit and the IR SENSOR of the CC4300 should be less than about 5 meters. If the transmitter is pointed to a direction other than the IR SENSOR or if there is an obstacle between them, remote control may not be possible. -
Page 13: Connections
• Plug the optical digital cable in securely, as far as it will go. • Refer to the connecting diagram in the operating instructions of AMPLIFIER/RECEIVER. Connecting other Audio Equipment CC4300 RS232C RS232C REMOTE REMOTE... -
Page 14: Connecting The Remote Control
Connections Connecting the Remote Control CC4300 RS232C RS232C REMOTE REMOTE DIGITAL OUT DIGITAL OUT ANALOG OUT ANALOG OUT REMOTE CONTROL REMOTE CONTROL CONTROL CONTROL SELECTOR SELECTOR COAX. COAX. OPTICAL OPTICAL EXT. EXT. INT. INT. INT. EXT. REMOTE CONTROL Amplifier / Receiver... -
Page 15: Operations
Operations Playing CDs 1. Press the POWER ON/STANDBY button on the unit or the POWER button on the remote control to turn on the power. STANDBY POWER ON/STANDBY DISC • Each time the POWER ON/STANDBY (or POWER ) button is pressed, this unit is turned on or off. 2. -
Page 16: Changing Discs During Play
Operations Changing Discs during Play 1. Press the OPEN/CLOSE button on the unit to open the disc tray. OPEN/CLOSE 2. Change the desired discs. Disc tray • During playing the disc q, the discs e and r can be changed. •... -
Page 17: Playing Tracks In Random Sequence (Random Play)
Playing Tracks in Random Sequence (Random Play) ❖ 1 Disc Random Play • Press RANDOM button on the unit or the RANDOM button on the remote control to play tracks in random sequence. RANDOM PROGRAM DELETE • “RANDOM” indicator lights up. •... -
Page 18: Repeat Play
Operations Repeat Play ❖ Repeating a Single Track during Play • Press REPEAT button on the unit or the REPEAT button on the remote control after selecting the desired track. REPEAT DISC PROGRAM DELETE ❖ Repeating a Disc during Play •... - Page 19 3. Select the desired track. ∞ § Press buttons on the unit or the button or the NUMERIC buttons on the remote control. (Example) When selecting the track 4. EDIT T.SIZE DIMMER TIME REMOTE CONTROL UNIT RC4300CC PROG TRACK 4. Store the selected track in the memory. Press PROGRAM button on the unit or the PROGRAM button on the remote control.
- Page 20 Operations ❖ Rectifying Any Wrong Programmed Selection (Example) When the track 3, 5 and 7 of the disc 1 are programmed and you want to store the track 7 of the disc 3 instead of the track 5 of the disc 1. 1.
- Page 21 ❖ Clearing the Programmed Selections - To Clear One by One • Each time Stop/Clear button on the unit or the Stop/Clear button on the remote control is pressed in the program mode, the programmed selections are cleared one by one in the opposite sequence. PROGRAM DELETE EDIT...
-
Page 22: Editing For Recording
Operations Editing for Recording Note : • Up to 30 tracks for auto edit or 32 tracks for manual edit can be edited according to the tape length. • It is possible only on the current disc. Disc selector DISC SKIP •... - Page 23 ❖ Setting Up Manual Edit 1. In the stop mode, select the manual edit mode. Press EDIT button twice on the unit or EDIT button twice on the remote control. EDIT EDIT T.SIZE REMOTE CONTROL UNIT RC4300CC EDIT 2. Select the tape length as you do in “Making auto edit”...
- Page 24 Programmed Selections” on page 16 and 17. ❖ Start Edit Recording Before start editing, connect remote control input of Marantz cassette deck with remote control output of CC4300 by remote control cable. RANDOM Reverse mode switch may be set to any of one side (O), both sides (p) and continuous play (∏).
- Page 25 - Synchro recording with Marantz one-way cassette deck, or Marantz auto reverse cassette deck set to one side (O) mode. 1. After setting up Edit program automatically or manually, setup the cassette deck to rec pause state. 2. Press Play/Pause button of the unit to start A side program.
-
Page 26: Deleted Play
Operations Deleted Play When there are the undesired discs or tracks, you can delete up to 32 selections. ❖ Deleting the Undesired Discs or Tracks 1. In the stop mode, enter the delete mode. Press DELETE button on the unit or the DELETE button on the remote control. - Page 27 5. When deleting other tracks on that disc within 8 seconds after the above step 4, repeat the above steps 3 and 4 and when deleting the tracks on other discs, repeat the above steps 2, 3 and 4. 6. Start the deleted play. Press Play/Pause button on the unit or the Play button on the remote control.
-
Page 28: Selecting A Brightness Of The Display
Operations ❖ Recovering the Deleted Selections - To Recover One by One • Each time Stop/Clear button on the unit or the Stop/Clear button on the remote control is pressed in the delete mode, the deleted selections are recovered one by one in the opposite sequence. PROGRAM EDIT T.SIZE... -
Page 29: Selecting A Time Display
Selecting a Time Display • Each time TIME button is pressed during play, time display changes as follows: TIME EDIT T.SIZE DIMMER REMOTE CONTROL UNIT RC4300CC Elapsed playing time of the current track. TRACK INDEX Remaining playing time of the current track TRACK INDEX Remaining playing... -
Page 30: External Control (Serial Interface) Rs232C
Operations External Control (Serial Interface) RS232C The unit can receive external control signals by connecting a straight cable on the market to the D-sub 9 pin connector for RS232C external control. ❖ Pin Assignment of the Connector RS232C ❖ RS232C Physical Specification Cable Straight-type Connector... - Page 31 • Remote Control Unit (RC4300CC) RC-5 Code The unit can be controlled through its infrared IR sensor on the front panel when it receives remote control signals that supports RC-5 signals as shown in the table on the following. These remote control (RC-5) codes can also be used if sent through the RS232C port found on the rear panel of the unit.
-
Page 32: Troubleshooting
Troubleshooting If your unit should not perform as expected, consult the table below to see if the problem can be corrected before seeking help from your dealer or our service organization. Problem No power No play No sound Poor or distorted sound Sound skips Programming or deleting does not perform. -
Page 33: Specifications
Specifications SYSTEM ... Compact Disc Digital Audio TYPICAL AUDIO PERFORMANCES Number of channels ... 2 Frequency response ... 20~20,000 Hz ±0.5 dB Signal to noise ratio, A Wtd..105 dB Dynamic range ... 95 dB Total harmonic distortion, 1 kHz ... 0.005 % Wow and flutter ... - Page 34 Ehte 4, 90503 Haapsalu, Estonia ul.Cedomir Kantargiev 21a, Skopje, Former Yugoslavian Republic of Macedonija Uudenmaankatu 4-6, Helsinki SF-00120, Finland A division of Marantz Europe B.V., P.O. Box 301, 92 156 Suresnes Cedex, France Hakenbusch 3, 49078 Osnabrück, Germany 188, Hippocratous Street, 11471 Athens, Greece P.O.
Need help?
Do you have a question about the CC4300 and is the answer not in the manual?
Questions and answers