Table of Contents
Advertisement
Quick Links
Advertisement
Table of Contents

Related Manuals for D-Link DSL-6540U


Summary of Contents for D-Link DSL-6540U
- Page 1 DSL-6540U User Manual VER: 1.0...
-
Page 2: Table Of Contents
Contents Introduction ....................2 Application ..................... 2 Features ....................2 Standards Compatibility and Compliance..........2 Safety Cautions ..................2 LED Status Description................2 1.5.1 LED Status.................. 2 1.5.2 Rear Panel.................. 2 Hardware Installation ................2 Connecting the DSL Router..............2 Factory Reset Button................ - Page 3 4.3.4 NAT..................... 2 4.3.5 Security..................2 4.3.6 Parental Control................2 4.3.7 Quality of Service................ 2 4.3.8 Routing ..................2 4.3.9 DSL..................... 2 4.3.10 UPNP..................2 4.3.11 DNS Proxy .................. 2 4.3.12 Print Server................. 2 4.3.13 Interface Grouping ..............2 4.3.14 IPsec................... 2 4.3.15 Certificate..................
-
Page 4: Introduction
1 Introduction The VDSL DSL-6540U is a high-speed VDSL2 router, uplink rate up to 40 Mbps and downlink rate up to 80 Mbps. It provides sufficient bandwidth for high performance connection to the Internet, online gaming, video on demand (VOD), video conferencing, and high definition television (HDTV). -
Page 5: Standards Compatibility And Compliance
User-friendly GUI for web configuration Support IPSec for virtual private network (VPN) Several pre-configured popular games. Just enable the game and the port settings are automatically configured. Configurable as a DHCP server on your network Compatible with all standard Internet applications ... -
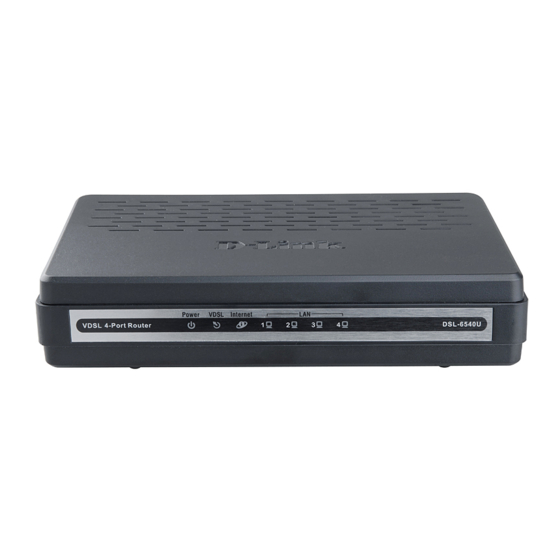
Page 6: Led Status Description
Pay attention to the power load of the outlet or prolonged lines. An overburden power outlet or damaged lines and plugs may cause electric shock or fire accident. Check the power cords regularly. If you find any damage, replace it at once. Proper space left for heat dissipation is necessary to avoid any damage ... -
Page 7: Rear Panel
Indicator Status Description Green The DSL line connection is established. No internet connection. The DSL line tries to activate or fails to Blink Red activate. Internet Data is being transmitted through the Blink Green WAN interface. The connection is established. The users Green can access the Internet. -
Page 8: Hardware Installation
2 Hardware Installation The Router can be placed on a shelf or desktop, ideally you should be able to see the LED indicators in the front, as you may need to view them for troubleshooting. Place the DSL Router in a location where it can be connected to the various devices as well as to a power source. -
Page 9: Introduction
The Router may be reset to the original factory default settings by depressing the reset button for a few seconds while the device is powered on. Use a ballpoint or paperclip to gently push down the reset button. Remember that this wipes out any settings stored in the flash memory, including user account information and LAN IP settings. -
Page 10: Setup
– Command line interface (CLI) – TR-069 WAN management protocol – TR-064-LAN-side DSL CPE configuration Remote update System statistics and monitoring DSL router is targeted at the following platforms: DSL modem and bridge. 3.2 Setup Connecting your computer or home network to the DSL router is a simple procedure, varying slightly depending on the operating system. -
Page 11: Lan Connection
Your can connect DSL interface of the router to the wall socket by using a telephone cable. If it has an Ethernet socket for the wide area network (WAN), connect it to the external modem you have, or to the Ethernet socket you might have, by using an Ethernet cable. - Page 12 Figure 2 IP and DNS configuration TCP/IP configuration instructions for Windows XP are as follows. Step 1 Choose Start > Control Panel > Access Network Connections from the desktop. Step 2 Right-click the Ethernet connection icon and choose Properties. Step 3 On the General tab, select the Internet Protocol (TCP/IP) component and click Properties.
-
Page 13: Web-Based Management
4 Web-Based Management Note: This project is hardware project, the Web interface of software is for reference only. This chapter describes how to use Web-based management of the DSL router, which allows you to configure and control all of DSL router features and system parameters in a user-friendly GUI. -
Page 14: Dsl Router Device Information
password of the common user are user and user. You need not enter the username and password again if you select the option Remember my password. It is recommended to change these default values after logging in to the DSL router for the first time. Step 4 Click OK to log in or click Cancel to exit the login page. -
Page 15: Summary Of Device Information
Figure 5 Device Info menu 4.2.1 Summary of Device Information Choose Device Info > Summary, the following page appears. LAN IPv4 Address: the management IPv4 address. Default Gateway: In the bridging mode there is no gateway. In other modes, ... -
Page 16: Statistics
Description: Descripte this interface with protocol and PVC. Type: The connection type of WAN, such as PPPoE, PPPoA. 4.2.3 Statistics This page contains the following four parts: Statistics of LAN Statistics of WAN Service Statistics of ATM ... -
Page 17: Statistics Of Wan
Figure 6 Statistics of LAN 4.2.3.2 Statistics of WAN Choose Device Info > Statistics > WAN Service and the following page appears. You can query information of packets recevied by the WAN interfaces. Click Reset Statistics to restore the values to zero and recount them. Figure 7 Statistics of WAN 4.2.3.3 Statistics of ATM Choose Device Info >... - Page 18 Traffic Type: ATM, or PTM. Status: Link Down, NoSignal, Training Link Power State: L0, L1, L2 Line Coding: Trallis on, etc. Rate (Kbps): Upstream Line Rate/Downstream Line Rate. ...
-
Page 19: Xdsl Ber Test
Click Reset Statistics at the bottom to restore the values to zero and recount them. Click xDSL BER Test to test xDSL Bit Error Rate. 4.2.3.5 xDSL BER Test Click xDSL BER Test to perform a bit error rate (BER) test on the DSL line. The test page is as follows: Figure 9 ADSL BER test The Tested Time (sec) can be 1, 5, 10, 20, 60, 120, 180, 240, 300, or 360. -
Page 20: Arp Table Information
Figure 10 Route table 4.2.5 ARP Table Information Choose Device Info > ARP and the following page appears. You can query the MAC and IP address information of the equipment attached to the modem. Figure 11 ARP table 4.2.6 DHCP IP Lease Information Choose Device Info >... -
Page 21: Layer2 Interface
4.3.1 Layer2 Interface Choose Advanced Setup > Layer2 Interface and three items appear. ATM Interface PTM Interface ETH Interface 4.3.1.1 ATM Interface Choose Advanced Setup > Layer2 Interface > ATM Interface . In this page, you can add or remove to configure DSL ATM Interfaces. Click Add to add ATM Interface and the following page appears. - Page 22 In this page, you can enter this PVC (VPI and VCI) value, and select DSL link type (EoA is for PPPoE, IPoE, and Bridge.), encapsulation mode, service category, connection Mode. VPI (Virtual Path Identifier): The virtual path between two points in an ATM ...
-
Page 23: Ptm Interface
Encapsulation Mode: LLC/SNAP-BRIDGING, or VC/MUX Service Category: UBR Without PCR, UBR With PCR, CBR, Non Realtime VBR, Realtime VBR. Connection Mode: Default mode, VLAN MUX mode, or MSC mode Enable Quality Of Service: enable/disable. In actual applications, you can modify them depending on your requirement. You can also select the Enable Quality Of Service check box in to enable the packet level QoS for a PVC. - Page 24 After proper configuration, click Apply/Save. 4.3.1.3 ETH Interface Choose Advanced Setup > Layer2 Interface > ETH Interface, and the following page appears. In this page, you can add or remove to configure ETH WAN Interfaces.
-
Page 25: Wan Configuration
Click Add and the following page appears. In this page, you can select a ETH port, such as eth0/ENET4, and select connection mode. Click Apply/Save to save configuration. 4.3.2 WAN Configuration Choose Advanced Setup > WAN Service, and the following page appears. Figure 13 WAN configuration Click Add to configure PPPoE, PPPoA, Mer (IPoE), Bridge, IPoA WAN configuration. - Page 26 4.3.2.1 Adding a PPPoE WAN Configuration In the WAN Service Setup page, click Add to add WAN configuration. This section describes the procedure for adding pppoe_0_0_32 (PPPoE mode). Step 1 Click Add to turn into the following page. (At first, you must add suitable ATM configuration for this WAN configuration.) In this page, you can select ATM Interface .
- Page 27 Step 4 In this page, you can modify the PPP username, PPP password, and authentication method. PPP Username: The correct user name that your ISP provides to you. PPP Password: The correct password that your ISP provides to you. ...
- Page 28 Enable Fullcone NAT: A full cone NAT is one where all requests from the same internal IP address and port are mapped to the same external IP address and port. Furthermore, any external host can send a packet to the internal host, by sending a packet to the mapped external address.
- Page 29 Step 5 In this page, select a preferred WAN interface as the system default gateway. Click Next, and the following page appears. Step 6 In this page, you can get DNS server information from the selected WAN interface or enter static DNS server IP addresses. If only a single PVC...
- Page 30 with IPoA or static MER protocol is configured, you must enter static DNS server IP addresses. Click Next, and the following page appears. Step 7 In this page, it shows all the configurations. Click Apply/Save to all the configurations, and the following page appears. Click Back to make any modifications.
- Page 31 Step 2 Select an ATM Interface, such as atm0/ (0_0_32). Click Next and the following page appears. Step 3 In this page, you can modify the WAN service type and Service Description. Click Next and the following page appears.
- Page 32 Step 4 In this page, you can modify the IP Settings. Enter information provided by your ISP to configure the WAN IP settings. Click Next and the following page appears. Note: If select Obtain an IP address automatically is chosen, DHCP will be enabled for PVC in MER mode.
- Page 33 Step 5 In this page, you can modify the Network Address Translation Settings. Click Next and the following page appears. Step 6 In this page, select a preferred wan interface as the system default gateway. Click Next and the following page appears.
- Page 34 Step 7 In this page, you can get DNS server information from the selected WAN interface or enter static DNS server IP addresses. If only a single PVC with IPoA or static MER protocol is configured, you must enter static DNS server IP addresses.
- Page 35 Step 8 In this page, click Apply/Save to save all the configurations, and the following page appears. If you want to make any modifications, click Back. 4.3.2.3 Adding a PPPoA Configuration This section describes the procedure for adding pppoa_0_0_35 (PPPoA mode). Step 1 You need to open the Layer2 Interface >...
- Page 36 Select the DSL link type to PPPoA, the Encapsulation Mode to VC/MUX Step 2 (according to the uplink equipment). Click Apply/Save, and the following page appears. Step 3 Return to the WAN Service page, and click Add. The following page appears.
- Page 37 Step 4 After proper selection, click Next, and the following page appears. In this page, you can modify the service description in the text box. Click Step 5 Next, and the following page appears.
- Page 38 In this page, you can modify the PPP Username, PPP Password, Step 6 Authentication Method according to your requirement. Click Next, and the following page appears.
- Page 39 Step 7 In this page, select a preferred wan interface as the system default gateway. Click Next, and the following page appears.
- Page 40 Step 8 In this page, you can get DNS server information from the selected WAN interface or enter static DNS server IP addresses. If only a single PVC with IPoA or static MER protocol is configured, you must enter static DNS server IP addresses.
- Page 41 Step 1 You need to open the Layer2 Interface > ATM Interface page to add a PVC for IPoA mode. Click Add and the following page appears. Select the DSL link type to IPoA, the Encapsulation Mode to Step 2 LLC/SNAP-ROUTING (according to the uplink equipment).
- Page 42 Step 4 After proper modifications, click Next, and the following page appears.. In this page, you can modify the service description. Click Next, and the Step 5 following page appears. Step 6 In this page, enter information provided to you by your ISP to configure the WAN IP settings.
- Page 43 In this page, Network Address Translation (NAT) allows you to share one Wide Area Network (WAN) IP address for multiple computers on your Local Area Network (LAN). Enable NAT: Select it to enable the NAT function of the modem. If you do not want to enable NAT, and wish the user of modem to access the Internet normally, you need to add a route on the uplink equipment.
- Page 44 Step 8 In this page, select a preferred WAN interface as the system default gateway. Click Next, and the following page appears.
- Page 45 In this page, you should use static DNS IP address for IPoA mode. Enter Step 9 primary DNS server and secondary DNS server. Click Next, and the following page appears. Click Apply/Save to save all the configurations. And the following page Step 10 appears.
- Page 46 select ATM Interface. Step 2 Select an ATM Interface, such as atm0/(0_0_32). Click Next, and the following page appears. Step 3 In this page, you can modify the WAN service type and Service Description. Click Next, and the following page appears.
-
Page 47: Lan Configuration
Step 4 Click Apply/Save to save all the configurations, and the following page appears. To make any modifications, click Back. 4.3.3 LAN Configuration Choose Advanced Setup > LAN, and the following page appears. In this page, you can configure an IP address for the DSL Router and enable DHCP server. - Page 48 4.3.3.1 Configuring the Private IP Address for the DSL Router In this page, you can modify the IP address of the device. The preset IP address is 192.168.1.1. This is the private IP address of the DSL Router, under which the device can be reached in the local network.
-
Page 49: Enabling Igmp Snooping
of available addresses. The IP address under which the Router can be reached from outside is assigned by the ISP. 4.3.3.2 Enabling IGMP Snooping Internet Group Management Protocol (IGMP) is an Internet protocol that enables an Internet computer to inform neighboring routers that it is a member of a multicast group. - Page 50 Note: A maximum 32 entries can be configured. Click Add Entries, and the following page appears. 4.3.3.5 Configuring the Second IP Address and Subnet Mask for LAN Interface View the following part for second IP address and subnet mask for LAN interface. 4.3.4 NAT Note: Only the mode of configuration PVC is PPPoE or PPPoA, NAT service appears.
-
Page 51: Dmz Host
H.323 Enable: The H.323 ALG is a flexible application layer gateway that allows H.323 devices such as H.323 phones and applications to make and receive calls between each other, when connected to private networks secured by clavister security gateways. IRC Enable: The IRC ALG is a flexible application layer gateway that allows ... -
Page 52: Port Triggering
host. Step 2 Enter the local IP address of the PC that is to be enabled as an exposed host. Step 3 Click Save/Apply to apply the configurations. Remove DMZ host Step 1 Clear the DMZ Host Address. Step 2 Click Save/Apply to apply the settings. - Page 53 Step 2 Select the use Interface like that ipoa_0_0_35/ipoa0 and select the required application from the Select an application drop-down list, or manually enter the information in the Custom application field. Trigger Port Start and Trigger Port End: Enter the port that is to be ...
- Page 54 Select the Remove check box. Click Save/Apply to apply the settings. 4.3.4.4 NAT - Virtual Server Setup Click Advanced Setup > NAT > Virtual Servers, and the following page appears. The port forwarding (virtual server) page is used to define applications that require special handling by DSL router.
- Page 55 Step 2 Select the use Interface like that ipoa_0_0_35/ipoa0 and select a service or enter a custom server. Step 3 Set Server IP Address. Step 4 Enter the Server IP address of the computer that provides the service (the server in the Local Host field). Note that unless an additional external IP address is added, only one LAN computer can be assigned to provide a specific service or application.
-
Page 56: Outgoing Ip Filtering Setup
Select the protocol for the service you are providing from the Protocol drop-down list. Under Public Port, enter the port number of the service you are providing. In the Local Port field, enter the internal port number to which service requests are to be forwarded. - Page 57 Click Add and the page for defining the IP filtering rule appears. In this page, you can create a filter rule to identify outgoing IP traffic by specifying a new filter name and at least one condition. All specified conditions in the filtering rule must be complied with the rule to take effect.
-
Page 58: Incoming Ip Filtering Setup
Step 3 Click Save/Apply and the following page appears. 4.3.5.2 Incoming IP Filtering Setup The incoming IP filter is used to block and permit IP packet transmisstion from internet. Choose Security > IP Filtering > Incoming and the following page appears. Click Add and the page for defining the IP filtering rule appears. - Page 59 In this page, you can create a filter rule to identify incoming IP traffic by specifying a new filter name and at least one condition. All specified conditions in the filter rule must be complied with the rule to take effect. Click Save/Apply to save and activate the filter.
-
Page 60: Mac Filtering Configuration
Step 3 Click Save/Apply and the following page appears. 4.3.5.3 MAC Filtering Configuration In some cases, you may want to manage Layer2 MAC address to block or permit a computer within the home network. When you enable MAC filter rules, the modem serves as a firewall that works at layer 2. - Page 61 Filtering Setup page does not appear. Click Change Policy and the following page appears. You can change the MAC Filtering Global Policy from FORWARDED to BLOCKED. Click Add to add MAC filter rules. See the following figure.
- Page 62 Frame Direction: Direction of transmission frame. MAC Filtering - Global Policy FORWARDED This section describes how to prevent the PC whose MAC address is 00:13:20:9E:0F:10 from transmitting PPPoE frames to Internet. Click Add and configure in the following page. Click Save/Apply and the following page appears.
- Page 63 MAC Filtering - Global Policy BLOCKED This section describes how to permit the PC who has the 00:13:20:9E:0F:10 MAC address transmit PPPoE frame to Internet. Click Add to configure in the following page. Click Save/Apply and the following page appears.
-
Page 64: Parental Control
4.3.6 Parental Control Parental Control restricts a speciel LAN device with its MAC address by setting Access Time Restriction, or add URL List to accept or restrict LAN devices accessing URL address by setting Url Filtering. 4.3.6.1 Access Time Restriction Step 1 Click Advanced >... -
Page 65: Quality Of Service
Step 3 In this page, you can add time of day restriction to a special LAN device connected to the Router. After enter user name, select days of week and blocking time, click Save/Apply, and the following page appears. 4.3.7 Quality of Service Under Quality of Service, there are two network share modes: Queue Config and Qos Classification. - Page 66 Select Enable QoS to enable QoS and configure the default DSCP mark.
- Page 67 Note: If Enable Qos checkbox is not selected, all QoS is disabled for all interfaces. The default DSCP mark is used to mark all egress packets that do not match any classification rules. Click Save/Apply to active QoS. 4.3.7.2 QOS - Queue Config Choose Advanced Setup >...
- Page 68 Precedence: Select an integer value for queue precedence. After you select an integer value, the queue entry appropriately places to ingress packets. Lower integer values for precedence imply higher priority for this queue relative to others. Step 2 Add a QoS queue entry and assign it to a specific network interface (pppoe_0_0_35), and set integer values for queue precedence to 1.
- Page 69 Step 3 After proper modifications, click Save/Apply and the following page appears. This configuration takes effective at once. To delete a certain queue, disable it, select it, and then click Remove. After the queue is configured, you can create several traffic class rules to classify the upstream traffic.
- Page 70 Click Add, and the following page appears.
- Page 71 Specify Classification Criteria: A blank criterion indicates it is not used for classification. Specify Classification Results: Must select a classification queue. A blank mark or tag value means no change. – Mark Differentiated Service Code Point (DSCP): Select a mark service that modifies the original packet IP header if all rules defined...
- Page 72 within the classification class are matched. (CS - Mark IP Precedence, AF - Assured Forwarding, EF - Expedited Forwarding) – Mark 802.1p priority: Select an 802.1p priority number that serves as the 802.1p value. The 802.1p header includes a 3-bit prioritization field, which allows packets to be grouped into eight levels of priority (0-7), where level 7 is the highest one.
- Page 73 After proper modifications, click Save/Apply and the following page appears.
- Page 74 Click Save/Apply. This configuration takes effective at once. QoS - 802.1p Setting For example: Mark the frame of 802.1p that queued to Queue 9 on value 2. See the following figure.
- Page 75 After proper modifications, click Save/Apply, and the following page appears.
-
Page 76: Static Route
Click Save/Apply. This configuration takes effective at once. 4.3.8 Routing 4.3.8.1 Routing – Default Gateway Choose Advanced Setup > Routing > Default Gateway, and the following page appears. In this page, you can modify the default gateway settings. If selected an interface by the Selected WAN Interface box, this router accepts the received default gateway assignment from this WAN interface. - Page 77 Step 2 Click Add and the following page appears. Enter destination network address and subnet mask. Enable Use Gateway IP Address and enter IP address. Select use interface. See the following figure. Step 3 Click Save/Apply to apply the settings and the following page appears.
-
Page 78: Rip Configuration
Note: A maximum 32 entries can be configured. Remove Static Route Select Remove checkbox, and click Remove to apply the settings. 4.3.8.3 RIP Choose Advanced Setup > Routing > RIP and the following page appears. RIP Configuration To activate RIP for the device, select Enabled for Global RIP Mode. ... -
Page 79: Upnp
4.3.10 UPNP 4.3.10.1 Enabling UPNP Choose Advanced Setup > UPNP and the following page appears. In this page, you can enable or disable UPNP protocol. Note: The operating system of the PC should be Windows ME or Windows XP. Check whether the UPnP function is installed in the PC. -
Page 80: Dns Proxy
or Windows ME. Please refer to the User Guide of your PC. 4.3.11 DNS Proxy Choose Advanced Setup > Dns Proxy and the following page appears. Enter Host name of the modem and domain name of the LAN network, click Apply/Save to save the configuration. - Page 81 Step 2 Select the Enable on-board printer server check box and enter the information in Printer name and Make and model. Note: The Printer name can be any text string up to 40 characters. The Make and model can be any text string up to 128 characters. ...
- Page 83 Step 2 Select Network Printer and click Next.
- Page 84 Step 3 Select Connect printer Internet, enter http://192.168.1.1:631/printers/hp3845 and click Next. The printer name (hp3845) must be the same name entered in the Printer server setting page as mentioned in Step 1.
- Page 85 Step 4 Click Have Disk and insert the printer driver CD.
-
Page 86: Interface Grouping
Step 5 Select driver file directory on CD-ROM and click OK. 4.3.13 Interface Grouping Choose Advanced Setup > Interface Grouping and the following page appears. - Page 87 4.3.13.1 Create a new mapping group Click Add and the following page appears.
- Page 88 Automatically Add Clients With the following DHCP Vendor IDs: If a vendor ID is configured for a specific client device, reboot the client device attached to the modem to allow it to obtain an appropriate IP address. (For example, the windows 2000/XP default DHCP client’s vender ID is MSFT 5.0.
- Page 89 Step 1 Enter the Group name and select interfaces from the available interface list and add it to the grouped interface list using the arrow buttons to create the required mapping of the ports. The group name must be unique.
-
Page 90: Ipsec
Note: These clients may obtain public IP addresses. Step 2 Click Save/Apply to apply the configuration immediately. Note: The selected interfaces are removed from their existing groups and added to the new group. 4.3.14 IPsec 4.3.14.1 How to Use and Configure the IPSec To use IPSec user interface, choose Advanced Setup >... - Page 91 Single Address. IP Address for VPN: If you select Single Address, it is the IP address of the PC. If you choose Subnet, it is the subnet address. Tunnel access from remote IP addresses: same with the third item, but it ...
-
Page 92: Certificate
key exchange or manual key exchange, pre-shared key authentication or certificate authentication, etc. When automatic key exchange method is used, click Show Advanced Settings and more options appear: 4.3.15 Certificate Choose Advanced Setup > Certificate and two items appear: Local and Trusted CA. - Page 93 In the menu, Local means local certificates. Trusted CA means trusted Certificate Authority certificates. Local certificates preserve the identity of the modem. CA certificates are used by the modem to very certificates from other hosts. Local certificates can be created by two ways: Create a new certificate request, have it signed by a certificate authority and ...
- Page 94 Step 2 Wait several seconds and the generated certificate request appears. The certificate request needs to be submitted to a certificate authority, which would sign the request. Then the signed certificate needs to be loaded into modem. Click Load Signed Certificate in the previous page or in the first page, and the load...
- Page 95 certificate page appears. Paste the signed certificate, click Apply, and a new certificate is created. 4.3.15.2 Importing an Existing Local Certificate To import existing certificate, click Import Certificate and paste both certificate and corresponding private key.
- Page 96 4.3.15.3 Trusted CA Certificates Choose Certificate > Trusted CA and the following page appears.
-
Page 97: Diagnostics
Click Import Certificate and the following page appears. CA certificate can only be imported. 4.4 Diagnostics Click Diagnostics, and the following page appears. Your modem is capable of testing your DSL connection. The individual tests are listed below. If a test displays a fail status, click Tests at the bottom of this page to make sure the fail status is consistent. -
Page 98: Diagnostics - Fault Management
4.4.1 Diagnostics - Fault Management Click Diagnostics > Fault Management, and the following page appears. 4.5 Management... -
Page 99: System Log
4.5.1 Settings 4.5.1.1 Settings Backup Click Management > Settings > Backup to back up the DSL router configuration. 4.5.1.2 Settings Update Click Management > Settings > Update, and the following page appears. Click Browse and select the correct update configure settings file. Then, click Update Settings to update the modem settings. - Page 100 Figure 14 System Log overview Click Configure System Log to show the following interface. You can enable or disable the system log and then select the log level, display level and mode, and click Apply to end your configurations. Both the log level and display level have eight choices. The default log level is Debugging and the default display level is Error.
- Page 101 Figure 15 System log configuration (1) If you select Remote or Both, all events will be transmitted to the specified UDP port of the specified log server.
- Page 102 Figure 16 System log configuration (2) After operations under Configure System Log, click View System Log to query the system logs. In this example, the View System Log is the default. Note: The log and display of the system events are above the set level.
-
Page 103: Tr-69 Client Management
Figure 17 View system event logs Click Refresh to refresh the system event logs or click Close to exit from this interface. 4.5.3 TR-69 Client Management 4.5.3.1 Tr-069 Client-configuration Choose Management > TR-069Client to show the TR-069 Client configuration page. - Page 104 Figure 18 Tr-069 client -configuration Inform: If the Enable option is selected,the CPE accepts the commands from ACS, the CPE does not accept the commands from ACS when the Disable option is selected. Inform Interval: How many seconds does the CPE inform the ACS to ...
-
Page 105: Internet Time
Connection Request Password: the Connection Request Password that the TR-069 Service provides to you. Click Save/Apply to save the he configuration. 4.5.4 Internet Time Click Management > Internet Time, and the following page appears. In this page, the modem can synchronize with Internet time servers. After enable Automatically synchronize with Internet time servers, the interface show below. -
Page 106: Access Control
4.5.5 Access Control 4.5.5.1 Access Control – Passwords Choose Management > Access Control > Passwords, and the following page appears. In the interface, you can modify the accounts passwords. -
Page 107: Update Software
4.5.6 Update Software Click Management > Update Software, and the following page appears. In this interface, you can update the modem firmware. Click Browse to find the right version file and click Update Software to update. Note: Do not turn off your modem during firmware updates. When the update is finished, the modem reboots automatically.
Need help?
Do you have a question about the DSL-6540U and is the answer not in the manual?
Questions and answers