Table of Contents
Advertisement
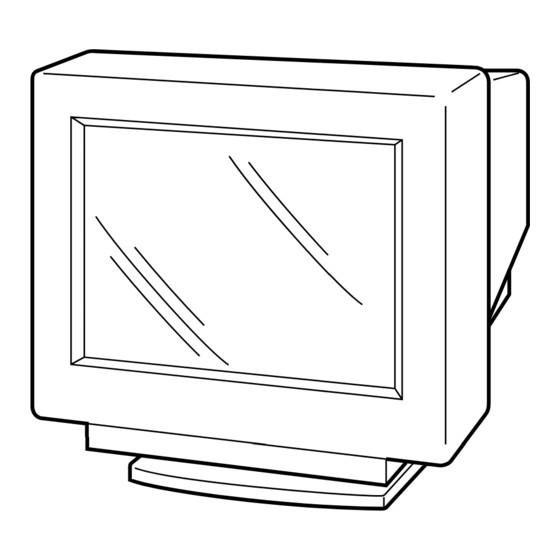
SERVICE MANUAL
SPECIFICATIONS
Picture tube
0.25 – 0.27 mm aperture grille pitch
21 inches measured diagonally
90-degree deflection
Approx. 403.8 × 302.2 mm (w/h)
Viewable image size
(16 × 12 inches)
19.8" viewing image
Resolution
Horizontal: Max. 1600 dots
Vertical: Max. 1200 lines
Approx. 388 × 291 mm (w/h)
Standard image area
3
(15
or
Approx. 364 × 291 mm (w/h)
3
(14
Scan frequency
Horizontal: 30 to 107 kHz
Vertical: 48 to 160 Hz
AC input voltage/current
100 to 240 V, 50 – 60 Hz, 2.0 – 1.0 A
Power consumption
Max. 160 W (502 BTU/h)
498 × 505 × 474 mm (w/h/d)
Dimensions
5
(19
Mass
Approx. 31 kg (68 lb 5 oz)
Design and specifications are subject to change without
notice.
COLOR GRAPHIC DISPLAY
GDM-5011P
N.Hemisphere Model
S.Hemisphere Model
Chassis No. SCC-L04P-A
× 11
1
/
/
inches)
8
2
× 11
1
/
/
inches)
8
2
× 20 × 18
3
/
/
inches)
8
4
N3
CHASSIS
Advertisement
Table of Contents

Related Manuals for Silicon Graphics GDM-5011P


Summary of Contents for Silicon Graphics GDM-5011P
-
Page 1: Service Manual
GDM-5011P SERVICE MANUAL N.Hemisphere Model S.Hemisphere Model Chassis No. SCC-L04P-A CHASSIS SPECIFICATIONS Picture tube 0.25 – 0.27 mm aperture grille pitch 21 inches measured diagonally 90-degree deflection Approx. 403.8 × 302.2 mm (w/h) Viewable image size (16 × 12 inches) 19.8”... - Page 2 GDM-5011P SAFETY CHECK-OUT After correcting the original service problem, perform the fol- LEAKAGE TEST lowing safety checks before releasing the set to the customer: The AC leakage from any exposed metal part to earth ground 1. Check the area of your repair for unsoldered or poorly-sol- and from all exposed metal parts to any exposed metal part hav- dered connections.
- Page 3 GDM-5011P POWER SAVING FUNCTION This monitor meets the power-saving guidelines set by Note VESA and NERGY TAR, as well as the more stringent If no video signal is input to the monitor, the “NO INPUT SIGNAL” message (page 1-8) appears. After the delay time has NUTEK .
-
Page 4: Timing Specification
GDM-5011P TIMING SPECIFICATION MODE AT PRODUCTION MODE 1 MODE 2 MODE 3 MODE 4 MODE 5 MODE 6 MODE 7 MODE 8 MODE 9 MODE 10 MODE 11 RESOLUTION 1280 X 1024 1280 X 1024 1280 X 1024 1280 X 1024 1280 X 1024 1024 X 768... -
Page 5: Table Of Contents
GDM-5011P TABLE OF CONTENTS Section Title Page 1. GENERAL ..............1-1 2. DISASSEMBLY 2-1. Cabinet Removal ..........2-1 2-2. D Board Removal ..........2-1 2-3. G Board Removal ..........2-2 2-4. A Board Removal ..........2-2 2-5. L Board Removal ..........2-3 2-6. -
Page 6: General
SECTION 1 The operating instructions mentioned here are partial abstracts from the Operating Instruction Manual. The page numbers of GENERAL the Operating Instruction Manual remain as in the manual. Getting Started Getting Started Getting Started Getting Started Warning on power connection Precautions Identifying Parts and Controls •... - Page 7 Getting Started Getting Started Getting Started Press the ¨./> and >?// buttons to select “ Press the ¨./> and >?// buttons to select “ Setup Automatically Adjusting the Size LANG,” and press the button again. OPTION,” and press the button again. The LANGUAGE OSD appears.
- Page 8 Customizing Your Monitor Customizing Your Monitor Getting Started Customizing Your Monitor Before adjusting Introducing the On-screen Using the CENTER On-screen Using the SIZE On-screen Display • Connect the monitor and the computer, and turn them on. • Select “ LANG” in the MENU OSD, then select Display System Display The SIZE settings allow you to adjust the size of the picture.
- Page 9 Getting Started Customizing Your Monitor Customizing Your Monitor Press the >?// buttons to adjust the settings. Using the ZOOM On-screen Using the COLOR On-screen Display Using the GEOM (Geometry) On- Display screen Display You can change the monitor’s color temperature. For example, you can adjust or change the colors of a picture on The ZOOM settings allow you to enlarge or reduce the The GEOM (geometry) settings allow you to adjust the...
- Page 10 Getting Started Customizing Your Monitor Customizing Your Monitor Fine tuning the color temperature Select Press Using the SCREEN On-screen Press the ¨./> buttons to select an item and adjust by select one of the four corners that / . . . to shift red shadows up and blue pressing the >?// buttons.
- Page 11 Getting Started Customizing Your Monitor Customizing Your Monitor Setting the power saving delay time Locking the controls Changing the on-screen display position Using the OPTION On-screen Display You can set the delay time before the monitor enters the The control lock function disables all of the buttons on the You can change the OSD position (for example, when you power saving mode.
- Page 12 Customizing Your Monitor Technical Features Getting Started Technical Features Technical Features You can set the delay time before the monitor enters the Resetting the Adjustments Preset Modes Power Saving Function power saving mode using the OSD. Set the time according to “Setting the power saving delay time”...
- Page 13 Additional Information Additional Information Getting Started Additional Information 1 The input signal condition Symptom Check these items Warning Messages “OUT OF SCAN RANGE” indicates that the input signal You cannot adjust the monitor • If the control lock function is set to on, set it to off using the OPTION OSD (page 15). is not supported by the monitor’s specifications.
- Page 14 Additional Information Self-diagnosis Function Specifications This monitor is equipped with a self-diagnosis function. If Picture tube 0.25 – 0.27 mm aperture grille pitch there is a problem with your monitor or computer(s), the 21 inches measured diagonally screen will go blank and the u indicator will either light up 90-degree deflection Approx.
-
Page 15: Disassembly
GDM-5011P SECTION 2 DISASSEMBLY 2-1. CABINET REMOVAL Four screws (+ BVTP 4 x 16) Screw cover Four screws (+ BVTT 4 x 8) Two claws Top cover Screw cover Cabinet Four screws (+ BVTT 4 x 8) Video shield 2-2. D BOARD REMOVAL... -
Page 16: G Board Removal
GDM-5011P 2-3. G BOARD REMOVAL Two screws (+BVTP 3 x 10) Screw (+ BVTT 4 x 8) G shield Two screws (+ BVTT 4 x 8) G board Three hooks Open the G block in the direction Two printed circuit board holders of the arrow . -
Page 17: L Board Removal
GDM-5011P 2-5. L BOARD REMOVAL CN5001 CN5004 CN5002 CN5003 L board Four printed circuit board holders 2-6. I/O TERMINAL BOARD ASSY REMOVAL CN401 CN511 CN402 Three screws (+ BVTT 3 x 8) I/O terminal board assembly... -
Page 18: Service Position
GDM-5011P 2-7. SERVICE POSITION CAUTION : SHORT D,G boards Rear shield If the claw is hooked, opening and closing the board is impossible. Do not try to do it by force. D board (Refer to 2-2.) A board (Refer to 2-4.) -
Page 19: Picture Tube Removal
GDM-5011P 2-9. PICTURE TUBE REMOVAL Open the D block (Refer to 2-2.) Four screws (+ BVTT 4 x 8) Two connectors 6P (DY) A board 10P (DY) Anode cap Open the G block (Refer to 2-3.) Neck assembly Deflection yoke Picture tube •... -
Page 20: Safety Related Adjustment
GDM-5011P SECTION 3 SAFETY RELATED ADJUSTMENT When replacing or repairing the shown below table, the a) HV Regulator Circuit Check following operational checks must be performed as a 1) Confirm that the voltage of the pin 2 of CN901 on safety precaution against X-rays emissions from the unit. -
Page 21: Adjustments
GDM-5011P SECTION 4 ADJUSTMENTS Note: Hand degauss must be used on stand-by or power-off condition. This model has an automatic earth magnetism correction function by using an earth magnetism sensor and a LCC coil. When using a hand degauss while monitor (LCC coil) is being operated, it sometimes gets magnetized, and the system may not work properly as a result. - Page 22 GDM-5011P Connect the communication cable of the computer to the connector located on the D board on the monitor. Run the service software and then follow the instruction. 1-690-391-21 A-1500-819-A 3-702-691-01 Interface Unit Connector Attachment IBM AT Computer To BUS CONNECTOR...
-
Page 23: Diagrams
SECTION 5 DIAGRAMS 5-1. BLOCK DIAGRAMS TO FBT 13W3 FV1 FV2 HV IC401 IC402 IC403 RGB SWITCH RGB PRE-AMP RGB OUT V901 PICTURE TUBE CN402 Q101 R IN 2 R_IN2 R_OUT R_IN R_OUT R_IN R_OUT G IN 2 G_IN2 G_IN G_OUT BUFFER Q201... - Page 24 CN520 CN504 CN512 (U-COM,DEFLECTION) (POWER SW) LLC_RB POWER LLC_RT CN891 H CONV HTR_SW LLC_LB S891 V CONV STBY 8V LLC_LT AC L IN POWER CN511 LLC_LB AC L OUT HOST_GND_1 HOST_GND_2 IC012 C.SYNC_1 V.SYNC_1 C.SYNC_2 PS504 V CLK V.SYNC_2 CN605 DDC_SDA_1 IC002 IC001...
-
Page 25: Circuit Boards Location
5-2. FRAME SCHEMATIC DIAGRAM 5-3. CIRCUIT BOARDS LOCATION CONNECTOR PANEL R IN 1 Note: The components identified by shading and mark R GND 1 CN401 G IN 1 ! are critical for safety. Replace only with part WHT-L G GND 1 13W3 :S-MICRO number specified. - Page 26 — D BOARD (Conductor Side) — — D BOARD (Component Side) — µ-COM, DEFLECTION • D BOARD SEMICONDUCTOR LOCATION Q528 C–3 C–2 – D513 E–1 Q660 D–2 D514 A–4 A–1 – Conductor Component Q661 D–2 D516 D–2 Side Side Q701 D–1 D–4 –...
- Page 27 (1) Schematic Diagram of D Board • D BOARD WAVEFORMS • D BOARD VOLTAGE LIST Ref. Pin No. Voltage [V] Ref. Pin No. Voltage [V] ROTATION+ TO L BOARD TO L BOARD ROTATION- IC002 CN5002 CN5001 11.2 CN520 CN512 CN509 5.0 Vp-p (4MHz) 4.3 Vp-p (H) 2.0 Vp-p (H)
-
Page 28: Schematic Diagram Of D Board
(2) Schematic Diagrams of G, GA, H, J and L Boards (POWER SENSOR) +15V STBY+5V Q7504 C811 2SA1037AK CN7501 • GA BOARD R7509 B-TO-B :CHIP VOLTAGE LIST Q801 TO D BOARD 2SC3311A CN801 R7510 Q802 CN501 C7504 LED DRIVE 2SC3311A :S-MICRO L :CHIP R814... - Page 29 (ga) V.STAT, H.STAT, LLC, POWER SUPPLY USER CONTROL POWER SENSOR GEO MAGNETIC SENSOR — G BOARD — — L BOARD (Conductor Side) — — L BOARD (Component Side) — G BOARD Terminal name of semiconductors in silk screen printed circuit ( Ref.
-
Page 30: Schematic Diagram Of A Board
(3) Schematic Diagram of A Board C458 IC403 IC401 IC402 C412 +12V FA4111 C101 M52755FP-TP RGB PRE-AMP M52722P RGB DRIVE 0.01 C312 BLOCK 0.01 B:CHIP B:CHIP RGB OUT STBY+5V +12V C102 C402 R475 C305 47 25V R339 R314 B:CHIP R122 0.01 C322 :CHIP... - Page 31 VIDEO AMP • A BOARD RGB OUT SEMICONDUCTOR LOCATION — A BOARD (Conductor Side) — — A BOARD (Component Side) — Conductor Component Side Side IC401 A–1 IC402 B–3 B–1 IC403 B–3 B–1 IC404 A–2 IC406 A–1 A–3 IC408 A–1 A–3 IC409 C–1...
-
Page 32: Semiconductors
5-4. SEMICONDUCTORS BA9756FS-E2 LA6510 NJM4558M µPC1093J 2SA1091-O M62352GP-75E µPC4558G2 2SC2362K-G M62352GP-75ED 24LC16BT/SN TOP VIEW TOP VIEW 8 pin SOP 20 pin SOP LA7841L µPC78L05J 2SA1175-HFE CXA2043Q NJM78L05A 2SA1309A-QRSTA MARKING SIDE VIEW NJM78L09A 2SC2784 TA78L05S 2SC2785-HFE TA78L09S 2SC3311A-QRSTA LETTER SIDE 7 pin SIP LM324M DTA114GKAT146 TOP VIEW... - Page 33 2SC4015TV2 DTZ-TT11-16B D5LC20U P6KE200AG23 DTZ10B CATHODE DTZ13B DTZ24B DTZ33B DTZ4.7C DTZ5.1B MA111 RD12SB2 RD5.6SB ANODE UDZ-TE-17-10B UDZ-TE-17-12B UDZ-TE-17-13B 2SC5047-CA EGP20G RD6.2M-B1 UDZ-TE-17-16B ERA34-10 UDZ-TE-17-24B RGP02-17EL-6433 UDZ-TE-17-33B RGP02-17PKG23 UDZ-TE-17-4.7B RGP02-20EG23 UDZ-TE-17-5.1B RGP02-20EL-6394 UDZ-TE-17-5.6B RGP15GPKG23 UDZ-TE-17-6.2B UF4005PKG23 CATHODE 2SK1120LBSONY2 RM11A ANODE 2SK2098-01MR RM11C CATHODE CATHODE...
-
Page 34: Exploded Views
GDM-5011P SECTION 6 EXPLODED VIEWS NOTE: • Items with no part number and no • Items marked " * " are not stocked since The components identified by shading ¡ description are not stocked because they they are seldom required for routine and mark are critical for safety. -
Page 35: Picture Tube
GDM-5011P 6-2. PICTURE TUBE The components identified by shading Les composants identifiés per un tramé 7-685-663-71 +BVTP 4X16 ¡ ¡ and mark are critical for safety. et une marque sont critiques pour la ¢ 7-685-881-09 +BVTT 4X8 Replace only with part number specified. -
Page 36: Packing Materials
GDM-5011P 6-3. PACKING MATERIALS REF.NO. PART NO. DESCRIPTION REMARK REF.NO. PART NO. DESCRIPTION REMARK * 4-062-130-02 CUSHION (UPPER) (ASSY) * 4-061-815-01 TRAY * 4-069-724-01 INDIVIDUAL CARTON [NH model] * 4-396-077-01 JOINT * 4-069-913-01 INDIVIDUAL CARTON [SH model] * 4-041-927-31 BAG, POLYETHYLENE... - Page 37 GDM-5011P MEMO...
-
Page 38: Electrical Parts List
GDM-5011P SECTION 7 ELECTRICAL PARTS LIST NOTE: • All variable and adjustable resistors have • Items marked " * " are not stocked since characteristic curve B, unless otherwise they are seldom required for routine The components identified by shading noted. - Page 39 GDM-5011P Les composants identifiés per un tramé The components identified by shading ¡ ¡ et une marque sont critiques pour la and mark are critical for safety. sécurité. Ne les remplacer que par une Replace only with part number specified.
- Page 40 GDM-5011P Les composants identifiés per un tramé The components identified by shading ¡ ¡ et une marque sont critiques pour la and mark are critical for safety. sécurité. Ne les remplacer que par une Replace only with part number specified.
- Page 41 GDM-5011P Les composants identifiés per un tramé The components identified by shading ¡ ¡ et une marque sont critiques pour la and mark are critical for safety. sécurité. Ne les remplacer que par une Replace only with part number specified.
- Page 42 GDM-5011P Les composants identifiés per un tramé The components identified by shading ¡ ¡ et une marque sont critiques pour la and mark are critical for safety. (a)(ga)(g) sécurité. Ne les remplacer que par une Replace only with part number specified.
- Page 43 GDM-5011P Les composants identifiés per un tramé The components identified by shading ¡ ¡ et une marque sont critiques pour la and mark are critical for safety. sécurité. Ne les remplacer que par une Replace only with part number specified.
- Page 44 GDM-5011P Les composants identifiés per un tramé The components identified by shading ¡ ¡ et une marque sont critiques pour la and mark are critical for safety. (g)(d) sécurité. Ne les remplacer que par une Replace only with part number specified.
- Page 45 GDM-5011P Les composants identifiés per un tramé The components identified by shading ¡ ¡ et une marque sont critiques pour la and mark are critical for safety. sécurité. Ne les remplacer que par une Replace only with part number specified.
- Page 46 GDM-5011P Les composants identifiés per un tramé The components identified by shading ¡ ¡ et une marque sont critiques pour la and mark are critical for safety. sécurité. Ne les remplacer que par une Replace only with part number specified.
- Page 47 GDM-5011P Les composants identifiés per un tramé The components identified by shading ¡ ¡ et une marque sont critiques pour la and mark are critical for safety. sécurité. Ne les remplacer que par une Replace only with part number specified.
- Page 48 GDM-5011P Les composants identifiés per un tramé The components identified by shading ¡ ¡ et une marque sont critiques pour la and mark are critical for safety. sécurité. Ne les remplacer que par une Replace only with part number specified.
- Page 49 GDM-5011P Les composants identifiés per un tramé The components identified by shading ¡ ¡ et une marque sont critiques pour la and mark are critical for safety. sécurité. Ne les remplacer que par une Replace only with part number specified.
- Page 50 GDM-5011P Les composants identifiés per un tramé The components identified by shading ¡ ¡ et une marque sont critiques pour la and mark are critical for safety. sécurité. Ne les remplacer que par une Replace only with part number specified.
- Page 51 GDM-5011P Les composants identifiés per un tramé The components identified by shading ¡ ¡ et une marque sont critiques pour la and mark are critical for safety. (d)(h) sécurité. Ne les remplacer que par une Replace only with part number specified.
- Page 52 GDM-5011P Les composants identifiés per un tramé The components identified by shading ¡ ¡ et une marque sont critiques pour la and mark are critical for safety. (h)(j)(l) sécurité. Ne les remplacer que par une Replace only with part number specified.
- Page 53 GDM-5011P Les composants identifiés per un tramé The components identified by shading ¡ ¡ et une marque sont critiques pour la and mark are critical for safety. sécurité. Ne les remplacer que par une Replace only with part number specified.
Need help?
Do you have a question about the GDM-5011P and is the answer not in the manual?
Questions and answers