Table of Contents
Advertisement
Quick Links
Advertisement
Table of Contents

Related Manuals for Harbor Point HF-25GW/GX1b


Summary of Contents for Harbor Point HF-25GW/GX1b
- Page 1 WALL SPLIT DUCTLESS COOLING ONLY AND HEAT PUMP SYSTEMS Cooling Only Models Heat Pump Models: HF-25GW/GX1b HFR-25GW/GX1b HF-35GW/GX1b HFR-35GW/GX1b HF-51GW/GX1a HFR-51GW/GX1a HF-70GW/GX1a HFR-70GW/GX1a 9,000 Btu / 12,000 Btu 18,000 Btu 24,000 Btu Harbor Point Air Conditioners www.harborpointac.com...
- Page 2 INSTALLATION, OPERATION AND MAINTENANCE MANUAL This manual is intended as an aid to a qualified service personnel for proper installation, operation, and maintenance of Harbor Point Air high efficiency R-410A W all Split Ductless Systems. Carefully read these instructions before attempting installation or operation.
- Page 3 • Gauge Set : R-410 specific. PRODUCT DESCRIPTION • High Voltage Interconnect Wiring: The Harbor Point system is an efficient 14 AWG wiring from outdoor unit to in- wall split ductless conditioning system door unit for power and control. * with cooling capacities from 9,000-24,000 •...
- Page 4 HARBOR POINT WALL SPLIT DUCTLESS SYSTEMS CHOOSING UNIT MODEL Model # Model # Duty Duty Capacity Btu Capacity Btu Voltage Voltage DELS OFFERED Cooling Only 9,000 HF‐25G/GX1b 115‐1‐60 Cooling Only 12,000 HF‐35G/GX1b 115‐1‐60 Cooling Only 18,000 HF‐51G/GX1a 208/230‐1‐60 Cooling Only 24,000 HF‐70G/GX1a 208/230‐1‐60 Heat Pump 9,000 115‐1‐60 HFR‐25G/GX1b Heat Pump 12,000 ...
- Page 5 If this can Certification: not be done then a field installed pump All Harbor Point Systems are certified by that is external to the evaporator would UL under UL Standard 1995. Per- be required.
-
Page 6: Indoor Unit Installation
HARBOR POINT WALL SPLIT DUCTLESS SYSTEMS INDOOR UNIT INSTALLATION CAUTION Follow Instructions, failure to follow instructions may cause possible mal- function and void any warranty. Remove indoor and outdoor units from Locate area to install indoor unit the the carton/box. Indoor unit carton con- unit should be located a minimum of 6 ft. - Page 7 HARBOR POINT WALL SPLIT DUCTLESS SYSTEMS INDOOR UNIT INSTALLATION Prepare the evaporator for mounting by removing the mounting bracket from If mounting the unit on an inside wall, use the rear of the indoor unit. Use a Phillips the knockouts provided on the left and...
- Page 8 HARBOR POINT WALL SPLIT DUCTLESS SYSTEMS INDOOR UNIT INSTALLATION Prepare unit line set connections Feed the 14 AWG interconnect wiring Rotate refrigerant line stubs gently to 90° between indoor and outdoor through the unit electrical connection (maxi- (if mounting on an outside wall). For oth- er line set configurations align the stubs...
-
Page 9: Outdoor Unit Installation
HARBOR POINT WALL SPLIT DUCTLESS SYSTEMS INDOOR UNIT INSTALLATION Install unit on mounting bracket Feed the line set stubs/condensate hose/ wiring connections through a ø 3” hole in the wall. Position the evaporator so that the “key” slots on the back of the unit slide onto the tabs on top of the mounting bracket. - Page 10 IR HIGH WALL DUCTLESS SPLIT SYSTEMS HARBOR POINT WALL SPLIT DUCTLESS SYSTEMS OUTDOOR UNIT INSTALLATION Refrigerant Line Set Piping Connect the line set to the stubs. Using Interconnecting line set between the the 2 wrenches, 1 on the male and 1 on outdoor unit and the indoor unit, must have the female tighten the flare nuts.
- Page 11 HARBOR POINT WALL SPLIT DUCTLESS SYSTEMS OUTDOOR UNIT INSTALLATION Evacuation tem to remove all traces of moisture. See “System Start-Up” section to fine-tune the Gauges can now be attached to the service refrigerant charge. ports - SERVICE PORTS HAVE A 1/2”...
- Page 12 HARBOR POINT WALL SPLIT DUCTLESS SYSTEMS OUTDOOR UNIT INSTALLATION Electrical Wiring Installation outdoor unit must be a point to point i.e. CAUTION the terminal that the wire is attached to on the outdoor unit must be the same termi- Electrical Wiring should be done by a nal it is wired to in on the indoor unit.
-
Page 13: Heat Pump Wiring
HARBOR POINT WALL SPLIT DUCTLESS SYSTEMS OUTDOOR UNIT INSTALLATION HEAT PUMP WIRING If the system is a heat pump the defrost Note: use of colored wire (supplied with sensor must be connected from the in- line set) and defrost sensor connected door unit to the defrost sensor in the out- (heat pump only). -
Page 14: System Start-Up
HARBOR POINT WALL SPLIT DUCTLESS SYSTEMS OUTDOOR UNIT INSTALLATION 12) Condensate Hose: The unit is provided with approximately All condensate hose extensions should be 18” of condensate hose connected. Hose in accordance with local building codes. connection is sized to accept a 3/4” OD or Remember water only flows downhill to... -
Page 15: Field Charging
HARBOR POINT WALL SPLIT DUCTLESS SYSTEMS Start the indoor unit, cooling mode is Note: If interconnect is less then only allowed when the outside ambient 24.6 feet a small amount of refrigerant temperature is above 60° F to prevent may need to be reclaimed to achieve damage to the compressor. - Page 16 HARBOR POINT WALL SPLIT DUCTLESS SYSTEMS FIELD CHARGING Instructions: 1. Measure suction pressure and deter- 4. Determine from the table what the mine evaporator-refrigerant temperature superheat should be for the indoor and on R410A scale of low-side gauge. outdoor temperatures.
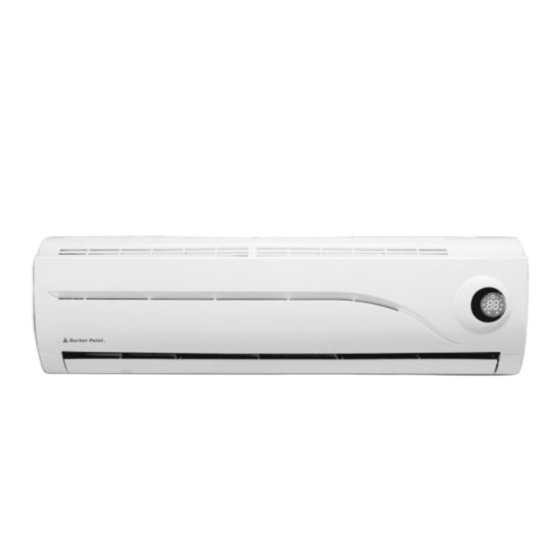
- Page 17 OPERATION SECTION FOR HF-25/HF-35 & HFR-25/HFR-35 OPERATION AND MAINTENANCE SECTION FOR HF-51/HF-70 & HFR-51/HFR-70 model follows this section Guide to features and their function There are many models, features and appearance will vary. The figure shown is representative of the operation of 9,000/12,000 Btuh systems. Air return grill Takes in the indoor air Push down the air inlet grille and the push both sides of air inlet...
-
Page 18: Remote Control Operation
OPERATION SECTION FOR HF-25/HF-35 & HFR-25/HFR-35 Remote Control Operation This button, when pressed, starts operation and stops when pressed again. - Page 19 OPERATION SECTION FOR HF-25/HF-35 & HFR-25/HFR-35 Remote Control Operation Note: Wait 3 minutes before restarting the unit. Selecting MODE of OPERATION To select operating mode, point the remote control toward the indoor air conditioning unit: 1) Press the ON/OFF button to START. 2) Press the MODE button to step through the operating modes:...
- Page 20 OPERATION SECTION FOR HF-25/HF-35 & HFR-25/HFR-35 Remote Control Operation Temperature adjustment in AUTO SELECT mode To adjust the air temperature during AUTO SELECT mode, point the remote control toward the indoor air conditioning unit: 1) Press the button once. To raise the set point temperature 1°C or 1°F.
- Page 21 OPERATION SECTION FOR HF-25/HF-35 & HFR-25/HFR-35 Remote Control Operation Up/down air flow direction adjustment The up/down air flow direction can be adjusted by pressing the VANE CONTROL button on the remote control, each time this button is pressed, the vane angle changes in the following sequence: (AUTO) •...
- Page 22 OPERATION SECTION FOR HF-25/HF-35 & HFR-25/HFR-35 Remote Control Operation Setting the time clock button flashing When batteries are inserted, the time will automatically be set to 12:00 AM. Back Front 1) With the back cover off, press the CLK button with the tip of a ball pen, etc. The time indicator will flash, the time can now be set.
- Page 23 OPERATION SECTION FOR HF-25/HF-35 & HFR-25/HFR-35 Remote Control Operation How to set the ON timer 1) Press the AUTO START button to set the ON timer mode during operation. Each time the button is pressed, the ON timer mode alternates between ON and OFF. 2) Set the time on the timer using the HOUR and MIN buttons.
-
Page 24: Features Of Heating Operations
OPERATION SECTION FOR HF-25/HF-35 & HFR-25/HFR-35 Features of Heating Operations Defrosting Important: When the outdoor air temperature is very Heating operation will cease at ap- low and humidity is very high, frosting will proximately 15° F outdoor tempera- occur in the heat exchanger of the outdoor ture due to a sensor located in the unit, which has negative impacts upon the outdoor unit. - Page 25 OPERATION SECTION FOR HF-51/HF-70 & HFR-51/HFR-70 Guide to features and their function Air return grill Takes in the indoor air Push down the air inlet grille and the push both sides of air inlet grille at the bottom. Lightly push both sides of the air inlet grille at the botton and pull it to this side till a resistance is felt.
- Page 26 OPERATION SECTION FOR HF-51/HF-70 & HFR-51/HFR-70 Remote Control Operation When timer is set this light is lit. Air conditioner running light Digital display It can show set point temperature, fixed time or malfunction code. Fan speed indicator In high speed, three indicators are lit. In middle speed,two indicators are lit.
- Page 27 OPERATION SECTION FOR HF-51/HF-70 & HFR-51/HFR-70 Remote Control Operation This button, when pressed, starts operation and stops when pressed again. (fixed direction) This button is used for selection of the left/right air flow direction, whenever pressed the flap changes from osculating to fix, or from fixed to osculating. When air-conditioner is cool-only model, the HEAT mode is bypassed to FAN mode.
- Page 28 OPERATION SECTION FOR HF-51/HF-70 & HFR-51/HFR-70 Remote Control Operation Note: Wait 3 minutes before restarting the unit. Selecting MODE of OPERATION To select operating mode, point the remote control toward the indoor air conditioning unit: 1) Press the ON/OFF button to START. 2) Press the MODE button to step through the operating modes:...
- Page 29 OPERATION SECTION FOR HF-51/HF-70 & HFR-51/HFR-70 Remote Control Operation Temperature adjustment in AUTO SELECT mode To adjust the air temperature during AUTO SELECT mode, point the remote control toward the indoor air conditioning unit: 1) Press the button once, to raise the set point 1°C or 1°F.
- Page 30 OPERATION SECTION FOR HF-51/HF-70 & HFR-51/HFR-70 Remote Control Operation Up & down air flow direction adjustment The up/down air flow direction can be adjusted by pressing the OUT FLAP button on the remote control, each time this button is pressed, the vane angle changes in the following sequence: (AUTO) •...
- Page 31 OPERATION SECTION FOR HF-51/HF-70 & HFR-51/HFR-70 Remote Control Operation Setting the time clock button flashing When batteries are inserted, the time will automatically be set to 12:00 AM. Back Front 1) With the back cover off, press the CLK button with the tip of a ball pen, etc. The time indicator will flash, the time can now be set.
- Page 32 OPERATION SECTION FOR HF-51/HF-70 & HFR-51/HFR-70 Remote Control Operation How to set the ON timer 1) Press the AUTO START button to set the ON timer mode during operation. Each time the button is pressed, the ON timer mode alternates between ON and OFF. 2) Set the time on the timer using the HOUR and MIN buttons.
-
Page 33: Maintenance
HARBOR POINT WALL SPLIT DUCTLESS SYSTEMS Features of Heating Operations Defrosting Important: Heating operation will cease at When the outdoor air temperature is very approximately 15° F outdoor temperature due to a sensor located in the outdoor unit. low and humidity is very high, frosting will... -
Page 34: Troubleshooting
HARBOR POINT WALL SPLIT DUCTLESS SYSTEMS Maintenance To clean the surface of the air conditioner: After the operating season • Use a soft and dry cloth to wipe the 1) Set the temperature at 86°F or 30°C and air conditioner off, or use a vacuum operate in the fan status for about half a cleaner to clean it. - Page 35 HARBOR POINT WALL SPLIT DUCTLESS SYSTEMS Basic Operation Characteristics Problem Cause Restart is delayed for 3 minutes after shut down to protect the unit. The unit can not be restarted just after Three-minute protection timer incorporated shut down. (RUN light is on) in the microcomputer actuates automatically.