Table of Contents
Advertisement
Quick Links
- 1 Setting up the Dlxi Printer
- 2 Loading Thermal Transfer Ribbon
- 3 Chapter 3: Installing Cognitivetpg Printer Administrator and Print Drivers
- 4 Downloading Cognitivetpg Printer Administrator
- 5 Cognitivetpg Printer Administrator Utility
- 6 Chapter 6: Troubleshooting & Default Settings
- Download this manual
Advertisement
Table of Contents

Related Manuals for CognitiveTPG DLXi


Summary of Contents for CognitiveTPG DLXi
- Page 1 DLXi Desktop Label Printer USER GUIDE “Built to Last... Designed to Connect.” DLX-UG00000 Rev. C 10/14...
- Page 2 All information in this document is subject to change without notice, and does not represent a commitment on the part of CognitiveTPG. No part of this document may be reproduced for any reason or in any form, including electronic storage and retrieval, without the expressed written permission of CognitiveTPG.
-
Page 3: Table Of Contents
Connecting via Bluetooth ..............9 Loading Thermal Transfer Ribbon ............ 11 Self-Testing: ....................13 Chapter 3: Installing CognitiveTPG Printer Administrator and Print Drivers ..14 Downloading CognitiveTPG Printer Administrator ....14 CognitiveTPG Printer Administrator Utility........15 Chapter 4: Advanced DLXi Features ............24 Using USB Hubs, Keyboards, and Scanners ........ -
Page 4: Chapter 1: Introduction
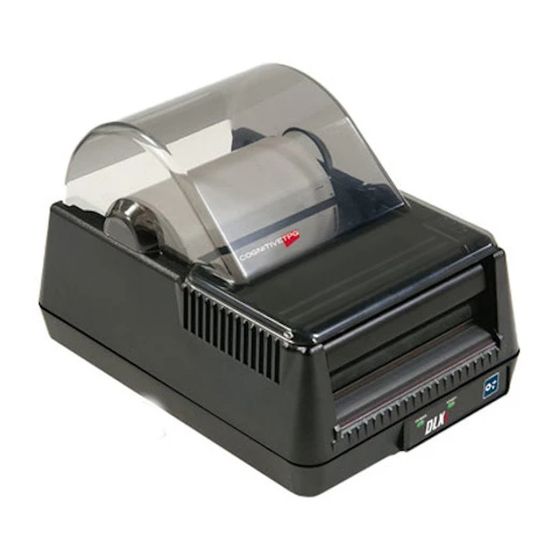
Chapter 1: Introduction Welcome Congratulations on the purchase of a CognitiveTPG DLXi desktop label printer. With its durable design, the DLXi provides professional quality direct thermal and thermal transfer label printing and performance. CognitiveTPG is committed to providing a reliable product and user experience. -
Page 5: Printer Feature Overview
Printer Feature Overview Front/Rear View Front View Rear View USB-A, USB-B, Serial, Parallel, Ethernet (4-inch Model Shown) Component Function A - Power Indicator Indicates power status ON – printer on and ready to print OFF- no power applied B - Ready Indicator Indicates printer status GREEN –... - Page 6 DLXi Communication Interfaces (2” and 4” Model Detail) 2” 4” 2” USB/Ethernet/ Serial 2” USB/Serial 2” USB/Parallel 4” USB/Ethernet/ Serial/Parallel 4” USB/Serial/ Parallel USB-B USB-A ETHERNET SERIAL 9-PIN MINI-CENTRONICS (DTE Device) Parallel 1284-C Inside View Common Components for All Models (Direct Thermal and Thermal Transfer) (TT Printer Shown) Component (DT &...
- Page 7 Components for Thermal Transfer Models Component (TT Models) Function E - Ribbon Take-up Driver Ribbon take-up core mount and driver F - Ribbon Take-up Mount Flexible arm for ribbon take-up core mounting G - Ribbon Supply Core Mounts Holds ribbon supplly roll...
-
Page 8: Chapter 2: Printer Installation
Chapter 2: Printer Installation Setting up the DLXi Printer Connecting the Interface and Power Cables IMPORTANT! PRIOR TO CONNECTING ANY INTERFACE CABLE AND POWER CABLE TO PRINTER, MAKE SURE POWER OFF PRINTER IS OFF. Connect power cable to AC adapter... -
Page 9: Connecting Via Bluetooth
BLUETOOTH Make sure Bluetooth is enabled on the PC, and that the DLXi is powered on. WINDOWS 7 Click the Bluetooth icon on the taskbar and select “Add a Device. ” If icon isn’t visible in the taskbar, click the arrow to show hidden icons. - Page 10 WITH PRINTHEAD. PRINTHEAD MAY BE HOT AFTER PRINTING. Unpack and prepare outward wound or inward wound media for installation into printer. NOTE: USE ONLY COGNITIVETPG APPROVED MEDIA. FOR MORE INFORMATION ON COGNITIVETPG APPROVED SUPPLIES, CONTACT US AT 800-732-8950 OR AT COGNITIVETPG.COM.
-
Page 11: Loading Thermal Transfer Ribbon
NOTE: THIS STEP Position ribbon in front of printer with supply core closest to printer IS FOR THERMAL and text on ribbon leader facing TRANSFER (TT) DLXI down. Raise dust cover. PRINTERS. USE ONLY COGNITIVETPG APPROVE THERMAL RIBBON. FOR MORE... - Page 12 Latch both sides of the printhead HELPFUL TIP: IF and turn the power on to take up POWER IS ALREADY the slack in the ribbon leader. ON, THE DLXI WILL TAKE UP ANY EXCESS Click! RIBBON UPON LATCHING THE PRINTHEAD...
-
Page 13: Self-Testing
Self-Testing: NOTE: AFTER PRINTING A SELF- TEST, PRINTER IS IN HEXIDECIMAL DUMP MODE. CYCLE PRINTER’S POWER TO RETURN TO NORMAL OPERATION. Press and hold the feed button while Release feed button when printing turning printer ON. begins and printer will conduct a self- test and print a configuration label. -
Page 14: Chapter 3: Installing Cognitivetpg Printer Administrator And Print Drivers
COGNITIVETPG Administrator and Print Drivers PRINTER ADMINISTRATOR CognitiveTPG Printer Administrator is a Java based utility designed for installation on WILL ALSO LOAD various operating system platforms. Administrator allows complete control over the PRINT DRIVERS profiles and settings of the DLXi printer. -
Page 15: Cognitivetpg Printer Administrator Utility
CognitiveTPG Printer Administrator Utility Connection Settings Connecting Via USB 1. Select the System Printer Connection radio dial. 2. Select the appropriate printer from the Printer Name drop down menu. 3. Click Connect. NOTE: WHEN PRINTER IS PROPERLY CONNECTED, COGNITIVETPG PRINTER... -
Page 16: Printer Settings
Connecting Via Serial 1. Select the Use Serial Connection radio dial. 2. Select the Com port to which the printer is connected. 3. Select the printer’s baud rate setting. Serial Connection Parameters HELPFUL TIP: PRINT • Baud Rate A SELF TEST TO •... - Page 17 No-Media Timeout The no media timeout value represents the number of inches of media fed through the printer without detecting an index mark prior to reporting an error. EXAMPLE: IF NO MEDIA TIMEOUT IS SET TO 12, THE PRINTER WILL CONTINUE TO FEED 12 INCHES OF MEDIA WITHOUT DETECTING AN INDEX MARK BEFORE REPORTING AN ERROR.
- Page 18 REQUIRES THE USE OF Select direct thermal or thermal transfer based on the model of DLXi printer and the A THERMAL TRANSFER type of media being used. Thermal transfer DLXi printers can be set to operate in direct PRINTER AND thermal mode.
- Page 19 Auto Recalibration Check and Apply Enable Auto Recalibration and the printer will automatically attempt to recalibrate in the event an index mark is not detected. Auto Top Of Form Check and Apply Enable Automatic TOF and the printer will feed a label when the printer is turned ON or the printhead is latched.
- Page 20 FILE NAME MUST BE 8 CHARACTERS OR LESS. Deleting Fonts and Objects 1. Select the Fonts and Objects tab in CognitiveTPG Printer Administrator. 2. Highlight the Font, Object or Graphic to be deleted. 3. Click the Delete Selected Objects button.
-
Page 21: Profile Management
Profile Management Manage the settings of the DLXi using the Profile Management section of CognitiveTPG Printer Administrator. Profile Management displays a list of the printer’s current variable settings. Obtaining Printers Current Profile 1. Select the Profile Management tab in CognitiveTPG Printer Administrator. -
Page 22: Firmware Upgrade
NOTE: IF YOUR COMPUTER IS CONNECTED TO THE INTERNET, USE THE “GET LATEST FIRMWARE FROM COGNITIVETPG” BUTTON. THIS ACTION WILL ALSO LOAD 2. Click the Select Firmware File button. CURRENT FONTS. 3. Select the appropriate Firmware file and click Ok. - Page 23 Use the Script Editor in CognitiveTPG Printer Administrator to send programming language code to the printer. For more information on programming CPL please refer to the CPL Programmers guide located on the CognitiveTPG Web site www. CognitiveTPG.com. Sample Test Script in CPL:...
-
Page 24: Chapter 4: Advanced Dlxi Features
Chapter 4: Advanced DLXi Features Each DLXi printer includes a USB-A (Host) port in addition to the USB-B (Device) port. This feature allows for stand alone applications and set-up as described below. USB-B Ethernet Serial 9-pin Mini-Centronics USB-A (DTE Device) -
Page 25: Usb A Port
USB A Port Utilization Changing Printer Settings Using a USB Flash Drive NOTE: CHANGING VARIABLE PRINTER 1. Create a folder on the USB flash drive at the root level named Cognitive. SETTINGS WITH THE 2. Inside the Cognitive folder create a folder named Settings. USB FLASH DRIVE 3. -
Page 26: Chapter 5: Cleaning And Maintenance
A CERTIFIED CLEANING PEN FOR CLEANING THERMAL PRINTHEAD. 2. Gently clean the printhead (A), platen roller (B) and media path using a CognitiveTPG approved cleaning pen, card or a soft, lint-free cloth saturated with 99% isopropyl alcohol. Cleaning Supplies DLXi Cleaning Supplies... -
Page 27: Chapter 6: Troubleshooting & Default Settings
Chapter 6: Troubleshooting & Default Settings Use the chart below for troubleshooting your DLXi printer prior to contacting Technical Support. If you are unable to resolve the problem using the chart below, please contact our Technical Support. Symptom Possible Cause... - Page 28 The DLXi ships with the following default settings: Parameter Default Setting Programming Language CPL - Cognitive Programming Language Speed 5 ips (127 mm/s) Label Width 2” Models: 220 (2.2” or 56 mm) 4” Models: 409 (4.09” or 104 mm) Label Length...
Need help?
Do you have a question about the DLXi and is the answer not in the manual?
Questions and answers