Manitowoc MARINE MODEL S1800 Service Manual
Marine model
Hide thumbs
Also See for MARINE MODEL S1800:
- Installation, use & care manual (68 pages) ,
- Use and care manual (56 pages) ,
- Manual (5 pages)
Table of Contents
Advertisement
Quick Links
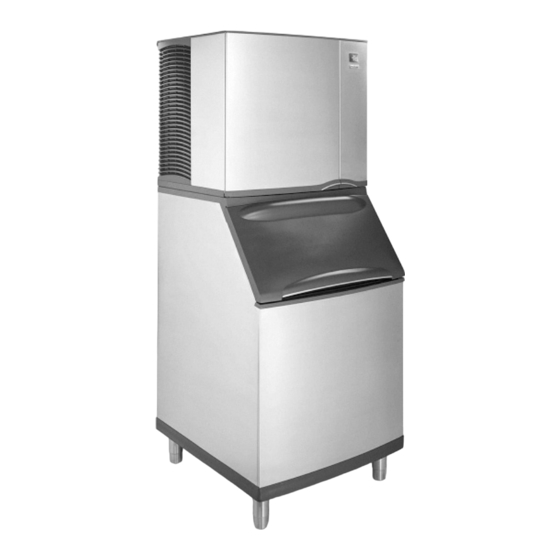
S1800 Marine Model
Ice Machines
Service
Manual
Thank you for selecting a Manitowoc Ice Machine, the dependability leader in ice making equipment and related products.
With proper installation, care and maintenance, your new Manitowoc Ice Machine will provide you with many years of
reliable and economical performance.
This manual is updated as new information and models
Part Number 80-1634-3
are released. Visit our website for the latest manual.
9/2004
www.manitowocice.com
Advertisement
Table of Contents

Related Manuals for Manitowoc MARINE MODEL S1800


Summary of Contents for Manitowoc MARINE MODEL S1800
- Page 1 Service Manual Thank you for selecting a Manitowoc Ice Machine, the dependability leader in ice making equipment and related products. With proper installation, care and maintenance, your new Manitowoc Ice Machine will provide you with many years of reliable and economical performance.
-
Page 2: Safety Notices
Read and understand this manual. It contains valuable care and maintenance information. If you encounter problems not covered by this manual, do not proceed, contact Manitowoc Ice, Inc. We will be happy to provide assistance. Important Routine adjustments and maintenance procedures outlined in this manual are not covered by the warranty. -
Page 3: Table Of Contents
Section 1 General Information Model Numbers ..........How to Read a Model Number . - Page 4 Section 3 Ice Machine Operation Component Identification ......... Sequence Of Operation .
- Page 5 Section 6 Electrical System Energized Parts Charts ......... . . Wiring Diagram Sequence of Operation .
- Page 6 Refrigerant Recovery/Evacuation and Recharging ..... Table of Contents (continued) Normal Self-Contained Model Procedures ......System Contamination Clean-Up .
-
Page 7: Section 1 General Information
Section 1 Model Numbers This manual covers the following models: Self-Contained Water-Cooled SR1801WM SD1803WM SY1805WM NOTE: Model numbers ending in 3 indicate a 3-phase unit. Example: SY1805WM3 Warning PERSONAL INJURY POTENTIAL Do not operate equipment that has been misused, abused, neglected, damaged, or altered/modified from that of original manufactured specifications. -
Page 8: Accessories
MANITOWOC CLEANER AND SANITIZER Manitowoc Ice Machine Cleaner and Sanitizer are available in convenient 16 oz. (473 ml) bottles. These are the only cleaner and sanitizer approved for use with Manitowoc products. -
Page 9: Model/Serial Number Location
Section 1 Model/Serial Number Location These numbers are required when requesting information from your local Manitowoc distributor, or Manitowoc Ice, Inc. SV13147 MODEL/SERIAL DECAL Part Number 80-1634-3 The model and serial number are listed on the MODEL/ SERIAL NUMBER DECAL affixed to the ice machine, remote condenser and storage bin. -
Page 10: Owner Warranty Registration Card
NOTE: If the dealer you purchased the ice machine from is not authorized to perform warranty service, contact your Manitowoc distributor or Manitowoc Ice, Inc. for the name of the nearest authorized service representative. Service Calls Normal maintenance, adjustments and cleaning as outlined in this manual are not covered by the warranty. -
Page 11: Section 2 Installation Instructions
General These instructions are provided to assist the qualified installer. Check your local Yellow Pages for the name of the nearest Manitowoc distributor, or call Manitowoc Ice, Inc. for information regarding start-up services. Ice Machine Dimensions S1800 WATER-COOLED ICE MACHINES 2.50"... -
Page 12: Location Of Ice Machine
Installation Instructions Location of Ice Machine The location selected for the ice machine must meet the following criteria. If any of these criteria are not met, select another location. • The location must be free of airborne and other contaminants. •... -
Page 13: Electrical Service
Section 2 Electrical Service GENERAL Warning All wiring must conform to local, state and national codes. VOLTAGE The maximum allowable voltage variation is ±10% of the rated voltage at ice machine start-up (when the electrical load is highest). Warning The ice machine must be grounded in accordance with national and local electrical codes. -
Page 14: Self-Contained Electrical Wiring Connections
Installation Instructions Self-Contained Electrical Wiring Connections Warning These diagrams are not intended to show proper wire routing, wire sizing, disconnects, etc., only the correct wire connections. All electrical work, including wire routing and grounding, must conform to local, state and national electrical codes. -
Page 15: Water Supply And Drain Requirements
Section 2 Water Supply and Drain Requirements WATER SUPPLY Local water conditions may require treatment of the water to inhibit scale formation, filter sediment, and remove chlorine odor and taste. Important If you are installing a Manitowoc Arctic Pure™ water filter system, refer to the Installation Instructions supplied with the filter system for ice making water inlet connections. -
Page 16: Water Supply And Drain Line Sizing/Connections
Installation Instructions WATER SUPPLY AND DRAIN LINE SIZING/CONNECTIONS ! Caution Plumbing must conform to state and local codes. Location Water Temperature 35°F (1.6°C) Min. Ice Making Water Inlet 90°F (32.2°C) Max. Ice Making Water Drain 40°F (4.4°C) Min. Condenser Water Inlet 90°F (32.2°C) Max. -
Page 17: Installation Check List
Section 2 Installation Check List Is the Ice Machine level? Has all of the internal packing been removed? Have all of the electrical and water connections been made? Has the supply voltage been tested and checked against the rating on the nameplate? Is there proper clearance around the ice machine for air circulation? Has the ice machine been installed where... -
Page 18: Before Starting The Ice Machine
Installation Instructions Before Starting the Ice Machine All Manitowoc ice machines are factory-operated and adjusted before shipment. Normally, new installations do not require any adjustment. To ensure proper operation, follow the Operational Checks in Section 3 of this manual. Starting the ice machine and completing the Operational Checks are the responsibilities of the owner/operator. -
Page 19: Section 3 Ice Machine Operation
Section 3 Ice Machine Operation Section 3 Ice Machine Operation Component Identification Water Distribution Tube Toggle Switch Water Curtain Dump Valve Check Valve sv3149 Ice Thickness Probe Bin Switch Water Level Probe Water Inlet Location Water Pump Water Inlet Valve (Located in Refrigeration Compartment) sv3150 Part Number 80-1634-3... -
Page 20: Sequence Of Operation
Ice Machine Operation Sequence Of Operation NOTE: The toggle switch must be in the ice position and the water curtain must be in place on the evaporator before the ice machine will start. INITIAL START-UP OR START-UP AFTER AUTOMATIC SHUT-OFF 1. -
Page 21: Harvest Sequence
Section 3 HARVEST SEQUENCE 5. Water Purge The harvest valve(s) opens at the beginning of the water purge to divert hot refrigerant gas into the evaporator. The water pump continues to run, and the water dump valve energizes for 45 seconds to purge the water in the sump trough. -
Page 22: Operational Checks
Ice Machine Operation Operational Checks GENERAL Manitowoc ice machines are factory-operated and adjusted before shipment. Normally, new installations do not require any adjustment. To ensure proper operation, always follow the Operational Checks: • when starting the ice machine for the first time •... -
Page 23: Harvest Sequence Water Purge
Section 3 HARVEST SEQUENCE WATER PURGE The harvest sequence water purge adjustment may be used when the ice machine is hooked up to special water systems, such as a de-ionized water treatment system. Warning Disconnect electric power to the ice machine at the electrical disconnect before proceeding. - Page 24 Ice Machine Operation Section 3 THIS PAGE INTENTIONALLY LEFT BLANK Part Number 80-1634-3...
-
Page 25: Section 4 Maintenance
Section 4 General You are responsible for maintaining the ice machine in accordance with the instructions in this manual. Maintenance procedures are not covered by the warranty. Warning If you do not understand the procedures or the safety precautions that must be followed, call your local Manitowoc service representative to perform the maintenance procedures for you. -
Page 26: Guardian
*Although one sachet is recommended, extreme conditions may necessitate using two sachet packets. Guardian™ sachet packets are available through your local Manitowoc ice machine dealer. SACHET REPLACEMENT PROCEDURE 1. Loosen the left screw and open the left front door. The right front panel does not need to be removed. -
Page 27: Interior Cleaning And Sanitizing
Cleaning mode. Step 3 Wait about two minutes or until water starts to flow over the evaporator. Step 4 Add the proper amount of Manitowoc Ice Machine Cleaner to the water trough. Model... -
Page 28: Sanitizing Procedure
Maintenance SANITIZING PROCEDURE Use sanitizer to remove algae or slime. Do not use it to remove lime scale or other mineral deposits. Step 1 Set the toggle switch to the OFF position after ice falls from the evaporator at the end of a Harvest cycle. -
Page 29: Removal Of Parts For Cleaning/Sanitizing
Section 4 REMOVAL OF PARTS FOR CLEANING/SANITIZING 1. Turn off the electrical and water supply to the ice machine (and dispenser when applicable). Warning Disconnect electric power to the ice machine (and dispenser if applicable) at the electric switch box before proceeding. - Page 30 Maintenance 1. Water Curtain A. Gently flex the curtain in the center and remove it from the right side. B. Slide the left pin out. STEP 2 Water Curtain Removal 2. Ice Thickness Probe A. Compress the hinge pin on the top of the ice thickness probe.
- Page 31 Section 4 3. Water Distribution Tube Warning Removing the distribution tube while the water pump is running will allow water to spray from ice machine. Disconnect the electrical power to the ice machine and dispenser at the electric service switch box and turn off the water supply.
- Page 32 Maintenance Water Level Probe 1. Remove the water trough. Warning Disconnect the electrical power to the ice machine at the electrical disconnect before proceeding. 2. The water level probe normally does not require removal for cleaning. The probe can be wiped and cleaned in place or proceed to step 3.
-
Page 33: Dump Valve Disassembly
Section 4 Water Dump Valve The water dump valve normally does not require removal for cleaning. To determine if removal is necessary: 1. Locate the water dump valve. 2. Set the toggle switch to ICE. 3. While the ice machine is in the freeze mode, check the dump valve’s clear plastic outlet drain hose for leakage. - Page 34 Maintenance Evaporator Tray Removal 1. Remove the water trough. 2. Remove thumbscrew on left side of tray. 3. Allow left side of tray to drop as you pull the tray to the left side. Continue until the outlet tube disengages from the right side. 4-10 Drain Line Check Valve The drain line check valve normally does not require...
- Page 35 Section 4 Water Inlet Valve The water inlet valve normally does not require removal for cleaning. Refer to Section 5 for a list of causes for “No Water Entering Water Trough” or “Water Overflows Water Trough. 1. When the ice machine is off, the water inlet valve must completely stop water flow into the machine.
-
Page 36: Removal From Service/Winterization
Maintenance Removal from Service/Winterization GENERAL Special precautions must be taken if the ice machine is to be removed from service for an extended period of time or exposed to ambient temperatures of 32°F (0°C) or below. ! Caution If water is allowed to remain in the ice machine in freezing temperatures, severe damage to some components could result. -
Page 37: Section 5 Before Calling For Service
Section 5 Checklist If a problem arises during operation of your ice machine, follow the checklist below before calling service. Routine adjustments and maintenance procedures are not covered by the warranty. Problem Ice machine does not operate. Ice machine stops, and can be restarted by moving the toggle switch to OFF and back to ICE. -
Page 38: Safety Limit Feature
Low ice capacity. Safety Limit Feature In addition to the standard safety controls, such as the high pressure cutout, your Manitowoc ice machine features built-in safety limits which will stop the ice machine if conditions arise which could cause a major component failure. -
Page 39: Section 6 Electrical System
Section 6 Energized Parts Charts SELF-CONTAINED WATER-COOLED MODELS Ice Making Sequence Of Harvest Water Operation Valve Pump (Left) START-UP 1. Water Purge 2. Refrigeration System Start-Up FREEZE SEQUENCE 3. Pre-Chill 4. Freeze HARVEST SEQUENCE 5. Water Purge 6. Harvest 7. AUTOMATIC SHUT-OFF 1. -
Page 40: Wiring Diagram Sequence Of Operation
Electrical System Wiring Diagram Sequence of Operation SELF-CONTAINED MODELS Initial Start-Up or Start-Up After Automatic Shut-Off 1. WATER PURGE Before the compressor starts, the water pump and water dump solenoid are energized for 45 seconds to purge old water from the ice machine. - Page 41 Section 6 2. REFRIGERATION SYSTEM START-UP The compressor starts after the 45- second water purge, and it remains on throughout the Freeze and Harvest cycles. The water fill valve is energized at the same time as the compressor. The harvest valve(s) remains on for the first 5 seconds of the initial compressor start-up and then shuts off.
- Page 42 Electrical System Freeze Sequence 3. PRE-CHILL To pre-chill the evaporator, the compressor runs for 30 seconds (60 seconds initial cycle) prior to water flow. The water fill valve remains on until the water level probe is satisfied. Table 6-3. Self-Contained Models 3.
- Page 43 Section 6 4. FREEZE The water pump starts after the pre- chill. An even flow of water is directed across the evaporator and into each cube cell, where it freezes. The water fill valve will cycle off then on one more time to refill the water trough.
- Page 44 Electrical System Harvest Sequence 5. WATER PURGE The harvest valve(s) opens at the beginning of the water purge to divert hot refrigerant gas into the evaporator. The water pump continues to run, and the water dump valve energizes for 45 seconds to purge the water in the sump trough.
- Page 45 Section 6 6. HARVEST The harvest valve(s) remains open and the refrigerant gas warms the evaporator. This causes the cubes to slide, as a sheet, off the evaporator and into the storage bin. The sliding sheet of cubes swings the water curtain out, opening the bin switch.
- Page 46 Electrical System Automatic Shut-Off 7. AUTOMATIC SHUT-OFF When the storage bin is full at the end of a harvest cycle, the sheet of cubes fails to clear the water curtain and holds it open. After the water curtain is held open for 30 seconds, the ice machine shuts off.
-
Page 47: Wiring Diagrams
Section 6 Wiring Diagrams The following pages contain electrical wiring diagrams. Be sure you are referring to the correct diagram for the ice machine which you are servicing. Warning Always disconnect power before working on electrical circuitry. WIRING DIAGRAM LEGEND The following symbols are used on all of the wiring diagrams: Internal Compressor Overload (Some models have external compressor overloads) -
Page 48: S1800 - Self-Contained - 1 Phase
Electrical System S1800 - SELF-CONTAINED - 1 PHASE (89) (55) HIGH PRESSURE CUTOUT (88) (42) ICE THICKNESS PROBE WATER LEVEL PROBE CONTACTOR *OVERLOAD CONTACTS (BLACK) (51) 6-10 (61) CONTROL BOARD (57) TRANS. FUSE (7A) CLEAN LEFT BIN COMP RIGHT BIN RMT BIN WTR PROBE (26) -
Page 49: S1800 - Self-Contained - 3 Phase
Section 6 S1800 - SELF-CONTAINED - 3 PHASE (89) HIGH PRESSURE CUTOUT (88) (42) ICE THICKNESS PROBE WATER LEVEL PROBE CONTACTOR CONTACTS (51) COMPRESSOR Part Number 80-1634-3 (55) CONTROL BOARD TRANS. FUSE (7A) CLEAN LEFT BIN RIGHT BIN RMT BIN WTR PROBE ICE PROBE HARV... -
Page 50: Component Specifications And Diagnostics
Electrical System Component Specifications and Diagnostics MAIN FUSE Function The control board fuse stops ice machine operation if electrical components fail causing high amp draw. Specifications The main fuse is 250 Volt, 7 amp. Check Procedure Warning High (line) voltage is applied to the control board (terminals #55 and #56) at all times. -
Page 51: Diagnostic Aids
Section 6 Symptoms Bin Switch Fails Open • The ice machine will not start with the toggle switch in the ice position, but runs normally with the toggle switch in the clean position. Bin Switch Fails Closed • Safety limit 2 is recorded in the control board memory and the harvest cycle continues after the ice opens and closes the water curtain (harvest cycle is 3.5 minutes long). -
Page 52: Compressor Electrical Diagnostics
Electrical System COMPRESSOR ELECTRICAL DIAGNOSTICS The compressor will not start or will trip repeatedly on overload. Check Resistance (Ohm) Values NOTE: Compressor windings can have very low ohm values. Use a properly calibrated meter. Perform the resistance test after the compressor cools. The compressor dome should be cool enough to touch (below 120°F/49°C) to assure that the overload is closed and the resistance readings will be accurate. -
Page 53: Ptcr Diagnostics
Section 6 PTCR DIAGNOSTICS What is a PTCR? A PTCR (or Positive Temperature Coefficient Resistor) is made from high-purity, semi-conducting ceramics. A PTCR is useful because of its resistance versus temperature characteristic. The PTCR has a low resistance over a wide (low) temperature range, but upon reaching a certain higher temperature, its resistance greatly increases, virtually stopping current flow. - Page 54 Electrical System S-Model Automatic Shut-Off and Restart When the storage bin is full at the end of a harvest cycle, the sheet of cubes fails to clear the water curtain and will hold it open. After the water curtain is held open for 30 seconds, the ice machine shuts off.
- Page 55 • The voltage at the compressor during start-up is too low. Manitowoc ice machines are rated at ±10% of nameplate voltage at compressor start-up. (Ex: An ice machine rated at 208-230 should have a compressor start-up voltage between 187 and 253 volts.)
-
Page 56: Diagnosing Start Components
Electrical System DIAGNOSING START COMPONENTS If the compressor attempts to start, or hums and trips the overload protector, check the start components before replacing the compressor. Capacitor Visual evidence of capacitor failure can include a bulged terminal end or a ruptured membrane. Do not assume a capacitor is good if no visual evidence is present. -
Page 57: Ice/Off/Clean Toggle Switch
Section 6 ICE/OFF/CLEAN TOGGLE SWITCH Function The switch is used to place the ice machine in ICE, OFF or CLEAN mode of operation. Specifications Single-pole, single-throw switch. The switch is connected into a varying low D.C. voltage circuit. Check Procedure NOTE: Because of a wide variation in D.C. -
Page 58: Electronic Control Board
Electrical System ELECTRONIC CONTROL BOARD AC LINE VOLTAGE ELECTRICAL PLUG (NUMBERS MARKED ON WIRES) MAIN FUSE (7A) CLEAN LIGHT (YELLOW) LEFT BIN LIGHT (GREEN) RIGHT BIN LIGHT (GREEN) REMOTE BIN LIGHT (GREEN) WATER PROBE LIGHT (GREEN) ICE PROBE LIGHT (GREEN) HARVEST LIGHT (RED) SAFETY LIMIT 1 LIGHT (RED) SAFETY LIMIT 2 LIGHT (RED) - Page 59 Section 6 General S-Model control boards use a dual voltage transformer. This means only one control board is needed for both 115V and 208-230V use. Safety Limits In addition to standard safety controls, such as the high pressure cut-out, the control board has built-in safety limits.
-
Page 60: Ice Thickness Probe (Harvest Initiation)
Make sure the ice thickness probe wire and the bracket do not restrict movement of the probe. Ice Thickness Probe Cleaning 1. Mix a solution of Manitowoc ice machine cleaner and water (2 ounces of cleaner to 16 ounces of water) in a container. -
Page 61: Diagnosing Ice Thickness Control Circuitry
Section 6 DIAGNOSING ICE THICKNESS CONTROL CIRCUITRY Ice Machine Does Not Cycle Into Harvest When Water Contacts The Ice Thickness Control Probe Step 1 Bypass the freeze time lock-in feature by moving the ICE/OFF/CLEAN switch to OFF and back to ICE. Step 2 Wait until the water starts to flow over the evaporator (freeze cycle). -
Page 62: Water Level Control Circuitry
Electrical System Water Level Control Circuitry WATER LEVEL PROBE LIGHT The water level probe circuit can be monitored by watching the water level light. The water level light is on when water contacts the probe, and off when no water is in contact with the probe. -
Page 63: Diagnosing Water Level Control Circuitry
Section 6 DIAGNOSING WATER LEVEL CONTROL CIRCUITRY Problem: Water Trough Overfilling During The Freeze Cycle Step 1 Start a new freeze sequence by moving the ICE/ OFF/CLEAN toggle switch to OFF, then back to ICE. (if water flows with the switch off, check the water inlet valve). - Page 64 Electrical System Problem: Water Will Not Run Into The Sump Trough During The Freeze Cycle Step 1 Verify water is supplied to the ice machine, and then start a new freeze sequence by moving the ICE/ OFF/CLEAN toggle switch to OFF then back to ICE. Important This restart must be done prior to performing diagnostic procedures.
-
Page 65: Diagnosing An Ice Machine That Will Not Run
Section 6 Diagnosing An Ice Machine That Will Not Run Warning High (line) voltage is applied to the control board (terminals #55 and #56) at all times. Removing control board fuse or moving the toggle switch to OFF will not remove the power supplied to the control board. - Page 66 Electrical System Section 6 SELF CONTAINED - 1 PHASE WITH TERMINAL BOARD SV2071 6-28 Part Number 80-1634-3...
-
Page 67: Section 7 Refrigeration System
Section 7 Sequence of Operation SELF-CONTAINED WATER -COOLED MODELS HEAT EXCHANGER COMPRESSOR DRIER (WATER COOLED ONLY) HIGH PRESSURE VAPOR HIGH PRESSURE LIQUID Figure 7-1. Self-Contained Prechill and Freeze Cycle Prechill Refrigeration Sequence No water flows over the evaporator during the prechill. The refrigerant absorbs heat (picked up during the harvest cycle) from the evaporator. - Page 68 Refrigeration System H E A T E X C H A N G E R C O M P R E S S O R D R I E R ( W A T E R C O O L E D O N L Y ) H I G H P R E S S U R E V A P O R H I G H P R E S S U R E L I Q U I D Harvest Cycle Refrigeration Sequence...
-
Page 69: S1800 Self-Contained Tubing Schematic
Section 7 Refrigeration System S1800 SELF-CONTAINED TUBING SCHEMATIC HEAT EXCHANGER EXPANSION VALVE EXPANSION VALVE EVAPORATOR HARVEST HARVEST SOLENOID VALVE SOLENOID VALVE COMPRESSOR STRAINER DRIER RECEIVER AIR OR WATER COOLED CONDENSER NOTE: The refrigeration sequence for self-contained dual expansion valve ice machines is identical to self- contained single expansion valve ice machines. -
Page 70: Operational Analysis (Diagnostics)
Refrigeration System Operational Analysis (Diagnostics) GENERAL When analyzing the refrigeration system, it is important to understand that different refrigeration component malfunctions may cause very similar symptoms. Also, many external factors can make good refrigeration components appear bad. These factors can include improper installation, or water system malfunctions such as hot incoming water supply or water loss. -
Page 71: Before Beginning Service
Section 7 BEFORE BEGINNING SERVICE Ice machines may experience operational problems only during certain times of the day or night. A machine may function properly while it is being serviced, but malfunctions later. Information provided by the user can help the technician start in the right direction, and may be a determining factor in the final diagnosis. -
Page 72: Installation/Visual Inspection Checklist
Refrigeration System INSTALLATION/VISUAL INSPECTION CHECKLIST Possible Problem Ice machine is not level Level the ice machine Condenser is dirty Clean the condenser Water filtration is plugged (if Install a new water filter used) Water drains are not run Run and vent drains separately and/or are not according to the Installation vented... -
Page 73: Ice Formation Pattern
Section 7 ICE FORMATION PATTERN Evaporator ice formation pattern analysis is helpful in ice machine diagnostics. Analyzing the ice formation pattern alone cannot diagnose an ice machine malfunction. However, when this analysis is used along with Manitowoc’s Refrigeration System Operational Analysis Table, it can help diagnose an ice machine malfunction. - Page 74 Refrigeration System 3. Extremely Thin at Evaporator Inlet There is no ice, or a considerable lack of ice formation at the inlet of the evaporator. Examples: The ice at the outlet of the evaporator reaches 1/8" to initiate a harvest, but there is no ice formation at all at the inlet of the evaporator.
-
Page 75: Safety Limits
Section 7 SAFETY LIMITS General In addition to standard safety controls, such as high pressure cut-out, the control board has two built in safety limit controls which protect the ice machine from major component failures. Safety Limit #1: If the freeze time reaches 60 minutes, the control board automatically initiates a harvest cycle. - Page 76 Refrigeration System Safety Limit #1 Refer to previous page for safety limit operation. Freeze time exceeds 60 minutes for 6 consecutive freeze cycles. Possible Cause Improper installation Water system Electrical system Miscellaneous Refrigeration system SAFETY LIMIT NOTES • Because there are many possible external problems, do not limit your diagnosis to only the items listed in this chart.
- Page 77 Section 7 Safety Limit #2 Refer to page 7-11 for safety limit operation. Harvest time exceeds 3.5 minutes for 500 consecutive harvest cycles. Possible Cause Improper installation Water system Electrical system Refrigeration system SAFETY LIMIT NOTES • Because there are many possible external problems, do not limit your diagnosis to only the items listed in this chart.
-
Page 78: Analyzing Discharge Pressure During Freeze Or Harvest Cycle
Refrigeration System ANALYZING DISCHARGE PRESSURE DURING FREEZE OR HARVEST CYCLE Procedure 1. Determine the ice machine operating conditions: Air temp. entering condenser Air temp. around ice machine Water temp. entering sump trough 2. Refer to Operating Pressure Chart for ice machine being checked. -
Page 79: Analyzing Suction Pressure During Freeze Cycle
Section 7 ANALYZING SUCTION PRESSURE DURING FREEZE CYCLE The suction pressure gradually drops throughout the freeze cycle. The actual suction pressure (and drop rate) changes as the air and water temperatures entering the ice machine change. This affects freeze cycle times. To analyze and identify the proper suction pressure drop throughout the freeze cycle, compare the published suction pressure to the published freeze cycle time. -
Page 80: Freeze Cycle Suction Pressure High Checklist
Refrigeration System Freeze Cycle Suction Pressure High Checklist Possible Cause Improper installation Discharge pressure Improper refrigerant charge Other Freeze Cycle Suction Pressure Low Checklist Possible Cause Improper installation Discharge pressure Improper refrigerant charge Other NOTE: Do not limit your diagnosis to only the items listed in the checklists. 7-14 Check/Correct See “Installation/Visual Inspection Checklist”... -
Page 81: Harvest Valve Temperature Check
Section 7 HARVEST VALVE TEMPERATURE CHECK General NOTE: This procedure requires checking both harvest valves. A harvest valve requires a critical orifice size. This meters the amount of hot gas flowing into the evaporator during the harvest cycle. If the orifice is even slightly too large or too small, long harvest cycles will result. -
Page 82: Discharge Line Temperature Analysis
Refrigeration System DISCHARGE LINE TEMPERATURE ANALYSIS General Knowing if the discharge line temperature is increasing, decreasing or remaining constant can be an important diagnostic tool. Maximum compressor discharge line temperature on a normally operating ice machine steadily increases throughout the freeze cycle. Comparing the temperatures over several cycles will result in a consistent maximum discharge line temperature. -
Page 83: How To Use The Refrigeration System Operational Analysis Tables
Section 7 HOW TO USE THE REFRIGERATION SYSTEM OPERATIONAL ANALYSIS TABLES General These tables must be used with charts, checklists and other references to eliminate refrigeration components not listed on the tables and external items and problems which can cause good refrigeration components to appear defective. -
Page 84: Suction Pressure
Refrigeration System REFRIGERATION SYSTEM OPERATIONAL ANALYSIS TABLES S Models Dual Expansion Valve - Ice Machine Model Number_________________ This table must be used with charts, checklists and other references to eliminate refrigeration components not listed on the table and external items and problems, which can cause good refrigeration components to appear defective. -
Page 85: Pressure Control Specifications And Diagnostics
Section 7 Pressure Control Specifications and Diagnostics HIGH PRESSURE CUT-OUT (HPCO) CONTROL Function Stops the ice machine if subjected to excessive high- side pressure. The HPCO control is normally closed, and opens on a rise in discharge pressure. Specifications Cut-out: 450 psig ±10 (3103 kPa ±69, 31 Bar ±.69) Cut-in: Manual or automatic reset... -
Page 86: Cycle Time/24 Hour Ice Production/Refrigerant Pressure Charts
Refrigeration System Cycle Time/24 Hour Ice Production/ Refrigerant Pressure Charts These charts are used as guidelines to verify correct ice machine operation. Accurate collection of data is essential to obtain the correct diagnosis. • Refer to “OPERATIONAL ANALYSIS TABLE” for the list of data that must be collected for refrigeration diagnostics. -
Page 87: Refrigerant Recovery/Evacuation And Recharging
Do not purge refrigerant to the atmosphere. Capture refrigerant using recovery equipment. Follow the manufacturer’s recommendations. Important Manitowoc Ice, Inc. assumes no responsibility for the use of contaminated refrigerant. Damage resulting from the use of contaminated refrigerant is the sole responsibility of the servicing company. - Page 88 Refrigeration System Self-Contained Charging Procedures Important The charge is critical on all Manitowoc ice machines. Use a scale or a charging cylinder to ensure the proper charge is installed. 1. Be sure the toggle switch is in the OFF position.
-
Page 89: System Contamination Clean-Up
This section describes the basic requirements for restoring contaminated systems to reliable service. Important Manitowoc Ice, Inc. assumes no responsibility for the use of contaminated refrigerant. Damage resulting from the use of contaminated refrigerant is the sole responsibility of the servicing company. - Page 90 Refrigeration System Mild System Contamination Cleanup Procedure 1. Replace any failed components. 2. If the compressor is good, change the oil. 3. Replace the liquid line drier. NOTE: If the contamination is from moisture, use heat lamps during evacuation. Position them at the compressor, condenser and evaporator prior to evacuation.
-
Page 91: Replacing Pressure Controls Without Removing Refrigerant Charge
Section 7 10. Follow the normal evacuation procedure, except replace the evacuation step with the following: Important Dry nitrogen is recommended for this procedure. This will prevent CFC release. A. Pull vacuum to 1000 microns. Break the vacuum with dry nitrogen and sweep the system. Pressurize to a minimum of 5 psi B. - Page 92 Refrigeration System Section 7 SV1406 Figure 7-10. Using Pinch-Off Tool 7-26 Part Number 80-1634-3...
-
Page 93: Filter-Driers
Section 7 FILTER-DRIERS The filter-driers used on Manitowoc ice machines are manufactured to Manitowoc specifications. The difference between Manitowoc driers and off-the- shelf driers is in filtration. Manitowoc driers have dirt- retaining filtration, with fiberglass filters on both the inlet and outlet ends. -
Page 94: Total System Refrigerant Charges
Refrigeration System TOTAL SYSTEM REFRIGERANT CHARGES Important This information is for reference only. Refer to the ice machine serial number tag to verify the system charge. Serial plate information information listed on this page. Series Version S1800M Water-Cooled NOTE: All ice machines are charged using R-404A refrigerant. -
Page 95: Refrigerant Definitions
Section 7 REFRIGERANT DEFINITIONS Recover To remove refrigerant, in any condition, from a system and store it in an external container, without necessarily testing or processing it in any way. Recycle To clean refrigerant for re-use by oil separation and single or multiple passes through devices, such as replaceable core filter-driers, which reduce moisture, acidity and particulate matter. -
Page 96: Refrigerant Re-Use Policy
Important Manitowoc Ice, Inc. assumes no responsibility for use of contaminated refrigerant. Damage resulting from the use of contaminated, recovered, or recycled refrigerant is the sole responsibility of the servicing company. -
Page 97: Hfc Refrigerant Questions And Answers
Section 7 HFC REFRIGERANT QUESTIONS AND ANSWERS Manitowoc ice machines use R-404A HFC refrigerant with ozone depletion potential (ODP) factors of zero (0.0). 1. What compressor oil does Manitowoc require for use with HFC refrigerants? Manitowoc products use Polyol Ester (POE) type compressor oil. - Page 98 Refrigeration System Section 7 THIS PAGE INTENTIONALLY LEFT BLANK 7-32 Part Number 80-1634-3...
- Page 100 • Improve Your Service Techniques • Network with Your Peers • 4 1/2 Days of Intensive Training on Manitowoc Ice Machines • Extensive “Hands On” Training on a Variety of Equipment • Breakfast, Lunch and Hotel Room Included with Tuition •...
Need help?
Do you have a question about the MARINE MODEL S1800 and is the answer not in the manual?
Questions and answers