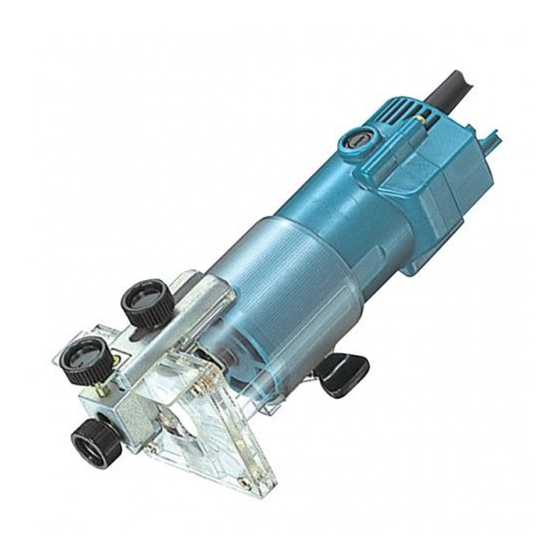
Makita 3703 Instruction Manual
1/4"
Hide thumbs
Also See for 3703:
- Instruction manual (57 pages) ,
- Instruction manual (12 pages) ,
- Instruction manual (52 pages)
Advertisement
Quick Links
Download this manual
See also:
Instruction Manual
TLimmer
Collet chuck capacity
114"
1/4" MODEL
3703
Overall length
N e t weight
No load speed
(RPMI
30,000
247
mm
(9-23132")
1.5
k g
(3.3 lbsl
INSTRUCTION MANUAL
DOUBLE
INSULATION
Advertisement

Related Manuals for Makita 3703


Summary of Contents for Makita 3703
- Page 1 TLimmer 1/4” MODEL 3703 INSTRUCTION MANUAL DOUBLE INSULATION No load speed Collet chuck capacity Overall length N e t weight (RPMI 114” (3.3 lbsl 30,000 (9-23132”)
- Page 2 SAFETY IN STRU CTI 0 N S WARNING: WHEN USING ELECTRIC TOOLS, BASIC SAFETY PRECAUTIONS SHOULD ALWAYS BE FOLLOWED TO REDUCE THE RISK OF FIRE, ELECTRIC SHOCK, AND PERSONAL INJURY, INCLUDING THE FOLLOWING: READ ALL INSTRUCTIONS. KEEP WORK AREA CLEAN. Cluttered areas and benches invite injuries. CONSIDER WORK AREA ENVIRONMENT.
- Page 3 REMOVE ADJUSTING KEYS AND WRENCHES. Form habit of checking t o see that keys and adjusting wrenches are removed from tool before turning it on. AVOID UNINTENTIONAL STARTING. Don't carry plugged-in tool with finger on switch. Be sure switch is OFF when plugging in. OUTDOOR USE EXTENSION CORDS.
-
Page 4: Additional Safety Rules
ADDITIONAL SAFETY RULES Wear hearing protection during extended periods of operation. Handle the bits very carefully. Check the bit carefully for cracks or damage before operation. Replace cracked or damaged Avoid cutting nails. Inspect for and remove all nails from the workpiece before operation. - Page 5 Installing or removing trimmer bit CAUTION Always be sure that the tool the bit. Insert the bit all the way into the collet cone and tighten the collet nur securely with the wrenches. To remove the bit, follow the installation procedure in reverse.
- Page 6 This will show exactly how the cut will look to check dimensions. When using the trimmer shoe, the straight guide or the trimmer guide, be sure to keep on the right side in the feed direction. This will help to keep workpiece.
- Page 7 In this case, firmly clamp straight board to the workpiece and use guide against the trimmer it as a base. Feed the tool in the direction of the arrow. Wave washer 1~Ki-i...
- Page 8 Circular work Circular work may be accomplished if you assemble the straight guide and guide plate shown in the figure below. Min. and max. radius of circles to be cut (distance between the center center of bit) are as follows Min.
- Page 9 The guide roller rides the curve and assures a fine cut. Install the trimmer guide on the tool base with the clamp screw (A). Loosen the clamp screw (B) and adjust the distance...
- Page 10 Templet guide The templet guide provides a sleeve through which the bit passes, allowing use of the trimmer with templet patterns. Remove the chip deflector. Loosen the screws and remove the base protector. Place the templet guide on the base and re- place the base protector.
-
Page 11: Maintenance
To maintain product SAFETY and RELIABILITY, repairs, any other maintenance or adjustment should be performed by Makita Authorized or Factory Service Centers, always using Makita replacement parts. switched off and unplugged before attempting to perform... - Page 12 ACCESSORIES CAUTION These accessories or attachments are recommended for use with your Makita tool specified in this manual. The use of any other accessories or attachments might present a risk of injury t o persons. The accessories or attachments should be used only in the proper and intended manner.
- Page 13 Bits STRAIGHT -Single Flute STRAIGHT 2 Flute HINGE MORTISING VEINING -Single Flute HIGH SPEED STEEL PART NO. 1 /8 7332328A CARBIDE TIPPED PART NO. 3/16 733003-2A 733003-4A 5/16 733003-EA HIGH SPEED STEEL (STRAIGHT - 2 Flute) PART NO. 7332334A 5/16 CARBIDE TIPPED PART NO.
- Page 14 ROUND NOSE CORE BOX 4 D C GROOVING 14' DOVE TAIL CARBIDE TIPPED PART NO. 733008-2A 1 I 4 15/32 7330084A 9/16 HIGH SPEED STEEL PART NO. 733238-2A 1 I 4 CARBIDE TIPPED PART NO. 733009-2A CARBIDE TIPPED PART 7330096A 1-114 1-114 1 I 4...
- Page 15 PANEL PILOT CORNER ROUNDING BEADING COVE HIGH SPEED STEEL PART NO. 733236-0A 1 /4 CARBIDE TIPPED - Ball Bearing Pilot 733120-OA 733120-2A REPLACEMENT BEARING - NO 733132-4A HIGH SPEED STEEL Solid Pilot PARTNO. 733240-2A 11/16 3/16 733240-6A 15/16 3/16 CARBIDE TIPPED - Ball Bearing Pilot 733121-4A 733121-6A REPLACEMENT BEARING...
- Page 16 CARBIDE TIPPED CARBIDE TIPPED -Self Piloting -Self Piloting FLUSH TRIMMER FLUSH TRIMMER SOLID CARBIDE 7" BEVEL TRIMMER Self-piloting 2 FLUTE FLUSH TRIMMER Ball Bearing Pilot Ball Bearing Pilot PARTNO. PARTNO. 733123-2A 733123-2A REPLACEMENT BEARING REPLACEMENT BEARING PART NO. 7331 28-OA...
- Page 17 COMBINATION FLUSH/22" BEVEL TRIMMER 3 FLUTE FLUSH TRIMMER ASSEMBLY -Self Piloting 4 D C 3 FLUTE 22" BEVEL TRIMMER ASSEMBLY 3 FLUTE FLUSH REPLACEMENT CUTTER CARBIDE TIPPED PART NO. 733128-6A 7/16 1 / 2 SOLID CARBIDE CUTTER PART NO 733129-2A REPLACEMENT BEARING - NO.
- Page 18 ARBOR BALL BEARING PILOT SOLID CARBIDE P A R T N O . 733129-8A FOR BEVEL TRIMMER ASSEMBLY NO. 733129-4A P A R T N O . 733131-2A FOR FLUSH TRIMMER ASSEMBLY NO. 733129-2A A N D NO. 733129-4A P A R T N O .
- Page 19 Mar.-26-'90 114" TRIMMER...
- Page 20 Should any trouble develop during this one-year period, return the COMPLETE tool, freight prepaid, to one of Makita's Factory or Authorized Service Centers. If inspection the trouble is caused by defective workmanship or material, Makita will repair (or at our option, replace) without charge.
Need help?
Do you have a question about the 3703 and is the answer not in the manual?
Questions and answers