Table of Contents
Advertisement
Quick Links
Advertisement
Table of Contents

Related Manuals for Abus TVIP10005B


Summary of Contents for Abus TVIP10005B
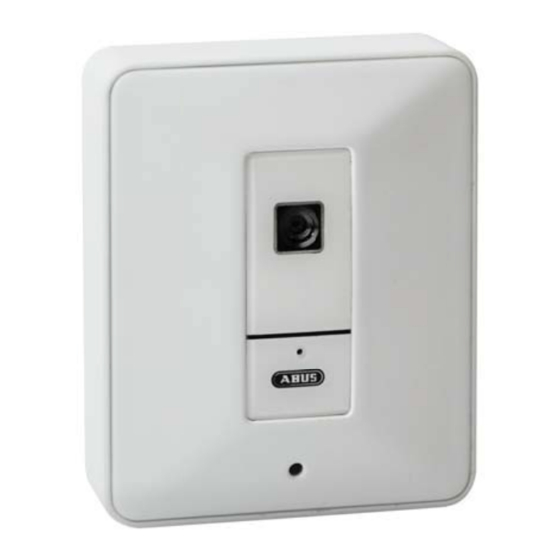
- Page 1 A Net twork Comp pact C Came User manu Version 03/2013...
- Page 2 ntroducti Dear Cus stomer, Thank yo ou for purch asing this p product. This pro duct meets s the requi rements of f the applic cable Euro pean and n national gu uidelines. The corr responding g declaratio ons and do ocuments c can be obta ained from...
- Page 3 Importa nt safety instructio The wa rranty will e expire for da amage due t to non-comp pliance with h these oper rating instruct tions. We sh hall not be l iable for an y conseque ential loss! We do n not accept l iability for d damage to p...
-
Page 4: Table Of Contents
Contents Usage in accordance with regulations ................. 7 Scope of delivery ........................7 Installation ..........................8 3.1 Power supply .......................... 8 3.2 Installing the camera ......................8 Camera description ........................ 8 4.1 Description of connectors ..................... 8 4.2 Status LEDs ..........................9 4.3 Restoring the factory settings .................... -
Page 5: Usage In Accordance With Regulations
2. Scop pe of deliv very ABUS S network ca amera TVIP10 005B / TVIP 10055B ower supply u unit Netwo ork cable (1 m... -
Page 6: Installation
3. Installation Make sure that all accessories and parts listed above are present in the scope of delivery. An Ethernet cable is required for camera operation. This Ethernet cable must meet UTP Category 5 (CAT 5) specifications and must not be longer than 100 metres. 3.1 Power supply Before starting installation, ensure that the mains voltage and the rated voltage on the power supply unit are identical. -
Page 7: Status Leds
4.2 Status LEDs Farbe Bedeutung Status LED Red continuously on Start up procedure (boot procedure) In case a network cable is attached to the camera, the camera will try to assign a valid IP address (using DHCP or using the configured fixed IP address). -
Page 8: Putting Into Operation
4.4 Putting into operation The network camera automatically detects whether a direct connection between the PC and camera should be made. A cross-over network cable is not required for this. You can use the supplied patch cable for direct connection when putting into operation for the first time. Direct connection of the network camera to a PC / laptop 1. -
Page 9: Accessing The Network Camera For The First Time
4.5 Accessing the network camera for the first time The network camera is accessed for the first time using the IP Installer. After the installation wizard is started, it searches for all connected ABUS IP network cameras and video servers in your network. -
Page 10: Accessing The Network Camera Over A Web Browser
4.6 Acce essing the e network camera ov ver a web b browser When you u first access s the network k camera und der Windows s, the web br owser querie es the install ation of an ActiveX pl lug-in for the network cam mera. -
Page 11: Password Prompt
4.9 Password prompt An administrator password is defined in the network camera as standard. However, the administrator should define a new password immediately for security reasons. After the new administrator password is stored, the network camera asks for the user name and password every time it is accessed. The administrator account is set up in the factory as follows: user name “admin”... -
Page 12: User Functions
5. User functions Open the main menu on the network camera. The interface is divided into the following main areas: Live image Camera settings display Video control Live image display You can access the full-screen view by double-clicking here (with Internet Explorer only). Camera settings Settings (configuration) Used to configure the camera (administrator settings) -
Page 13: Video Control
5.1. Video control These functions are only available when using Internet Explorer. Snapshot The web browser displays a new window containing the snapshot. To save the snapshot, either left-click it and then click the floppy disk icon or right-click it and select “Save” from the context menu. Full-screen view Activate the full-screen view. - Page 14 Example: C:\Recording\20091215\20091215143010.avi The recorded data can be played back using an MP4-compatible video player (e.g. VLC Media Player). Alternatively, you can also watch the videos on Windows Media Player by installing a video codec in the IP Installer. Digital zoom Click the magnifying glass symbol to activate the digital zoom.
-
Page 15: Camera Settings (Configuration)
6. Camera settings (configuration) Only the administrator has access to the system configuration. The following sections explain each of the elements in the left-hand column. After you click a menu item on the left-hand side, a menu tree may be opened depending on the number of sub-items contained in the item. -
Page 16: System
6.1 System Information Product information: Product name: The product name indicates the functions included (e.g. WLAN). Current version: Shows the current version of the installed firmware. Image settings: Brightness: Shows current brightness value Contrast: Shows current contrast value Saturation: Shows current saturation value Sharpness: Shows current sharpness value White balance:... - Page 17 Date/time Current date/time: Shows the setting for the date/time currently stored in the camera. PC clock: Shows the date/time on the PC from which you access the camera. Date/time format: Select a format (YYYY-year, MM-month, DD-day, hh-our, mm-minute, ss-second). Adjust: Keep current settings: No changes to the settings Synchronize with the PC:...
- Page 18 Upload language packet: You can set a different language here by uploading a language file. The following language is standard as default: TVIP10005B -> German TVIP10055B -> German The language files can be found on the supplied CD-ROM or inside the product...
-
Page 19: Video
6.2 Video Stream Settings (MJPEG) Resolution: Please select between followings resolutions (Pixel): 640x480, 320x240, 160x120 Frame rate: Setting for frame rate in images per seconds. Power frequency: Using this value the camera can be adjusted regarding different power line frequencies. In germany this value is 50 Hz as standard. Accept the settings by pressing “SAVE”... -
Page 20: Network
6.4 Network General settings MAC address: The hardware address of the camera is shown here. Obtain IP address automatically: The IP address, subnet mask, and address for the default gateway are obtained automatically from a DHCP server. An activated DHCP server must be present in the network in this case. - Page 21 DDNS DynDNS or DDNS (dynamic domain name system entry) is a system that can update domain name entries in real time. The network camera is equipped with an integrated DynDNS client that updates the IP address independently via a DynDNS provider. If the network camera is located behind a router, we recommend using the DynDNS function of the router.
- Page 22 Note down your user data and enter this into the configuration of the network camera. Accessing the network camera over DDNS If the network camera is located behind a router, then access via DynDNS must be configured in the router. On the ABUS Security-Center homepage www.abus.com you can find a description of DynDNS router configuration for common router models.
- Page 23 Accept the settings by pressing “SAVE” or cancel them by pressing “Cancel”. If the network configuration is changed, then the camera must be restarted (System \ Initialize \ Restart). Wireless (TVIP10055B only) The camera features a WLAN network interface for wireless data transmission in an IP network. The network camera must be connected via a network cable for the initial configuration of all WLAN parameters.
- Page 24 Key length: With WEP only. Select the bit length for the key here. Network key: With WEP only. Up to four keys can be assigned. Obtain IP address automatically: The IP address, subnet mask, and address for the default gateway are obtained automatically from a DHCP server.
-
Page 25: Security
A secure wireless connection is set up in the network camera and access point through the assignment of a PIN. Press the “Generate new PIN” button to assign a new random PIN. This PIN must then be made known in the access point (WPS settings). -
Page 26: Maintenance And Cleaning
7. Main ntenance a and cleani 7.1 Fun ction test Regularly check the te echnical safe ty of the prod duct, e.g. ch eck the hous sing for dama age. If safe ope eration is no longer possi ible, cease o operating the product and d safeguard i... -
Page 27: Technical Data
Supported Browser Mozilla Firefox, Apple Safari, Google Chrome or Internet Explorer 6.x and higher Supoorted Software Network connector RJ-45 Ethernet 10/100 Base-T TCP/IP, DHCP, PPPoE, ARP, ICMP, DNS, NTP, UPnP, HTTP, TCP, UDP, ABUS Network protocols Server Wireless IEEE 802.11b/g/n... -
Page 28: Gpl License Information
The license text for the GNU General Public License can be viewed on the enclosed software CD. Source code The source code in use can be obtained from ABUS Security-Center upon request if you send an e-mail to license@abus-sc.com up to three years after purchase.
Need help?
Do you have a question about the TVIP10005B and is the answer not in the manual?
Questions and answers