Table of Contents
Advertisement
Quick Links
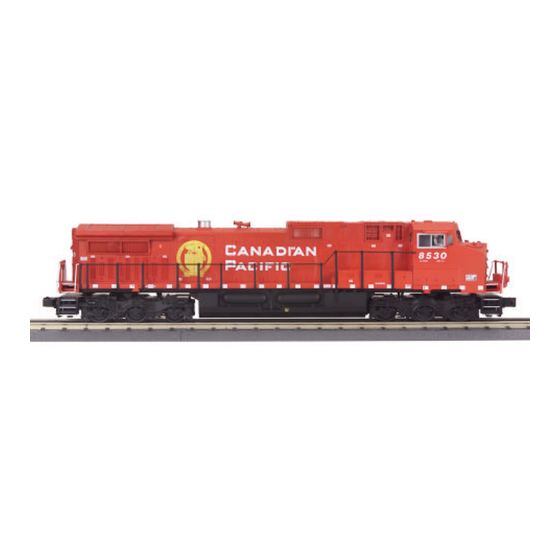
PREMIER DASH-9
DIESEL ENGINE
OPERATING INSTRUCTIONS
This Dash 9 Diesel Engine features a detailed ABS body, die-cast trucks and runs on
O-42 curves. This Premier Diesel Engine contains state-of-the-art electronics with many
built-in automatic features for incredibly realistic operation. Despite these advanced
features, the locomotive is easy to operate with any compatible standard AC transformer
that is equipped with whistle and bell buttons (see the compatibility chart on page 20),
and is compatible with most other 3-rail locomotives, rolling stock, and accessories.
This locomotive is equipped with Proto-Sound 2.0 with Digital Command System
(DCS). This new system will allow you to operate your locomotive in Command mode
(when used with the DCS Remote Control System, sold separately) or Conventional
mode. Conventional operating features are described in the following pages, while the
DCS operating features are covered in the set of operating instructions that
accompanies the DCS equipment. Conventional Mode operation of this locomotive is
much simpler than operation of original Proto-Sound engines. For your own safety and
that of your equipment, please read the instructions before you operate this engine.
Advertisement
Table of Contents

Related Manuals for M.T.H. PREMIER DASH-9


Summary of Contents for M.T.H. PREMIER DASH-9
-
Page 1: Operating Instructions
PREMIER DASH-9 DIESEL ENGINE OPERATING INSTRUCTIONS This Dash 9 Diesel Engine features a detailed ABS body, die-cast trucks and runs on O-42 curves. This Premier Diesel Engine contains state-of-the-art electronics with many built-in automatic features for incredibly realistic operation. Despite these advanced... -
Page 2: Table Of Contents
Table of Contents Set Up Basic Operation Throttle Operation Buttons Manual Volume Control Proto-Sound 2.0 Operation Activating Proto-Sound 2.0 Conventional Mode Features Freight Yard Sounds (FYS) Tips on Using FYS ® Proto-Coupler Operation Speed Control Lock into a Direction Reset to Factory Defaults Automatic Sounds Maintenance ProtoSmoke Unit Operation... -
Page 3: Set Up
Set Up There are a couple of simple steps you must take before operating this Premier diesel. 1. Although the engine was lubricated at the factory, it is important that you lubricate the chassis before operation. Lightly grease the outside idler and drive gears (marked “G”... -
Page 4: Basic Operation
Basic Operation Throttle – Throttle up the power to your track. Give about 10-12 volts or enough power so that the engine’s headlight shines brightly. Then put the engine into motion by either firmly pressing the Direction button on your transformer or remote once or dropping and advancing the throttle to put the engine in forward. -
Page 5: Proto-Sound 2.0 Operation
Proto-Sound 2.0 Operating Instructions This manual contains the operating instructions for Proto-Sound 2.0 in conventional mode only. Instructions for accessing DCS command mode features accompany the DCS Remote Control System equipment. Because Proto-Sound 2.0 is an all-new system developed by M.T.H.’s own research and development team, it operates differently from original Proto-Sound. -
Page 6: Freight Yard Sounds (Fys)
Freight Yard Sounds (FYS): Your engine is equipped with a sound package of freight yard sounds that you can play when you pull into a yard. Each sequence described below will play as long as it is left on, randomly generating sounds, but be sure to allow approximately 30 seconds between the button pushes described below to allow the FYS sufficient time to run through each sequence. -
Page 7: Tips On Using Fys
Tips on Using FYS • You can terminate FYS at anytime by turning off power to the track for 15 seconds. • You do not have to be in Forward to use FYS. At the conclusion of the full sequence, the train will pull away from the station in whatever direction you were going when you activated the feature. -
Page 8: Proto-Coupler® Operation
Proto-Coupler® Operation This locomotive is equipped with two coil-wound Proto-Couplers for remote uncoupling action. Because the Proto-Coupler is controlled through the Proto-Sound 2.0 microprocessor, it does not require an uncoupling track section or modification to your layout to function. Use the codes listed below to fire the coupler. -
Page 9: Lock Into A Direction
Lock into a Direction: You can lock your engine into a direction (forward, neutral, or reverse) so that it will not change directions. To do this, put the engine into the direction you want (or into neutral to lock it into neutral), run it at a very slow crawl (as slowly as it will move without halting), and quickly but firmly tap the Horn button once followed by three quick taps of the Bell button, allowing approximately ½... -
Page 10: Maintenance
Maintenance ® ProtoSmoke Unit Operation This Premier diesel locomotive contains a self-powered smoke unit that outputs smoke through the smokestack on the roof of the engine. The smoke unit is essentially a small heating element and wick that soaks up and then heats a mineral oil-based fluid that emits a harmless smoke. - Page 11 After removing the engine from storage, Inspection Cover add another 25 drops of fluid, letting the Screws wick soak up the fluid for 15 minutes prior to operation.If you experience poor or no smoke output when the smoke unit is on and has fluid, check the wick to see if it has become hard, blackened, and unabsorbent around the heating element.
-
Page 12: Lubrication And Greasing Instructions
Lubrication and Greasing Instructions The engine should be well oiled and greased in order to run properly. You should regularly lubricate the engine to prevent it from squeaking. Use light household oil and follow the lubrication points marked “L” in Fig. 5. Do not over-oil. -
Page 13: Traction Tire Replacement
4. Reassemble the truck and motor, being careful not to pinch any wires between the truck block and motor mount. 5. After repeating the procedure for the other motor, reassmble the chassis and body, being careful that the wire harnesses are not caught between the chassis and body and reinstall the chassis screws. -
Page 14: Light Bulb Replacement
Once the truck sides have been removed: 1. Make sure the old tire has been completely removed from the groove in the drive wheel, using a razor blade or small flathead screwdriver to pry away any remains. 2. Slip the new tire onto the wheel. You may find it useful to use two small flathead screwdrivers to stretch the tire over the wheel. - Page 15 To replace the lights mounted to the inside of the shell, remove the shell, and slide the spring contact bracket off of its post. Remove the light bulb and wires taking care to notice the path that the wires take on the inside of the shell.
-
Page 16: Self-Charging Battery Back-Up
Self-Charging Battery Back-Up The special NiCad 7-cell 8.4v self-charging battery in this engine improves performance at any speed. It ensures that power to the sound system will remain on during directional changes, or when travelling over dirty track or switches. The self-charging battery system is automatically turned on or off whenever track power is turned on or off. -
Page 17: Troubleshooting
® Troubleshooting Proto-Sound 2.0 Problems Although Proto-Sound 2.0 has been designed and engineered for ease of use, you may have some questions during initial operation. The following table should answer most questions. If your problem cannot be resolved with this table, contact M.T.H. - Page 18 Cab Chatter Remedy Cab Chatter plays only in neutral at Sometimes the Cab Chatter sounds don’t play. random intervals. Lock-out Remedy I can’t get the engine to run after I The engine is locked into the neutral power up the transformer. It sits still position.
-
Page 19: Compatibility
Remedy Once in FYS, the engine doesn’t go So that FYS effects can be as realistic into reverse. as possible, Proto-Sound 2.0 disables the reversing unit whenever FYS is enabled. This way the engine remains still at its stop as the operator cycles through the FYS sequences. -
Page 20: Transformer Compatibility Chart
Transformer Compatibility and Wiring Chart Proto-Sound 2.0 is designed to work with most standard AC transformers. The chart below lists the many compatible transformers. Note that many of the operational commands described in these instructions require a bell button, so if your transformer does not have its own bell button, you should consider adding one to get the full benefit of the system. -
Page 21: Additional Features With Dcs Remote Control System
Additional Features Accessible with the DCS Remote Control System: While conventional mode operation of a Proto-Sound 2.0 engine yields wonderfully realistic sound and several train control features, command mode operation allows the user to access a world of command functions never before accessible to O Gauge railroaders. - Page 22 Proto-Effects™ operations to be active or inactive, including cab chatter, train wreck sounds, coupler sounds, and wheel clickety-clack sounds • Direction Control Set Up-User can set initial individual start-up direction (start in forward or reverse) for double-heading operations • Locomotive Consist Set-up-User can determine locomotive values for consist make-ups, allowing multiple locomotives belonging to a consist to operate together •...
-
Page 23: Safety Precautions
CAUTION: Electrically Operated Product: Not recommended for children under 10 years of age. M.T.H. recommends adult supervision with children ages 10 - 16. As with all electric products, precautions should be observed during handling and use to reduce the risk of electric shock. -
Page 24: Service And Warranty Information
Service & Warranty Information How to Get Service Under the Terms of the Limited One-Year Warranty For warranty repair, do not return your product to the place of purchase. Instead, follow the instructions below to obtain warranty service as our dealer network is not prepared to service the product under the terms of this warranty.
Need help?
Do you have a question about the PREMIER DASH-9 and is the answer not in the manual?
Questions and answers