Table of Contents
Advertisement
Advertisement
Table of Contents

Related Manuals for Flex QQ Extra 300


Summary of Contents for Flex QQ Extra 300
-
Page 2: Table Of Contents
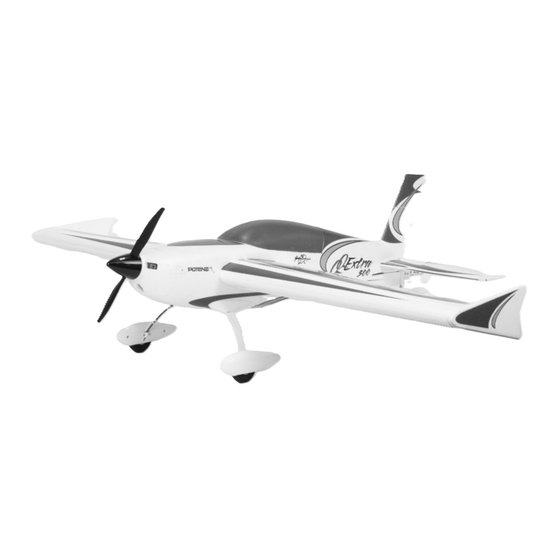
§ system provides the ultimate in stability and control The QQ Extra 300 - it is the evolution and accumulation of many years of experience in the aerodynamic and electronic control stabilization world. Powerful 10-sized motor provides the punch for §... -
Page 3: Replacement Parts Listing
Our airplanes are designed around our Potenza LiPo batteries and we recommend the Potenza 3S 2200mAh 40C WARNING LiPo in the QQ Extra 300 based on our extensive testing and development. This battery features an EC3 connector, so no FOLLOW ALL INSTRUCTIONS PROVIDED BY YOUR soldering is required for use in your Extra. -
Page 4: Special Language De Nitions
3. This model must be assembled according to these instructions. Do not alter or modify the model outside of these instructions provided by Flex Innovations, Inc, as doing so may render it unsafe and/or un yable. It is your responsibility to ensure the airworthiness of the model. -
Page 5: Main Landing Gear Installation
MAIN LANDING GEAR INSTALLATION Required Tools and Fasteners: #1 Phillips Screwdriver, (4) M1.5x5 self-tapping screws 1. Insert the landing gear assembly into the slot in the bottom of the fuselage. The gear will sweep forward. 2. Install the cover plate over the landing gear slot and attach with (4) M1.5x5mm self-tapping screws. TAILWHEEL INSTALLATION Required Tools and Fasteners: #1 Phillips Screwdriver, (3) M1.5x5 self-tapping screws 1. -
Page 6: Horizontal Stabilizer Installation
HORIZONTAL STABILIZER INSTALLATION Required Tools and Fasteners: Clear Tape (4 strips) 1. Insert the horizontal stabilizer tube into the fuselage and roughly center. 2. Slide the left and right stabilizer halves onto the tube. Ensure that the control horn orients towards the belly of the airplane and that the elevator joiner tabs are properly indexed. -
Page 7: Main Wing Installation
MAIN WING INSTALLATION Required Tools and Fasteners: #1 Phillips Screwdriver, (2) M2.5x10mm self-tapping screws 1. Remove the belly hatch by peeling back the tape at the rear of the hatch. 2. Install the wing tube into the fuselage. 3. Slide the left or right wing panel on the wing tube and guide the servo wire into the fuselage. 4. -
Page 8: Aura 8 Acfs
AURA 8 ACFS The Aura 8 advanced ight control system installed in your QQ Extra 300 is a giant leap forward in aircraft ight control system technology. Compatible with virtually every receiver on the market today via PWM connections, the Aura features special con guration for DSM systems Works conveniently with all major radio systems §... -
Page 9: Transmitter Setup
To bind a DSM connection utilizing a remote receiver, insert a bind plug in Aura port S8. Power the model and follow the instructions *The QQ Extra 300 can y anywhere between 4:00 to 6:30 depending on ying style from the transmitter manufacturer. Remove and store bind plug to ‡... -
Page 10: Flight Control Direction Sensing Test
FLIGHT CONTROL SENSING DIRECTION TEST Perform a test of the gyro system to verify the corrections made for a given movement are correct. If any of the tests do not result in the correct reaction from the airplane’s gyro system, do not y the airplane, and refer to the Aura 8 manual for more information. The ight control system activates with RF broadcast. -
Page 11: Control Direction Test
CONTROL DIRECTION TEST Refer to the chart at right to determine the proper control Transmitter Proper Control surface direction. Reversed controls may be corrected in Command Surface De ection either the transmitter’s servo reverse menu or through the Aura 8 app in the outputs section. Stick Left After any adjustments, repeat the ight control sensing direction test, and the control direction test to con rm... -
Page 12: Sfg Installation
SFG INSTALLATION 1. Liberally apply medium CA (cyanoacrylate adhesive) to the airfoil-shaped mounting plate on the inside of the SFG. 2. Insert the SFG into the molded cavity in the wingtip and press tightly. NOTE- the plastic skid is on the BOTTOM of the SFG. PROPELLER/SPINNER INSTALLATION Required Tools and Fasteners: #1 Phillips Screwdriver, 13mm Box Wrench, M3x6mm machine screw 1. -
Page 13: Battery Installation
BATTERY INSTALLATION 1. Push the spring-loaded battery latch tab back to release the battery hatch. 2. OPTIONAL- Apply a strip of adhesive-backed hook-and-loop fastener (not included) to the bottom of your battery and battery tray. 3. Press the battery to the center of the battery tray and secure with the provided hook-and-loop strap. 4. -
Page 14: Flying Your Qq Extra 300
LEARNING TO FLY 3D WITH THE QQ EXTRA 300 The QQ Extra 300 was designed from the ground up to be a Harrier- The harrier is one of the most basic 3D maneuveres and is superior 3D aircraft. -
Page 15: Airframe Repairs
AIRFRAME REPAIRS The QQ Extra 300 is molded from durable EPO foam and is repairable with most adhesives. Similar to building and repairing wood or composite airplanes, the correct glue for a given application is critical to the repair holding and not breaking again. For major repairs, such as a broken fuselage, epoxy is preferred because it allows time to correct any misalignment. -
Page 16: Servicing The Power System
SERVICING THE POWER SYSTEM Required Tools and Fasteners: #1 Phillips Screwdriver, 13mm box wrench 1. Remove the propeller and spinner assembly from the motor. 2. Remove the cowling by unscrewing the (2) M1.5x4mm self-tapping screws from the plastic mounts on the side of the cowling. 3. -
Page 17: Aircraft Troubleshooting Guide
AIRCRAFT TROUBLESHOOTING GUIDE Should you encounter any abnormal situations with your QQ Extra 300, refer to the matrix below to determine probable cause and a recommended solution for the action. If the required solution does not rectify the problem, please contact product support for further assistance. -
Page 18: Limited Warranty
Declaration of Conformity (In accordance with ISO/IEC Flex’s sole obligation and purchaser’s sole and exclusive remedy 17050-1) shall be that Flex will, at its option, either (i) service, or (ii) replace, any Product determined by Flex to be defective. Flex reserves the Product(s): QQ Extra 300 Super PNP right to inspect any and all Product(s) involved in a warranty claim. -
Page 19: Ama Safety Code
Academy of Model Aeronautics National Model Aircraft Safety Code E ective January 1, 2014 GENERAL: A model aircraft is a non-human-carrying aircraft capable 4. RC model aircraft must use the radio-control frequencies currently of sustained ight in the atmosphere. It may not exceed limitations of this allowed by the Federal Communications Commission (FCC). - Page 20 © 2015 Flex Innovations, Inc. Premier Aircraft™, Potenza™, and Top Value RC™ are trademarks or registered trademarks of Flex Innovations, Inc. Android is a trademark of Google Inc. iPhone® is a trademark of Apple Inc registered in the US and other countries.
Need help?
Do you have a question about the QQ Extra 300 and is the answer not in the manual?
Questions and answers