Table of Contents
Advertisement
Advertisement
Table of Contents

Related Manuals for Flex Cessna 170


Summary of Contents for Flex Cessna 170
- Page 1 DESIGNED BY:...
-
Page 2: Table Of Contents
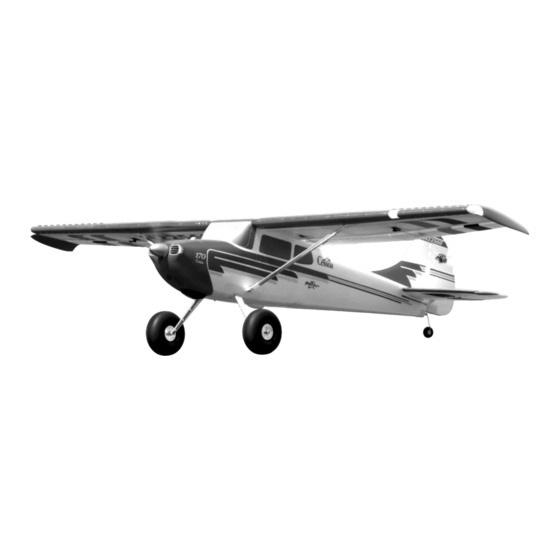
The Cessna 170 and the Aura 8: the perfect combina�on! Low wing loading offers superb stability at slow speed. The Cessna 170 is the evolu�on and accumula�on of many years of Custom-tuned Aura 8 gyro stabiliza�on system provides experience in the aerodynamic and electronic stabiliza�on world. A perfectly tuned airframe design, combined with today's most advanced control system the ul�mate in stability and control... -
Page 3: Comple�On Items
BATTERY CHARGING GUIDELINES Hot Aeroba�cs: 3300-5000mAh 6S 22.2V 40C+ LiPo (FPZB40006S40), (FPZB50006S40) The assembly of the Cessna 170 can be accomplished in Sport Aeroba�cs: less than one hour. Prior to assembling the airplane, it is NEEDED TO 3300-5000mAh 5S 18.5V 30C+ LiPo advisable to charge your ba�ery so that you are ready... -
Page 4: Important Information Regarding Warranty
3. This model must be assembled according to these instruc�ons. Do not alter or modify the model outside of these instruc�ons provided by Flex Innova�ons, Inc. as doing so may render it unsafe and/or unflyable. It is your responsibility to ensure the airworthiness of the model. -
Page 5: Rudder Installation
RUDDER INSTALLATION 3 - M3x10 Hex Head Self-Tapping Screw Required Tools and Fasteners: Medium CA 2mm Hex Driver The rudder comes pre-hinged to a small sec�on of ver�cal fin. Test fit the rudder and fin sec�on onto the fuselage. Remove it from the fuselage once fit is confirmed. -
Page 6: Main Landing Gear Installation
MAIN LANDING GEAR INSTALLATION Required Tools and Fasteners: 2mm Hex Driver 4 - M3x10 Hex Head Self-Tapping Screws 1.5mm Hex Driver 2 - M5 Lock Collars, with Set Screws 2 - M5 Spacer Slide an M5 spacer over the landing gear wire. Slide a main wheel over the landing gear wire, followed by a lock collar. - Page 7 PROP ADAPTER, PROPELLER AND SPINNER INSTALLATION Required Tools and Fasteners: 2.5mm Hex Driver 3 - M3x9 Hex Head Machine Screws #1 Phillips Screwdriver 1 - M3x30 Phillips Head Machine Screw Adjustable Wrench 1 - Prop Washer Blue Thread Lock 1 - Propeller Nut Note: It is important to check the rear motor sha�...
-
Page 8: Horizontal Stabilizer Installation
HORIZONTAL STABILIZER INSTALLATION Required Tools and Fasteners: Clear Tape (4 Strips) Insert the horizontal stabilizer tube into one of the horizontal stabilizer halves. Slide the tube through the hole in the fuselage, being sure to orient the control horn towards the bo�om of the airplane. Do not force it into place. -
Page 9: Main Wing Installa�On
MAIN WING INSTALLATION Required Tools and Fasteners: 2.5mm Hex Driver 4 - M3x25 Hex Head Machine Screws 4 - 6mm Strut Retaining Pins 4 - Strut Retaining Pin Keepers Insert the main wing tube into one of the main wing halves. Slide the tube through the hole in the fuselage. - Page 10 MAIN WING INSTALLATION (CONTINUED) Note which wing strut goes to each wing panel, and which end goes to the wing and to the fuselage The struts are labeled R and L at one end of the strut. Also note that there are two different strut retaining pins; one that is shorter (A) and one that is longer with a "D"...
-
Page 11: Night Cessna Led Connec�Ons
NIGHT CESSNA LED CONNECTIONS If you have purchased the Night version of the Cessna, this page will cover all LED light connec�ons. If you did not purchase the night version, skip ahead to the next page. In order to power the internal Night LED lights (not wing �p or landing lights) you will need to use a seperate 3S Lithium-Polymer ba�ery. We recommend the Potenza 3S 2200mAh 40C Li-Po (FPZB22003S40). -
Page 12: Transmitter Setup
Begin by star�ng with a freshly reset and new model memory in your transmi�er. Make ONLY the changes shown in the Transmi�er Setup Guide. The Aura 8 on the Cessna 170 defaults to 3 flight modes that are switched via CH5/Gear in your transmi�er. You may need to reassign CH5/Gear to a 3-posi�on switch. -
Page 13: Aura 8 Afcs
AURA 8 AFCS The Aura 8 advanced flight control system installed in your Cessna 170 is a Works conveniently with all major radio systems giant leap forward in aircra� flight control system technology. Compa�ble with virtually every receiver on the market today via PWM connec�ons, Accepts signals from DSM Satellite(s), Spektrum SRXL, the Aura features special configura�on for DSM systems via remote... - Page 14 Aura. Due to the flaps and the flight modes in the Aura, a minimum of a 6-channel receiver and transmi�er is required to maximize the func�onality of the Cessna 170. A 7+ channel receiver and transmi�er is recommended.
- Page 15 TRANSMITTER CONTROL DIRECTION TEST Refer to the chart below to determine the proper control surface direc�ons. If controls are reversed, DO NOT REVERSE CONTROLS IN TRANSMITTER OR IN THE AURA CONFIG TOOL. Email us at support@flexinnova�ons.com for correc�ve ac�on. Note that BOTH the Transmi�er Control Direc�on Test AND the Flight Controller Sensor Direc�on Test MUST BOTH BE PASSED! IF ONE DOES NOT PASS, DO NOT FLY! Note: There is pre-configured rudder to aileron and rudder to elevator mixing programmed into the Aura.
- Page 16 FLIGHT CONTROLLER SENSOR DIRECTION TEST Perform a test of the gyro system to verify the correc�ons made for a given movement are correct. If any of the tests do not result in the correct reac�on from the airplane's gyro system, do not fly the airplane, and contact us via email at support@flexinnova�ons.com The flight control system ac�vates with RF broadcast.
-
Page 17: Battery Installation
BATTERY INSTALLATION It is recommended to install adhesive-backed hook and loop tape strips to the ba�ery and ba�ery tray to help prevent the ba�ery from coming loose in flight. Pull the spring-loaded ba�ery latch tab towards the nose of the airplane to release the ba�ery hatch. Be sure to con�nue holding the latch. Using the tape on the front of the hatch, li�... -
Page 18: Flying Your Cessna 170
flight. Land, adjust linkages and return the trim to zero, and fly again. Repeat un�l the airplane flies hands off, straight is the best loca�on for flying your Cessna 170. If no AMA field is and level. Transmi�er trim or sub-trim will cause trim shi�s when available in your area, a large open field with short grass and... -
Page 19: Advanced "3D" Cessna/Aura Setup
Aura 8 Advanced Flight Control 2-3/4-inches (70mm) Flap Deflec�on 24% Down Elevator System. Pilots of all skill levels will quickly find the Cessna 170 is a forgiving airplane, in many different a�tudes and flight regimes. First Flights with Flaps For first flights, it is recommended to have two flap posi�ons, a half... -
Page 20: Airframe Repairs
AIRFRAME REPAIRS The Cessna 170 is molded from durable EPO foam and is repairable with most adhesives. Similar to building and repairing wood or composite airplanes, the correct glue for a given applica�on is cri�cal to the repair holding and not breaking again. For major repairs, such as a broken fuselage, epoxy is preferred because it allows �me to correct any misalignment. -
Page 21: Servicing The Power System
SERVICING THE POWER SYSTEM Required Tools and Fasteners: #1 Phillips Screwdriver, Adjustable Wrench Remove the propeller and spinner assembly from the motor. Follow the assembly instruc�ons on page 6 in reverse. Remove the cowling by unscrewing the M3x10 phillips self-tapping screws from the firewall. You will need a long enough screwdriver to reach through the grill of the cowling. - Page 22 AIRCRAFT TROUBLESHOOTING GUIDE Should you encounter any abnormal situa�ons with your Cessna 170, refer to the matrix below to determine probable cause and a recommended solu�on for the ac�on. If the required solu�on does not rec�fy the problem, please contact product support for further assistance.
- Page 23 Adjust servo arm loca�on on spline and/or flap pushrod length to match Airplane Rolls when flaps are Le� and right flap travels are not equal throws. Reference Cessna 170 wiki page for more informa�on: in the down posi�on h�p://www.wiki.flexinnova�ons.com/Cessna170...
-
Page 24: Replacement Parts List
FPZAURA08ZZC17 Potenza Aura 8 for Cessna 170 Potenza LED Controller Cessna 170 FPZA1014 OPTIONAL ACCESSORIES FPM317014 Cessna 170: Float Set & Struts w/ LED Light FPM317015 Cessna 170: Leading Edge Fixed Slat Set Cessna 170: Snow Ski Set FPM317016 FPM317017... -
Page 25: Limited Warranty
Flex's sole obliga�on and purchaser's sole and exclusive remedy shall Product(s): Cessna 170 Super PNP be that Flex will, at its op�on, either (i) service, or (ii) replace, any Cessna170 Super PNP Night Product determined by Flex to be defec�ve. Flex reserves the right to... - Page 26 Academy of Model Aeronau�cs Na�onal Model Aircra� Safety Code Effec�ve January 1, 2015 GENERAL: A model aircra� is a non-human-carrying aircra� capable of RC model aircra� must use the radio-control frequencies currently sustained fight in the allowed by the Federal Communica�ons Commission (FCC). Only atmosphere.
- Page 27 Premier Aircra�™, Potenza™, and Top Value RC™ are trademarks or registered trademarks of Flex Innova�ons, Inc. Cessna and Cessna 170 are trademarks or registered trademarks of Textron Innova�ons, Inc. and are used under license by Flex Innova�ons, Inc. DSM®, DSM2™, and DSMX™ are trademarks or registered trademarks of Horizon Hobby LLC Futaba™...
Need help?
Do you have a question about the Cessna 170 and is the answer not in the manual?
Questions and answers