Table of Contents
Advertisement
Quick Links
Mercury Flanger User's Guide
Welcome
Thank you for purchasing the Mercury Flanger. This powerful stereo effects pedal features a
collection of meticulously crafted flanger sounds ranging from classic two-voice sounds inspired by
60s studio tape flangers to the swooshing jet engine sounds of the 70s and 80s and beyond. With a
simple control set, the Mercury can work in a wide variety of musical settings, and the powerful MIDI
and Neuro control options under the hood provide access to a vast array of additional tonal
possibilities.
SA240
Mercury Flanger User's Guide
1
Advertisement
Table of Contents

Related Manuals for Source Audio Mercury Flanger


Summary of Contents for Source Audio Mercury Flanger
-
Page 1: Welcome
Mercury Flanger User’s Guide Welcome Thank you for purchasing the Mercury Flanger. This powerful stereo effects pedal features a collection of meticulously crafted flanger sounds ranging from classic two-voice sounds inspired by 60s studio tape flangers to the swooshing jet engine sounds of the 70s and 80s and beyond. With a... -
Page 2: Overview
Diverse Flanger Sounds – Choose from traditional flanger tones such as Classic, Thru-Zero, and Shadow, or delve deeper into unique sounds cooked up in the Source Audio lab. Flexible Stereo Routing – The Mercury is equally at home in a mono rig or a stereo rig. A variety of routing modes such as True Stereo, Mono, Mono-to-Stereo, Sum-to-Mono and External Loop allow the Mercury to harness the true power of stereo signal chains. -
Page 3: Quick Start
To power the unit, connect the included 9V DC power supply to the jack labeled DC 9V on the back panel. Warning: Using a non-Source Audio supply, especially an unregulated supply, could damage the unit. Please be very cautious when using 3 -party power supplies. -
Page 4: Table Of Contents
Parametric EQ ............................16 External Control ............................. 18 Specifications ............................26 Troubleshooting ............................. 26 Frequently Asked Questions ........................27 Rubber Feet ............................29 Waste Disposal Notes ..........................29 Warranty ..............................30 Version History ............................31 SA240 Mercury Flanger User’s Guide... -
Page 5: Connections
Neuro-compatible pedal in the chain, provided that a TRS cable is used. The audio signal (if applicable) will be on the tip contact of the plug, and the Neuro App data will be on the ring contact. SA240 Mercury Flanger User’s Guide... - Page 6 The ring contact on Output 2 acts as a data connection for the Neuro App, passing data from the Mercury to the next Source Audio effect in your signal chain. You can daisy-chain the Neuro App data regardless of whether Output 2 is configured to output audio or not. Connect Output 2 to the next device’s Neuro App Data input (usually Input 2) using a stereo (TRS) ¼”...
- Page 7 TRS cable. The audio signal is carried on the same cable. Audio (Left) Guitar In Out to Amp (Left) Out to Amp (Right) Neuro In Audio (Right) Neuro Daisy-Chain SA240 Mercury Flanger User’s Guide...
- Page 8 The 3.5 mm Control Input port connects to external control devices such as the Dual Expression Pedal, Reflex Universal Expression Pedal, Neuro Hub, and Hot Hand Motion Controller. For more information, refer to the Expression Pedal Input, Hot Hand Input, and Neuro Hub sections of the User’s Guide. SA240 Mercury Flanger User’s Guide...
-
Page 9: Basic Flanger Operation
The blue line in the graph is known as the LFO. It changes the amount of delay over time. The frequency (a.k.a. “rate” or “speed”) of the LFO can be increased to get a more rapid change in the delay time, as shown in this graph: SA240 Mercury Flanger User’s Guide... - Page 10 If the speed is set to a high enough rate, the effect will resemble the Doppler shift common in “Leslie” rotating speaker effects. The depth of the LFO can also be changed to make the flanger effect more or less prominent, as shown in this graph: TIME SA240 Mercury Flanger User’s Guide...
- Page 11 Finally, the shape of the LFO can be changed to give the flanger effect a different character. Sine wave: TIME Falling Sawtooth wave: TIME Square wave: TIME SA240 Mercury Flanger User’s Guide...
-
Page 12: Effect Types
(iOS / Android) or the built-in USB port (Mac / Windows). The Mercury Flanger is compatible with Source Audio’s Phaser and Chorus effects, so it is possible to load chorus, phaser, and flanger effects on the Mercury at the same time. -
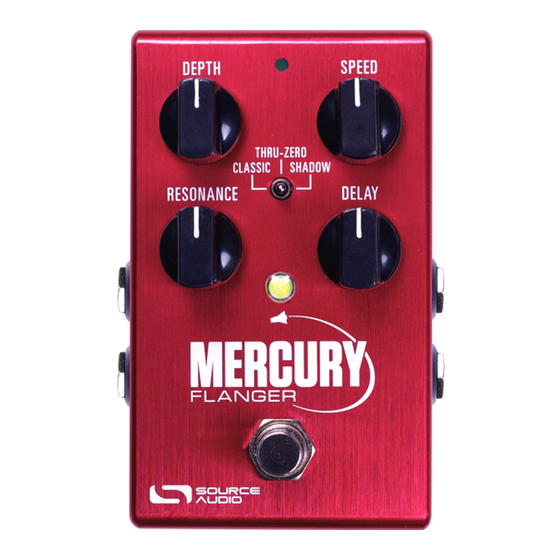
Page 13: Controls
Controls the depth of the LFO, which determines how prominent the flanger effect is. When the depth is set fully counter-clockwise, the flanger effect will be most subtle. When the depth is set fully clockwise, the flanger effect will be most prominent. TIME TIME Low Depth High Depth SA240 Mercury Flanger User’s Guide... - Page 14 The small LED located between the Depth and Speed knobs is the External Control LED. When lit, it indicates that external control mode (expression, hot hand, or MIDI) is active. For more information, see the External Control section. Footswitch Enables or bypasses the flanger effect. SA240 Mercury Flanger User’s Guide...
-
Page 15: Preset Storage And Recall
The buffered bypass path uses extremely low noise buffers, which provide a very low output impedance and are effective for driving long cables or long chains of effects following the Mercury’s audio output. SA240 Mercury Flanger User’s Guide... -
Page 16: Stereo Routing
The Mercury features a built-in 4 band parametric EQ that can be configured using the Neuro App or the USB Editor. Different EQ settings can be saved for each of the three effect types, as well as for the user preset. SA240 Mercury Flanger User’s Guide... - Page 17 20.0k Using the Neuro App or USB Editor, Band 1 (Low Shelf) can optionally be configured as a high pass filter, and Band 2 (High Shelf) can optionally be configured as a low pass filter. SA240 Mercury Flanger User’s Guide...
-
Page 18: External Control
The Mercury’s effects parameters can be controlled directly by an expression pedal or Hot Hand connected to the Control Input port. Expression Pedal Input The Dual Expression Pedal or Reflex Universal Expression Pedal, both from Source Audio, can be directly connected to the Control Input using a 3.5 mm, TRRS cable. SA240... - Page 19 In the case of an expression pedal with a TRRS plug, like Source Audio’s expression pedals, the tip connection is power, the first ring is the X axis expression signal, the second ring is the Y axis expression signal, and the sleeve connection is ground.
- Page 20 3. Move the Hot Hand ring over the range of motion you would like to use to control the Mercury. The easiest way to do this is to move the ring in the same way that you intend to SA240 Mercury Flanger User’s Guide...
- Page 21 One Series families to create a single, stage-ready system. It features shared MIDI, passive expression pedal input, Hot Hand connectivity, and USB, and can connect to up to five Source Audio pedals. The Neuro Hub features a powerful scene saving functionality, which allows you to create up to 128 multi-pedal presets known as scenes, each recallable via MIDI program change messages.
- Page 22 Some DAWs send multiple MIDI messages when the play or pause buttons are pressed, and this can lead to unintended MIDI mappings. Check your DAW documentation in order to learn about messages that are sent at the beginning or end of playback. SA240 Mercury Flanger User’s Guide...
- Page 23 Musically speaking, this means that the LFO can run at the rate of quarter notes, eighth notes, triplets, or sixteenth notes. The following diagram shows the knob positions corresponding to each subdivision, with the knob currently set to quarter notes: Eighth Notes Triplets Quarter Notes Sixteenth Notes SA240 Mercury Flanger User’s Guide...
- Page 24 For advanced tweaking of the Mercury’s audio processing algorithms, the One Series USB Editor software is available for free download from the Source Audio website. It allows for editing of the Mercury’s signal processing parameters on such a deep level that entirely new and original effects can be created.
- Page 25 Switch The tap tempo switch needs to be more than a simple switch; a pull-up resistor and RC passive low pass filter are required. The circuit for the footswitch is shown in the following figure: SA240 Mercury Flanger User’s Guide...
-
Page 26: Specifications
In the case of laptops, the noise can often be mitigated by disconnecting the computer’s power supply and running it on a battery. External display monitors are often the primary source of noise, and powering down monitors can also resolve noise issues. SA240 Mercury Flanger User’s Guide... -
Page 27: Frequently Asked Questions
No. USB provides 5 Volts, but the Mercury needs 9 Volts, so the Mercury cannot be powered directly from USB. Make sure that you have plugged in the included 9V DC power supply when connecting to the Mercury’s USB port. SA240 Mercury Flanger User’s Guide... - Page 28 So, each CC message consists of a total of three bytes. If the Mercury is not responding to MIDI, make sure that your MIDI controller is properly configured and sending messages in the format described above. SA240 Mercury Flanger User’s Guide...
-
Page 29: Rubber Feet
If possible, dispose of the device at an electronics recycling center. Do not dispose of the device with the household waste. For full compliance with EN 61000-4-6 standard, input cable must be less than 3 meters in length. SA240 Mercury Flanger User’s Guide... -
Page 30: Warranty
Source Audio. Warranty Information Source Audio may, at its option, require proof of the original purchase date in the form of a dated copy of the original authorized dealer’s invoice or sales receipt. Service and repairs of Source Audio products are to be performed only at the Source Audio factory or a Source Audio authorized service center. -
Page 31: Version History
Do not open the effects pedal under any circumstance. This will void the warranty. The foregoing limited warranty is the only warranty given by Source Audio and is in lieu of all other warranties. All implied warranties, including warranties of merchantability and fitness for any particular purpose, exceeding the specific provisions of this limited warranty, are hereby disclaimed and excluded from this limited warranty.
Need help?
Do you have a question about the Mercury Flanger and is the answer not in the manual?
Questions and answers