Table of Contents

Related Manuals for Gastroback 42639


Summary of Contents for Gastroback 42639
-
Page 1: Operating Instructions
Operating Instructions Design Coffee Grinder Advanced Pro Art.-Nr. 42639 Design Coffee Grinder Advanced Pro Read all provided instructions before first use! Model and attachments are subject to change! For household use only! -
Page 2: Table Of Contents
Carefully read all provided instructions before you start running the appliance and pay regard to the warnings mentioned in these instructions. Table of Contents Knowing Your Design Coffee Grinder Advanced Pro ..........28 Important Safeguards ..................30 General Safety Instructions ................30 Important Safeguards for Electrical Appliances ............ - Page 3 Dear Customer! Congratulations! A series of new possibilities comes with your new Gastroback Design Coffee Grinder Advanced Pro. This new Coffee Grinder will prove itself by its outstanding adaptability and smart modes of operation. Your Coffee Grinder provides always freshly ground coffee for your special coffee delight by automatically adapting the amount to your pre-selections.
-
Page 4: Knowing Your Design Coffee Grinder Advanced Pro
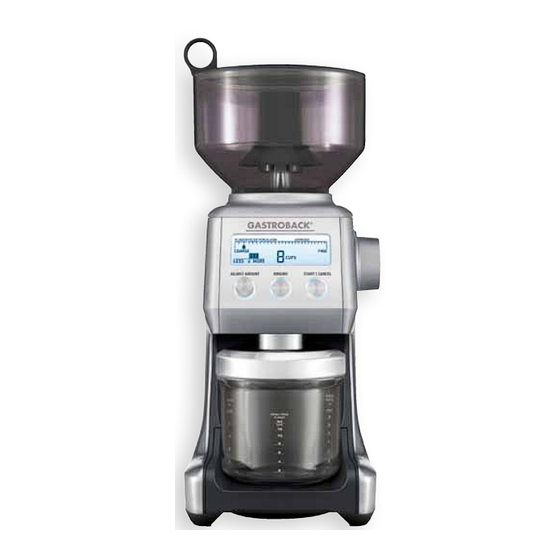
Knowing Your Design Coffee Grinder Advanced Pro... - Page 5 Conical burr sleeve— Slip reducing feet hardened stainless steel for reduced grinding heat N/O Cradles for Portafilter 50-54 mm and 58 mm – for fixing your Portafilter Bean hopper – with locking system under the grind outlet for easy removal and filling Grinds container –...
-
Page 6: Important Safeguards
Important Safeguards Carefully read all instructions before operating this appliance and save for further reference. Do not attempt to use this appliance for any other than the intended use, described in these instructions. Any other use, especially misuse, can cause severe injuries or damage by electric shock, moving parts, or fire. -
Page 7: Important Safeguards For Electrical Appliances
the appliance where it is dry, frost-free, and clean, and where young children cannot reach it. Do not leave the appliance or any part of it unattended, when in reach of young children. • Do not place the appliance or any part of it on or near hot surfaces (e.g. burner, heater or oven). -
Page 8: Moving Parts
Thus, ensure to keep the bean hopper lid firmly closed during operation. Additi- onally, keeping the bean hopper lid closed will prevent unnecessary loss of flavour and taste. Technical Specifications Model: Art. No. 42639 Design Coffee Grinder Advanced Pro Power supply: 230-240 V AC, 50 Hz Power consumption:... -
Page 9: Properties Of Your New Coffee Grinder
Properties of Your New Coffee Grinder Important: Your new Design Coffee Grinder Advanced Pro is intended for grinding roasted coffee beans, and is driven electrically. The appliance is NOT suited for grinding or chopping other food or materials. Additionally, the appliance is NOT suited for processing already ground coffee. -
Page 10: Tips For Best Results
The appliance will automatically switch off when not used for more than 5 minutes. In this case, the screen and all buttons get dark. To reactivate normal operation, simply press any button of the operating elements. Tips for Best Results •... -
Page 11: Operation
WARNING: Always unplug the appliance before cleaning. Do not immerse the power base or power cord in water or other liquids or spill any liquids on the power base or power cord. Do not place the appliance or any part of it or power cord in an automatic dishwasher. 4. -
Page 12: Operating Your Design Coffee Grinder Advanced Pro
4. Fill coffee beans into the bean hopper; 450 g at the maximum. Tip: The bean hopper can be removed while still containing coffee beans. For this turn the bean hopper lock counter-clockwise and lift the bean hopper upwards and out. The locking system closes the bottom outlet of the bean hopper. -
Page 13: Grinding Into Portafilter
Tip: The buttons START/CANCEL und Portafilter execute exactly the same function. You can operate the Portafilter button by pressing the button with the used vessel (e.g. Portafilter). 5. Take out the ground coffee after the milling works come to a standstill. WARNING: Do not leave the appliance unattended, while it is connected to the power sup- ply. -
Page 14: Customising The Pre-Settings
3. Slide in the grind container (the opening in the lid facing towards the appliance) directly under the grind outlet until it snaps in place at the magnet in the rear of the appliance. 4. Press the START/CANCEL button to start the grinding process. You can use the automatic mode: only shortly press the button and let the appliance operate until the calculated amount is ground. -
Page 15: Solving Problems
To set the grind size: 1. Correctly prepare the appliance for operation. (see: ´Preparing the Appliance for Use`) 2. Turn the grind size dial at the right side of the appliance. You can turn the grind size dial in several revolutions. Depending on the set range, each grading line on the scale corresponds to various settings of the dial. - Page 16 The milling works start No coffee beans in Fill bean hopper with fresh coffee beans. but no ground coffee bean hopper! comes from grind outlet Milling works or Remove bean hopper and burr sleeve. bean hopper is Inspect bean hopper and milling works blocked.
-
Page 17: Care And Cleaning
Care and Cleaning Regular cleaning helps the grinder achieve consistent grinding results which is especially important when grinding for the use with espresso machines. Additionally, you avoid disad- vantages to flavour and taste due to any remainder left in the grinder. WARNING: Always ensure that the appliance and any parts and accessories of it are out of reach of young children. -
Page 18: Cleaning The Appliance
Cleaning the Appliance 1. Wash all removable parts in warm dishwater. These are: grind catch tray, bean hopper and bean hopper lid and, when used, the cradle or grind container and grind container lid. 2. Rinse with clear tap water and dry thoroughly. 3. -
Page 19: Storage
Please contact your local disposal company. Information and Service Please check www.gastroback.de for further information. For technical support, please contact Gastroback Customer Care Center by phone: +49 (0)4165/22 25-0 or e-mail: info@gastroback.de. -
Page 20: Warranty
Warranty We guarantee that all our products are free of defects at the time of purchase. Any demons- trable manufacturing or material defects will be to the exclusion of any further claim and within warranty limits of the law free of charge repaired or substituted. There is no warranty claim of the purchaser if the damage or defect of the appliance is caused by inappropriate treatment, over loading or installation mistakes. -
Page 22: Index
Index abroad operation ....................31 accessories ......................30 amount ......................38 assembling ......................42 automatic mode .................... 33, 36 capacity ......................32 care and cleaning ....................41 disassemble ......................41 disposal ......................43 electricity ......................31 extension cord ....................31 first use ...................... - Page 23 safety interlock ....................33 saving energy ..................... 33 service ....................... 43 settings ......................38 solving problems ....................39 spare parts ......................30 storage ......................43 technical specifications ..................32 test for proper operation ..................30 tips ........................34 warranty ......................44 workspace ......................
Need help?
Do you have a question about the 42639 and is the answer not in the manual?
Questions and answers