Table of Contents
Advertisement
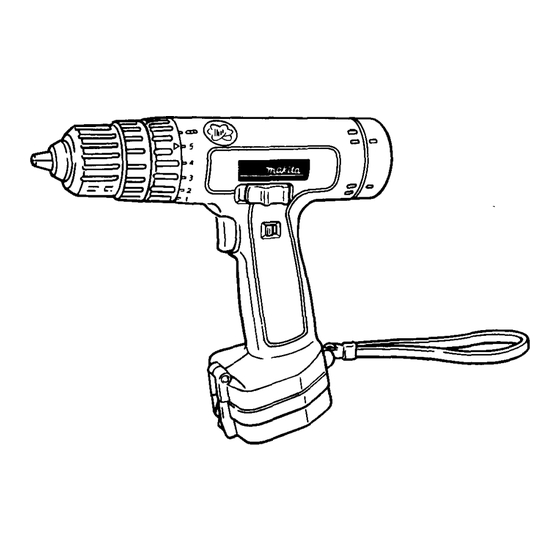
Equipped with Electric Brake
MODEL 6311D
MODEL 6311DW
With Fast Charger
Capacities
No load speed IRPMl
Dimensions
1L x W x HI
Steel
1
Wood
I
Wood screw
I
Machine screw
I
Hiqh
I
tow
INSTRUCTION MANUAL
Net
weight
13"
1112")
24"
6.4mmx55mm
6 m m 1 1 , 4 , , )
o p
, , 1 5 0
o - 3 7 0
244mmx79mmx233mm
1.95kg
115116"l
1114" x 2-3/16")
19-518"
x
3-118"
x
9-114")
14.3 Ibs)
Voltage
I
Input
I
output
1
charging time
Battery Cartridge 1200
12
v
1
A.C. only
50
Hz
-
60 Hz
I
D.C. 9.6 V. 12 V
I
1 Hr
Model DC1290 Fast Charger
~
~
~
~
~~~~~~~~~
Manufacturer reserves the right to change specifications without notice.
Note: Specifications may differ from country to country.
WARNING: For your personal safety, READ and UNDERSTAND before using.
SAVE THESE INSTRUCTIONS FOR FUTURE REFERENCE.
Advertisement
Table of Contents

Subscribe to Our Youtube Channel
Related Manuals for Makita 6311D


Summary of Contents for Makita 6311D
- Page 1 6 m m 1 1 , 4 , , ) , , 1 5 0 o - 3 7 0 Input output 60 Hz D.C. 9.6 V. 12 V ~~~~~~~~~ MODEL 6311D MODEL 6311DW With Fast Charger Dimensions 1L x W x HI weight 244mmx79mmx233mm 1.95kg 19-518"...
-
Page 2: Important Safety Instructions
SAFETY INSTRUCTIONS WARNING: WHEN USING ELECTRIC TOOLS, BASIC SAFETY PRECAUTIONS SHOULD ALWAYS BE FOLLOWED TO REDUCE THE RISK OF FIRE, ELECTRIC SHOCK, AND PERSONAL INJURY, INCLUDING THE FOLLOWING: READ ALL INSTRUCTIONS. ~~~~ 1. KEEP WORK AREA CLEAN. Cluttered areas and benches invite injuries. 2. -
Page 3: Installing/Removing Driver Bit/Drill Bit
KEYLESS CHUCK SYSTEM This cordless driver drill is now equipped with a”&&‘ system. This Keyless Chuck features a click locking mechanism loosening of the bit from vibration, in addition to making the bit faster and easier to install. Below are the instructions for using the sheet supersedes the “Installing or Removing Driver Bit or Drill Bit”... -
Page 4: Charging
This contains 12V High Capacity Battery 1201 and Charger DC1201. CAUTION - To reduce risk of injury, charge only appropriate MAKITA Ni-Cd batteries. Other types batteries may burst causing personal injury and damage. This insert page supersedes Page 6 and Page 12 from the enclosed instruction manual. - Page 5 ACCESSORIES CAUTION: These accessories or attachments are recommended for use with your Makita tool specified in this manual. The use of any other accessories or attachments might present a risk of injury to persons. The accessories or attachments should be used only in the proper and intended manner.
- Page 6 14. REMOVE ADJUSTING KEYS AND WRENCHES. Form habit of checking t o see that keys and adjusting wrenches are removed from tool before turning it on. 15. AVOID UNINTENTIONAL STARTING. Don't carry tool with finger on switch. Be sure switch is OFF when plugging in. OUTDOOR USE EXTENSION CORDS.
- Page 7 Before using battery charger, read all instructions and cautionary markings battery charger, CAUTION To reduce risk of injury, charge only MAKITA Battery Cartridge 9000,9100,1200,1210 personal injury and damage. 4. Do not expose charger t o rain or snow.
-
Page 8: Additional Safety Rules
ADDITIONAL SAFETY RULES FOR CHARGER & BATTERY CARTRIDGE 1. Do not charge Battery Cartridge when temperature is BELOW 10°C (5OOF) or ABOVE 4OoC (104OF). 2. Do not attempt t o use a step-up transformer, an engine generator or DC power receptacle. - Page 9 Installing or removing battery cartridge Always switch off the tool before insertion or removal or the battery cartridge. .To remove the battery cartridge, pull out plate on the tool and grasp both sides of the cartridge while withdrawing it from the tool. .To insert the battery cartridge, align the tongue on the battery cartridge with the groove in the housing and slip...
-
Page 10: Installing/Removing Driver Bit/Drill Bit
installing or removing driver bit or drill b i t CAUTION: that the Always be sure tool instaliing or removing the bit. Hold the ring and turn the sleeve counter- clockwise to open the chuck jaws. Place the bit in the chuck as far as Hold the ring firmly and turn the sleeve clockwise t o tighten the chuck. -
Page 11: Screwdriving Operation
Speed change To change the speed, slide the speed change lever to the "H" side for high speed or "L" side for low speed. To slide the speed change lever easily, pull the trigger slightly while pushing the speed change lever. Be sure that the speed change lever is the correct position before operation. -
Page 12: Drilling
NOTE : Make sure that the driver bit bit may be damaged. When driving wood screws, predrill pilot holes to make driving easier. and to pre- vent splitting of the workpiece. See the chart. Drilling operation First, turn the adjusting ring marking. - Page 13 Hook A hook is provided as a standard equip- ment. This hook is convenient for tem- porarily hanging the tool. To install the hook, first insert one end of the hook into one slot in the tool body and then insert the other end into the other slot.
-
Page 14: Maintenance
Always be sure that the tool is switched off and the battery cartridge is removed before attempting to perform inspection or maintenance. maintain product SAFETY and RELIABILITY, repairs, maintenance or adjustment should be performed Makita Authorized or Factory Service Centers, always using Makita replacement parts. -
Page 15: Accessories
ACCESSORIES CAUTION: These accessories or attachments are'recommended for use with your Makita tool specified in this manual. The use of any other accessories or attachments might present The accessories attachments should be used only in the proper and intended manner. - Page 16 CORDLESS DRIVER DRILL Model 6311D Note: The s w i t c h and other part conftgurations may differ f r o m c o u n t r y to country.
- Page 17 DESCRIPTION MACHINE Name Plate Tapping Screw PT4x18 Housing Set IWifh Item 591 Pan Head Screw M4x22 W t h Washer1 Sponge 1 4 - 7 2 Switch Lever Switch Lever Keyless Drill Chuck 13 Flat Head Screw M6x22 pmdle Bearing Retainer 17 Beanng W W L L B Ball Stop Ring E - 9...
-
Page 18: One Year Warranty
MAKllA L I M I T E D Every Makita tool is thorou ly inspected and tested before leaving the factory. It is warranted to be free of defects from worfkdshlp and materials far the period of ONE YEAR from the date of orighal purchsse.
Need help?
Do you have a question about the 6311D and is the answer not in the manual?
Questions and answers