Magnavox MAS-80 User Manual
Magnavox mini hi-fi system user guide
Hide thumbs
Also See for MAS-80:
- Quick use manual (4 pages) ,
- User manual (23 pages) ,
- User manual (26 pages)
Table of Contents
Advertisement
User guide
S M A R T . V E R Y S M A R T .
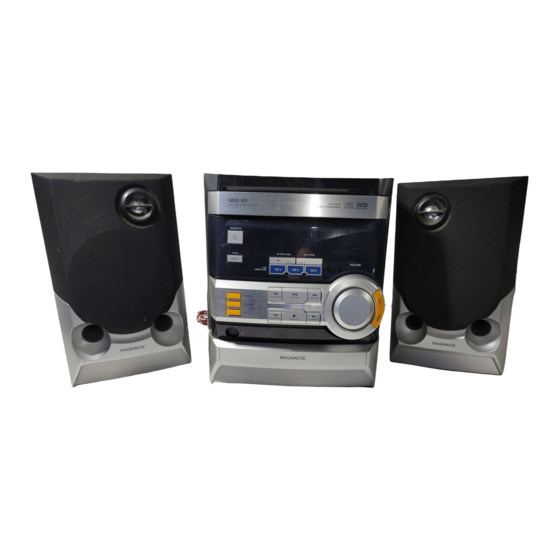
MAS-80
MINI HI-FI SYSTEM
Need help? Call us!
Return
Magnavox representatives are ready to help you with
your Warranty
any questions about your new product. We can guide
Registration Card
within 10 days
you through Connections, First-time Setup, or any of
the Features.We want you to start enjoying your
new product right away!
CALL US BEFORE YOU CONSIDER
RETURNING THE PRODUCT!
1-800-705-2000
or
Visit us on the web at www.magnavox.com
1
8240 009 34231
Advertisement
Table of Contents

Subscribe to Our Youtube Channel
Related Manuals for Magnavox MAS-80


Summary of Contents for Magnavox MAS-80
- Page 1 S M A R T . V E R Y S M A R T . MAS-80 MINI HI-FI SYSTEM Need help? Call us! Return Magnavox representatives are ready to help you with your Warranty any questions about your new product. We can guide Registration Card within 10 days you through Connections, First-time Setup, or any of the Features.We want you to start enjoying your...
- Page 2 Canada English: This digital apparatus does not exceed the Class B limits for radio noise emissions from digital apparatus as set out in the Radio Interference Regulations of the Canadian Department of Communications. Français: Cet appareil numérique n'emet pas de bruits radioélectriques dépassant les limites applicables aux appareils numériques de Class B prescrites dans le Règlement sur le Brouillage...
- Page 3 & 8240 009 34231...
-
Page 4: Warranty
Return your Warranty Registration card today to ensure you receive all the benefits you’re entitled to. • Once your Magnavox purchase is registered, you’re eligible to receive all the privileges of owning a Magnavox product. Warranty Verification Registering your product... - Page 5 And we’ll do everything in our power to keep you happy with your purchase for many years to come. As a member of the Magnavox “family,” you’re entitled to protection by one of the most comprehensive warranties and outstanding service net- works in the industry.
-
Page 6: Important Safety Instructions
IMPORTANT SAFETY INSTRUCTIONS Read these instructions. Keep these instructions. Heed all warnings. Follow all instructions. Do not use this apparatus near water. Clean only with dry cloth. Do not block any ventilation openings. Install in accordance with the manufacturer´s instructions. Do not install near any heat sources such as radiators, heat registers, stoves, or other apparatus (including amplifiers) that... - Page 7 Index English ------------------------------------------------ 8 Español --------------------------------------------- 28 8240 009 34231...
-
Page 8: Table Of Contents
Contents General Information Supplied accessories ... 9 Environmental information ... 9 Safety information ... 9 Preparations Rear connections ... 10–11 Power Antennas connection Speakers connection Inserting batteries into the remote control . 11 Controls Controls on the system and remote control ... -
Page 9: General Information
This system complies with the FCC rules, Part 15 and with 21 CFR 1040.10. Operation is subject to the following two conditions: – This device may not cause harmful interference, and – This device must accept any interference received, including interference that may cause undesired operation. -
Page 10: Preparations
Preparations AM loop antenna speaker (right) AC power cord Rear connections The type plate is located at the rear of the system. Power Before connecting the AC power cord to the wall outlet, ensure that all other connections have been made. WARNING! –... -
Page 11: Speakers Connection
FM Antenna G For better FM stereo reception, connect an outdoor FM antenna to the FM AERIAL (FM ANTENNA) terminal. Speakers Connection Front Speakers Connect the speaker wires to the SPEAKERS terminals, right speaker to "R" and left speaker to "L", colored (marked) wire to "+"... -
Page 12: Controls On The System And Remote Control
Controls (illustrations on page 3) Controls on the system and remote control STANDBY ON y – to switch the system on or to standby mode. CD OPEN/CLOSE – to open or close the disc tray. TUNER (FM•AM) – to select waveband : FM or AM. CD 1 / CD 2 / CD 3 (CD 1/2/3) –... -
Page 13: Basic Functions
IMPORTANT! Before you operate the system, complete the preparation procedures. Plug and Play Plug and Play allows you to store all available radio stations automatically. First time setup/power up When you turn on the main power, "AUTO INSTALL - PRESS PLAY" is displayed. PressÉ... -
Page 14: Demonstration Mode
Basic Functions Demonstration mode The system has a demonstration mode that shows the various available features. To activate the demonstration G In standby mode, press and holdÇon the system until "WELCOME" is displayed. ➜ The demonstration will begin. To deactivate the demonstration G Press and holdÇon the system until "DEMO OFF"... -
Page 15: Sound Control
Sound control DSC (Digital Sound Control) The DSC feature enables you to enjoy special sound effects with preset equalizer settings, that provide improved music reproduction. G Press DSC to select : JAZZ, ROCK, TECHNO or OPTIMAL. ➜ The selected DSC is shown. DBB (Dynamic Bass Boost) There are three DBB settings to enhance the bass response. -
Page 16: Cd Operation
CD Operation IMPORTANT! – This system is designed for regular discs. Therefore, do not use any accessories such as disc stabilizer rings or disc treatment sheets, etc., which may jam the changer mechanism. – Do not load more than one disc into each tray. -
Page 17: Playing Discs
Playing discs a disc is loaded in the disc tray the current selected disc tray is empty the current selected disc tray is loaded or playing To play all discs on the disc tray G PressÉ Å . ➜ All the available discs will play once, then stop. ➜... -
Page 18: Programming The Disc Tracks
CD Operation Notes: – During program play or shuffling mode, it is not possible to repeat playback for the current disc (Repeat Disc mode). – Pressing the CD OPEN/CLOSE button will cancel all repeat and shuffling modes. Programming the disc tracks Programming tracks is possible when playback is stopped. -
Page 19: Radio Reception
Tuning to radio stations Press TUNER to select TUNER mode. ➜ "TUNER" is displayed. A few seconds later, the current radio frequency will appear on the display. ➜ If an FM station is received in stereo, displayed. Press TUNER again to select the desired waveband : FM or AM. -
Page 20: Tuning To Preset Radio Stations
Radio Reception Tune to your desired radio station (refer to “Tuning to radio stations”). Press PROGRAM. ➜ starts flashing. PROG ➜ The next available preset number is displayed for selection. To store the radio station to another preset number G Press í or ë to select the desired preset number. -
Page 21: Clock/Timer
Clock/Timer View clock The clock (if it is set) will be shown in standby mode. To view the clock in any source mode (CD or TUNER for example) G Press CLOCK•TIMER. ➜ The clock is displayed for a few seconds. ➜... -
Page 22: Deactivating The Timer
Press CD 1/2/3, TUNER or PROGRAM to select the desired source. ➜ “CD1 [or 2, 3] XX:XX" indicates the CD mode is selected. ➜ “TU XX:XX” indicates the Tuner mode is selected. ➜ “PROG XX:XX" indicates the CD program mode is selected. G Before setting timer, make sure the music source has been prepared. -
Page 23: Specifications
Specifications AMPLIFIER Output power ... 4 W total power ... 2 x 2 W RMS Signal-to-noise ratio ... ≥ 67 dBA (IEC) Frequency response ... 50 – 15000 Hz Impedance loudspeakers ... 8 Ω Impedance headphones ... 32 Ω -1000 Ω (1) (8Ω, 60 Hz –... -
Page 24: Troubleshooting
WARNING Under no circumstances should you try to repair the system yourself, as this will invalidate the warranty. Do not open the system as there is a risk of electric shock. If a fault occurs, first check the points listed below before taking the system for repair. If you are unable to solve a problem by following these hints, consult your dealer or service center. - Page 25 Troubleshooting GENERAL The system does not react when buttons are pressed. Sound cannot be heard or is of poor quality. The left and right sound outputs are reversed. The remote control does not function properly. The timer is not working. The Clock/Timer setting is erased.
-
Page 26: Limited Warranty
You may exchange the product in all countries where the product is officially distributed by Magnavox. In countries where Magnavox does not distribute the product, the local Magnavox service organization will attempt to provide a replacement product (although there may be a delay if the appropriate product is not readily available).
Need help?
Do you have a question about the MAS-80 and is the answer not in the manual?
Questions and answers