Stihl FSA 65 Instruction Manual
Hide thumbs
Also See for FSA 65:
- Instruction manual (408 pages) ,
- Instruction manual (120 pages) ,
- Instruction manual (316 pages)
Table of Contents
Advertisement
Available languages
Available languages
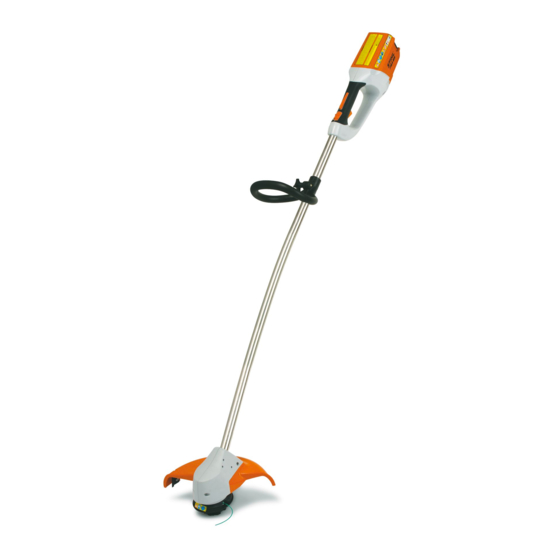
STIHL FSA 65, 85
{
Instruction Manual
Manual de instrucciones
WARNING
Read Instruction Manual thoroughly
before use and follow all safety
precautions – improper use can
cause serious or fatal injury.
ADVERTENCIA
Antes de usar la máquina lea y siga
todas las precauciones de
seguridad dadas en el manual de
instrucciones – el uso incorrecto
puede causar lesiones graves o
mortales.
Advertisement
Chapters
Table of Contents

Subscribe to Our Youtube Channel
Related Manuals for Stihl FSA 65


Summary of Contents for Stihl FSA 65
- Page 1 STIHL FSA 65, 85 Instruction Manual Manual de instrucciones WARNING Read Instruction Manual thoroughly before use and follow all safety precautions – improper use can cause serious or fatal injury. ADVERTENCIA Antes de usar la máquina lea y siga todas las precauciones de seguridad dadas en el manual de instrucciones –...
- Page 2 Instruction Manual 1 - 30 Manual de instrucciones 31 - 62...
-
Page 3: Table Of Contents
Adjusting Nylon Line information you can go to Connecting Charger to Power www.stihlusa.com. Supply Contact your STIHL dealer or the STIHL Charging the Battery distributor for your area if you do not LEDs on Battery understand any of the instructions in this LED on Charger manual. -
Page 4: Guide To Using This Manual
Keep Children Away – in different ways: described in this manual, please contact All visitors should be kept at a your STIHL dealer or the STIHL A bullet marks a step or procedure. distance from work area. distributor for your area for assistance. -
Page 5: Safety Precautions And Working
STIHL for use on your authorized service center unless FSA model. To reduce the risk of severe indicated elsewhere in this manual. - Page 6 Most of these safety precautions and hazardous. If the rotating line comes in check with your doctor before operating warnings apply to the use of all STIHL contact with your body, it may cut you. this machine. trimmers. Different models may have When it comes in contact with solid different parts and controls.
- Page 7 STIHL for and snug-fitting but allow in hot weather. Doing so may cause the use with the specific STIHL model are complete freedom of battery to generate heat, rupture or authorized. Although certain movement.
- Page 8 15 minutes at least. Also WARNING inside. seek medical attention immediately. Use STIHL batteries only with STIHL Store charger out of the reach of power tools, and charge them only with children. WARNING STIHL chargers.
- Page 9 Always switch off the power tool, move Never use power supply cords that do maintained, or not completely or retaining latch to ? and remove the not comply with regulations. securely assembled. battery – even when you carry the unit FSA 65, FSA 85...
- Page 10 Inspect for loose parts (nuts, ment with your hand or screws, etc.). Regularly check the any other part of your condition and tightness of the cutting body. attachment – with the motor stopped, FSA 65, FSA 85...
- Page 11 50 feet (15 m) away. To reduce the risk away from the operator. Follow the of damage to property, also maintain this recommendations of EPA / OSHA / FSA 65, FSA 85...
- Page 12 If the head continues to loosen, see your STIHL dealer. Never Using the unit with an overly long nylon Check the cutting attachment at regular cutting line increases the load on the...
-
Page 13: Using The Unit
Regularly check the electrical contacts parts for maintenance and repair. Use of and ensure that the insulation of the non-STIHL parts may cause serious or power cord and plug of the charger is in fatal injury. good condition and shows no sign of aging. -
Page 14: Approved Combinations Of Cutting Attachment And Deflector
Cutting Attachment and blades on this unit. the FSA 85. It is available as a special Deflector Only the provided mowing head may be accessory for the FSA 65. used. Cutting Attachment The bump guard (1) Limits the cutting range of the –... -
Page 15: Adjusting The Loop Handle
Push the deflector (2) into the guide slots as far as stop. Turn the handle to the vertical Insert the screws (3) and tighten position. them down firmly. FSA 65, FSA 85... -
Page 16: Adjusting Nylon Line
– then push it as far as stop. Press down the cap on the spool as far as stop. Pull the ends of the lines out of the spool. If the spool is empty, see "Replacing Nylon Line". FSA 65, FSA 85... -
Page 17: Leds On Battery
LED glows continuously red. charge time. The battery and charger heat up during LED flashes red. the charging process. AL 300, AL 500 Chargers The AL 300 and AL 500 chargers are equipped with a battery cooling fan FSA 65, FSA 85... - Page 18 / warmed up. During operation: Power tool cuts out – allow battery to cool down; it may be necessary to take the battery out of the power tool for this purpose. FSA 65, FSA 85...
-
Page 19: Led On Charger
Malfunction in battery – see also – "LEDs on Battery". Stand upright – hold the power tool in a relaxed position. Malfunction in charger – have – checked by a servicing dealer. STIHL recommends an authorized STIHL servicing dealer. FSA 65, FSA 85... -
Page 20: Switching Off
(4) and hold them in that power tool during work breaks and after position. finishing work. The motor runs only if the retaining latch (2) is on ‚ and the trigger switch lockout (3) and trigger switch (4) are operated simultaneously. FSA 65, FSA 85... -
Page 21: Storing The Machine
Store the charger indoors in a dry and secure location. Keep out of the reach of children and other unauthorized persons and protected from contamination. After finishing work, slide the cover (1) home until it engages audibly in position. FSA 65, FSA 85... -
Page 22: Replacing Nylon Line
Pull the spool (2) out of the mowing Push the spring into the spool (2) as In normal operation, the supply of nylon head (3) and remove the remaining far as stop. line in the head is used up almost line. completely. FSA 65, FSA 85... - Page 23 (3) until you feel a noticeable resistance – and then continue pushing as far as stop. Slip the mowing head (6) over the shaft (7) and engage hex recess (8) on the external hexagon (9). FSA 65, FSA 85...
-
Page 24: Maintenance And Care
Controls (retaining latch, trigger switch lockout, trigger switch) Clean All accessible screws and nuts Retighten Battery Visual inspection Clean Battery compartment Check operation (eject battery) Visual inspection Cutting attachment (mowing head) Replace Check tightness Safety labels Replace FSA 65, FSA 85... -
Page 25: Main Parts
10 Battery 11 Light Emitting Diodes (LED) on Battery 12 Push Button 13 Mowing Head 14 Line Limiting Blade 15 Deflector 16 Charger 17 Light Emiting Diode (LED) on Charger 18 Power Supply Cord Serial Number FSA 65, FSA 85... -
Page 26: Specifications
120 V / 60 Hz Rated current: 4.8 A 11. Light Emitting Diodes (LED) on Battery Power consumption: 570 W Indicate the state of charge and Charge current: 12 A operating condition of the battery. Insulation: II, E (double insulated) FSA 65, FSA 85... - Page 27 FSA 65: 11.8 in be fulfilled by the user to transport (300 mm) STIHL batteries by road to the power reorient or relocate the receiving – FSA 85: 13.8 in tool’s operating site. Check and comply...
-
Page 28: Troubleshooting
Allow power tool / battery to dry Battery or machine's electronics too hot Take battery out of machine, allow bat- tery and machine to cool down Machine cuts out during operation Electrical fault Remove the battery and refit it FSA 65, FSA 85... - Page 29 LED on charger flashes red LEDs continue to flash, the battery has a about 5 seconds) malfunction and must be replaced. Fault in charger Have charger checked by servicing dealer STIHL recommends an authorized STIHL servicing dealer. FSA 65, FSA 85...
-
Page 30: Maintenance And Repairs
Genuine STIHL parts can be identified by the STIHL part number, the STIHL products must not be thrown in STIHL is committed to the development { logo and, in some cases, by the garbage can. Take the product, of products that are environmentally the STIHL parts symbol K. -
Page 31: Trademarks
Any unauthorized use of these Ematic ™ ® trademarks without the express written EASYSTART FixCut ™ consent of ® FARM BOSS ANDREAS STIHL AG & Co. KG, HT Plus ™ ® Waiblingen is strictly prohibited. iCademy IntelliCarb ™ ® MAGNUM Master Control Lever ™... -
Page 32: Addresses
English Addresses STIHL Inc. 536 Viking Drive P.O. Box 2015 Virginia Beach, VA 23452-2015 FSA 65, FSA 85... - Page 33 Comuníquese con su concesionario Carga de la batería STIHL o con el distribuidor STIHL de su LED en batería región si no entiende alguna de las LED en cargador instrucciones incluidas en este manual.
-
Page 34: Acerca De Este Manual De Instrucciones
Mejoramientos técnicos Evite los entornos peligrosos - No utilice motoguadañas en lugares Muchas de las instrucciones de uso y La filosofía de STIHL es mejorar húmedos ni mojados. seguridad vienen acompañadas de continuamente todos sus productos. No las use bajo la lluvia. -
Page 35: Medidas De Seguridad Y Técnicas De Manejo
Utilice FSA 65, FSA 85... - Page 36 ésta. Esto evita el Pida a su concesionario STIHL que le riesgo de que el motor arranque ADVERTENCIA enseñe el manejo de la herramienta inesperadamente.
- Page 37 Para reducir el riesgo de lesiones el vista pantalones cortos. STIHL. Si bien es posible conectar a la operador debe usar el equipo protector herramienta motorizada de STIHL Evite el uso de chaquetas sueltas, adecuado.
- Page 38 No la exponga a la luz busque atención médica de inmediato. STIHL. Sustituya la batería únicamente solar directa ni la guarde dentro de un con la batería STIHL. Use sólo baterías vehículo en climas calurosos. De lo ADVERTENCIA recargables STIHL genuinas.
- Page 39 - riesgo de explosión. tamaño y forma que las del cargador. Úselo y guárdelo bajo techo y en un recinto seco. Utilice el cargador a temperaturas de 5 °C (41 °F) a 40 °C (104 °F). FSA 65, FSA 85...
- Page 40 "Montaje del deflector", en su manual de evitar que se vuelque y se dañe. instrucciones). Ajuste la empuñadura de modo correspondiente a su estatura antes de empezar a trabajar. La máquina debe FSA 65, FSA 85...
- Page 41 Al trabajar, siempre sujete la máquina visibilidad y a la luz del día. Trabaje con firmemente con ambas manos en los mucho cuidado. mangos. Cierre firmemente los dedos y pulgares sobre los mangos. FSA 65, FSA 85...
- Page 42 Aun si se mantiene una lugar. herramienta motorizada es más difícil de distancia mínima de 15 metros, esto no controlar. elimina el peligro potencial. Los trabajadores que deben quedar en la zona prohibida también deben usar FSA 65, FSA 85...
- Page 43 Las cabezas segadoras deben usarse de alambres o cables (de concesionario STIHL. Nunca use una solamente en las motoguadañas con alimentación, etc.) que motoguadaña con un accesorio de corte una cuchilla limitadora del hilo en el puedan tener corriente suelto.
- Page 44 / EE.UU sobrecalentamiento y daños de de piezas no fabricadas por STIHL Apriete todas las tuercas, pernos y componentes importantes (por ejemplo, puede causar lesiones graves o tornillos después de haber usado la componentes de la caja fabricados de mortales.
-
Page 45: Uso
Desecho suministra para reducir el riesgo de lesiones causadas por los objetos No tire los recortes al basurero – lanzados y por el contacto con el pueden usarse para abono. accesorio de corte. FSA 65, FSA 85... -
Page 46: Ajuste Del Mango Tórico
Afloje la perilla (1) en el mango. Gire el mango a la posición vertical. El mango tórico puede ajustarse de acuerdo con la talla y el alcance del operador y la aplicación, variando la distancia (A). FSA 65, FSA 85... -
Page 47: Montaje Del Deflector
Empuje hasta el tope la tapa en el rojo y luego se apaga otra vez. carrete. Extraiga los extremos de los hilos del carrete. Si no hay hilo en el carrete, vea "Sustitución del hilo de nilón". FSA 65, FSA 85... -
Page 48: Carga De La Batería
(2) hasta que se perciba durante el proceso de carga. una resistencia definitiva – luego empújela hasta que tope. Cargadores AL 300, AL 500 Los cargadores AL 300 y AL 500 disponen de un ventilador para enfriar la batería. FSA 65, FSA 85... -
Page 49: Led En Batería
Diodo fotoemisor iluminado con- completa el proceso de carga. tinuamente en rojo. Si los diodos fotoemisores de la batería Diodo fotoemisor destella rojo. destellan o se encienden en rojo, consulte “Si los diodos fotoemisores rojos se encienden continuamente/destellan”. FSA 65, FSA 85... -
Page 50: Led En Cargador
El diodo fotoemisor verde del cargador destellan en un concesionario de servicio - se apaga cuando la batería está rojo: STIHL recomienda acudir a un completamente cargada. concesionario autorizado de 3 diodos fotoe- La herramienta STIHL. -
Page 51: Encendido De La Máquina
Cargador averiado – solicite a un – de instalar la batería, es decir, concesionario de servicio que lo oprima las dos pestañas de traba revise. STIHL recomienda acudir a para soltarlas y quitar la tapa. un concesionario STIHL autorizado para servicio. Instalación de la batería... -
Page 52: Apagado De La Máquina
? – el gatillo (2) no puede accionarse – la herramienta motorizada está bloqueada para evitar que arranque. Siempre retire la batería de la herramienta motorizada durante los descansos y después de terminar el trabajo. FSA 65, FSA 85... -
Page 53: Almacenamiento De La Máquina
Sustitución del hilo de nilón máquina Extraiga la batería de la Mueva el pestillo de retención a la herramienta motorizada o del AutoCut C 4-2 de STIHL posición ?. cargador. Retire la batería. Almacénese bajo techo, en un lugar Revise siempre la cabeza segadora en seco y bajo llave. - Page 54 Empuje el extremo recto de cada hilo a través de un manguito (5) en la cabeza segadora (3) hasta sentir resistencia, y luego siga empujando hasta el tope. FSA 65, FSA 85...
- Page 55 (9). Coloque la tapa (1) en el carrete (2), presionándola hacia abajo hasta el tope y girándola en sentido horario al mismo tiempo. Gire la tapa (1) hasta el tope y apriétela con la mano. FSA 65, FSA 85...
-
Page 56: Información Para Mantenimiento
Todos los tornillos y tuercas accesibles Volver a apretar Batería Inspección visual Limpiar Compartimiento para la batería Revisar el funcionamiento (extraer la batería) Inspección visual Accesorio de corte (cabeza de segado) Reemplazar Revisar el apriete Etiquetas de seguridad Reemplazar FSA 65, FSA 85... -
Page 57: Componentes Importantes
10 Batería 11 Diodos fotoemisores (LED) de la batería 12 Pulsador 13 Cabeza segadora 14 Cuchilla limitadora del hilo 15 Deflector 16 Cargador 17 Diodo fotoemisor (LED) del cargador 18 Cordón eléctrico N.º Número de serie FSA 65, FSA 85... -
Page 58: Especificaciones
Fija la batería en la unidad. Aislamiento: II, E (aisla- 10. Batería miento doble) Suministra energía eléctrica al motor. 11. Diodos fotoemisores (LED) de la batería Indican el estado de la carga y la condición de funcionamiento de la batería. FSA 65, FSA 85... - Page 59 – recibir ayuda. todas las interferencias que reciba, Las baterías STIHL cumplen con los incluso las interferencias que No cambie ni modifique este producto requisitos descritos en el Manual-UN pudieran causar un funcionamiento en modo alguno, a menos que se le ST/SG/AC.10/11/Rev.5/Parte III,...
-
Page 60: Localización De Averías
Si los diodos destellan rojo) fotoemisores continúan destellando, la herramienta eléctrica está averiada y un concesionario de servicio STIHL debe inspeccionarla Hay humedad en la herramienta motori- Deje que la herramienta eléctrica/bate- zada y/o en la batería ría se seque. - Page 61 5 segundos) continúan destellando, la batería está averiada y es necesario reemplazarla. Defecto en el cargador Solicite al concesionario de servicio que revise el cargador STIHL recomienda acudir a un concesionario STIHL autorizado para servicio. FSA 65, FSA 85...
-
Page 62: Información De Reparación
STIHL utilizando piezas de repuesto genuinas de STIHL. STIHL está comprometida con el No se debe botar los aparatos STIHL en desarrollo de productos que protejan el Los repuestos genuinos STIHL se el basurero. Lleve el producto, los medio ambiente. -
Page 63: Marcas Comerciales
Ematic ™ ® uso de estas marcas comerciales sin el EASYSTART FixCut ™ consentimiento expreso por escrito de ® FARM BOSS ANDREAS STIHL AG & Co. KG, HT Plus ™ ® Waiblingen. iCademy IntelliCarb ™ ® MAGNUM Master Control Lever ™... -
Page 64: Direcciones
/ EE.UU Direcciones STIHL Inc. 536 Viking Drive P.O. Box 2015 Virginia Beach, VA 23452-2015 FSA 65, FSA 85... - Page 65 / EE.UU FSA 65, FSA 85...
- Page 66 / EE.UU FSA 65, FSA 85...
- Page 68 State of California to cause consideradas por el Estado de California como cancer, birth defects causantes de cáncer, defectos de nacimiento u or other reproductive harm. otra toxicidad reproductora. 0458-284-8621-A englisch / spanisch USA englisch / spanisch USA www.stihl.com *04582848621A* 0458-284-8621-A...
Need help?
Do you have a question about the FSA 65 and is the answer not in the manual?
Questions and answers